
🔑 OAuth Client Registration & Integration
🔑 OAuth Client Registration & Integration
Overview
OAuth clients enable secure third-party integrations with ARPIA applications and platforms. When you register an OAuth client, you're creating a trusted credential pair that allows external systems—such as Microsoft Copilot Studio, Power Automate, or custom applications—to authenticate and access ARPIA resources on behalf of your organization without sharing passwords.
Use Cases
Create an OAuth client when:
- 🔗 Integrating Microsoft Copilot Studio or Power Automate with ARPIA
- 💻 Building custom applications that need programmatic access to ARPIA APIs
- 👤 Enabling third-party services to authenticate users via ARPIA's identity system
- 🛡️ Connecting external governance or compliance tools to ARPIA
Setup Steps
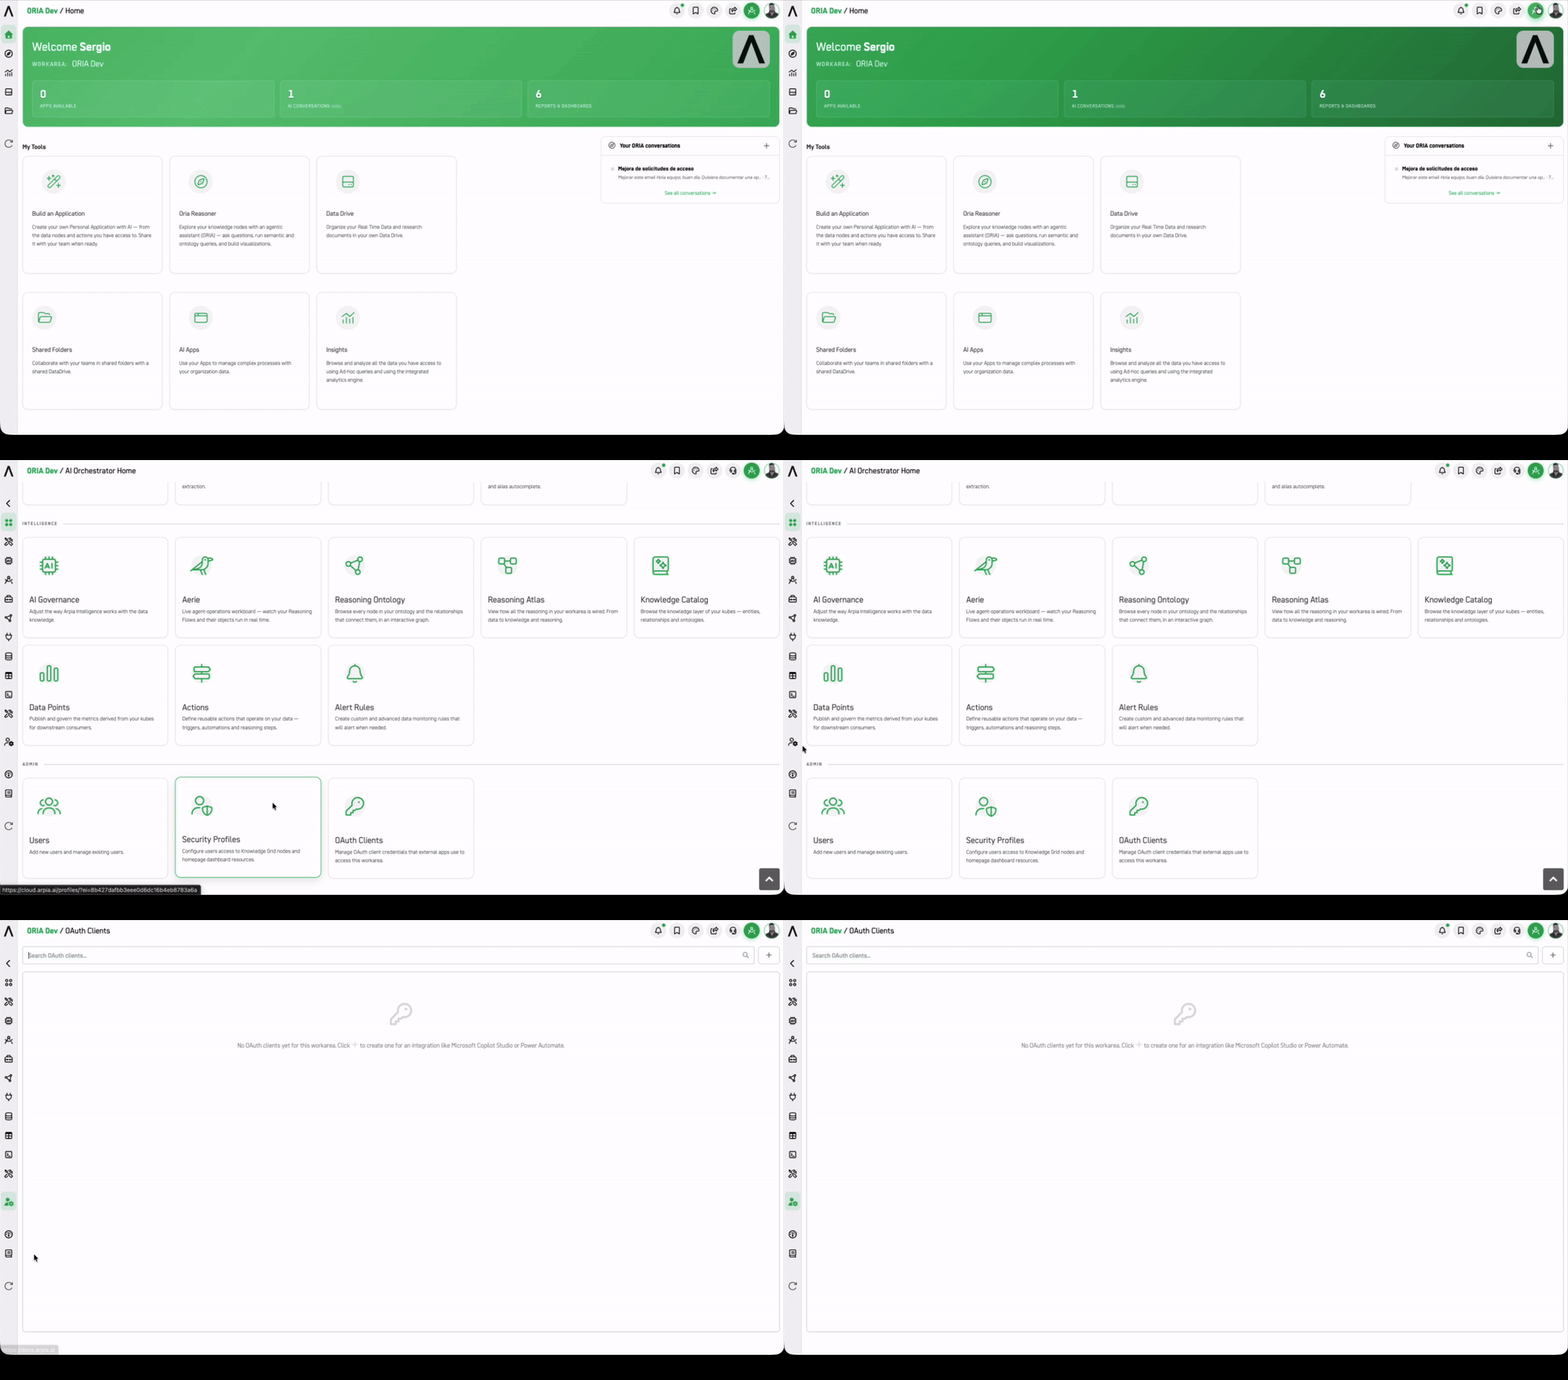
1. Navigate to OAuth Clients
In ARPIA Apps Demos, select the OAuth Clients section. If no clients exist, you'll see an empty state with a Create button.
2. Enter Client Details
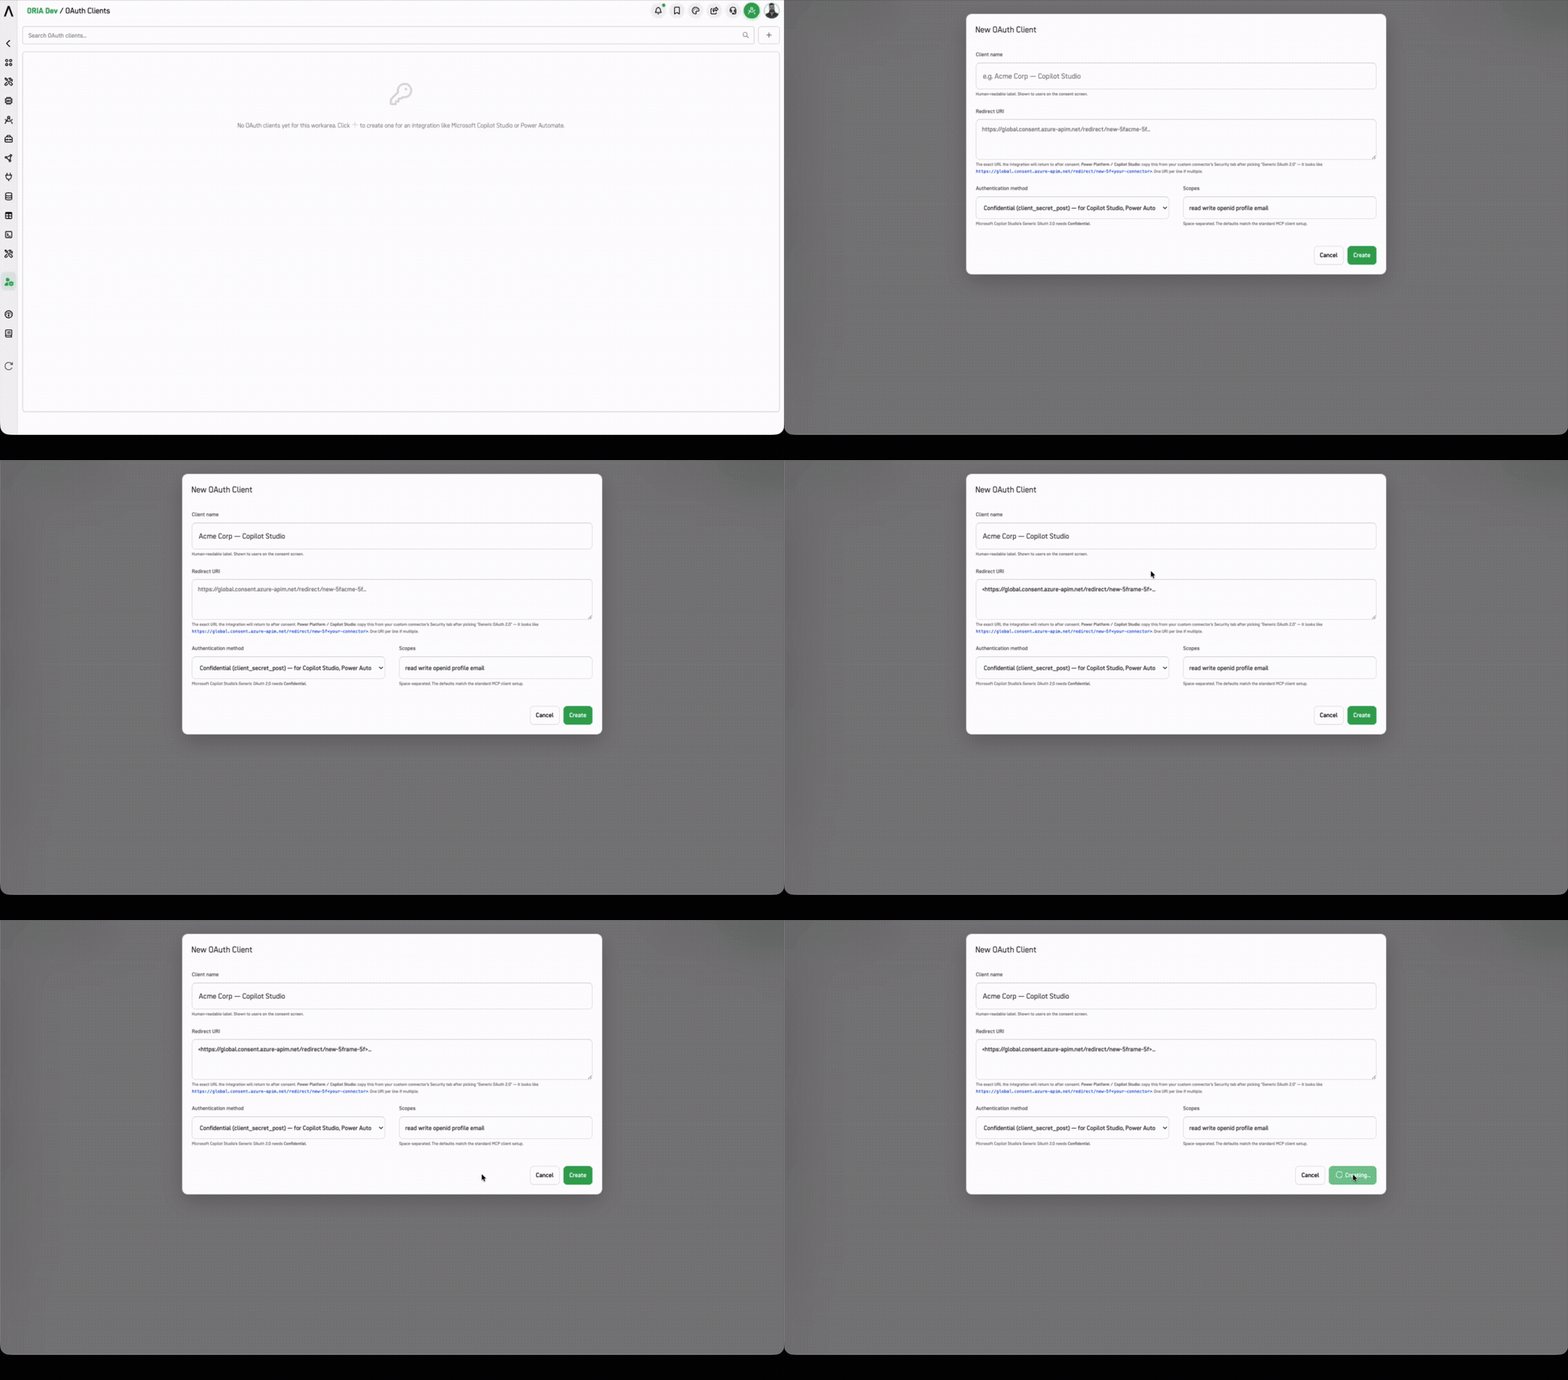
Client Name
- Human-readable label shown to users during consent.
- Example:
Acme Corp — Copilot Studio
Redirect URI
- The exact URL where users return after authentication.
- Must match precisely (including protocol and trailing characters).
- Common pattern:
https://global.consent.azure-apim.net/redirect/new-5frame-5f...for Microsoft connectors.
3. Choose Authentication Method
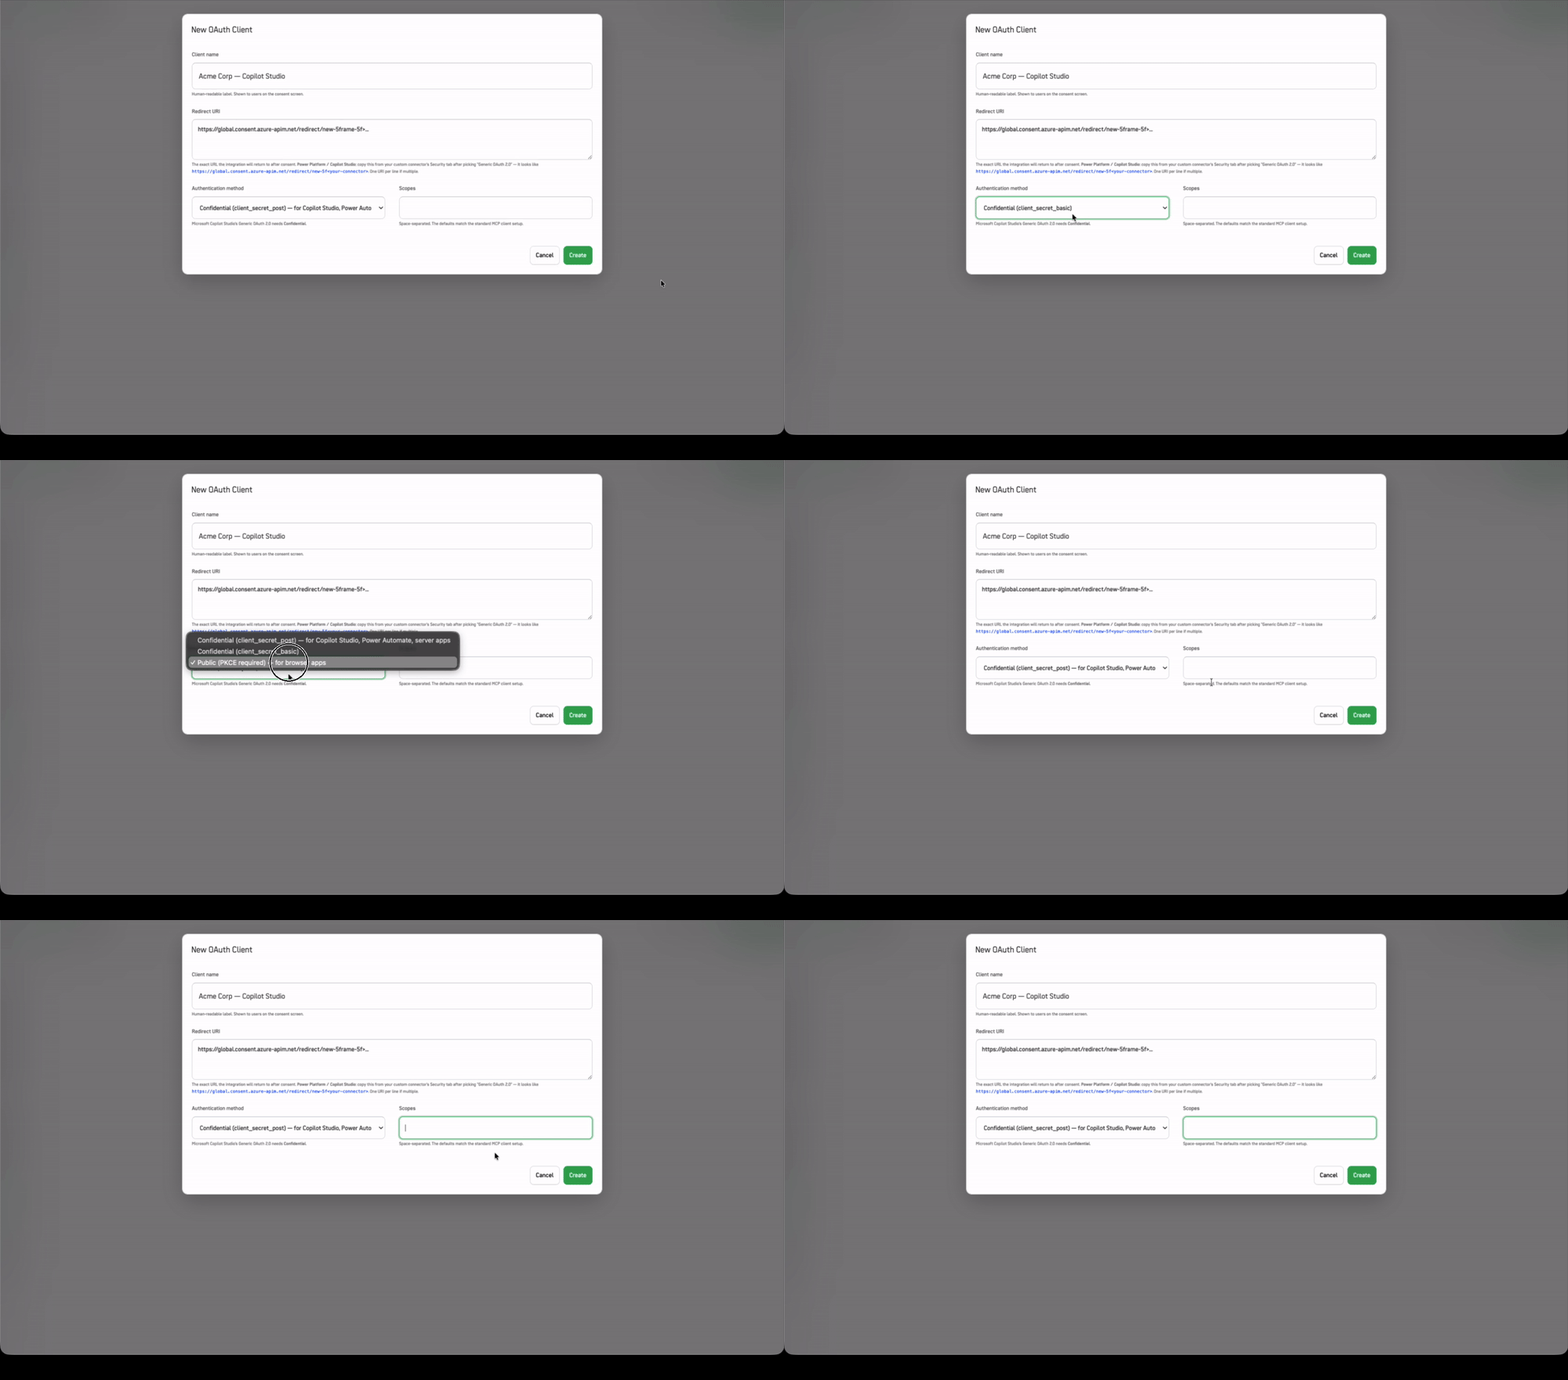
Three authentication options are available, each suited to different deployment contexts:
| Method | Use Case | Security Characteristics |
|---|---|---|
| Confidential (client_secret_post) | Server-to-server integrations, Microsoft Copilot Studio, Power Automate | Secret transmitted via POST body. Suitable when backend server is trusted environment. |
| Confidential (client_secret_basic) | Server-to-server integrations requiring HTTP Basic authentication header | Secret transmitted via Authorization header using Base64 encoding. Legacy OAuth 2.0 pattern. |
| Public (PKCE required) | Browser-based single-page applications (SPAs) and native mobile apps | No secret stored. Uses PKCE (Proof Key for Code Exchange) to prevent authorization code interception. |
⚠️ Security Note: For Confidential methods, keep your client secret secure. Never commit it to version control or expose it in client-side code. Rotate secrets periodically per your organization's credential management policy.
4. Configure Scopes
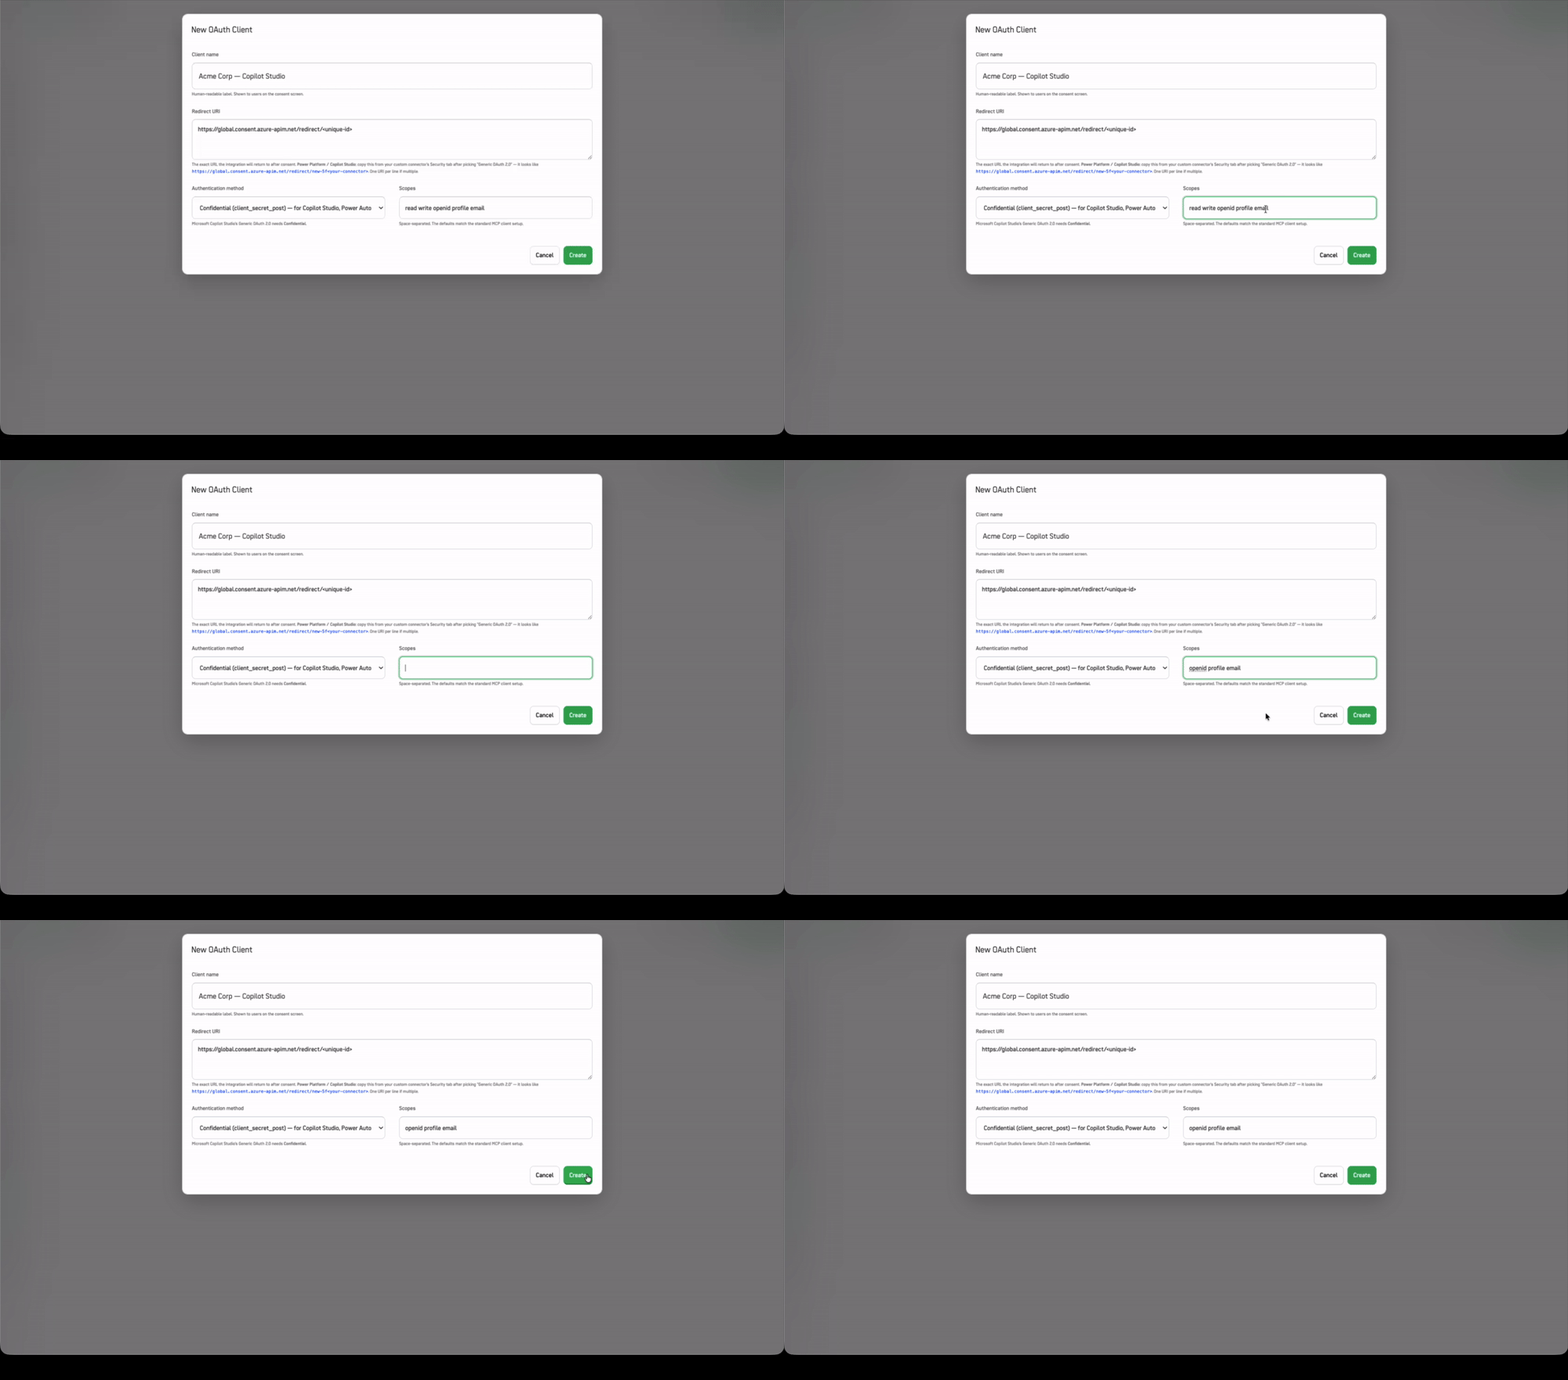
Scopes define the permissions granted to the OAuth client. These are space-separated values. Standard defaults:
read write openid profile email
- read — Permission to read user data and resources
- write — Permission to create and modify resources
- openid — OpenID Connect scope; enables identity verification
- profile — Access to user profile information
- email — Access to user email address
Governance & Audit
Each OAuth client registration is a security boundary and must be tracked:
- Client Name should clearly identify the integrating system and owner for audit trails
- Redirect URIs must be validated to prevent authorization code interception attacks
- Authentication method selection should align with deployment topology (server vs. browser)
- Scope grants should follow the principle of least privilege—request only necessary permissions
For integrations involving sensitive data or critical systems, document the rationale for scope grants and obtain approval from security governance prior to deployment.
Troubleshooting
Redirect URI Mismatch Errors
Ensure the Redirect URI registered exactly matches the one provided by your integration platform (Microsoft, custom app). Check:
- Protocol (https vs. http)
- Domain
- Path
- Any query parameters
Authentication Method Compatibility
- Microsoft Copilot Studio and Power Automate require
Confidential (client_secret_post)method - Browser-based apps require
Public (PKCE)method
Selecting an incompatible method will cause authentication to fail. Refer to the authentication method table above to verify alignment with your deployment topology.
Updated about 2 months ago