
AI Assistant
🤖 AI Assistant Screen Guide
The AI Assistant screen in DataApps provides an interactive interface for users to communicate with AI-powered workflows and assistants.
It enables natural language interaction with your data — allowing users to query, analyze, and automate directly within the application.
📖 Quick Navigation
- Overview
- Key Features
- Configuration Steps
- Assistant Settings
- Integration Options
- Best Practices
- Example Screenshot
- Related Guides
🧠 Overview
The AI Assistant Screen serves as the conversational layer of your DataApp.
It connects to Assistants and Reasoning Flows configured in AI Central, letting users interact naturally with data and automation nodes.
With the AI Assistant screen, builders can:
- Embed chat-like experiences into their DataApps.
- Integrate reasoning and automation logic behind user prompts.
- Display contextual data and insights based on user input.
✨ Key Features
- Conversational Interface: Users can type or speak queries to interact with data or workflows.
- Dynamic Context: Integrate filters, variables, and data nodes to guide AI responses.
- Multi-Assistant Support: Choose between multiple assistants configured in AI Central.
- Actionable Outputs: Allow the assistant to execute tasks, trigger workflows, or navigate screens.
- Customizable Layout: Adjust components like chat view, input area, and response formatting.
⚙️ Configuration Steps
Follow these steps to configure an AI Assistant Screen:
- Go to DataApp Studio → Screens → Add New → AI Assistant.
- Select the Assistant from your AI Central library.
- Configure display mode (Chat, Compact, or Split View).
- Optionally link Nodes or Variables to provide contextual data.
- Set permissions to define who can access or interact with the assistant.
- Customize styling and interface labels.
- Save and preview the screen in your DataApp.
🧩 Assistant Settings
Each AI Assistant screen connects to a specific assistant configuration stored in AI Central.
⚙️ Common Configuration Options
| Setting | Description |
|---|---|
| Assistant Source | Select the Assistant or Flow from AI Central |
| Display Mode | Chat, Compact, or Split interface |
| Memory Context | Enable persistent conversation history |
| Data Context | Bind assistant to Nodes for dynamic insights |
| Theme Customization | Modify layout, chat colors, and fonts |
| User Access | Restrict by profile or role |
💡 Use Case
Use the AI Assistant screen when you want to provide interactive analytics, guided troubleshooting, or intelligent task automation — directly inside your DataApp.
🔗 Integration Options
- Nodes Integration: Link Nodes to provide real-time data context for the assistant.
- Variables: Store and reuse user inputs across sessions.
- Workflows: Trigger automations or reasoning flows based on assistant responses.
- External APIs: Connect to APIs for advanced custom actions or third-party integrations.
Tip: Use the AI Central Screen to manage and monitor all assistants connected to this screen.
🧱 Best Practices
| Practice | Why It Matters |
|---|---|
| Define assistant roles clearly | Ensures accurate and relevant responses |
| Provide context through Nodes | Helps the assistant access real data |
| Limit visible history | Keeps the interface clean and performant |
| Use prompts with structure | Improves consistency of AI responses |
| Customize styling | Enhances user trust and experience |
Pro Tip: Combine the AI Assistant screen with Dashboard or Page Layout screens to create hybrid data + AI experiences.
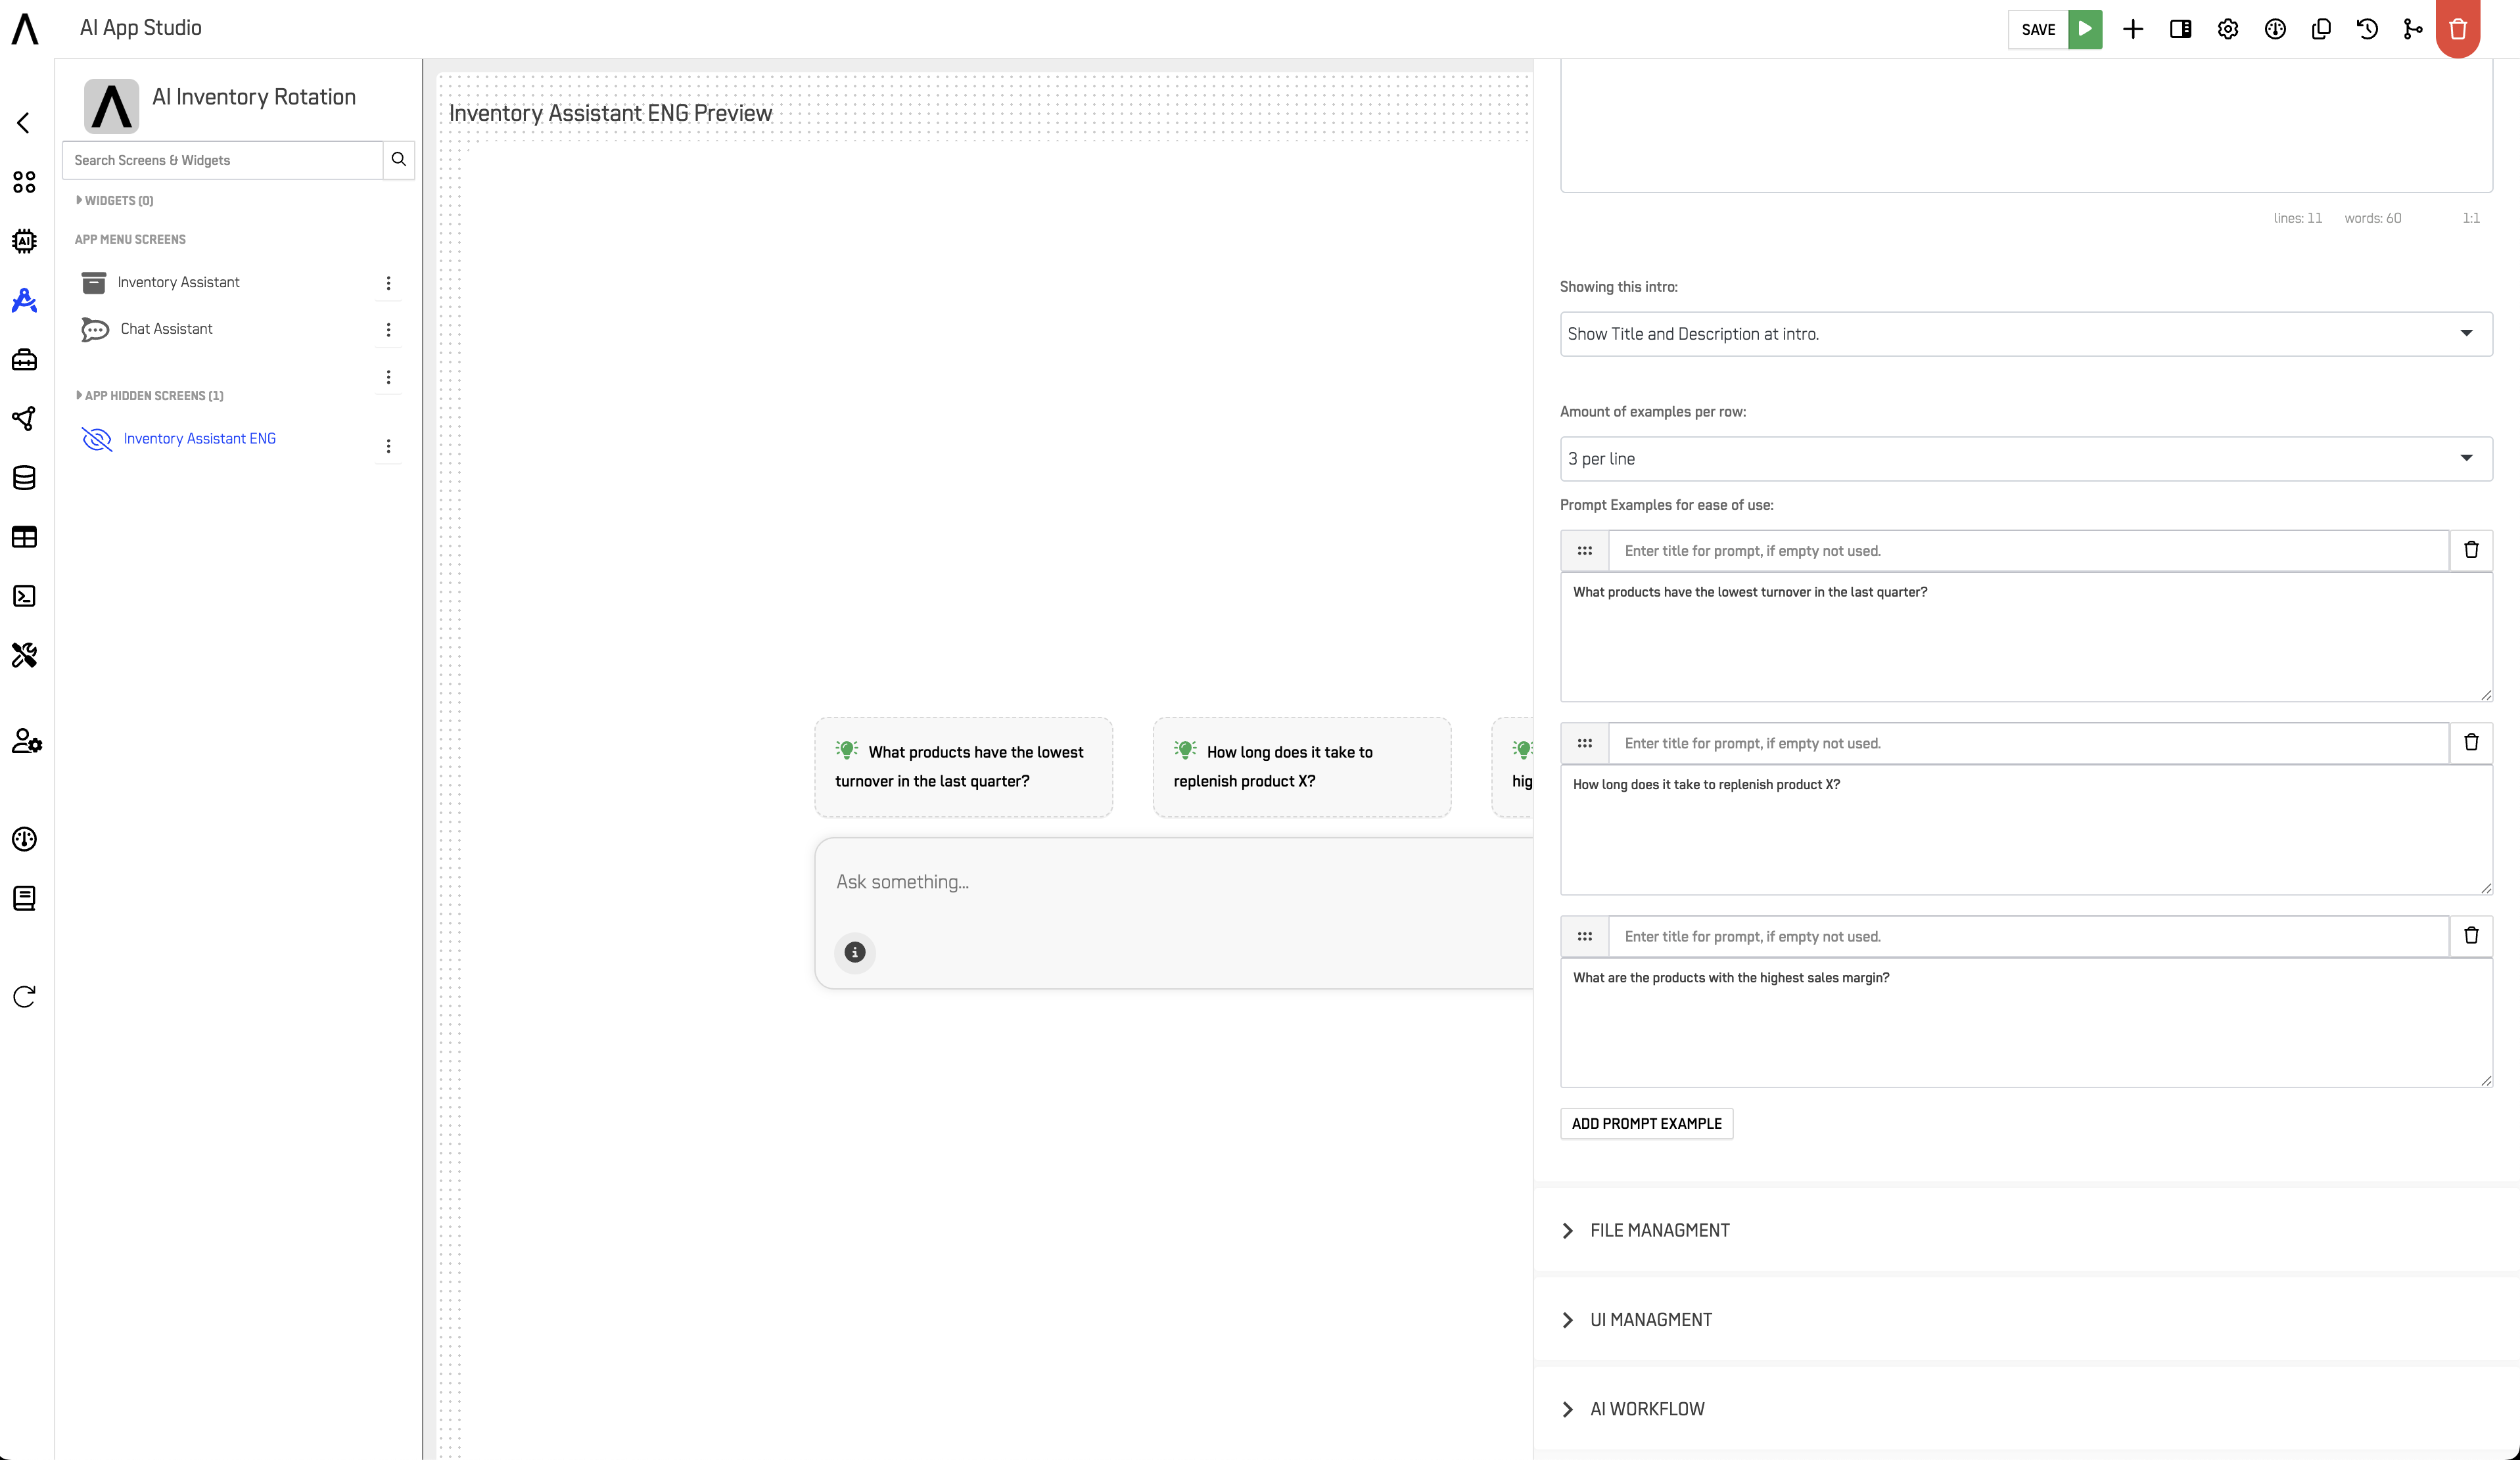
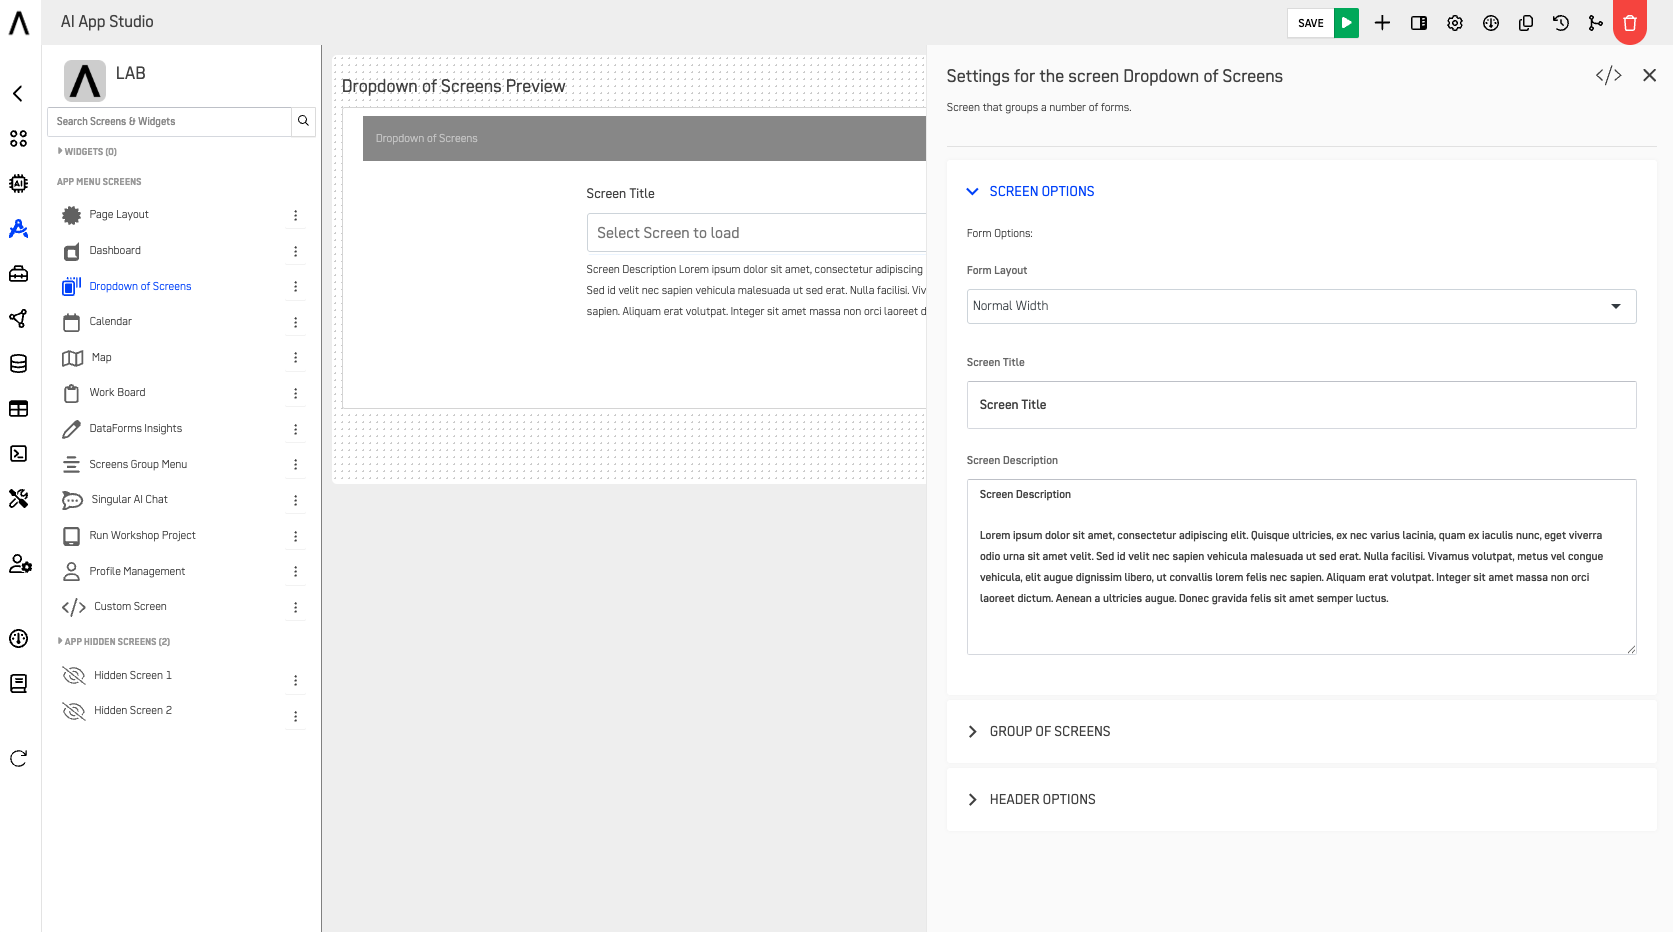
🖼️ Example Screenshot
🔚 Conclusion
The AI Assistant Screen turns your DataApp into an intelligent, conversational workspace.
By integrating assistants from AI Central, you can empower users to explore data, trigger workflows, and make decisions faster — all through natural interaction.
🔗 Related Guides
Updated 7 months ago