
How to request access to a Node?
Step-by-Step Guide
Step 1: Access the Insights Section
Navigate to the "Insights" section from the ARPIA home page.
Insights
Note: Ensure you are on the ARPIA home screen and not the Orchestrator home screen to access this section.
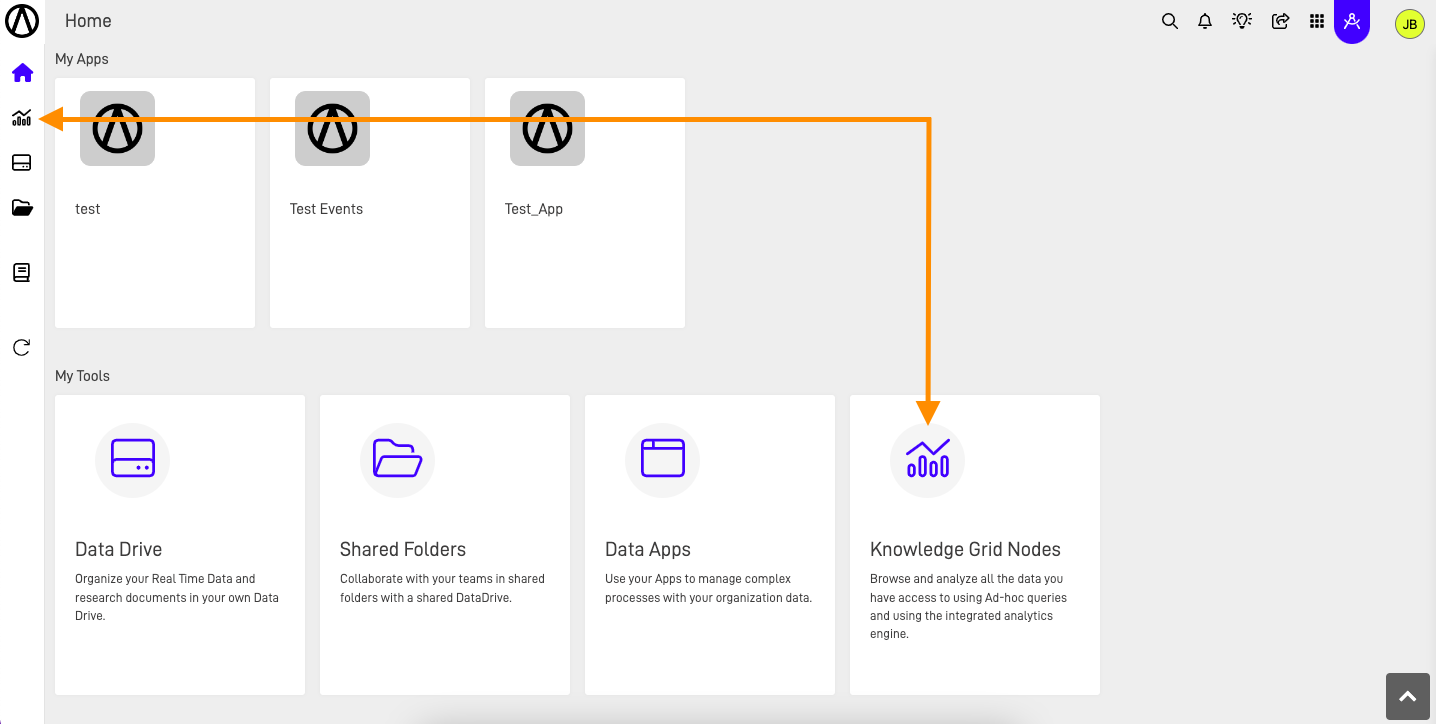
Step 2: Access the Available Nodes
Click on the Insights icon to display the Knowledge Catalog screen. This screen lists all available nodes for your profile. If you don't see the required node or there are no available nodes, you can request access by navigating to the Available Nodes section in the Knowledge Catalog.
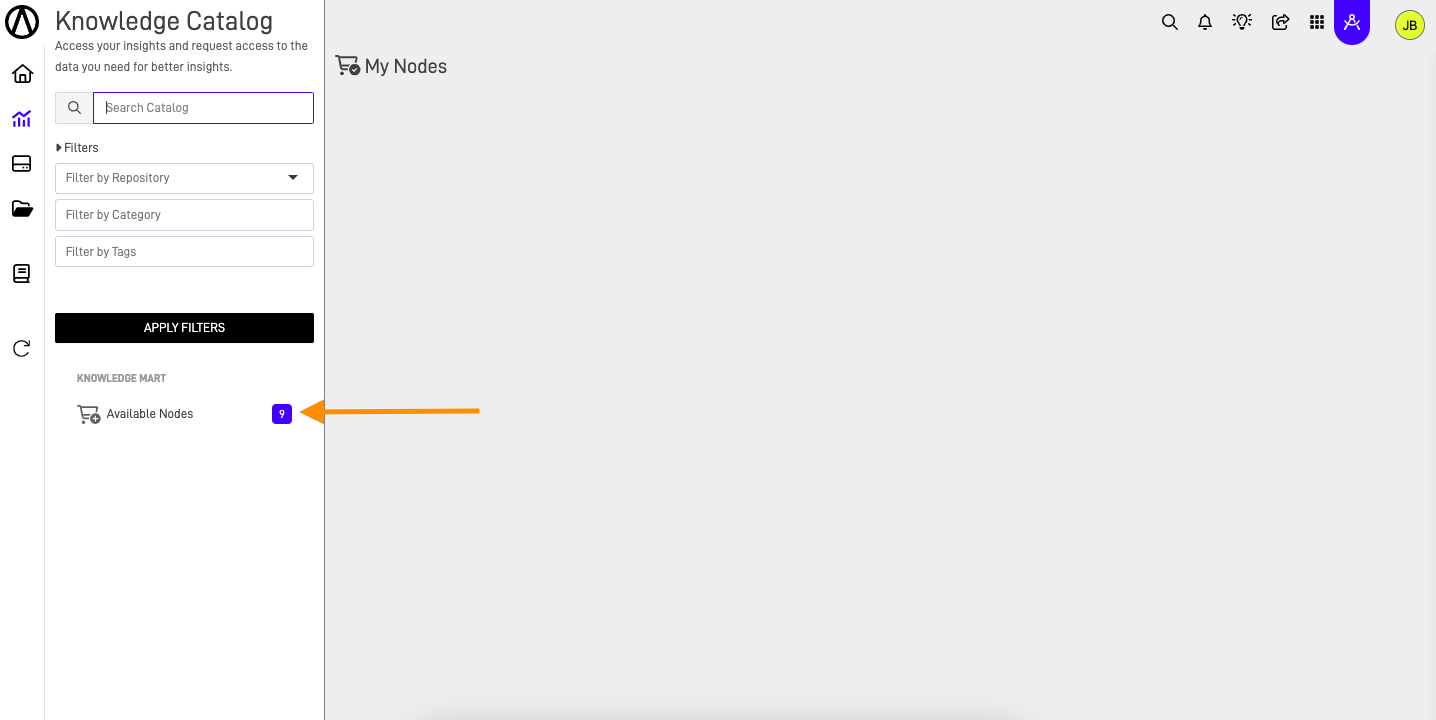
Step 3: Select the Node You Want
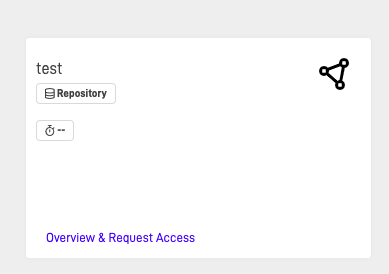
In the Workarea, click on the available nodes icon to view all nodes. Select the node you want to access and click on "Overview and Request Access".
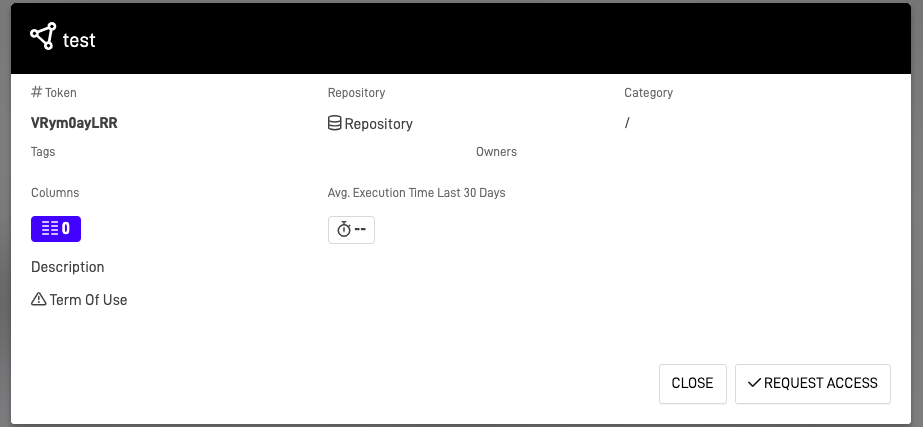
Step 4: Request Access
After selecting "Overview and Request Access", a screen displaying the node's general information will appear. This includes the token, repository, number of columns, description, terms of use, etc. To request access, click the "✔️ REQUEST ACCESS" button.
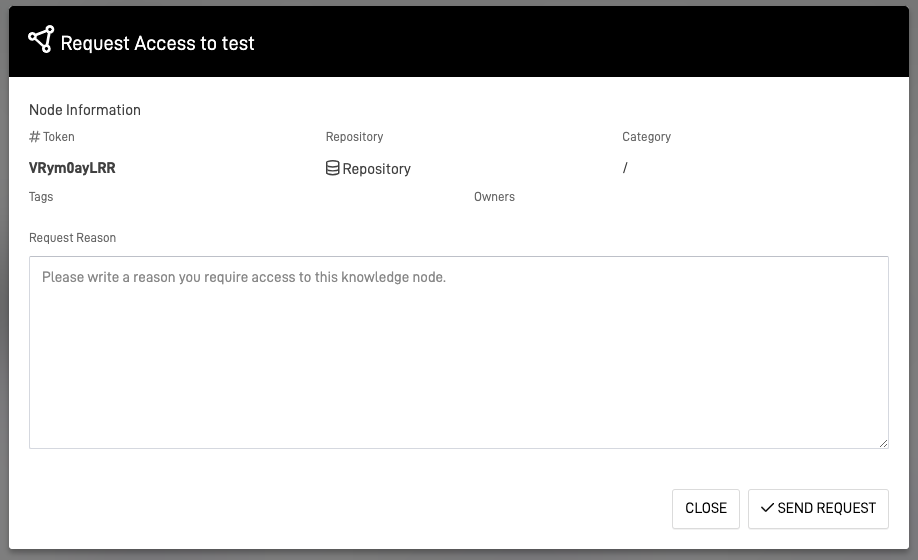
Step 5: Send Request
The Send Request screen will appear, allowing you to review the node's general information. Optionally, you can write a reason for requesting access to the node. Once done, click the "✔️ SEND REQUEST" button.
After sending the request, a confirmation message will display your request ID.
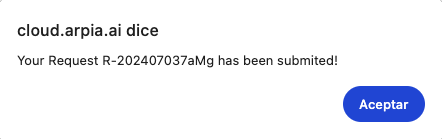
Now, wait for a user with access to the node to approve your access request.
Updated almost 2 years ago