
Databases in ORIA Reasoner
How to Configure and Use Databases in ORIA Reasoner
Databases provide persistent storage that lasts beyond the duration of an individual session. They allow you to perform deep analysis, build custom applications, and integrate automated tasks through Oria Machine, ensuring that data can be read and updated without being lost after restarting a session.
What is a Database in ORIA Reasoner?
Persistent Storage: Retains generated, structured, or processed information even if the session ends or restarts.
Multi-Session Access: Databases can be attached to different work sessions.
Compatibility: Both integrated applications (Live Apps) and the automated execution environment (Oria Machine) can read from and write to them directly.
Privacy and Publishing: By default, they are private to the creator, but they can be published to the tenant's general catalog to share them with the team.
How to Enable and Create a Database
There are two methods to create and associate a database with your workflow:
Method A: From the Session Tools Panel (Tools in this session)
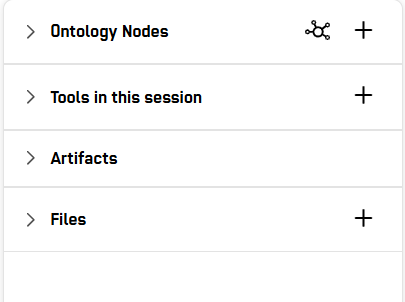
- Add the tool: In the right side panel, go to Tools in this session and click the + button (Add tools).
-
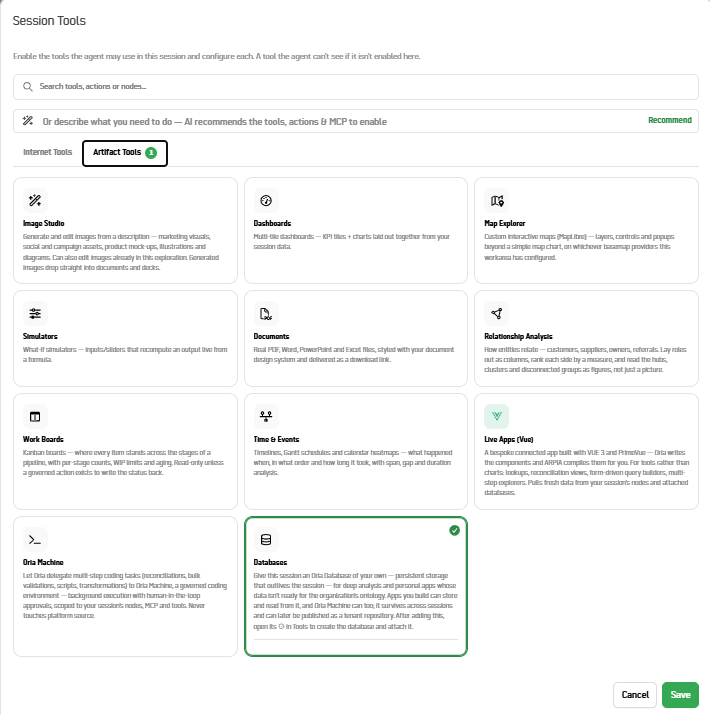
Select Artifact Tools: In the pop-up window, select the Artifact Tools tab.
-
Enable Databases: Locate the Databases card, select it, and click Save.
-
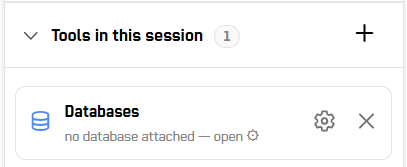
Open settings: Once added to the side panel, click the gear icon (⚙) in the Databases section to open the management panel.
-
Create a new database:
- Enter a descriptive name in the New database field (e.g., Cost model 2026).
- Click the Create button.
- The new database will be created and automatically Attached to your current session.
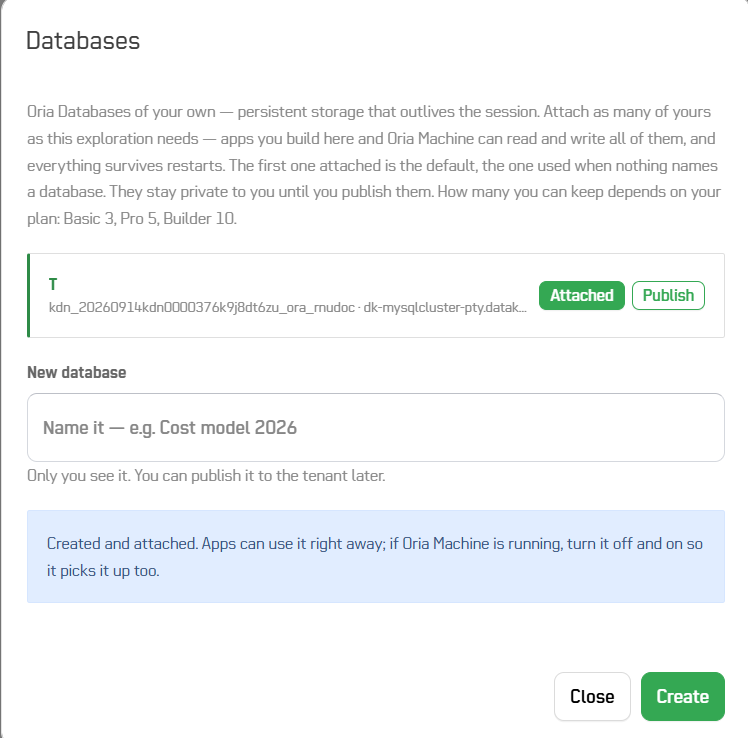
Note: _If you are running Oria Machine at the time of attaching a new database, turn it off and back on so it detects the new connection.
Method B: From the Main Menu (Artifacts / DataBases)
-
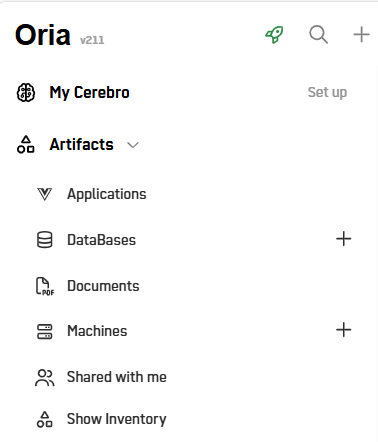
Navigate to Artifacts: In the left navigation sidebar, expand the Artifacts section and select DataBases.
-
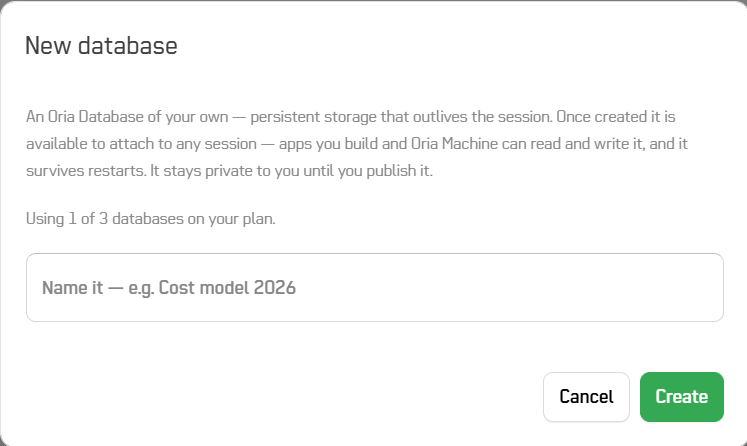
Create from catalog: Click the + button (located next to the section title or in the upper right corner of the central panel).
-
Name and confirmation: Type the database name in the pop-up modal and click Create.
-
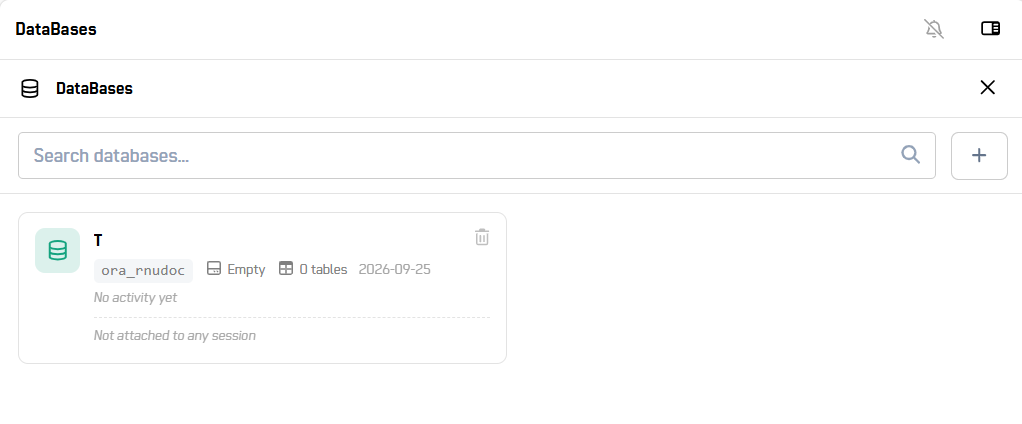
View, Manage & Delete Databases: The main DataBases panel displays a list of all created databases. Each database card includes the following details:
- Internal Identifier: Unique system identifier (e.g., ora_rnudoc).
- Status & Metrics: Content status (e.g., Empty), table count (0 tables), and creation date.
- Session Attachment Status: Displays whether it is linked to an active session or states Not attached to any session.
- Delete Option: A trash icon (🗑) located in the upper-right corner of the database card, allowing you to permanently delete the database when it is no longer needed.
Database Management and Limits
- Default Database: The first database you attach to a session acts as the default when a query or script does not specify a name.
- Storage Limits by Plan: The number of persistent databases you can keep depends on your current subscription:
- Basic Plan: Up to 3 databases.
- Pro Plan: Up to 5 databases.
- Builder Plan: Up to 10 databases.
- Publishing: To allow other users in the organization to access structured data, use the Publish button inside the database settings panel.
When to Use a Database in Your Workflow
| Use Case | Recommended Splution |
|---|---|
| Store permanent results across multiple queries or code executions. | Database |
| Consolidate data from Oria Machine for querying in dashboards or Live Apps (Vue). | Database |
| Process a quick, one-off analysis that does not require keeping historical records. | Simple Session |
| Standardize a fixed set of nodes, tools, and models for the whole team. | Expert (you can include the Database within its Scope) |
Tip: If you work with an Expert, you can attach the database directly to the Expert's Scope so that every new session started from it automatically includes the configured storage.
Updated 21 days ago