
How to create a Table
How to Create a Table
ARPIA offers three ways to create tables in your repository, each suited for different workflows and skill levels.
Methods for Creating Tables
- Manual Table Creation - Build tables with a visual form interface
- AI Assistant - Generate tables using natural language descriptions
- Query Tool - Create tables using SQL statements
Method 1: Manual Table Creation
Step 1: Access the Data Objects Section
Navigate to the Data Object section in your Orchestrator toolbar.
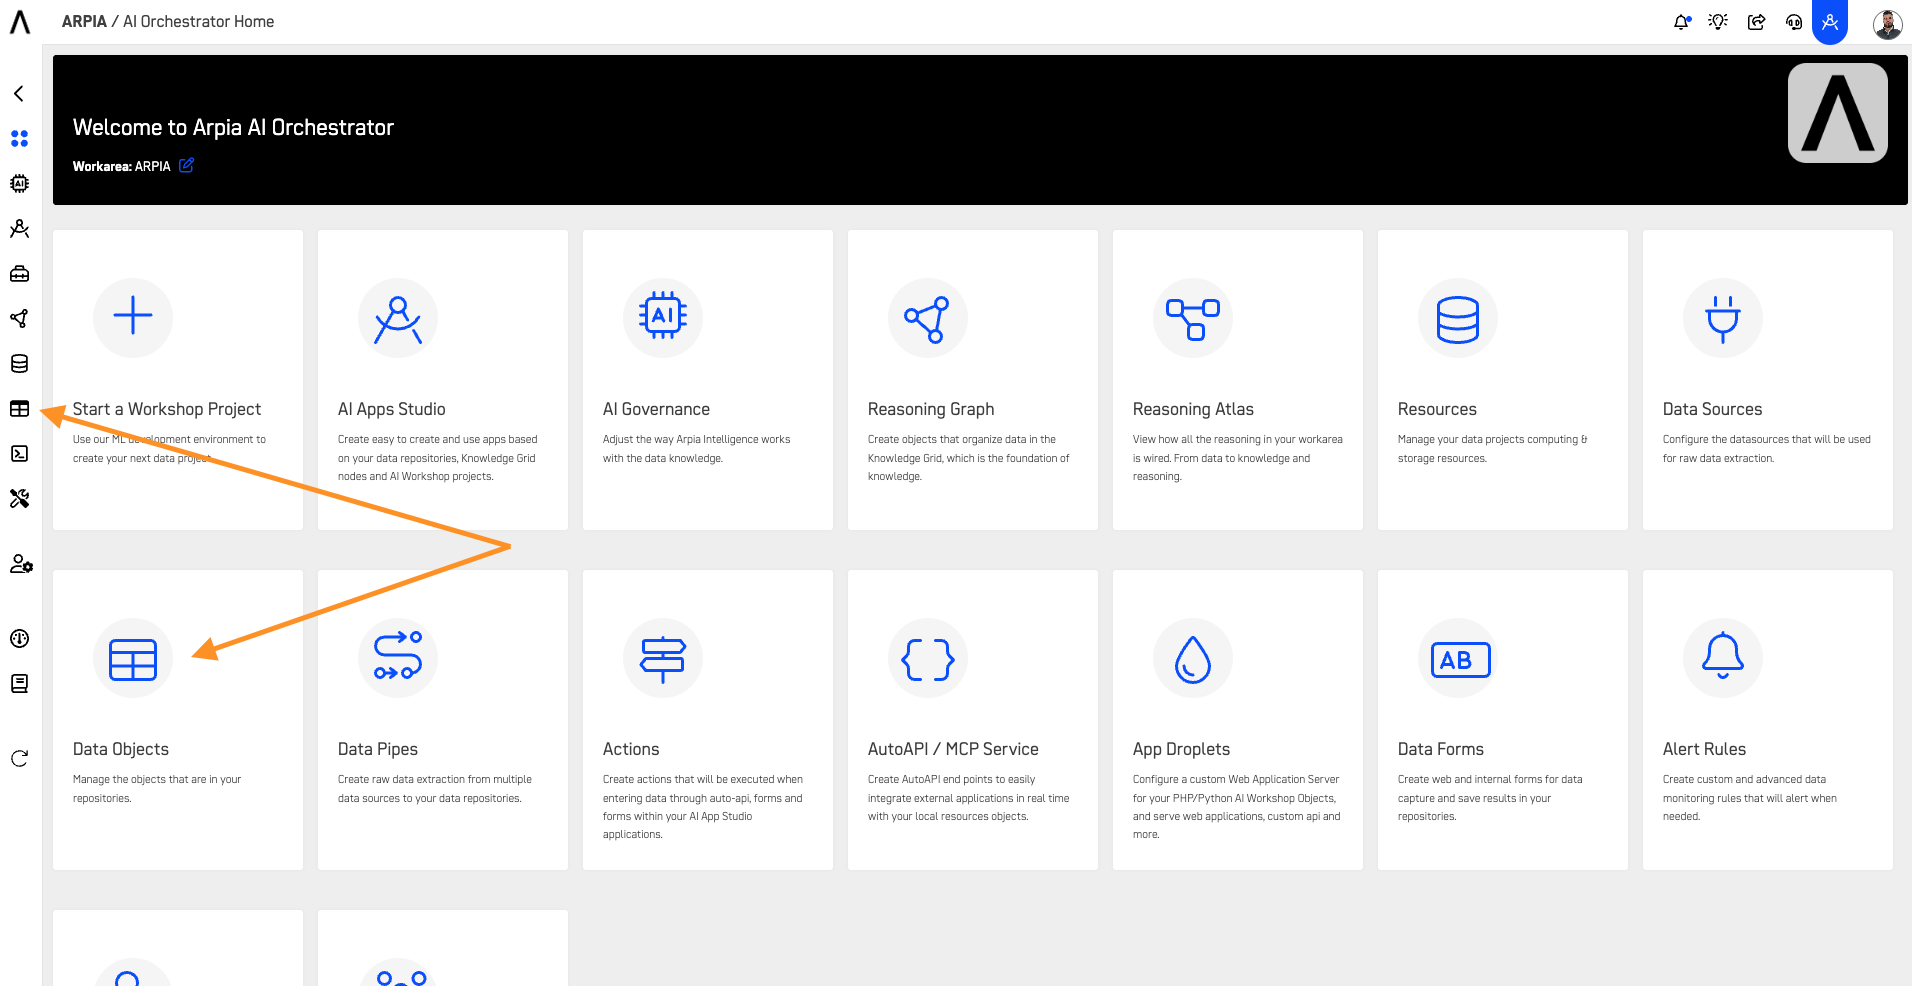
Step 2: Create a New Table
Click the "TABLE" button in the quick actions menu.

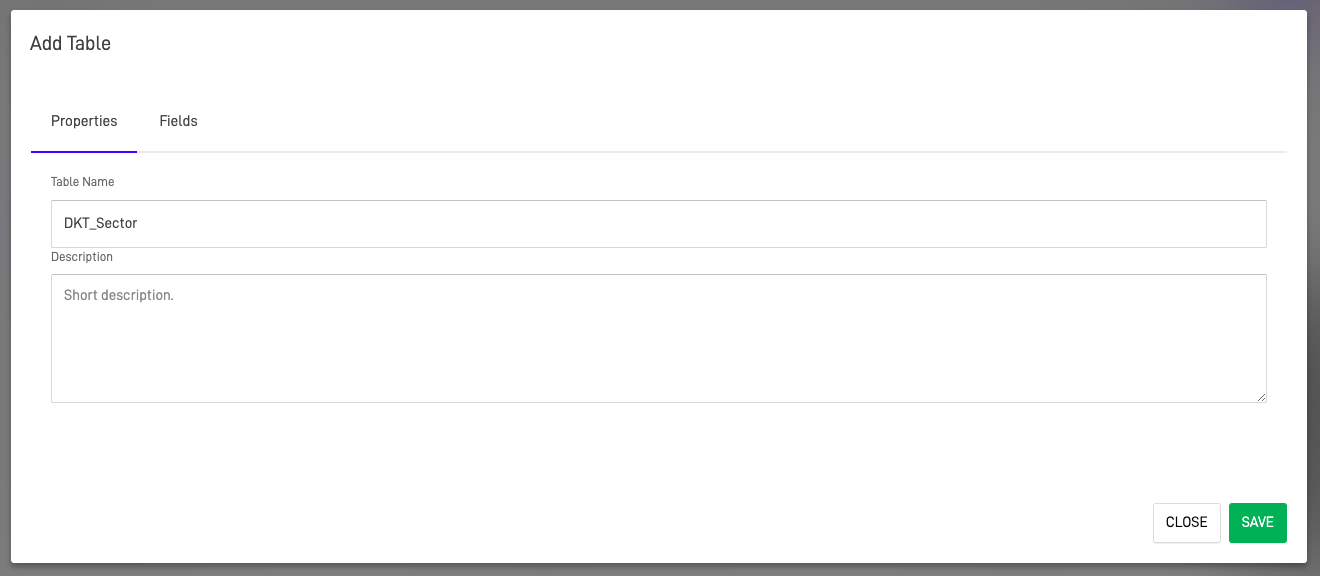
Step 3: Configure Table Properties
The table creation form has two main tabs:
Properties Tab
Enter the table name and optionally add a description for documentation purposes.
Fields Tab
Define your table structure by adding columns/fields with customizable options.
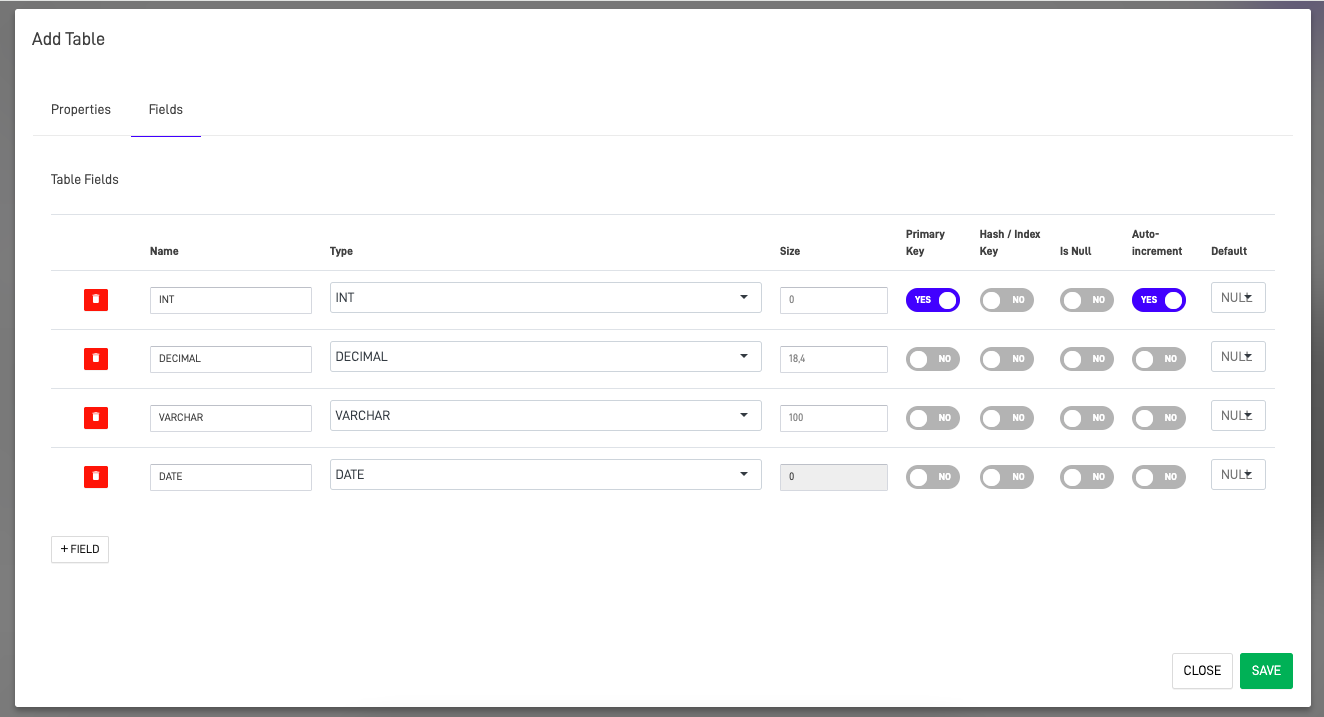
Field Configuration Options:
| Option | Description |
|---|---|
| Name | Enter the field name |
| Type | Select the data type (see available types below) |
| Size | Define storage size (e.g., INT(11) = integer with 11-digit display width) |
| Primary Key | Unique identifier for each record (one per table, can be composite) |
| Hash/Index | Optimize query performance with indexes (Hash or B-tree) |
| Is Null | Allow NULL values (NOT NULL requires a value) |
| Auto-increment | Generate unique numbers automatically (typically for primary keys) |
| Default | Set predefined value if none is specified during insert |
Available Field Types:
| Field Type | Description |
|---|---|
| INT | Integer values (primary keys, counters, whole numbers) |
| DECIMAL | Fixed-point numbers with precision (ideal for financial data) |
| VARCHAR | Variable-length strings (names, email addresses) |
| DATE | Date values in YYYY-MM-DD format |
| DATETIME | Date and time in YYYY-MM-DD HH:MM:SS format |
| TIME | Time values in HH:MM:SS format |
| TEXT | Large text data (descriptions, comments) |
| LONGTEXT | Very large text data (articles, blog posts) |
| JSON | JSON data for flexible, schema-less structured data |
| GEOGRAPHYPOINT | Geographic coordinates (latitude/longitude) for single points |
| GEOGRAPHY | Complex geographic data (polygons, lines, multi-point shapes) |
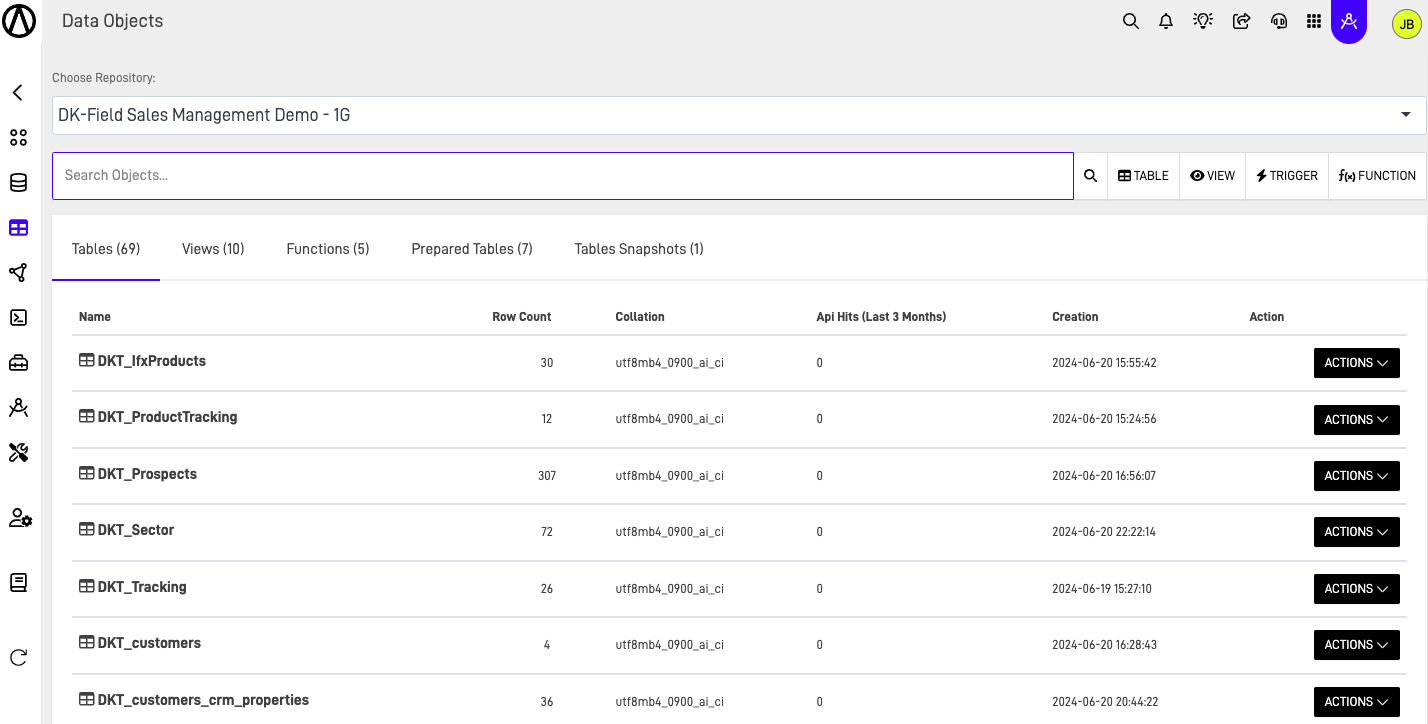
Step 4: View Your Table
Your new table appears in the Data Object section with all other repository tables.
Method 2: AI Assistant (Arpia Codex Assistant)
Generate tables using natural language descriptions with the AI Assistant.
How to Use:
- Click the AI ASSISTANT button in the Data Objects interface
- Describe your table requirements in plain language
- The Arpia Codex Assistant analyzes your needs in context of existing repository objects
- Review and create the generated table structure
Example Prompt:
"Create a customers table with fields for customer ID, name, email, phone number, and registration date"
Note: AI must be enabled in the workarea to use this feature.
Method 3: Query Tool
Create tables using SQL CREATE TABLE statements in the Query Tool.
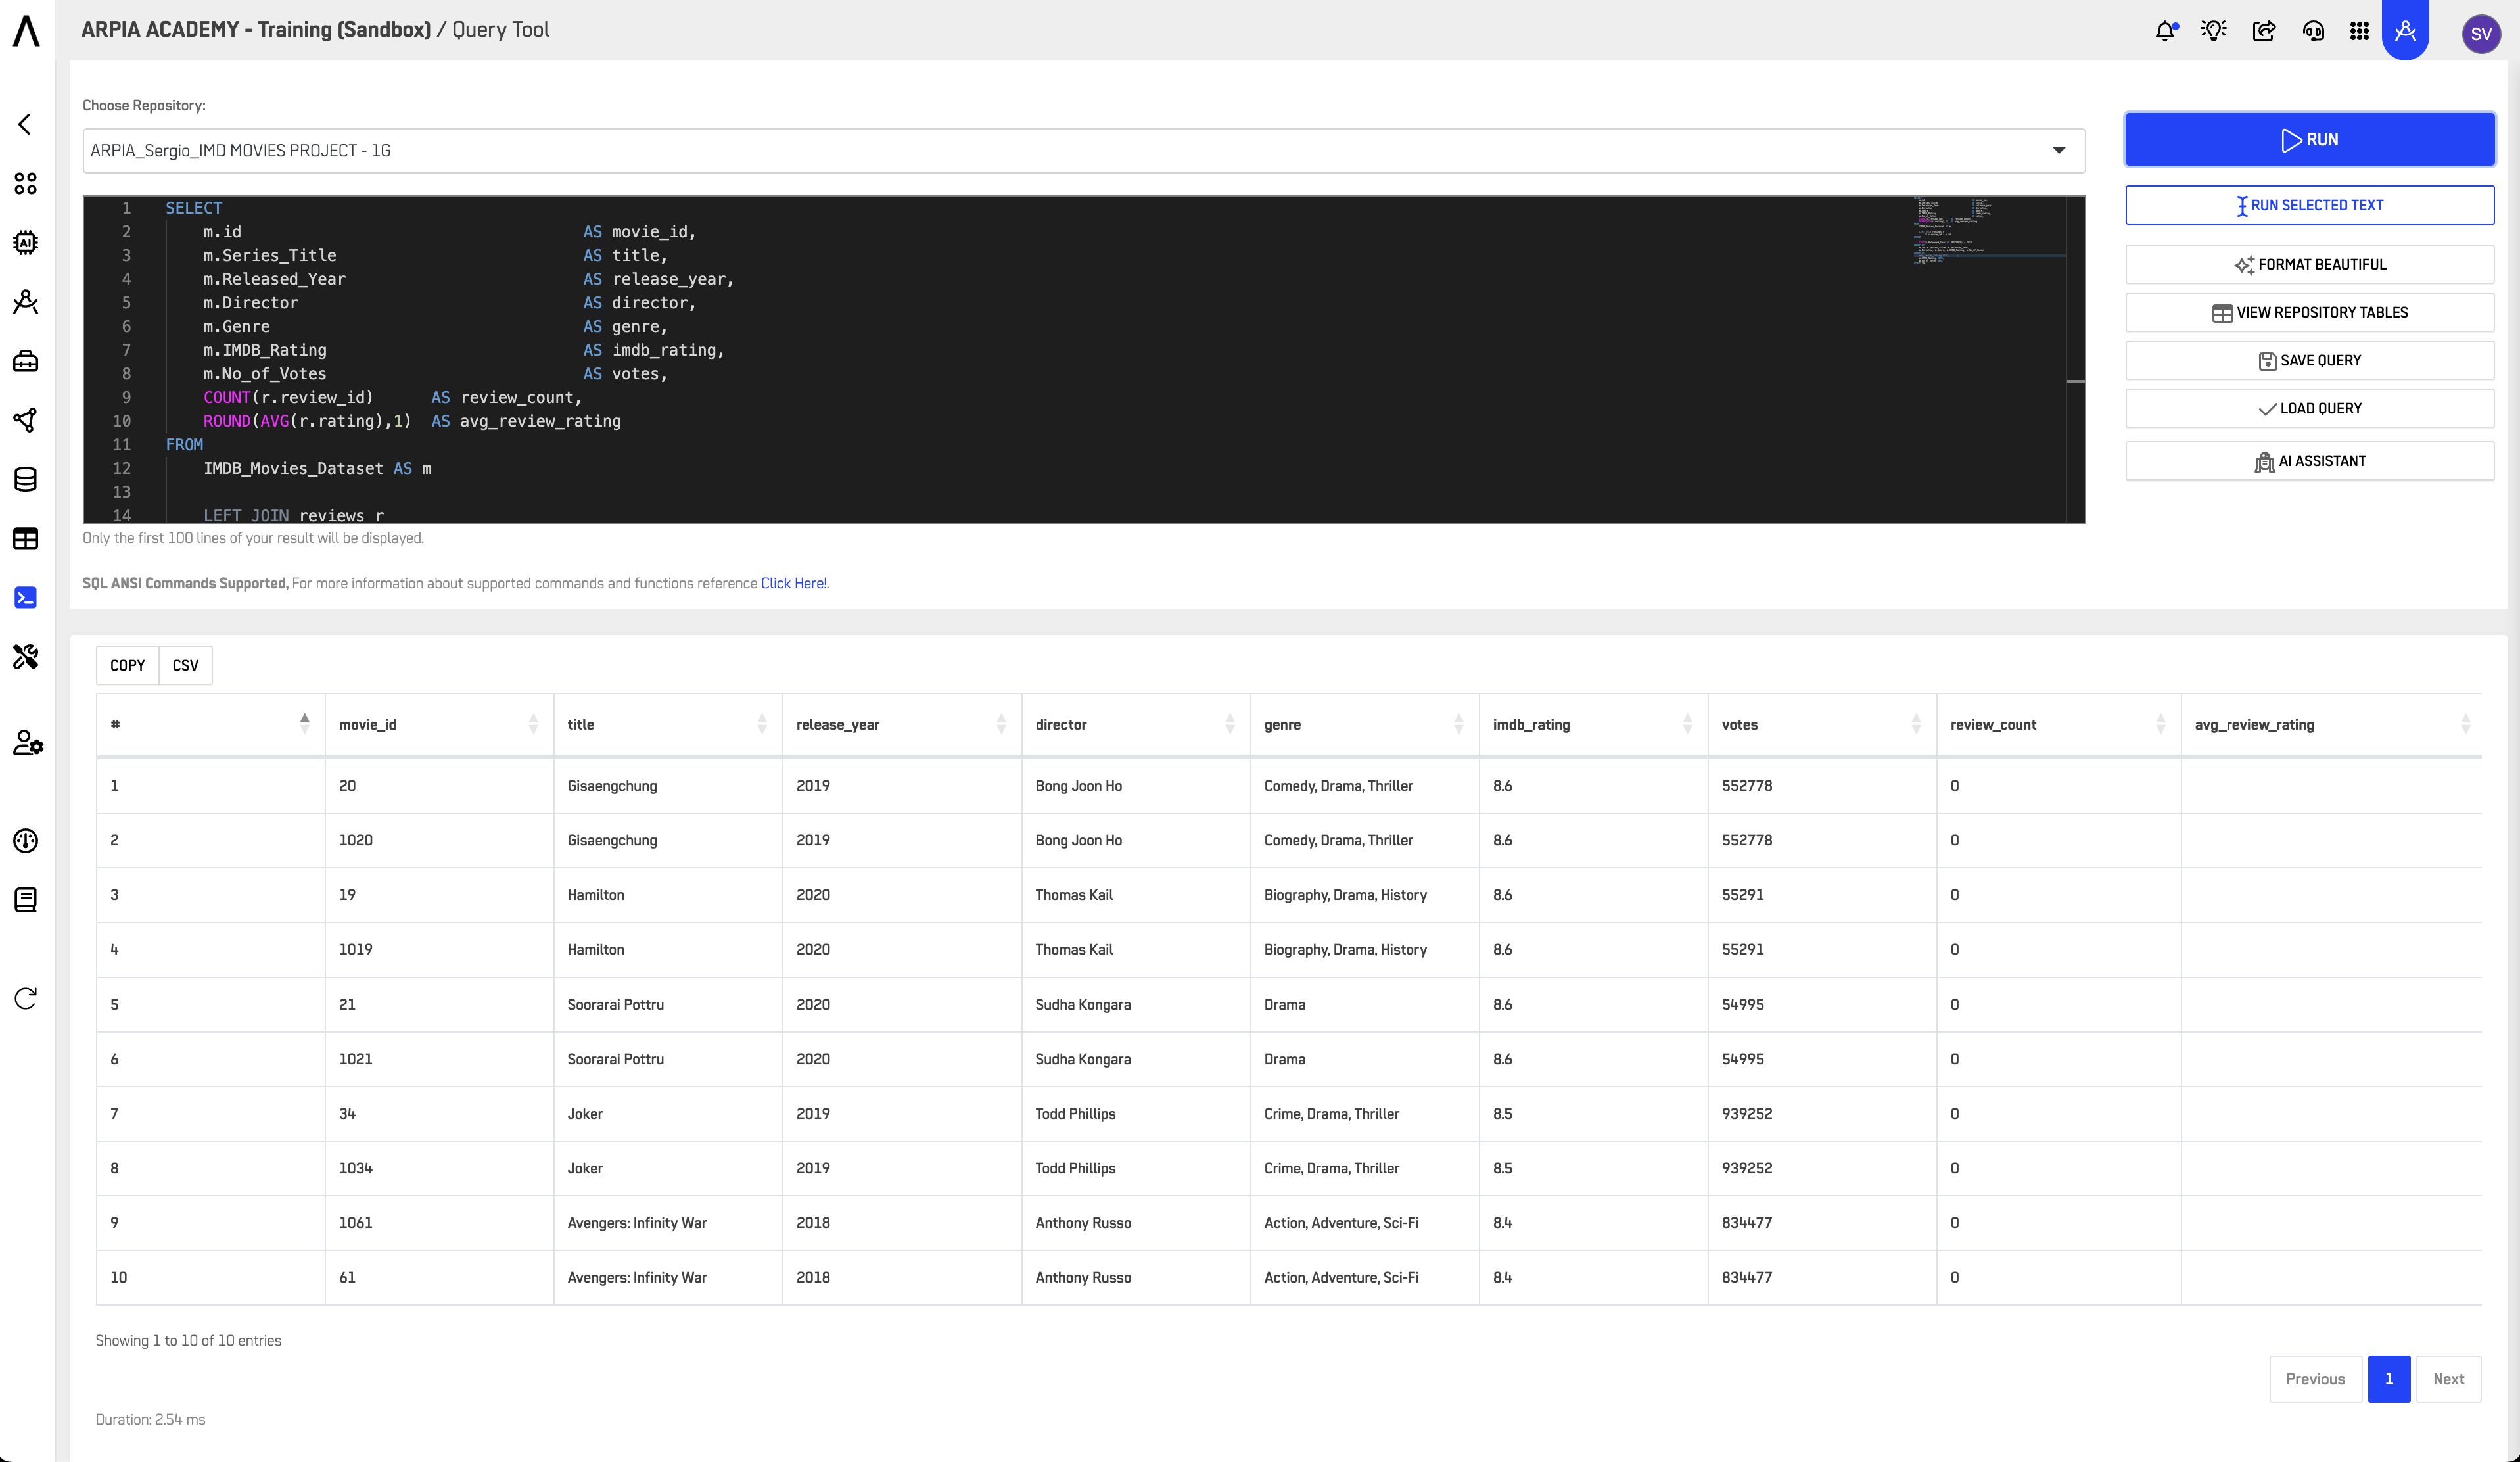
Key Features
SQL Query Editor
- Syntax highlighting for readability
- Auto-complete and query suggestions
- Format Beautiful option
- AI Assistant integration
Flexible Execution
- Run entire query or selected text
- Preview results directly in interface
- Switch between repositories seamlessly
Repository Management
- Access available repositories
- View repository tables for reference
- Save and load queries for reusability
Example SQL:
CREATE TABLE customers (
    customer_id INT AUTO_INCREMENT PRIMARY KEY,
    name VARCHAR(100) NOT NULL,
    email VARCHAR(100) UNIQUE,
    phone VARCHAR(20),
    registration_date DATETIME DEFAULT CURRENT_TIMESTAMP
);
Managing Your Tables
Once created, perform various operations on your tables using the ACTIONS menu.
Updated 8 months ago