How-To: Apply a User Filter in an ARPIA Agent Session
🎯 Guide: Setting Up a User Filter in an ARPIA Session-Based Agent
This guide will walk you through how to configure and test a user-specific filter in an ARPIA agent. The goal is to make sure the agent only shows data that belongs to the user currently logged in.
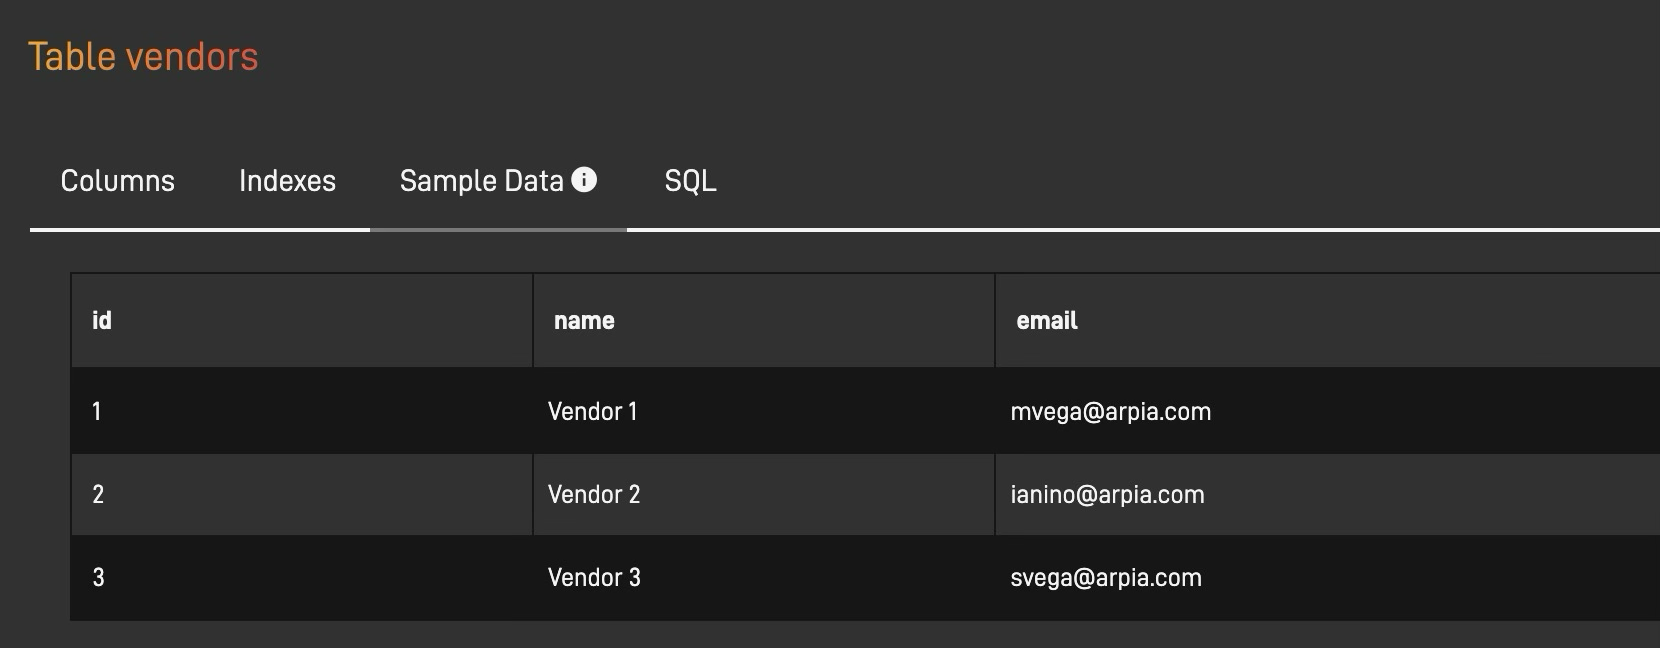
✅ Step 1: Add a User Email Field to Your Data
First, make sure your data table (or dataset) includes a column with user email addresses. This is how the system knows which records belong to which user.
Example: Add a column named
user_emailto store each user’s email.
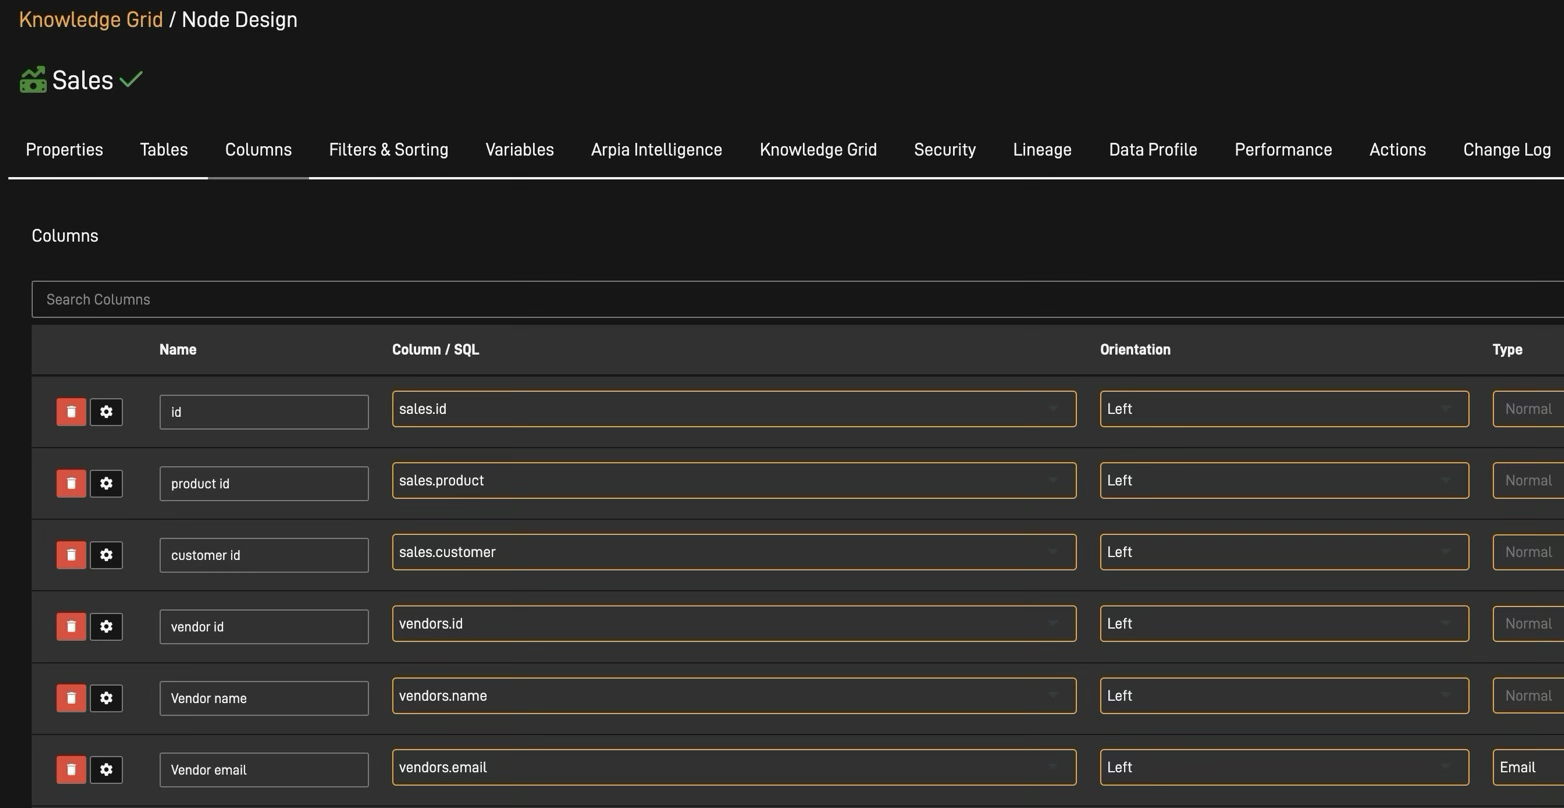
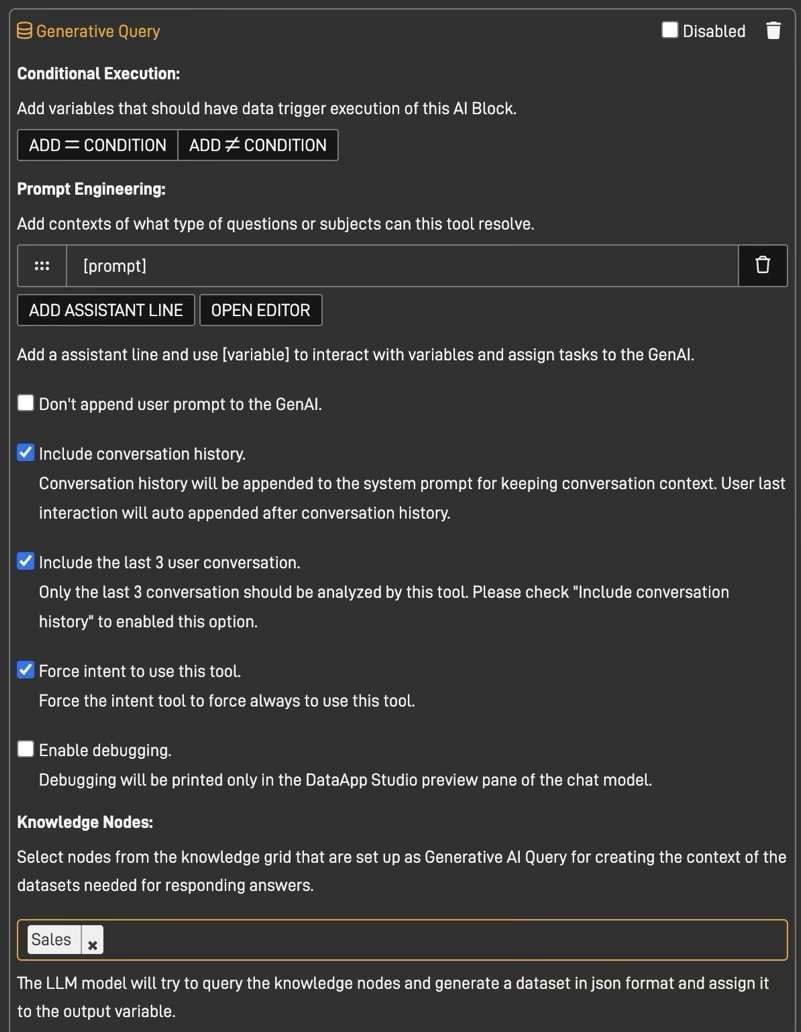
🔧 Step 2: Link the Email Field to the Agent Node
Go to the ARPIA agent and select the node that will query your data. Then, configure it to use the user_email field (or whatever your column is named).
-
Make sure this node is selected and ready for setup.
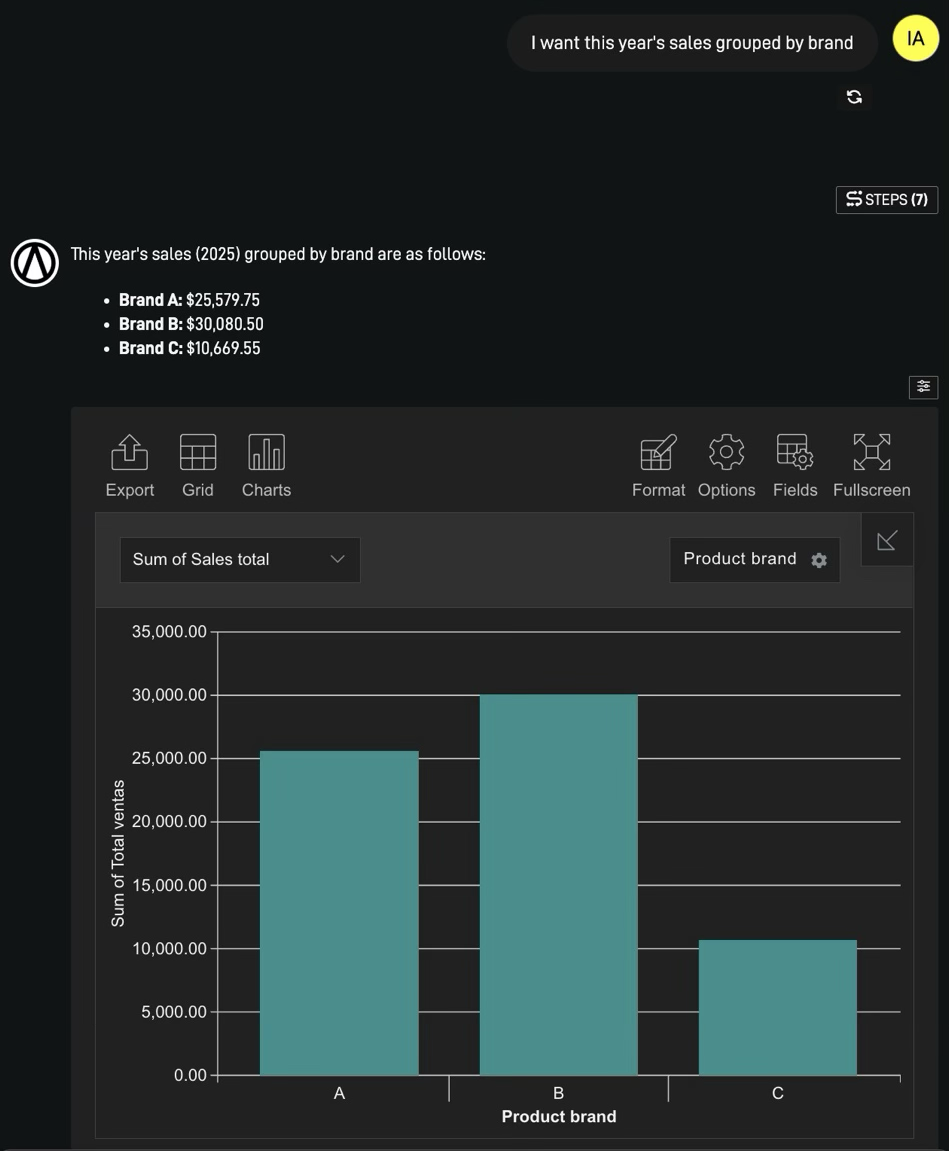
▶️ Step 3: Test the Agent Without a Filter
Now, ask the agent a test question without any filters applied. You should see that it returns all records.
-
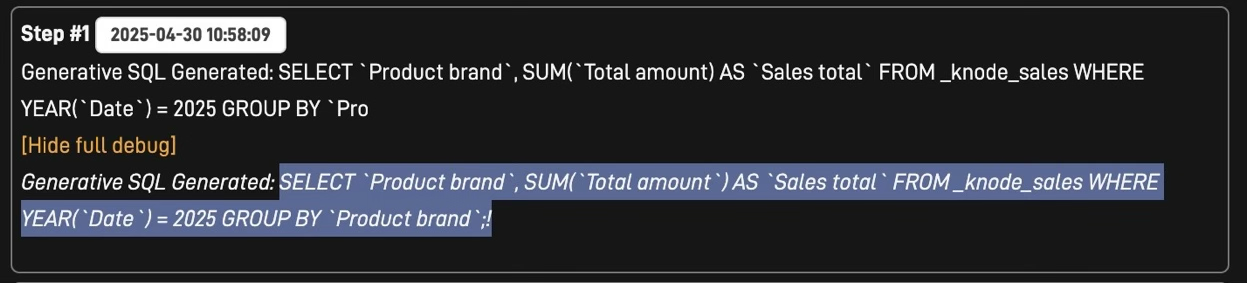
Open AI Governance and check the SQL query the agent created.
-
Confirm that there’s no filtering yet — all data is being shown.
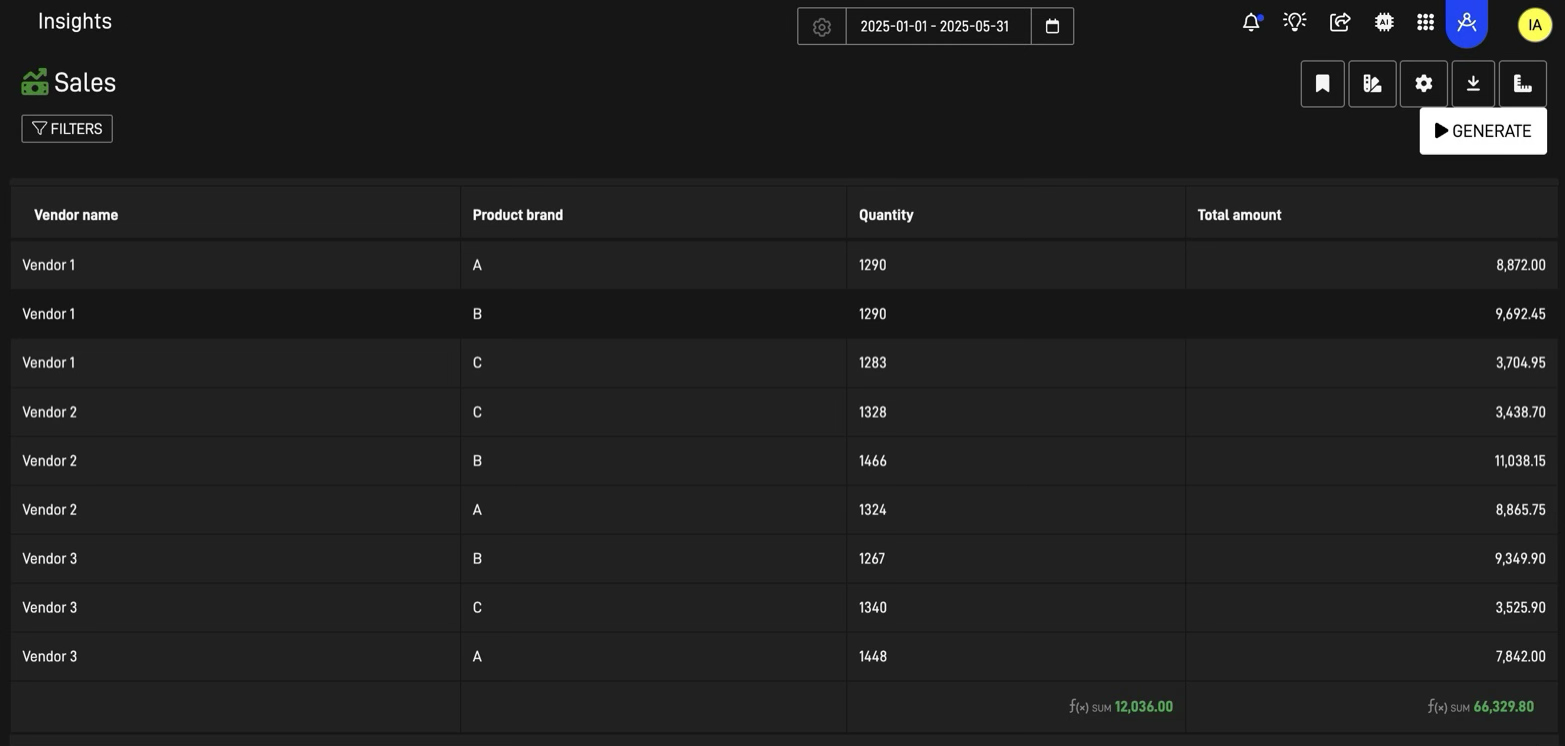
Make sure the node is selected on the agent screen:
Ask the agent a question (no filter applied):
In AI Governance, you’ll see the SQL shows all results — there’s no
WHEREclause yet:
⚙️ Step 4: Add a Filter Based on the User Email
Now apply a filter so the agent only shows results for the logged-in user.
- Open the node’s settings.
- Click on "Filtros & Ordenamiento" (Filters & Sorting).
- Add a filter where
user_emailequals the session user’s email.
Tip: Use a session variable like
{{user.email}}to match the logged-in user.
Note: This approach can also be used with any session user variable, not just emails. For example, you could filter by
user_id,user_department, or other session-specific values.

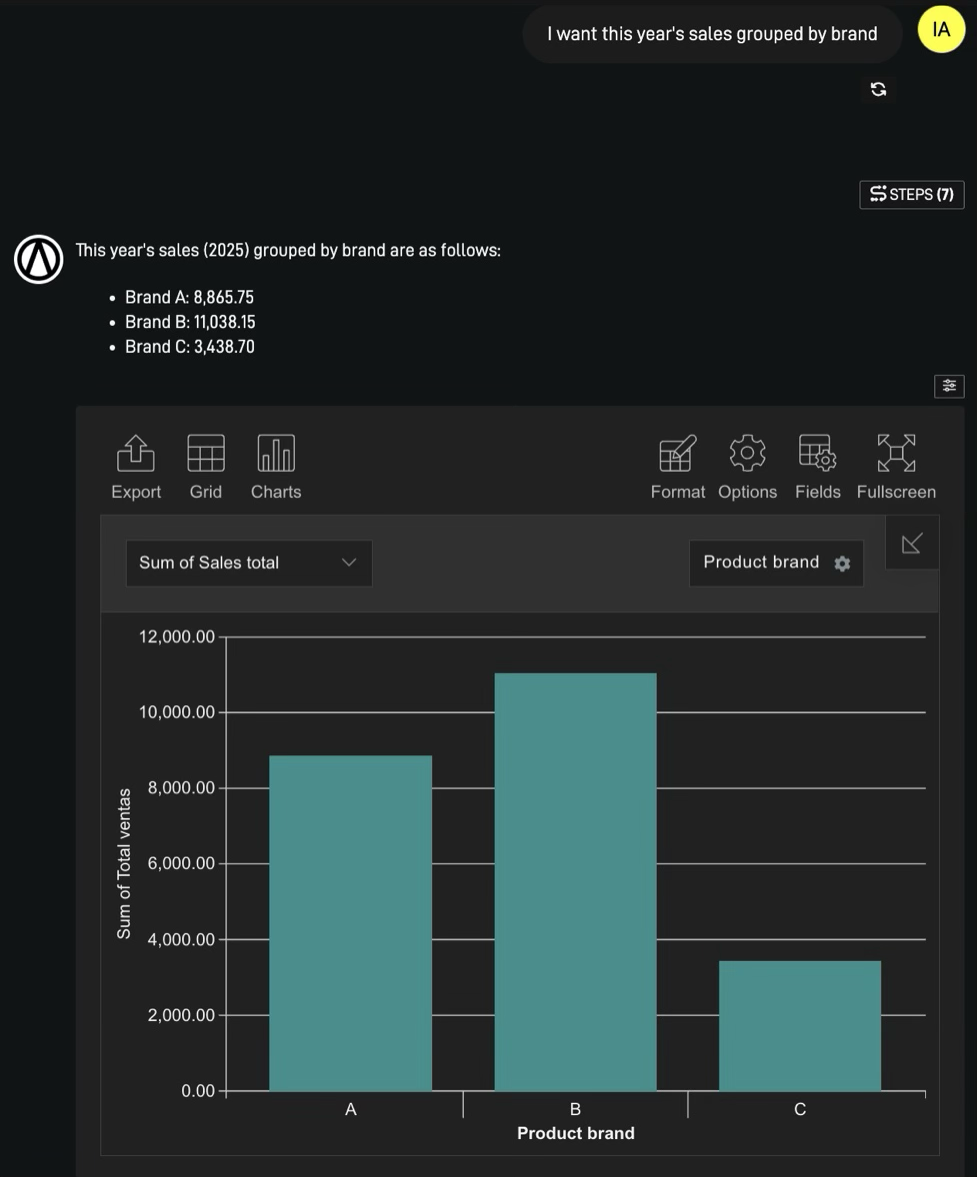
🧪 Step 5: Test Again — Now With the Filter
Ask the same question you used in Step 3. This time, the agent should only return results that match the current user’s email.
-
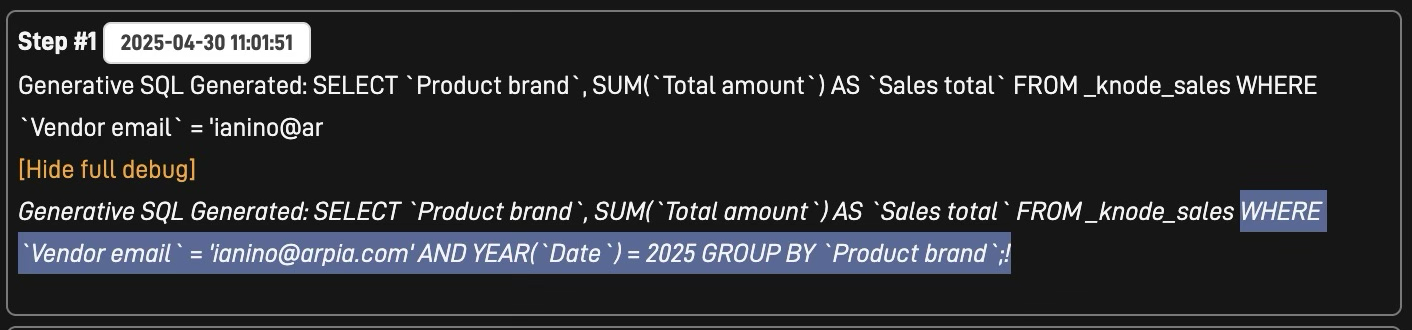
In AI Governance, check that the SQL now includes a
WHEREclause using the email. -
This confirms that the session filter is working correctly.
🔍 Final Check: Review the Generated SQL
Finally, make sure the SQL logic includes the email filter. This ensures the agent only pulls data for the right user.