
How to create an AI Market Research Assistant
Guide: Building an AI Market Research Assistant in ARPIA
This guide walks you through creating an AI Market Research Agent using ARPIA. This intelligent tool combines generative AI with real-time internet search to deliver market insights through a conversational interface. The workflow touches three ARPIA modules: AI Governance, AI Apps Studio, and Resources.
Before You Begin
Confirm the following before starting:
- You have access to the AI Governance module in your workarea
- You have permission to create apps in AI Apps Studio
- You have permission to create buckets under Resources > Object Storage
- AI is enabled for your workarea (configurable in AI General Settings — see Step 1)
Estimated time to complete: ~15 minutes
Step 1: Access AI Governance Configuration
There are two ways to reach this screen:
Option A — From the sidebar:
- In the ARPIA sidebar, click AI Governance to expand the menu.
- Select Configuration from the submenu.

Option B — From the Orchestrator Home:
- From the ARPIA AI Orchestrator Home, click the AI Governance tile.

- Inside the AI Governance Console, click the Settings tab (rightmost tab in the top navigation bar).

Both paths lead to the same AI General Settings panel, where you can configure model selection, enable/disable AI for the work-area, and access AI security & ethical behavior and AI LLM Models subsections.
Step 2: Launch AI App Studio
- From the sidebar or the Orchestrator home screen, open AI Apps Studio.

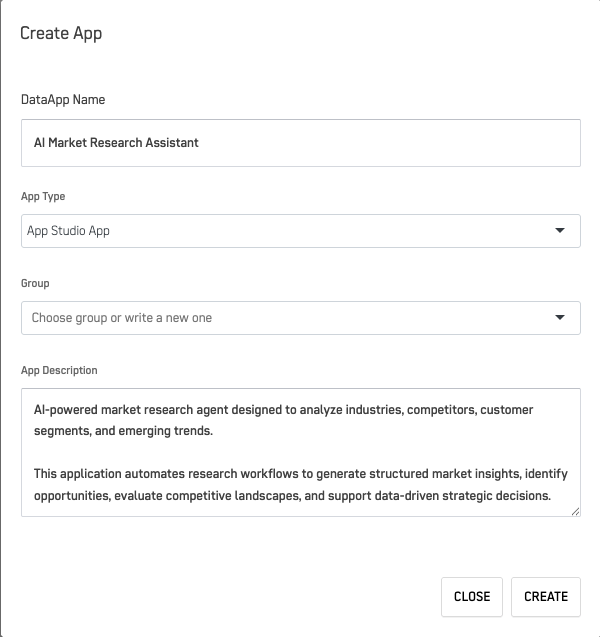
Step 3: Create a New App
- Click on + CREATE APP.
- Fill in the required App Name, Description, and other relevant details.
Step 4: Add a Screen
- When prompted, choose AI Assistant as the screen type.
- Provide a name, choose an icon, and click ADD.

Step 5: Configure Initial Prompt Engineering
- In the right panel, expand the Initial Prompt Engineering section.
- Fill in the Welcome title — a short name or greeting for your assistant.
- Add a Small description of assistant — a brief sentence explaining what the assistant does.
- In the rich-text editor below, write the full Welcome message that users will see when they open the chat.
- Under Showing this intro, select how the welcome content is displayed (e.g. Show Title and Description at intro).
- Click Save (top-right) to preserve your settings.

Tip: The welcome message supports rich-text formatting — you can use bold, italic, lists, and code blocks to structure the assistant's intro content.
Step 6: Create a Storage Bucket
- From the sidebar or Orchestrator home screen, navigate to the Resources tab.

- Under Object Storage, click + Create a Bucket and complete the required fields.
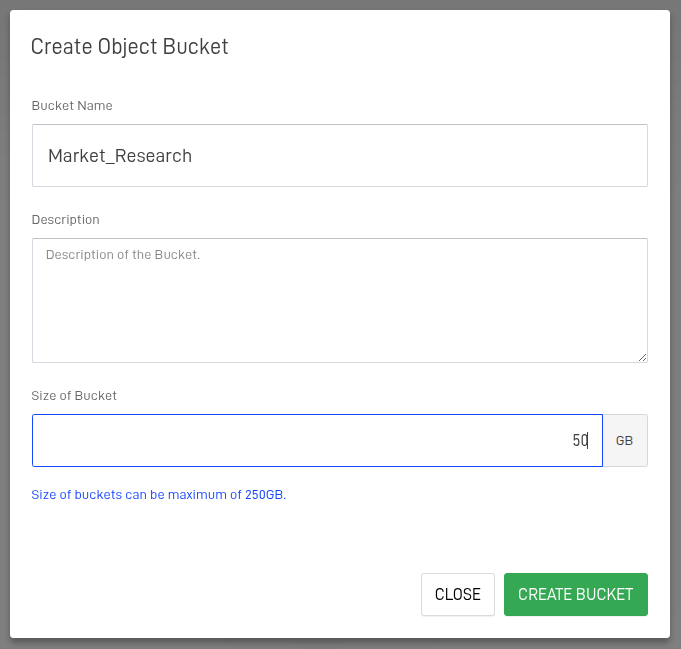
- Return to AI Apps Studio and select your newly created bucket from the dropdown.


Step 7: Configure the AI Workflow
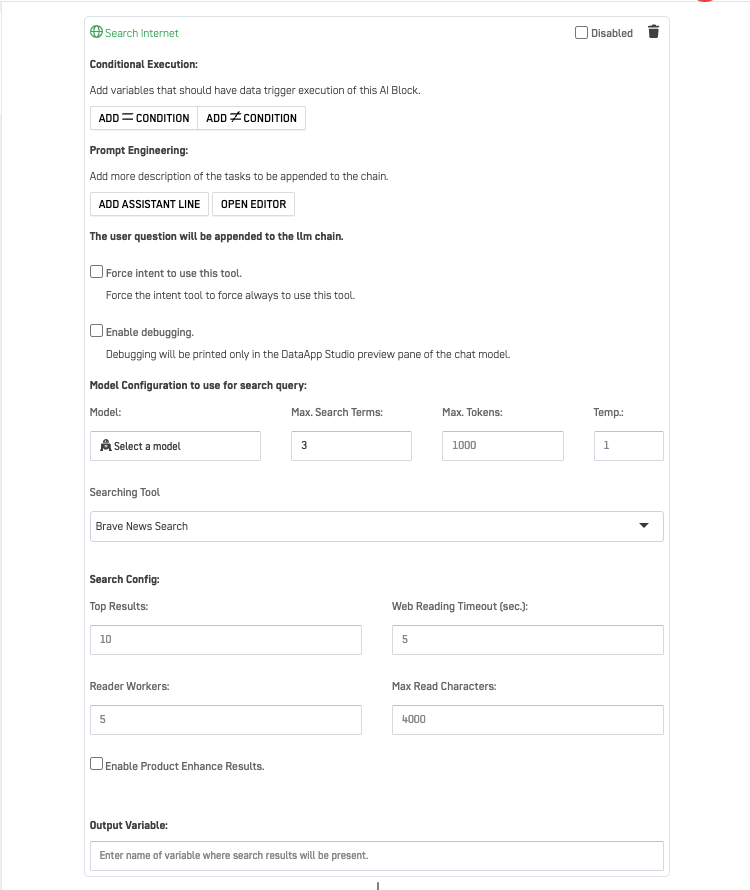
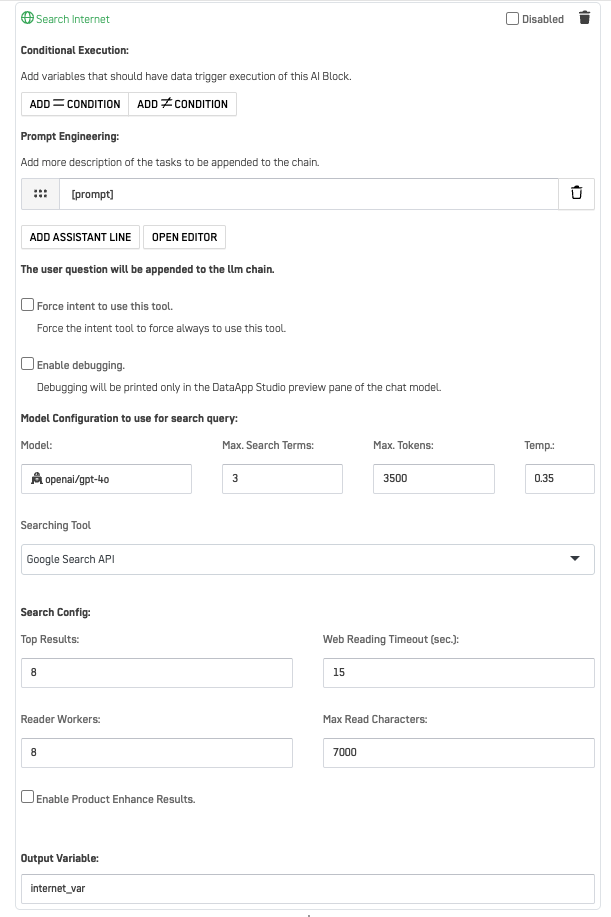
- Click + Add Tool, then select Internet Search Engine from the tool catalog.
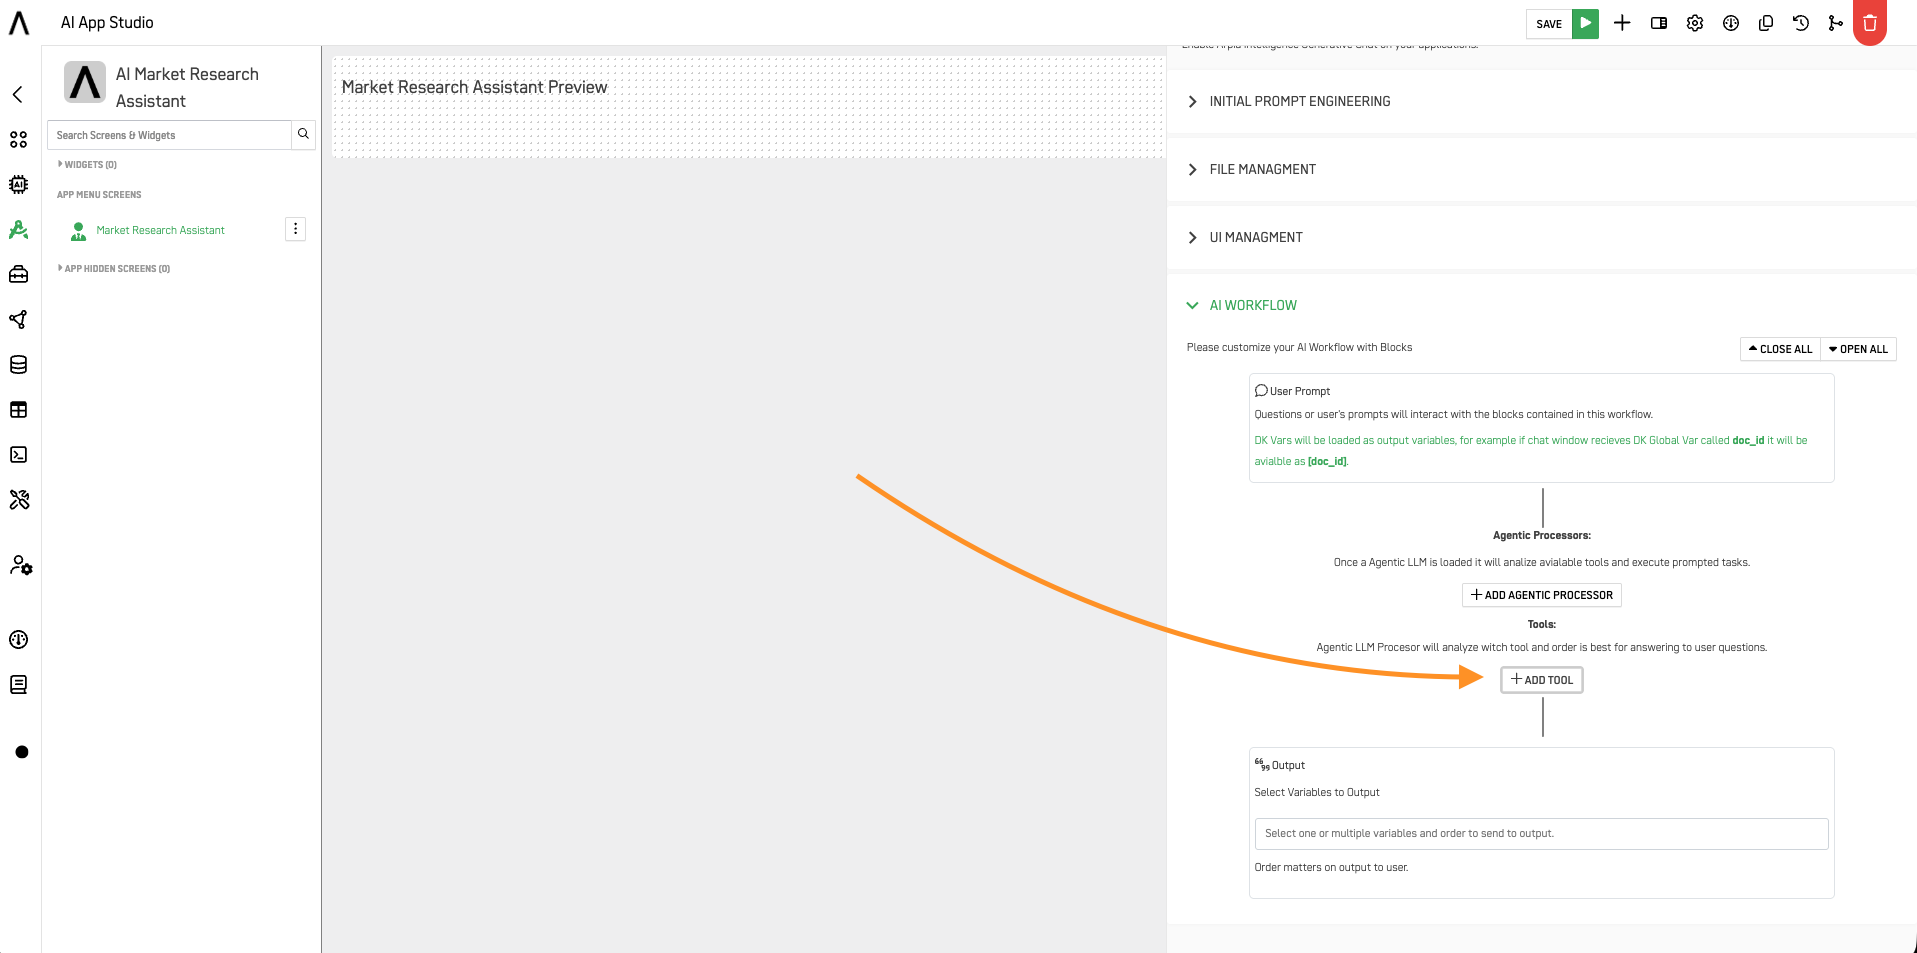
- Configure the Internet Search Engine tool settings as needed.

- Click + ADD AGENTIC PROCESSOR and choose the Add LLM option.
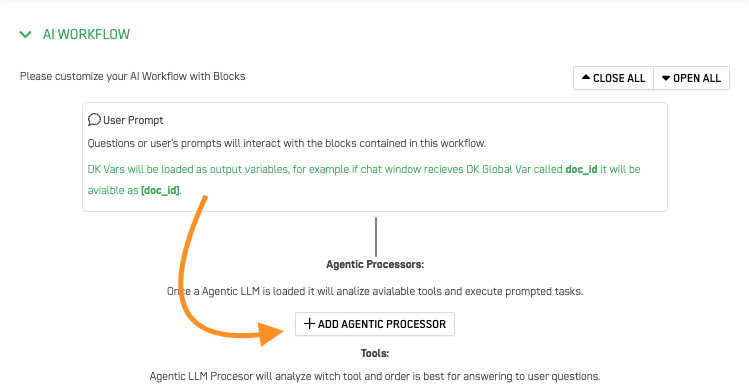

- Configure the LLM settings for your agent (model, temperature, system prompt, etc.).

- Click Save to preserve your workflow.
Step 8: Preview and Test the Agent
- Click the green Preview App button next to Save.

- Use the Conversations button to view prior interactions, or start a new session by clicking +.
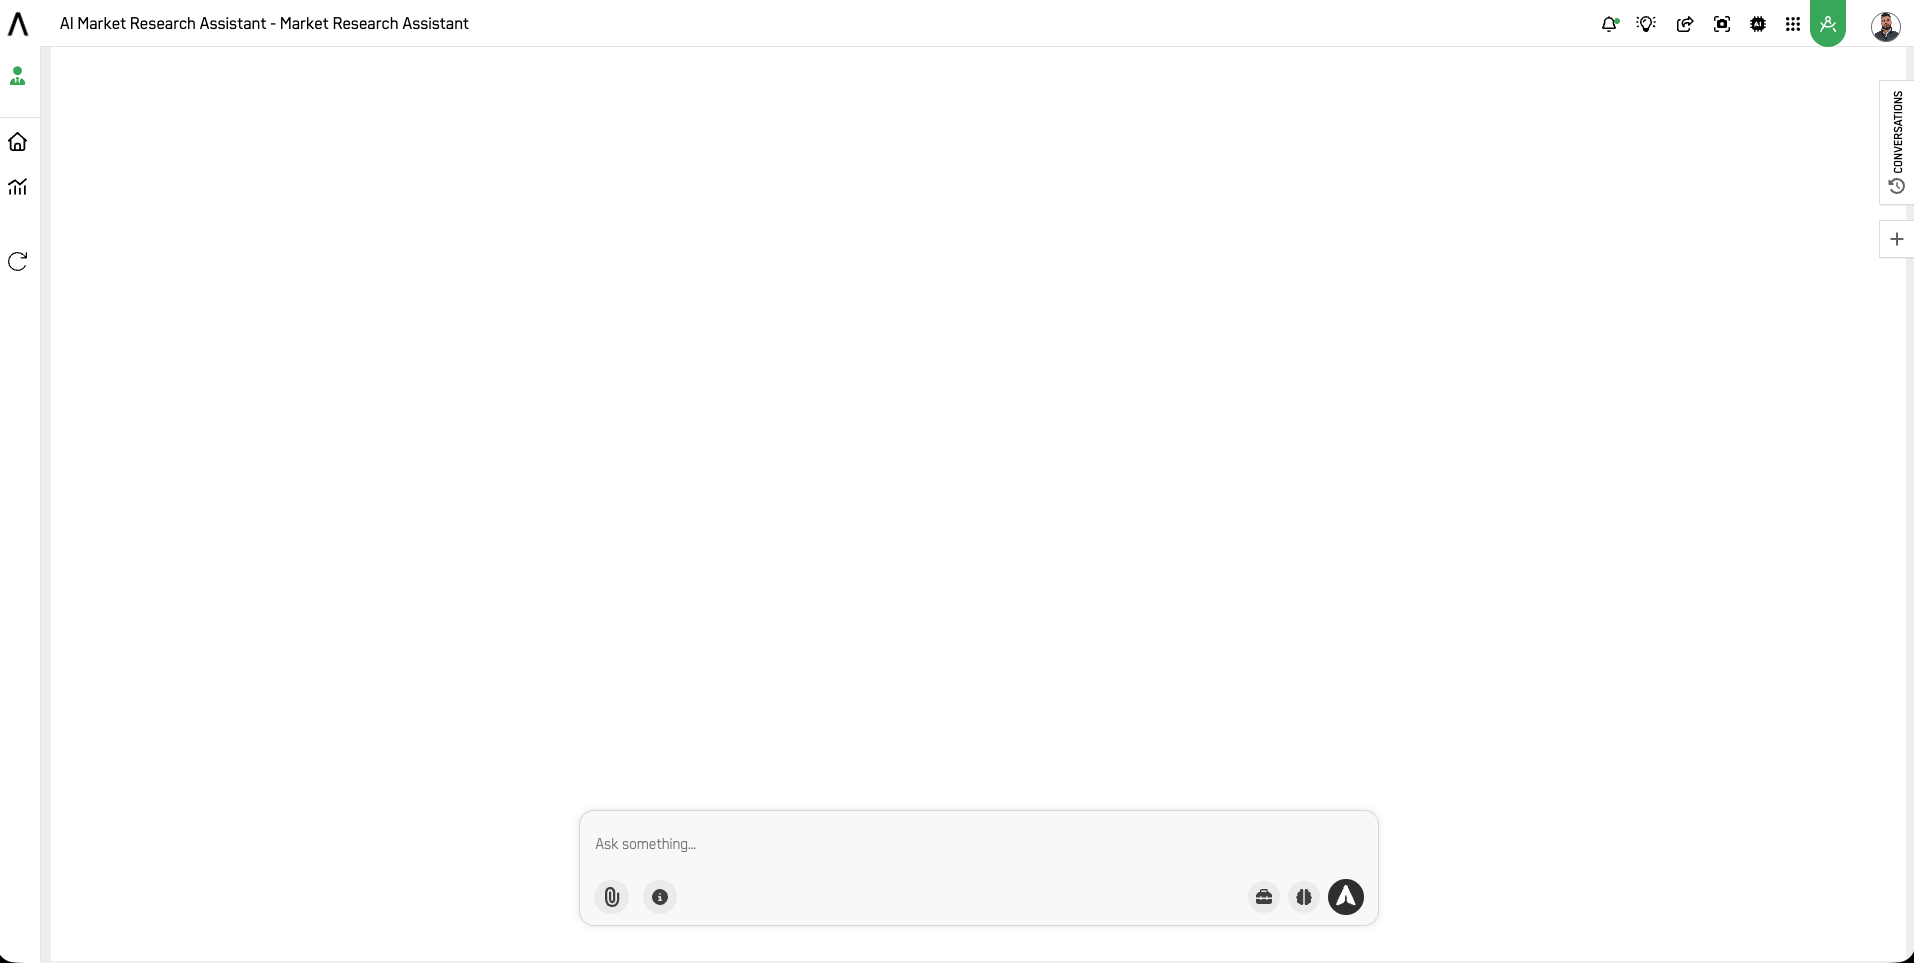
- Submit a test query to verify the agent returns live search results and a well-formed LLM response.

✅ You're Done!
Your AI Market Research Assistant is now live and ready to deliver real-time insights powered by LLMs and internet search.
Next steps to explore:
- Add custom knowledge sources via additional Storage Buckets or RAG processors
- Tune the LLM system prompt to constrain the agent's tone, format, or domain focus
- Publish the app to users via the Access & Permissions settings in AI Apps Studio
- Monitor usage and audit logs through AI Governance > Activity
Updated 4 months ago