How to create a Data Pipe to Python.
Step-by-Step Guide
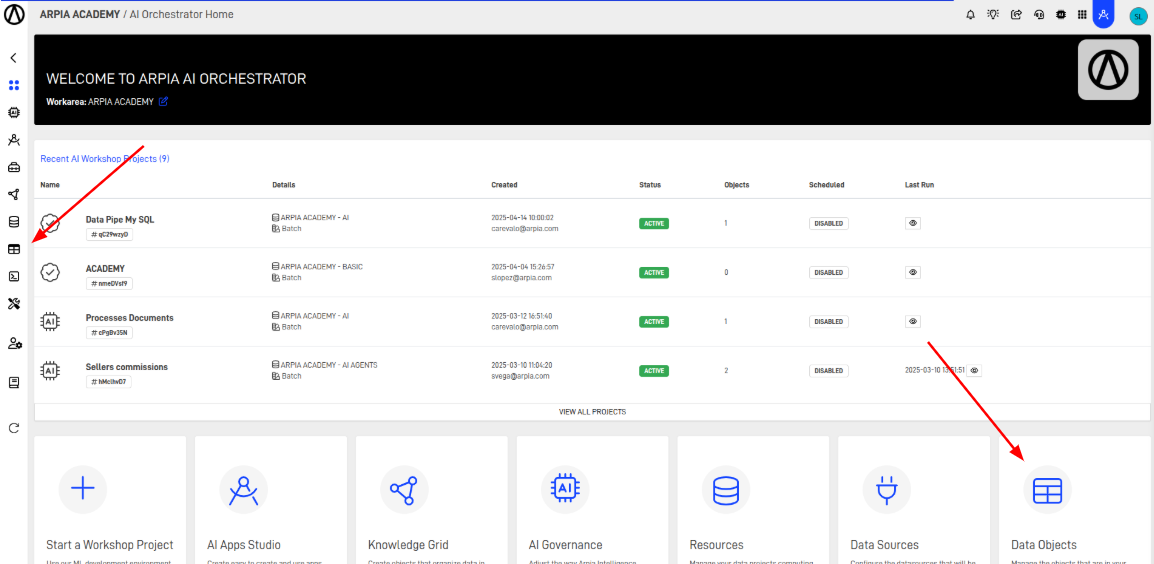
Step 1: Access the Data Objects Section
Navigate to the Data Object section in your Orchestrator toolbar.
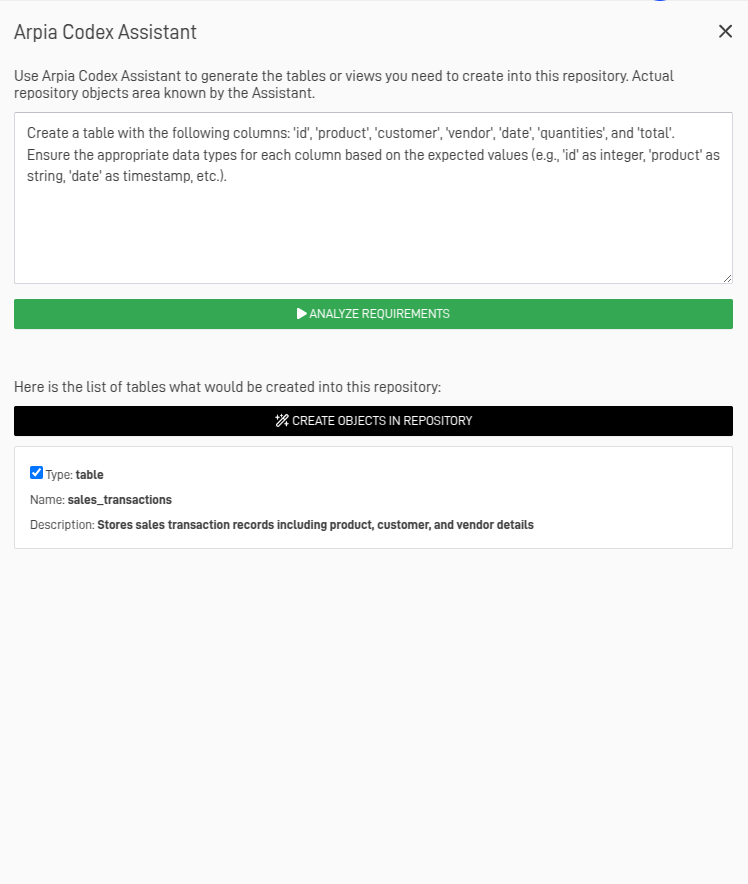
Step 2: Create the Table to Store Our Information
In this case, we will create the table with the help of Arpia Codex Assistant. For more information on how to create a table, visit How to create a Table.
Step 3: Access the AI Workshop Section
Navigate to the AI Workshops section in your Orchestrator toolbar.
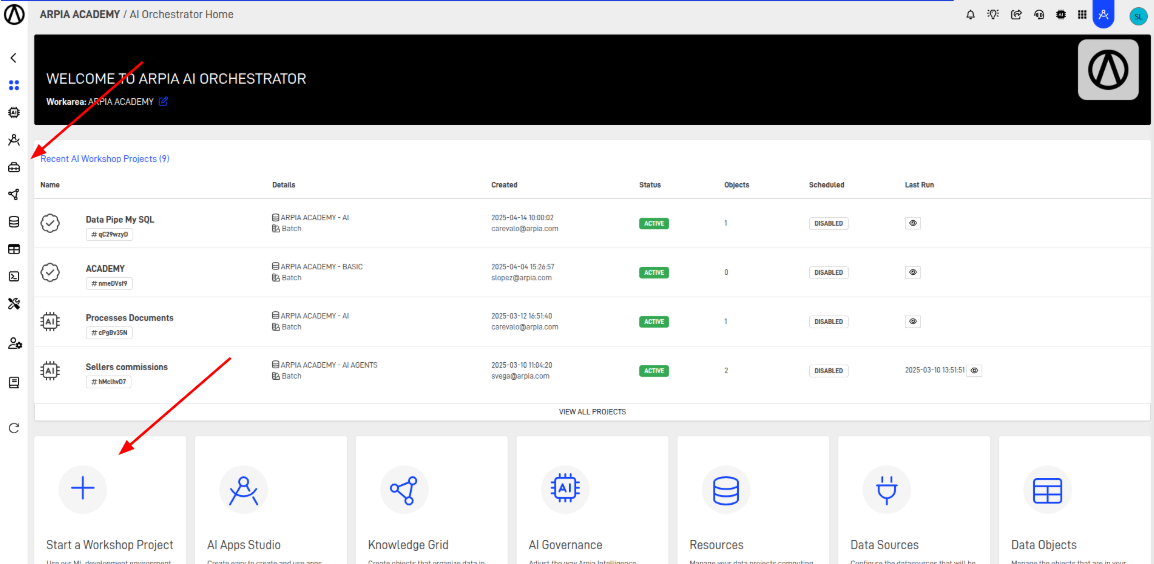
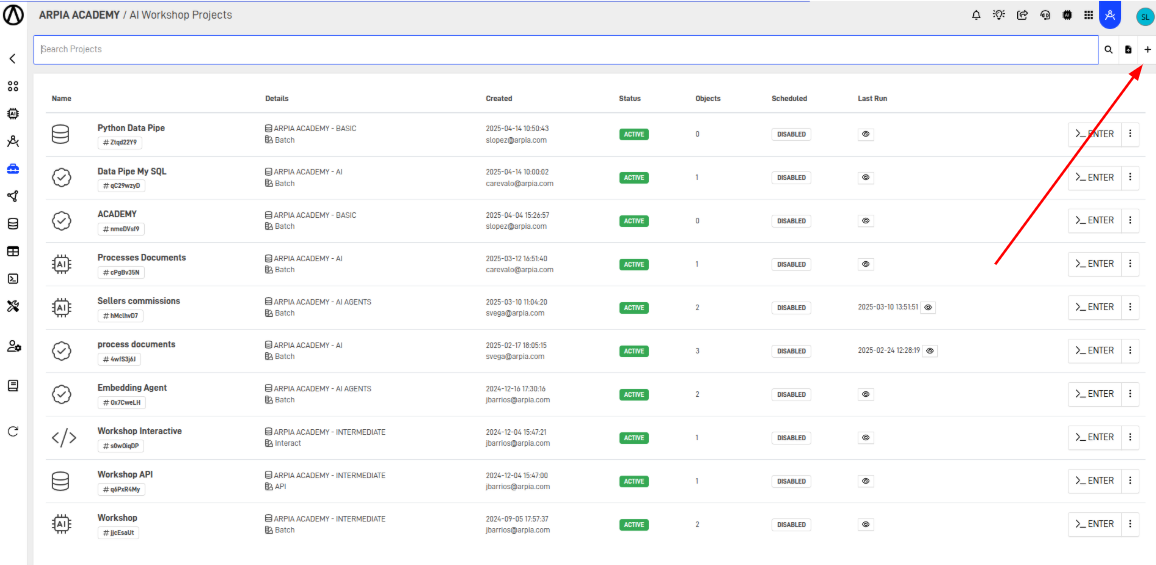
Step 4: Create a New Workshop Project
Click de "+" button.
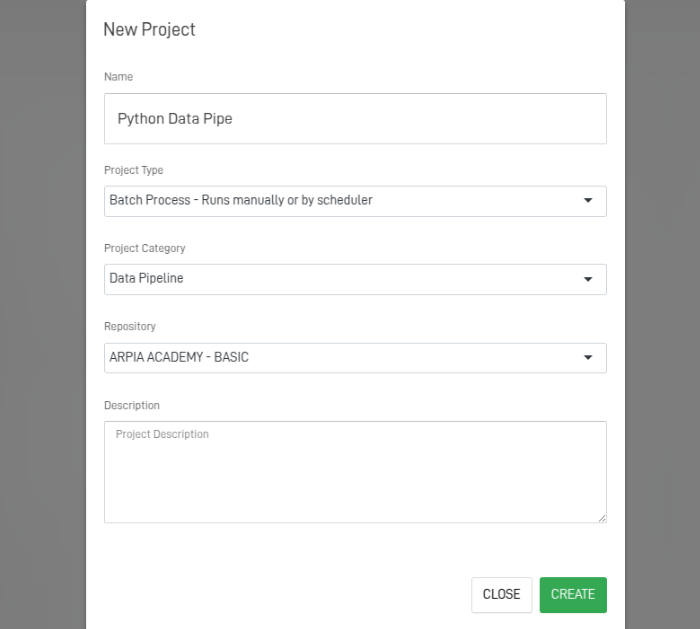
Step 5: Fill Out the Workshop Form.
After clicking the button, you'll see the following screen. Fill out the form to create your Workshop. Below is an explanation of each field.
- Name: Name of the workshop to create.
- Project Type: These can be Batch Process, Manually Process, or API Calls.
- Project Category: Ideally, select Data Pipeline.
- Repository: Repository containing the tables to be loaded.
- Description: Explanation about the project.
After fill the fields, click Create.
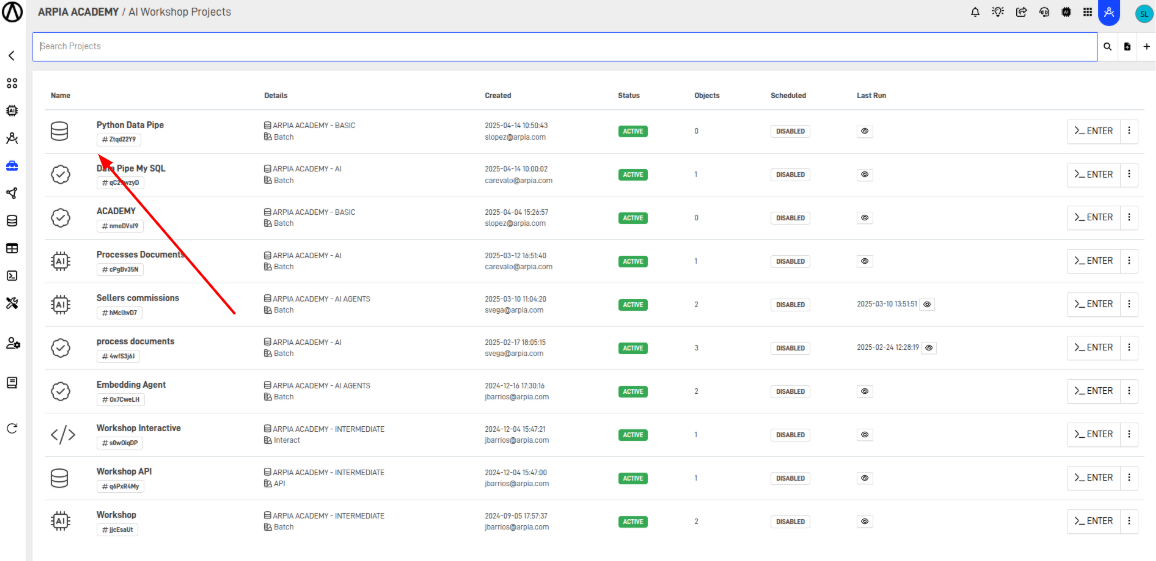
Step 6: Access the Created Workshop
Click the new Workshop.
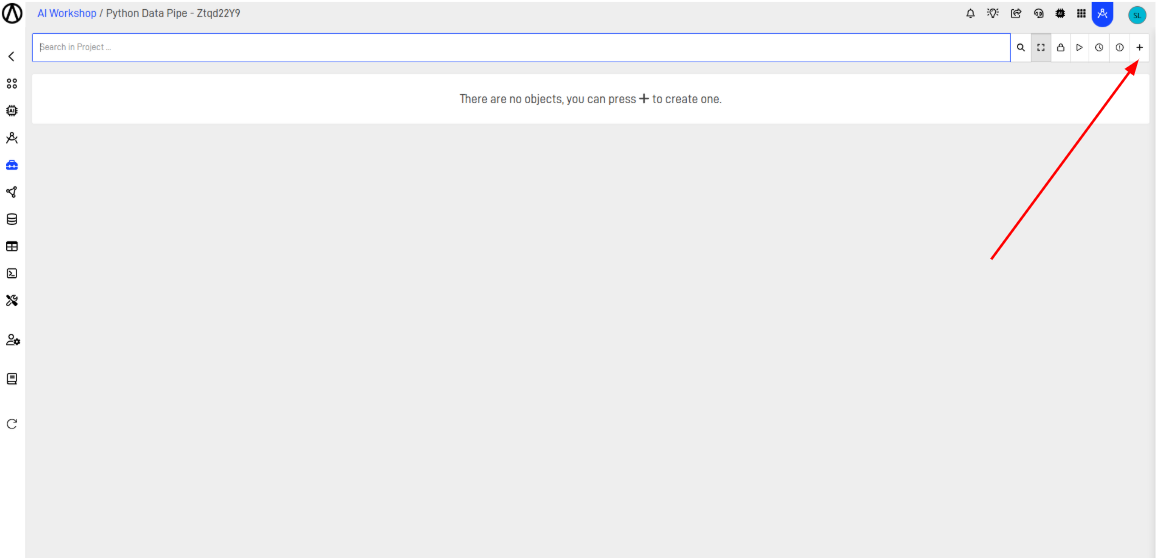
Step 7: Add a New Workshop Object.
Click de "+" button.
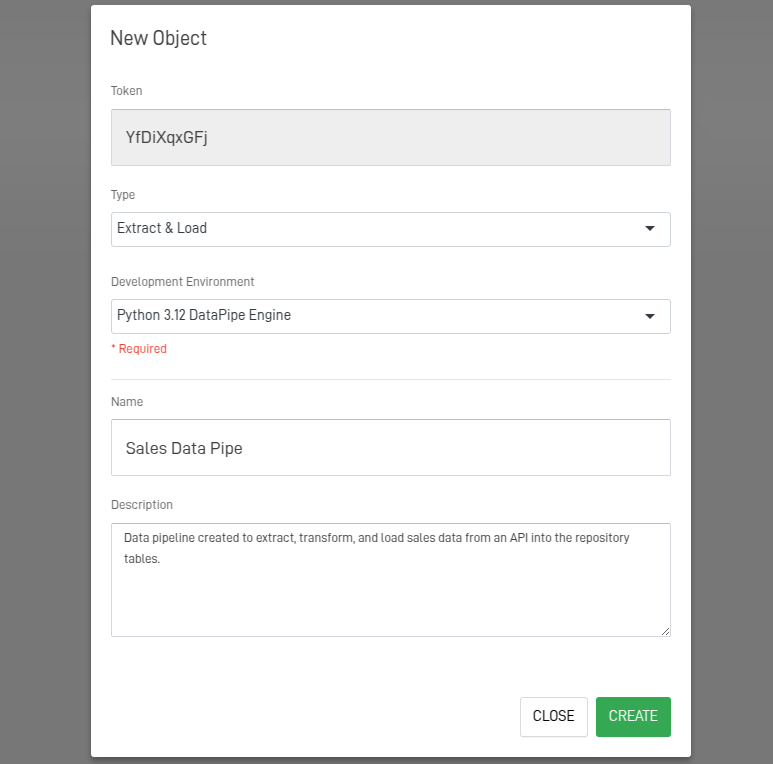
Step 8: Fill Out the Workshop Object Form.
After clicking the button, the following screen will appear. Complete the form to create your Workshop object. Each field is explained below.
- Type: Select Extract and Load
- Development Environment: Select Python 3.12 DataPipe Engine.
- Name: Name of the Object to create.
- Description: Explanation about the Object.
After fill the fields, click Create.
Step 9: Write the Python Code
If coding isn't your strong suit or you're facing any difficulties, you can refer to Arpia Codex Assistant for guidance and support.
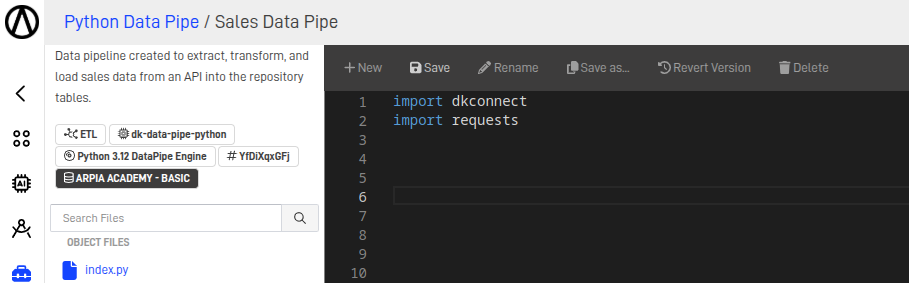
Step 9.1: Import Modules
For data extraction and loading in ARPIA, we will need to import at least the dkconnect module for connecting to the repository, and the requests module for making API calls.
Step 9.2: Setting Up API and Database Connections
- We need to create an object to establish a connection with the repository, and then initialize a cursor to perform operations on it.
- To establish the API connection, we need the URL and the parameters for the connection. After that, we can make the request to retrieve the data.
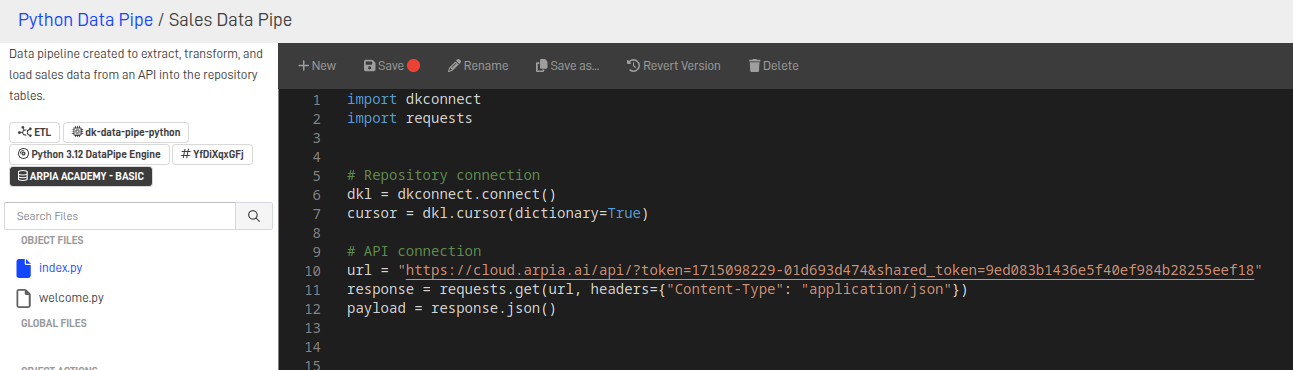
Note: For an ETL process using Python, it's important to have the API link with the necessary access parameters.
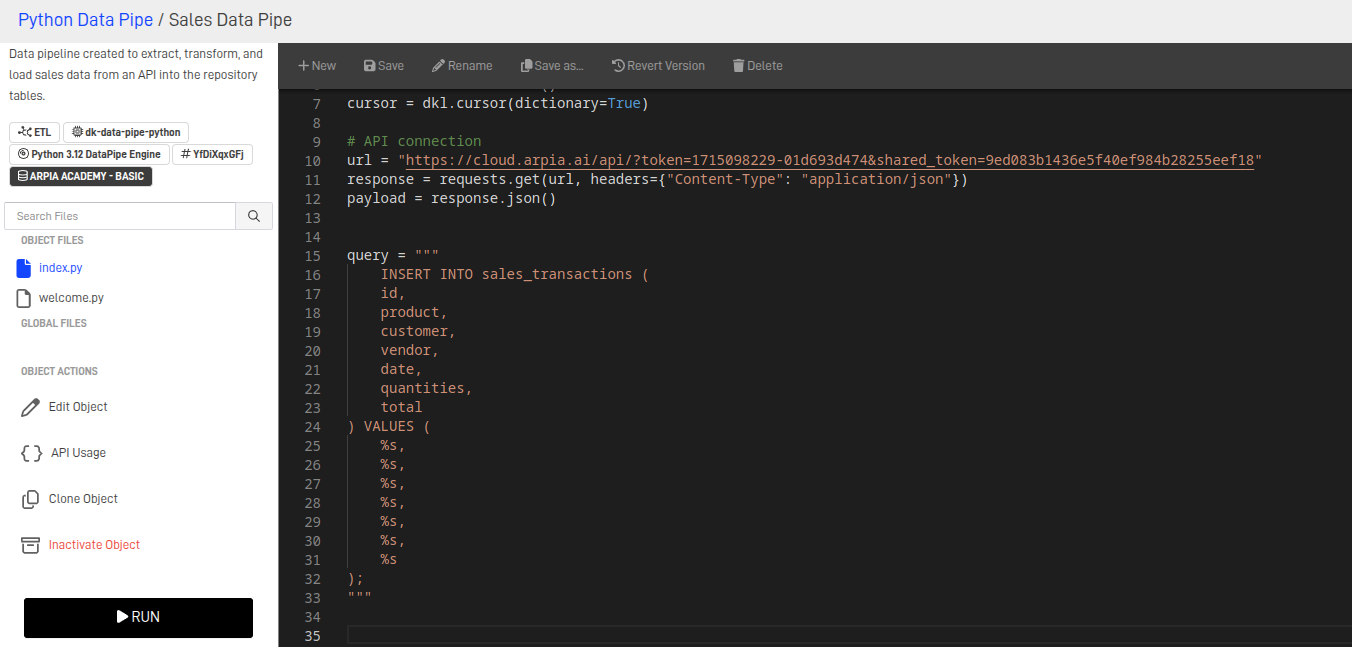
Step 9.3: SQL Statement to Load Data into the Repository Tables
To load the extracted information, you'll need to use INSERT INTO SQL statements, specifying the appropriate fields and tables as required by the necessary queries.
Step 9.5: Iterating Over the API Data and Inserting into the Database
- Loops through each element in the payload["data"] array.
- Extracts all relevant fields (id, product, customer, etc.).
- Executes the SQL query using the extracted values. The values are passed as a tuple.
Each loop inserts one record into the database.
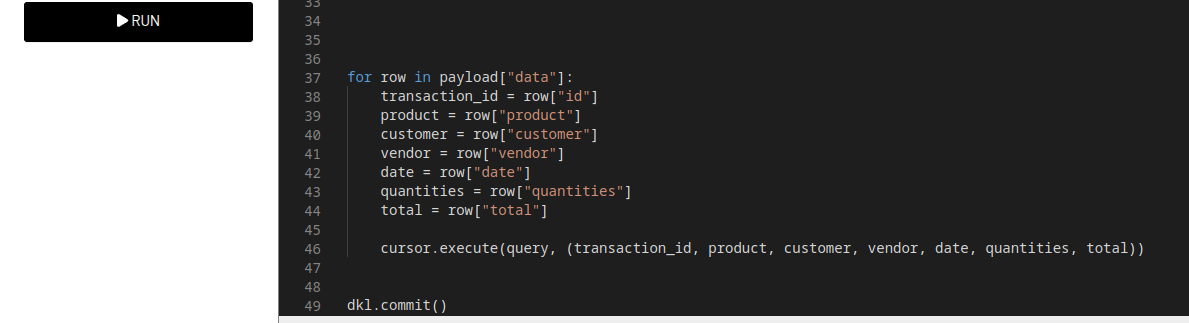
Then we commit the transaction to the database to confirm the changes. Without calling dkl.commit(), the inserted rows will not be stored permanently.
Step 9.5: Implementing Pagination and Validations
When working with large datasets provided by APIs, pagination and data validation are essential. In this case, the API already returns the data in paginated responses, so we need to iterate through each page to retrieve the complete dataset. At the same time, validations ensure that the retrieved data is correct before being processed. We will use Arpia Codex Assistant to efficiently implement both pagination handling and validation logic.
We will use the following prompt, making sure to include all the code.
The code isn't bringing all the data from the API; it only brings 100 rows. Help me with this
and apply validations to handle connection errors.
When the assistant responds, we will copy the code it provides, paste it, and use it in the workshop.
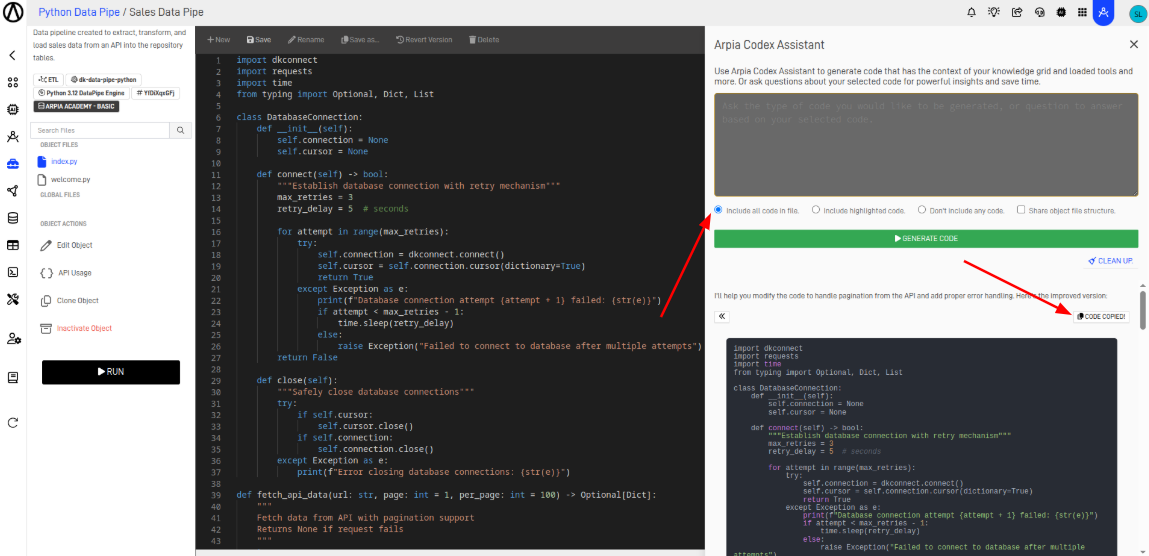
Then, click the save button.
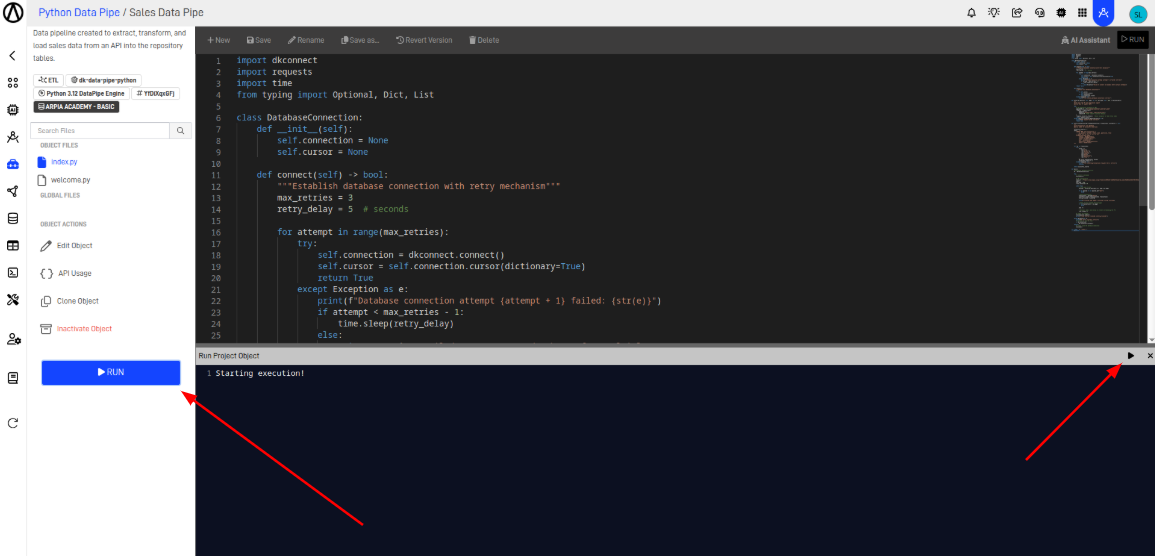
Step 10: Run the Workshop
To run the project, click the 'Run' button and then the 'Play' button.
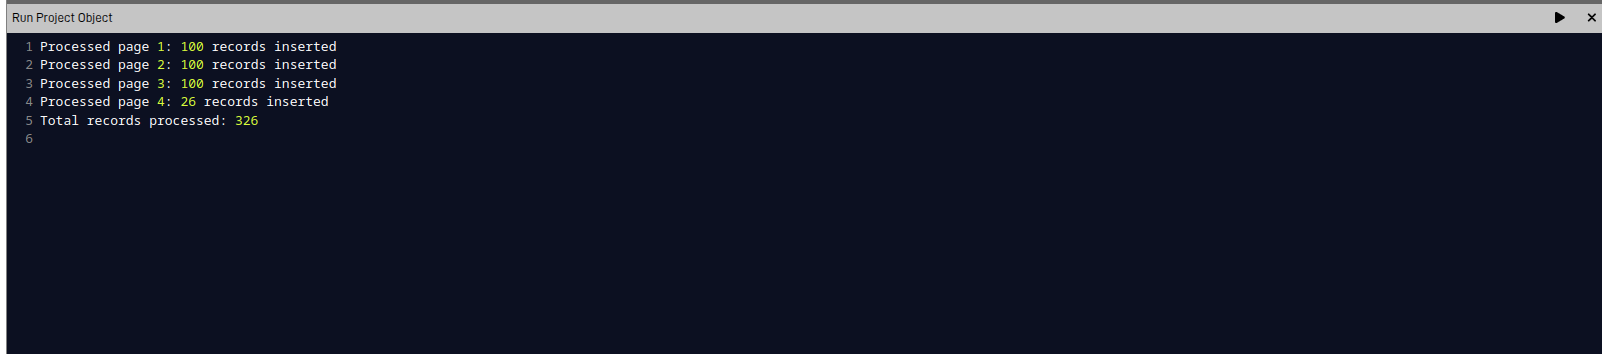
When we run the code, thanks to the code provided by the assistant, the result of the successful insertions will appear in the console.
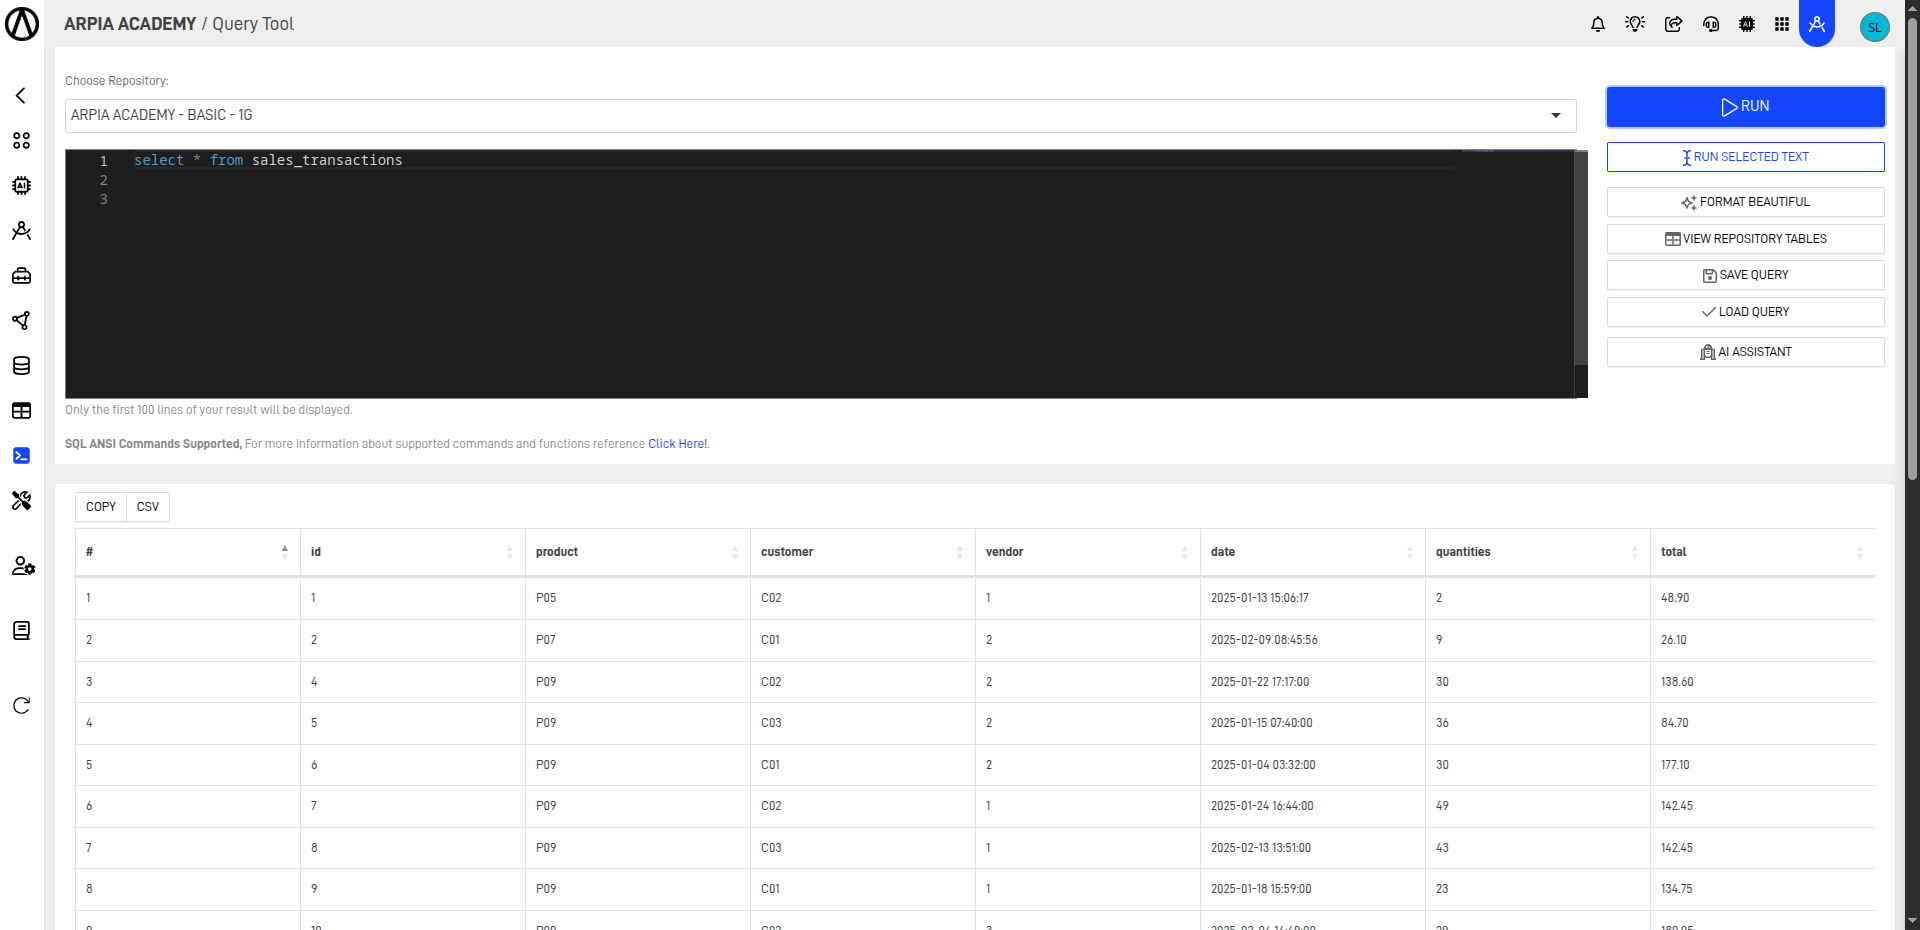
Step 11: Check the Results of Successful Insertions
To do this, we will go to the Query Tool and run a SELECT query on the tables where the data was inserted. As a result, we will see the records that were inserted through the Data Pipe.
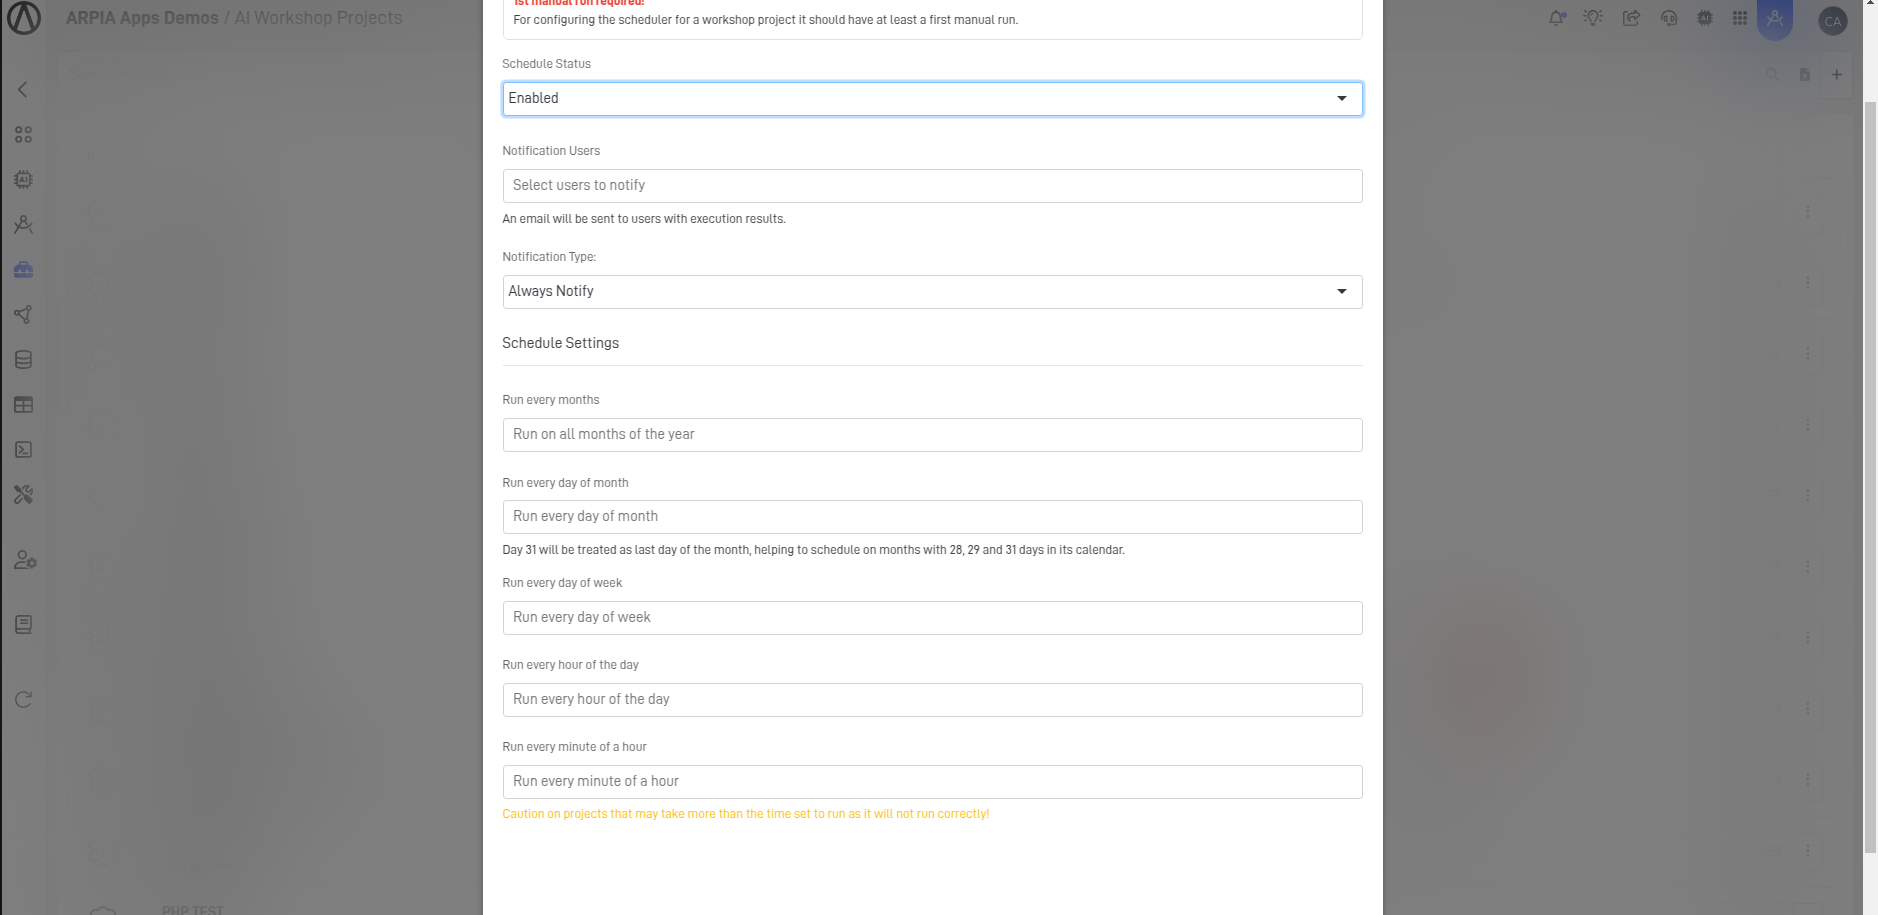
Step 12: Schedule the Execution of the Workshop
- Go back to the Workshop screen
- Click on the Workshop options
- Select Schedule Settings
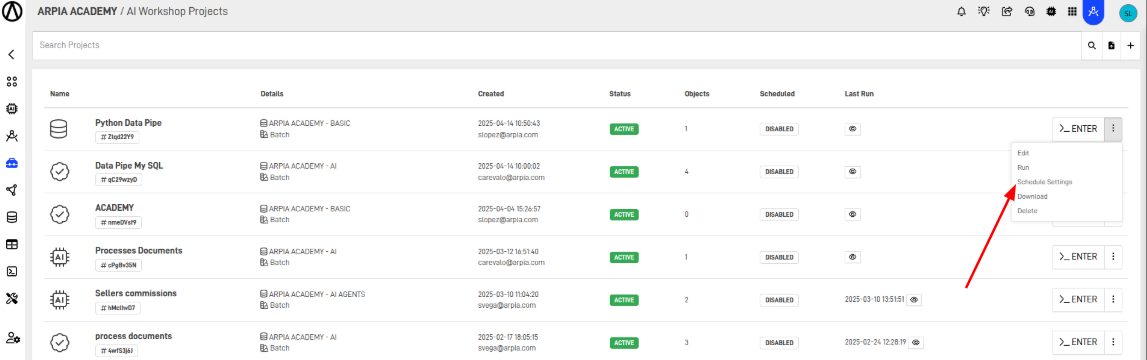
- Fill out the form and configure the desired execution schedule