Documents in ORIA Reasoner
How to Configure and Use Documents
The Documents tool allows you to generate structured files (PDFs, presentations, or reports) while ensuring they follow your company’s visual identity through a Brand Kit (colors, fonts, logo, and styling instructions).
What is the Documents Tool and What is a Brand Kit?
- Documents Tool: ORIA’s document generator that automatically applies professional formatting to text outputs, reports, and presentations in your session.
- Brand Kit: A predefined set of corporate identity elements _(logo, colors, typography, and layout rules) _that ensures all generated documents align with your company's branding.
How to Enable Documents in a Session
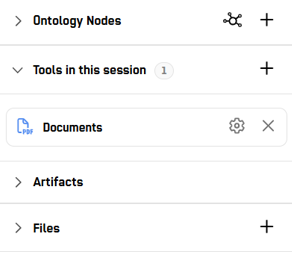
- Access session tools: In the right side panel, go to Tools in this session and click the + button (Add tools).
- Select Artifact Tools: In the pop-up window, click the Artifact Tools tab.
- Enable Documents: Select the Documents card (identified with a PDF document icon) and click Save.
- Open branding settings: In the Tools in this session section of the right side panel, click the gear icon (⚙) next to the Documents tool.
How to Create and Configure a Brand Kit
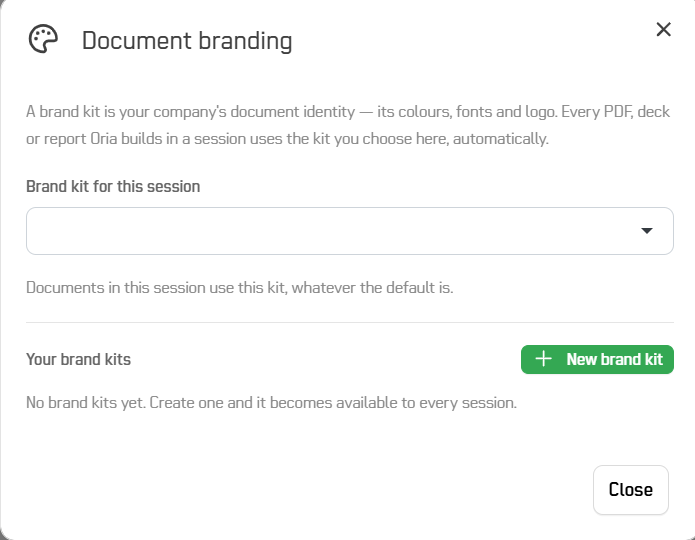
Clicking the gear icon on the Documents tool opens the Document branding window:
- Create a new Kit: Click the green + New brand kit button.
-
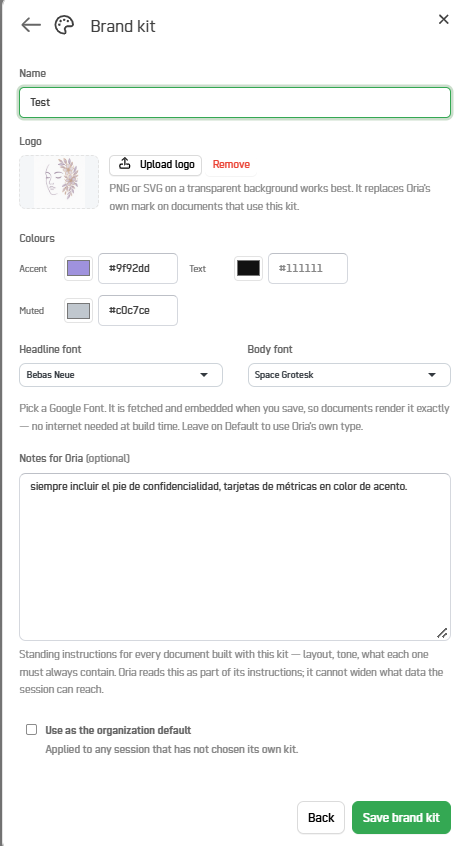
Fill in the Brand Kit parameters:
- Name: Internal identifier for your team (e.g., Acme Corp — Corporate).
- Logo: Click Upload logo to upload a transparent PNG or SVG image.
- Colours: Set hex color codes for Accent, Text, and Muted.
- Headline font & Body font: Choose Google Fonts for headings and body text.
- Notes for Oria (optional): Permanent design/tone rules (e.g., "Logo top-left; always include confidentiality footer").
- Use as the organization default (optional): Apply as default across the entire organization.
-
Save the Kit: Click Save brand kit to finalize.
Brand Kit Management and Assignment
Inside the Document branding modal, you can perform the following actions:
-
Assign to current session (Brand kit for this session): Open the top drop-down menu and select the specific kit you want to use for the active session (or choose None — unbranded if you do not want to apply brand styling).
-
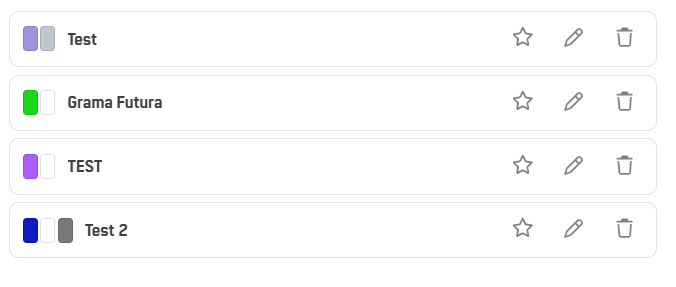
Set as Favorite (⭐): Click the star next to a kit in the Your brand kits list to prioritize it.
-
Edit (✏️): Modify the colors, logo, or layout rules of an existing kit at any time.
-
Delete (🗑️): Click the trash icon to remove a kit. The system will ask for confirmation before permanently deleting it.
Updated 21 days ago