
ARPIA Personal Tokens
The numbered list resets to 1. after each image block — that's a readme.io markdown limitation when blocks interrupt lists. Here's the fix with proper sequential numbering throughout:
ARPIA Personal Tokens (APT) — Authentication for CLI & AI Agents
Overview
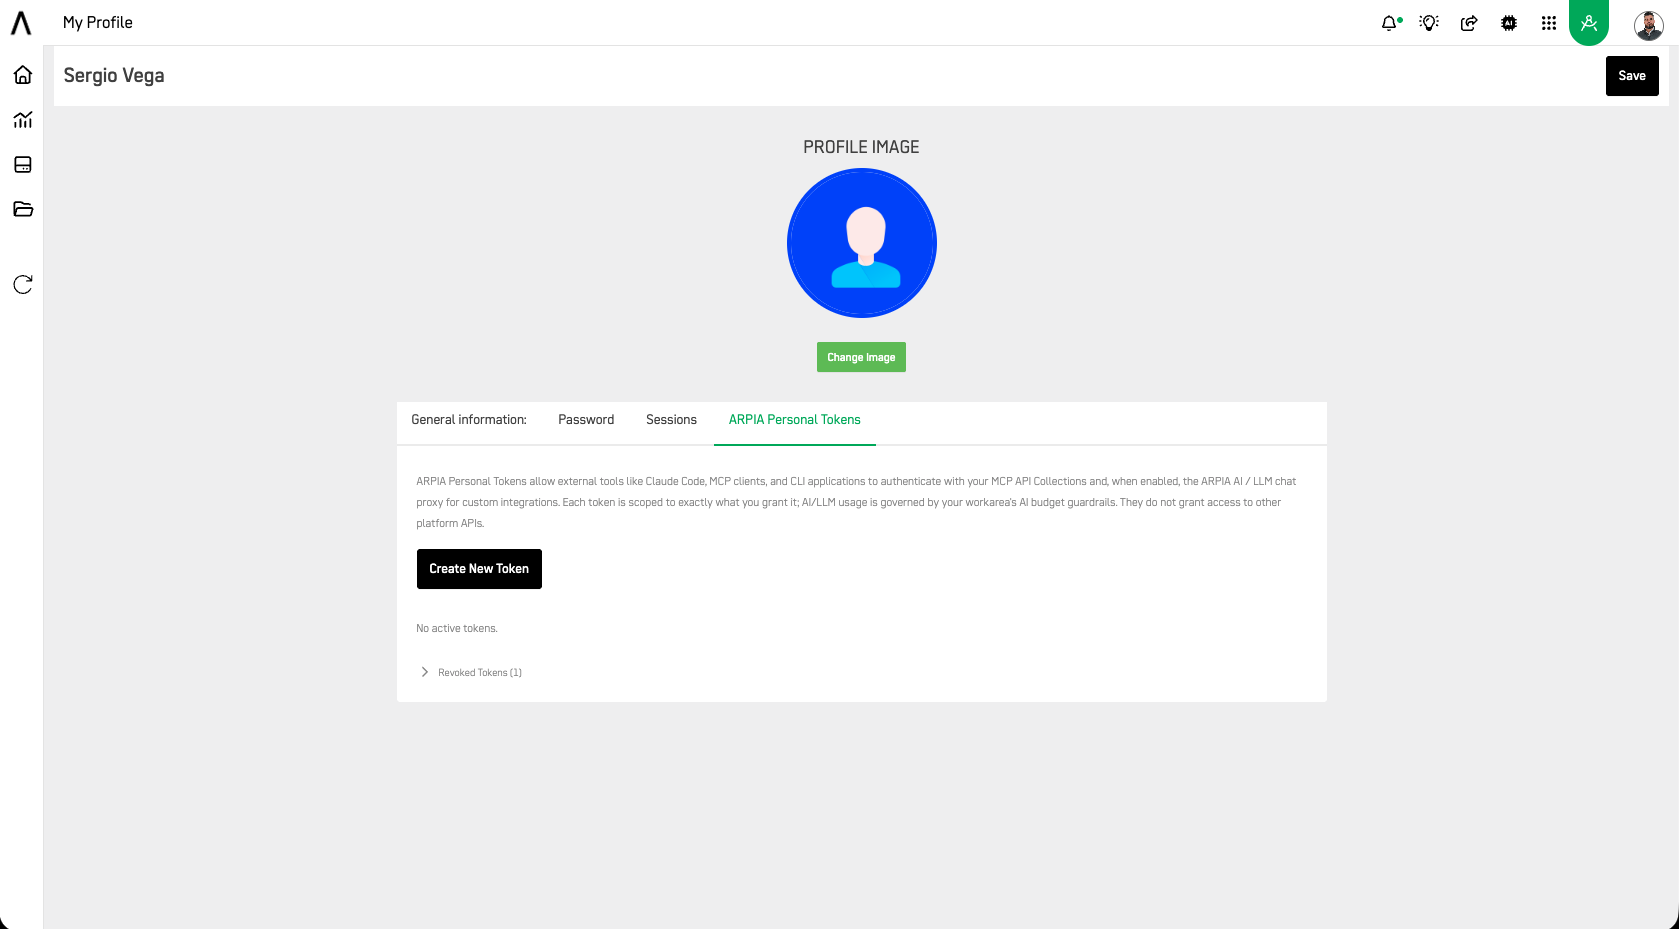
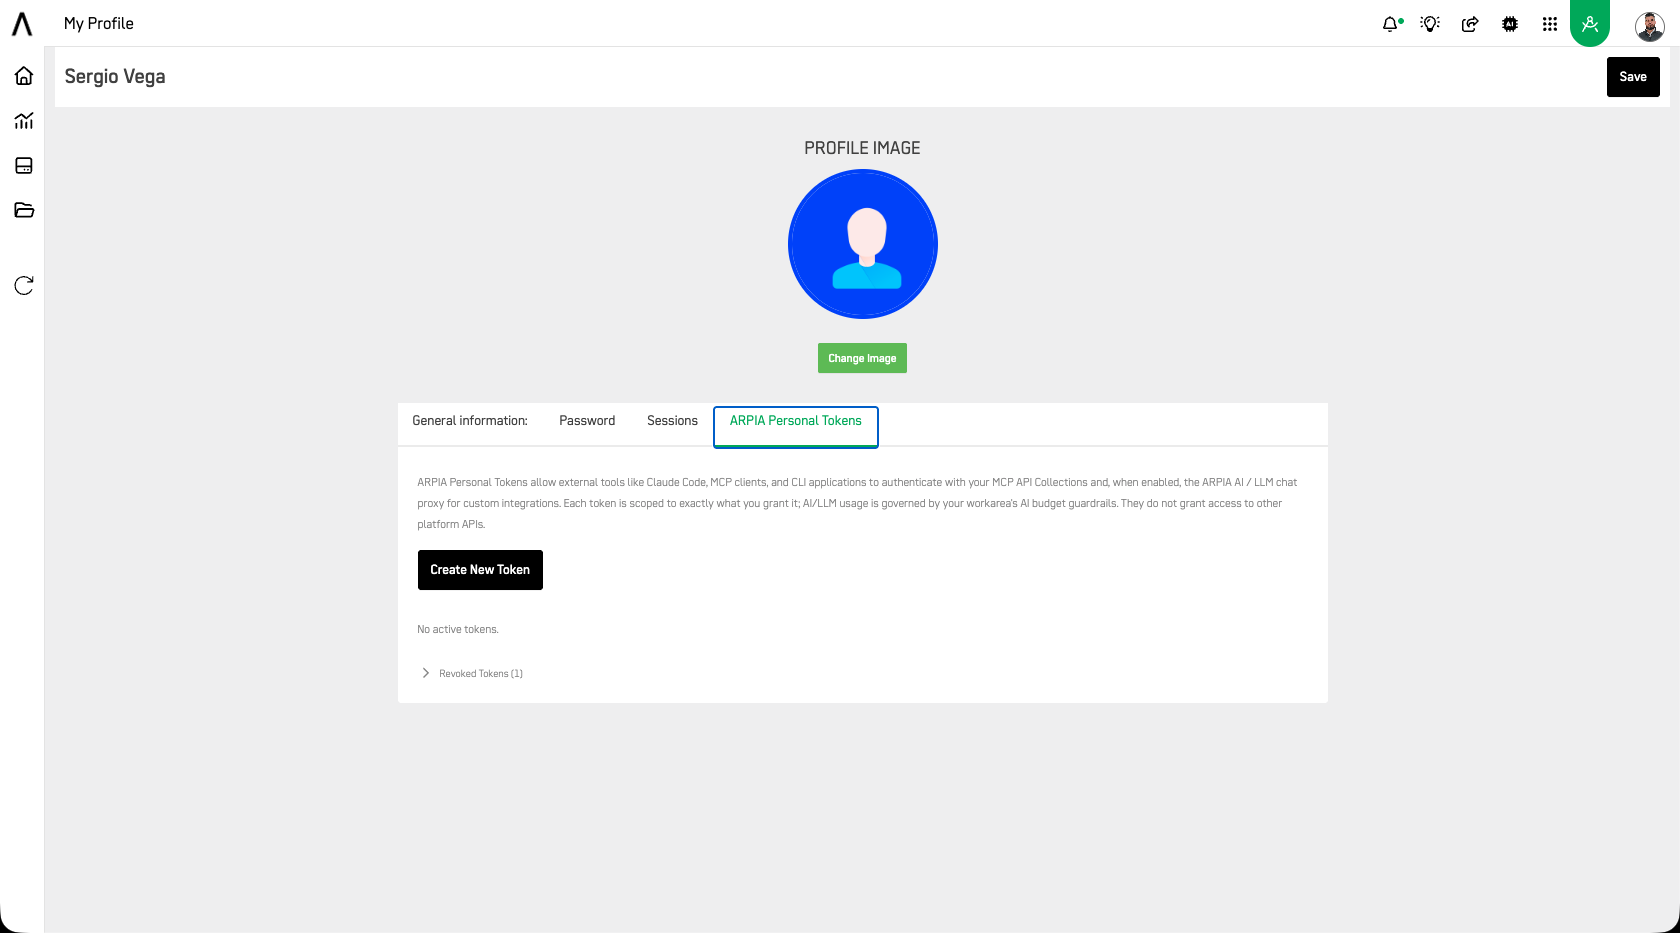
ARPIA Personal Tokens (APT) allow external tools like Claude Code, MCP clients, and CLI applications to authenticate with your MCP API Collections and, when enabled, the ARPIA AI / LLM chat proxy for custom integrations. Each token is scoped to exactly what you grant it; AI/LLM usage is governed by your workarea's AI budget guardrails. They do not grant access to other platform APIs.
Key Concepts
What is an ARPIA Personal Token?
An APT works similarly to a GitHub Personal Access Token (PAT):
- ✅ User-generated (created from your profile)
- 👤 Identity-bound (all usage is auditable)
- 🎯 Scoped (limited to selected API collections and proxy access)
- 🔁 Revocable (can be disabled anytime)
- ⏳ Expirable (configurable expiration)
Token Format
apt_{ApiShort_Token}_{random_hex}
Example:
apt_13a4ebf0f1_a7c3f9e1b2d4e5f6a7c3f9e1b2d4e5f6a7c3f9e1
| Segment | Description |
|---|---|
apt_ | Token prefix |
ApiShort_Token | Workspace identifier |
random_hex | Secret token value |
Tokens are shown only once at creation time and stored securely (hashed). If lost, they must be regenerated.
Prerequisites
Before creating a token:
- You have an active ARPIA account
- You have access to at least one MCP API Collection
- You can access your Profile page
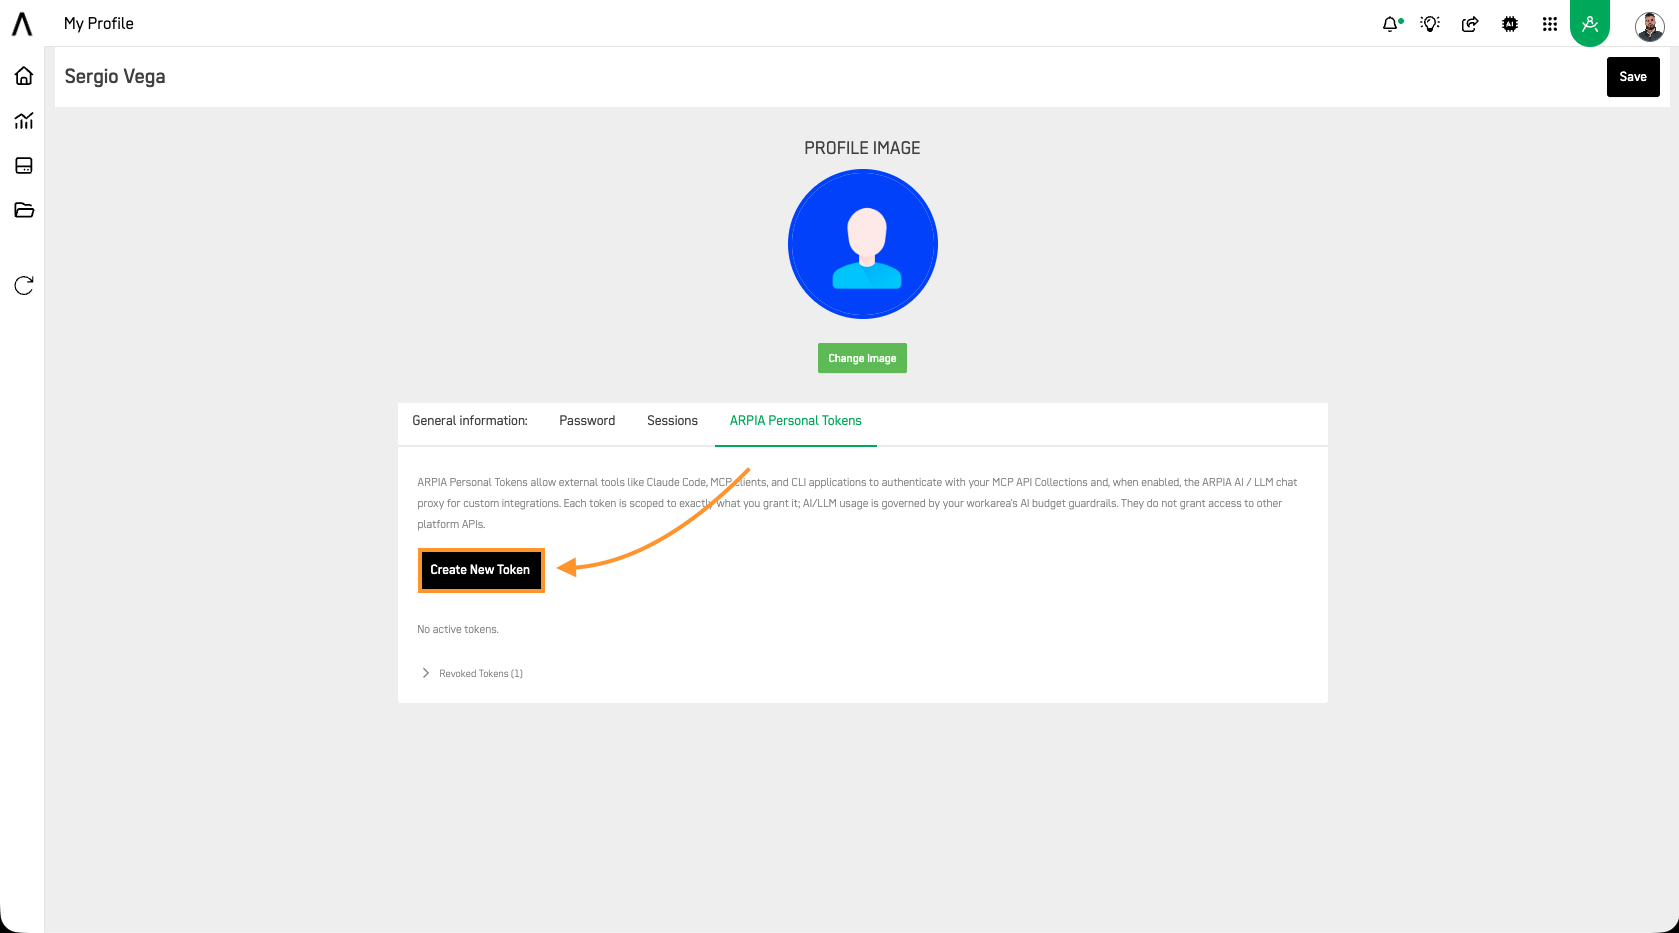
Creating a Token (Step-by-Step)
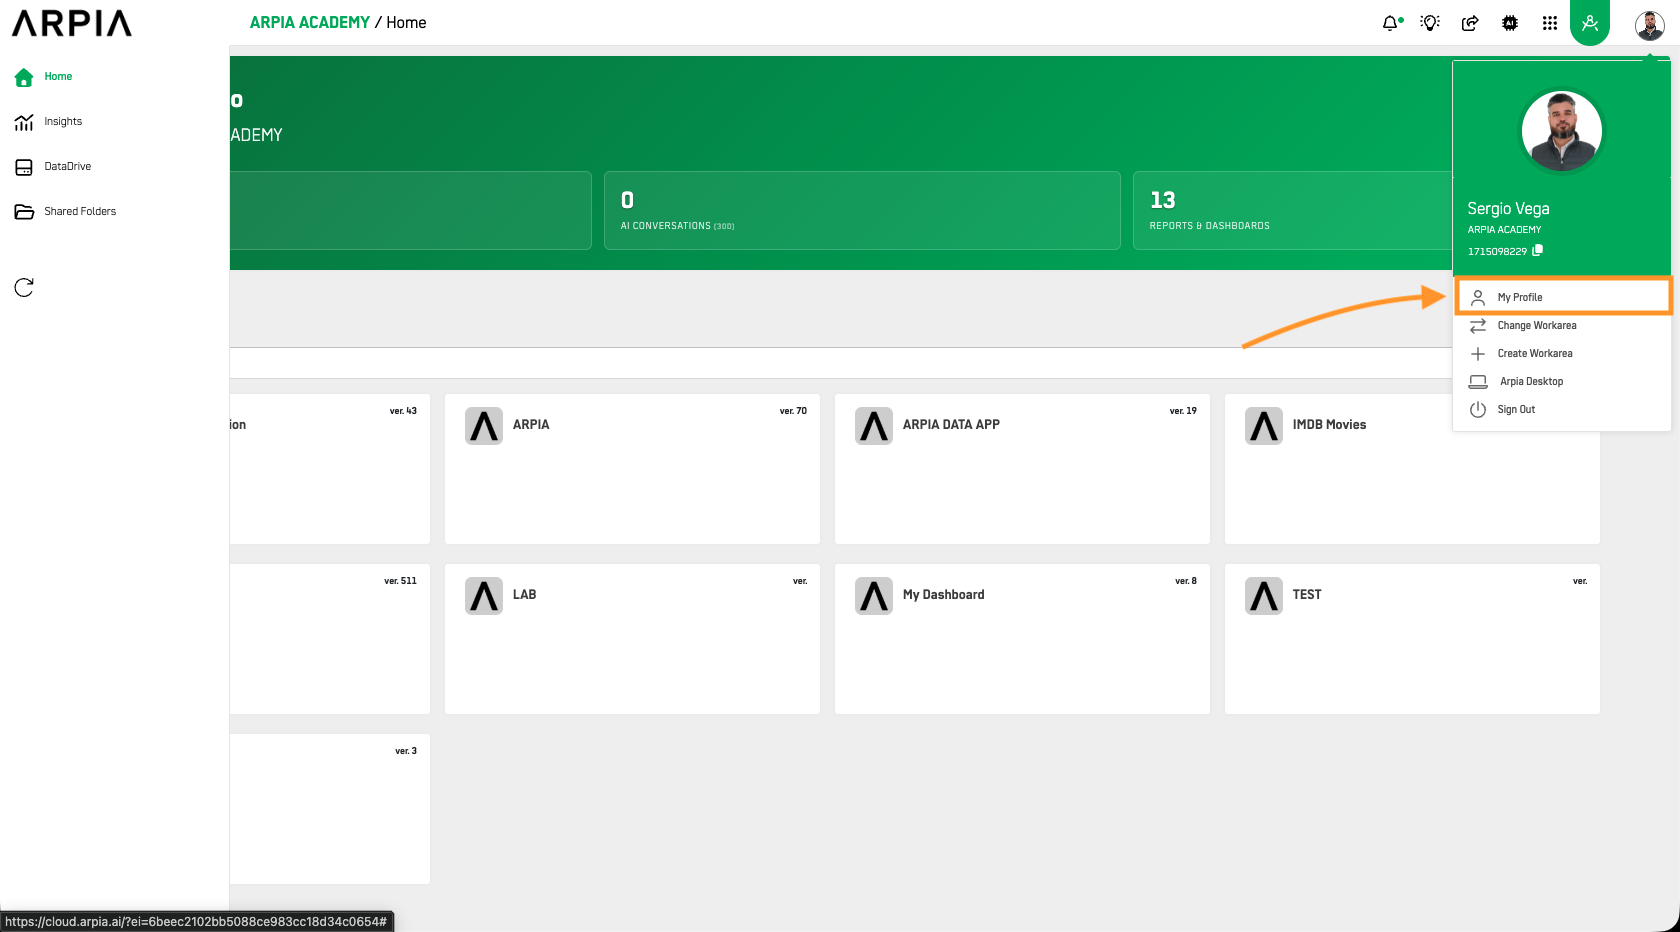
Step 1 — Open Profile
1. Click your avatar (top-right corner)
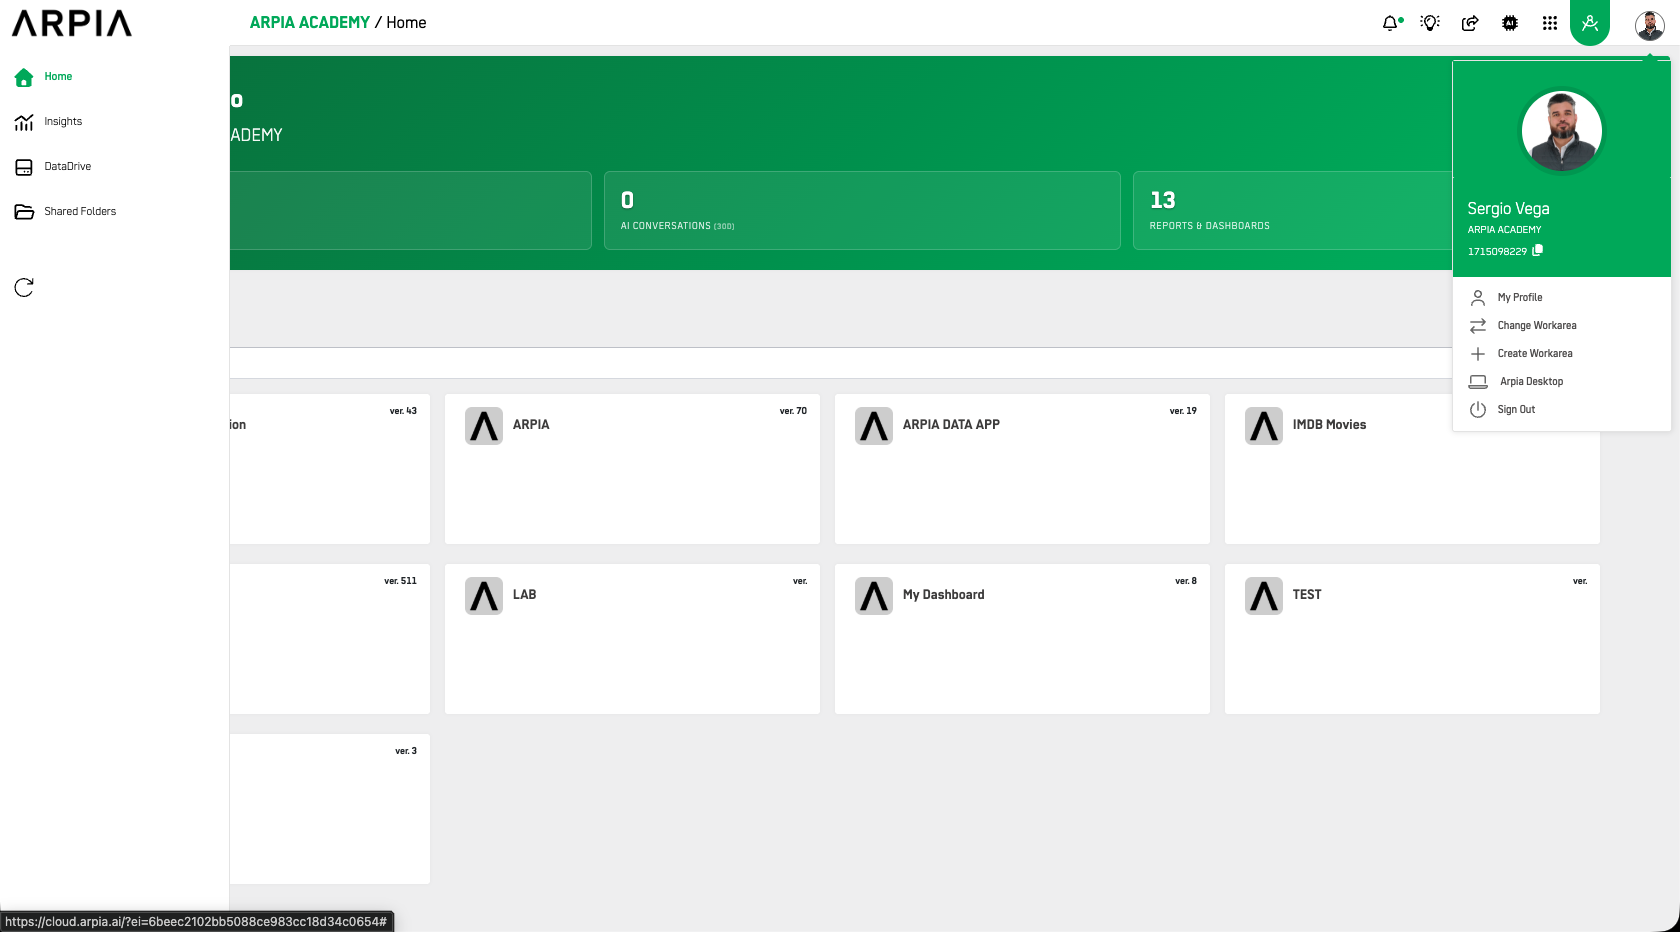
2. Select Profile
3. Scroll to ARPIA Personal Tokens
Step 2 — Create Token
1. Click Create New Token
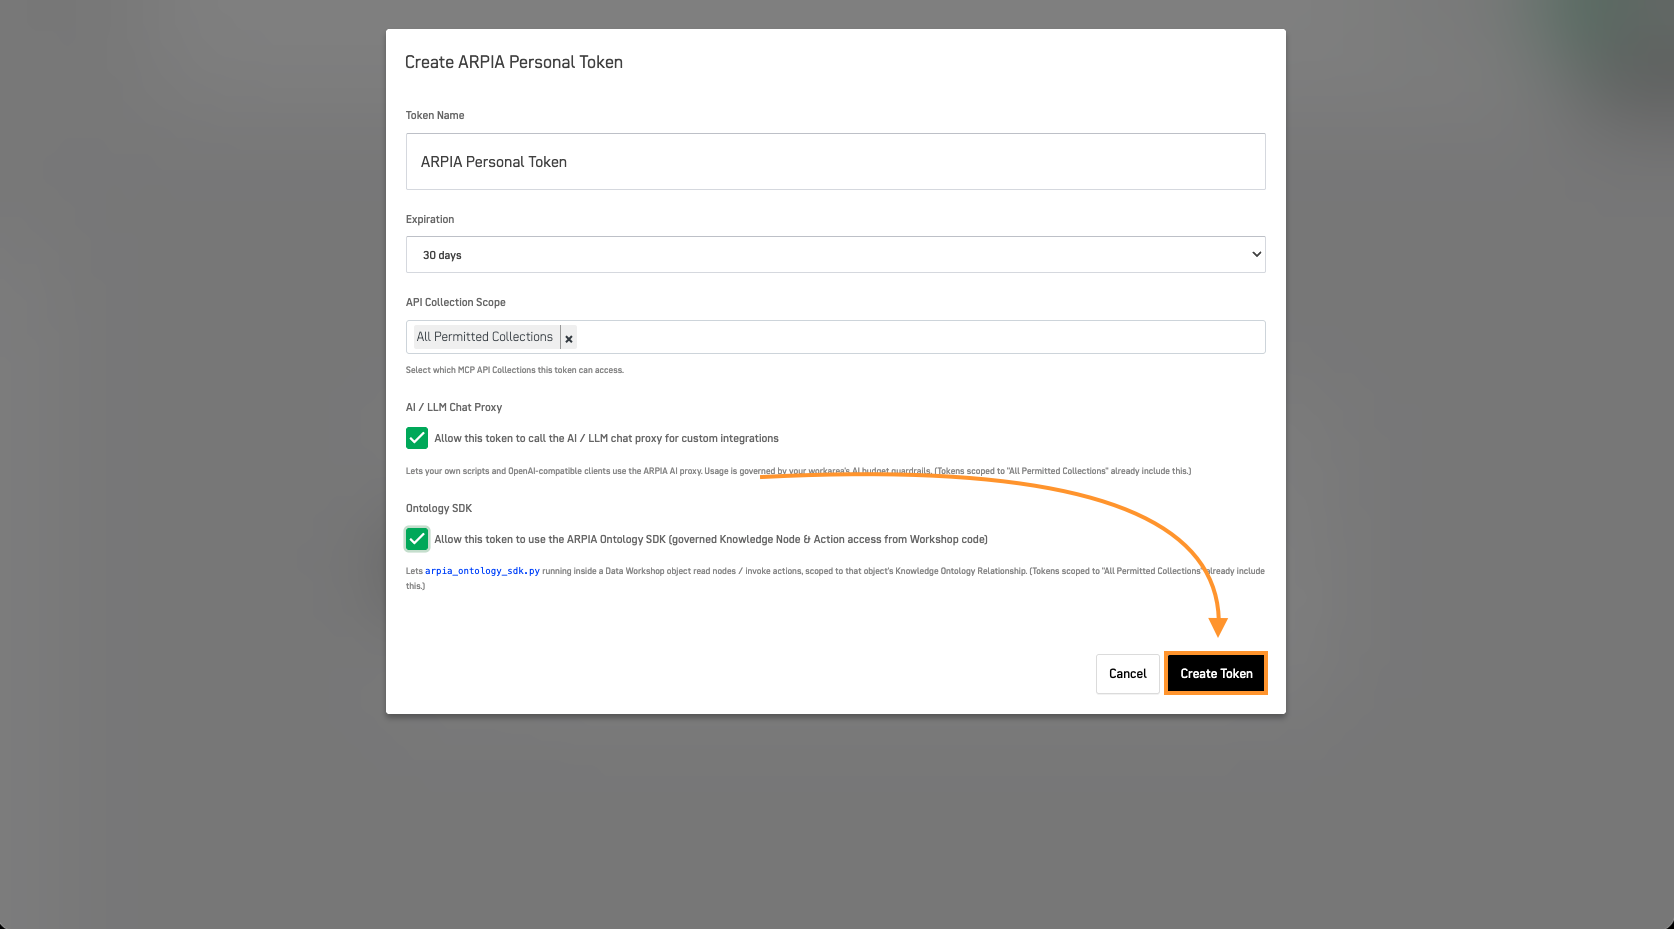
2. Complete the form:
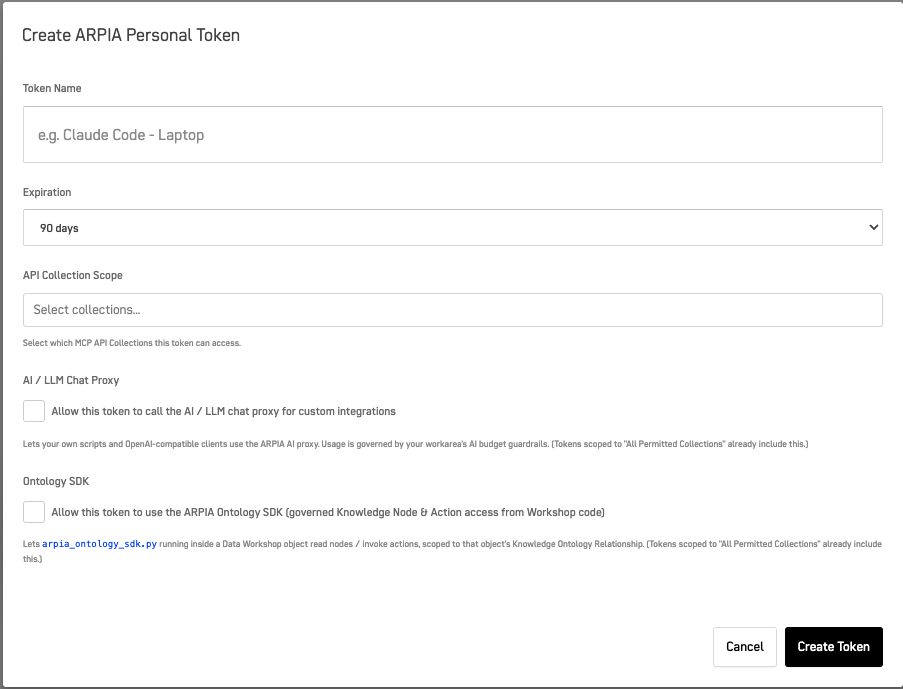
| Field | Description |
|---|---|
| Token Name | Friendly name (e.g., "Claude Code - Laptop") |
| Expiration | Token validity period |
| API Collection Scope | Allowed collections |
| AI/LLM Proxy Access | Allow this token to call the AI/LLM Chat Proxy for custom integrations |
Expiration Options:
- 30 / 60 / 90 days
- 1 year
- No expiration (⚠️ use carefully)
Scope Options:
- All permitted collections
- Specific collections only
AI/LLM Proxy Access:
Enable the "Allow this token to call the AI / LLM chat proxy for custom integrations" checkbox if your use case requires direct LLM completions (e.g., AI agents, custom scripts). Leave it unchecked if you only need MCP API Collection access.
Apply least privilege: only enable proxy access on tokens that explicitly require it. AI/LLM usage will count against your workarea's AI budget guardrails.
3. Click Create Token
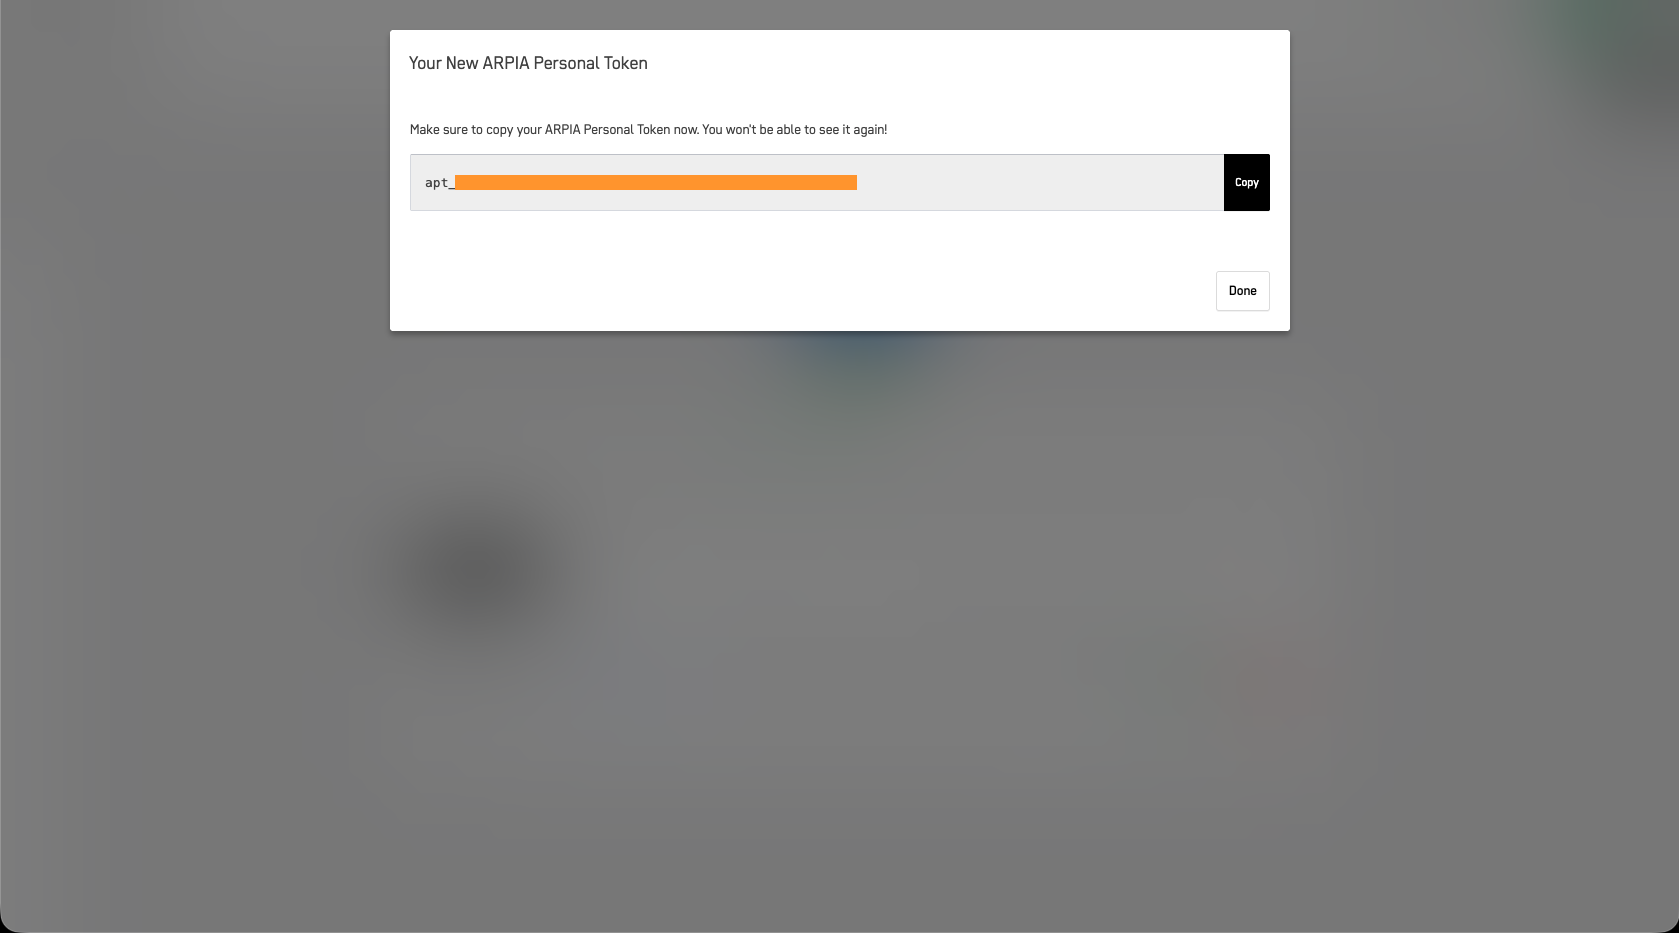
Step 3 — Copy Token
After creation:
- Copy the token immediately
- Store it securely (env variables, secrets manager)
- Click Done
⚠️ You will NOT be able to see the token again.
Using Your Token
Example: Claude Code / Cursor
{
  "mcpServers": {
    "arpia": {
      "url": "https://cloud.arpia.ai/mcp/?token=YOUR_COLLECTION_TOKEN",
      "headers": {
        "Authorization": "Bearer YOUR_APT_TOKEN"
      }
    }
  }
}
Example: curl
curl -X GET "https://cloud.arpia.ai/mcp/?token=YOUR_COLLECTION_TOKEN" \
  -H "Authorization: Bearer YOUR_APT_TOKEN"
Example: Python
import requests

headers = {
    "Authorization": "Bearer YOUR_APT_TOKEN",
    "Content-Type": "application/json"
}

response = requests.get(
    "https://cloud.arpia.ai/mcp/?token=YOUR_COLLECTION_TOKEN",
    headers=headers
)

print(response.json())
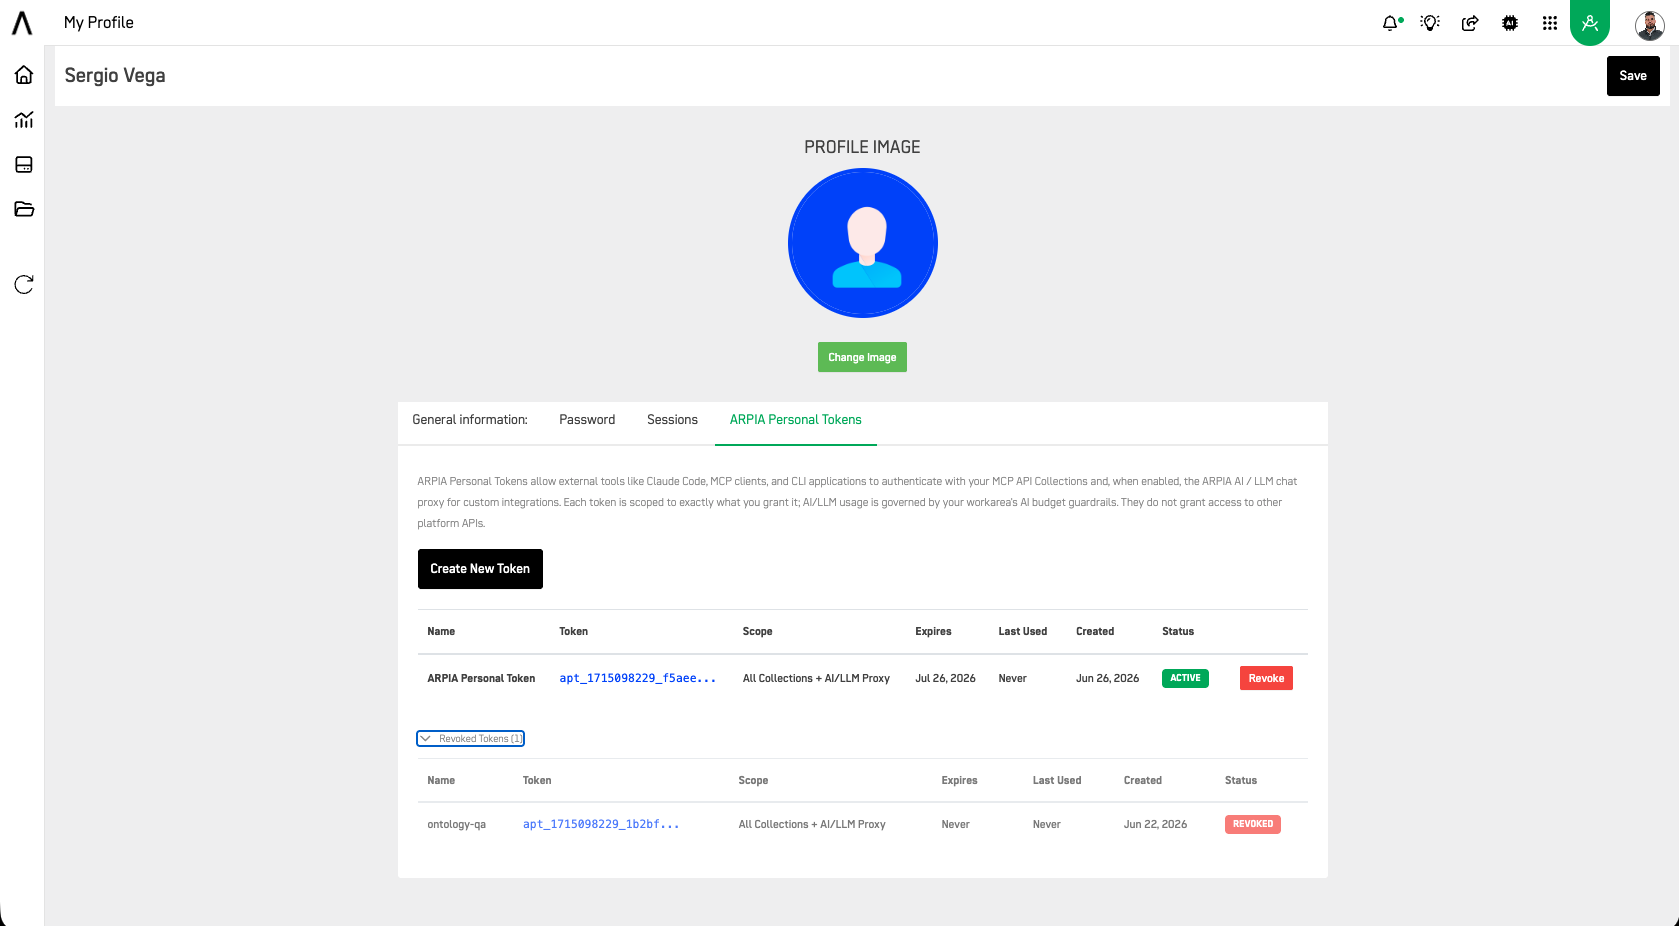
Managing Tokens
View Tokens
In your profile, you can see:
- Name
- Scope
- AI/LLM Proxy Access (enabled / disabled)
- Expiration
- Last Used (with IP)
- Status (ACTIVE / REVOKED)
Revoke Token
1. Go to Profile → ARPIA Personal Tokens
2. Click Revoke
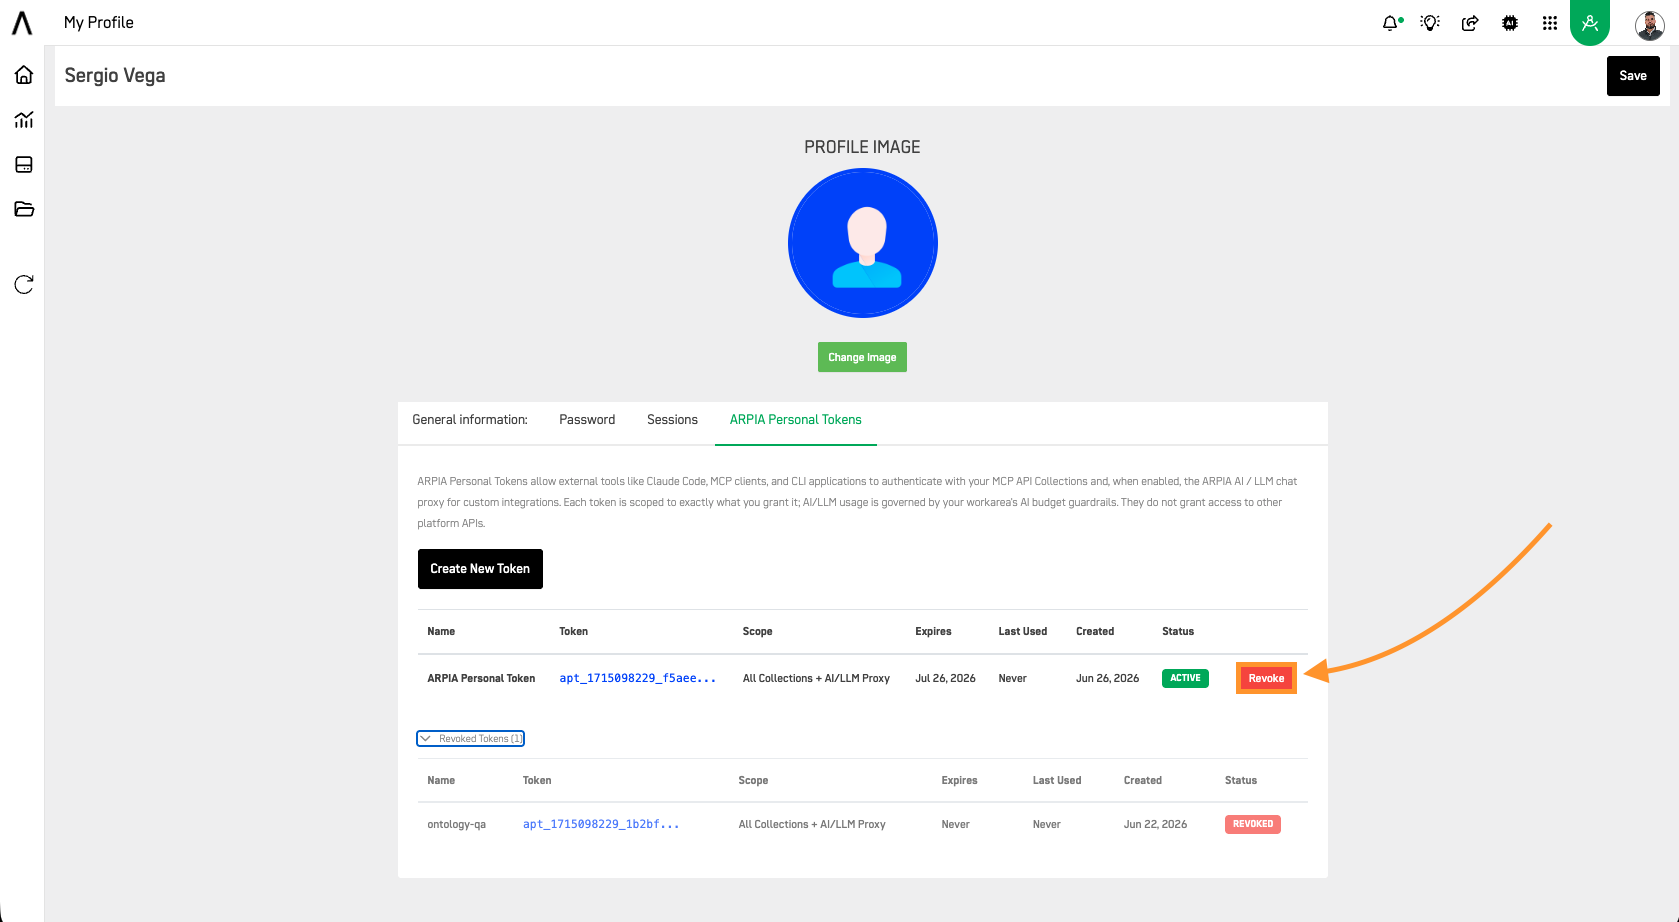
3. Confirm
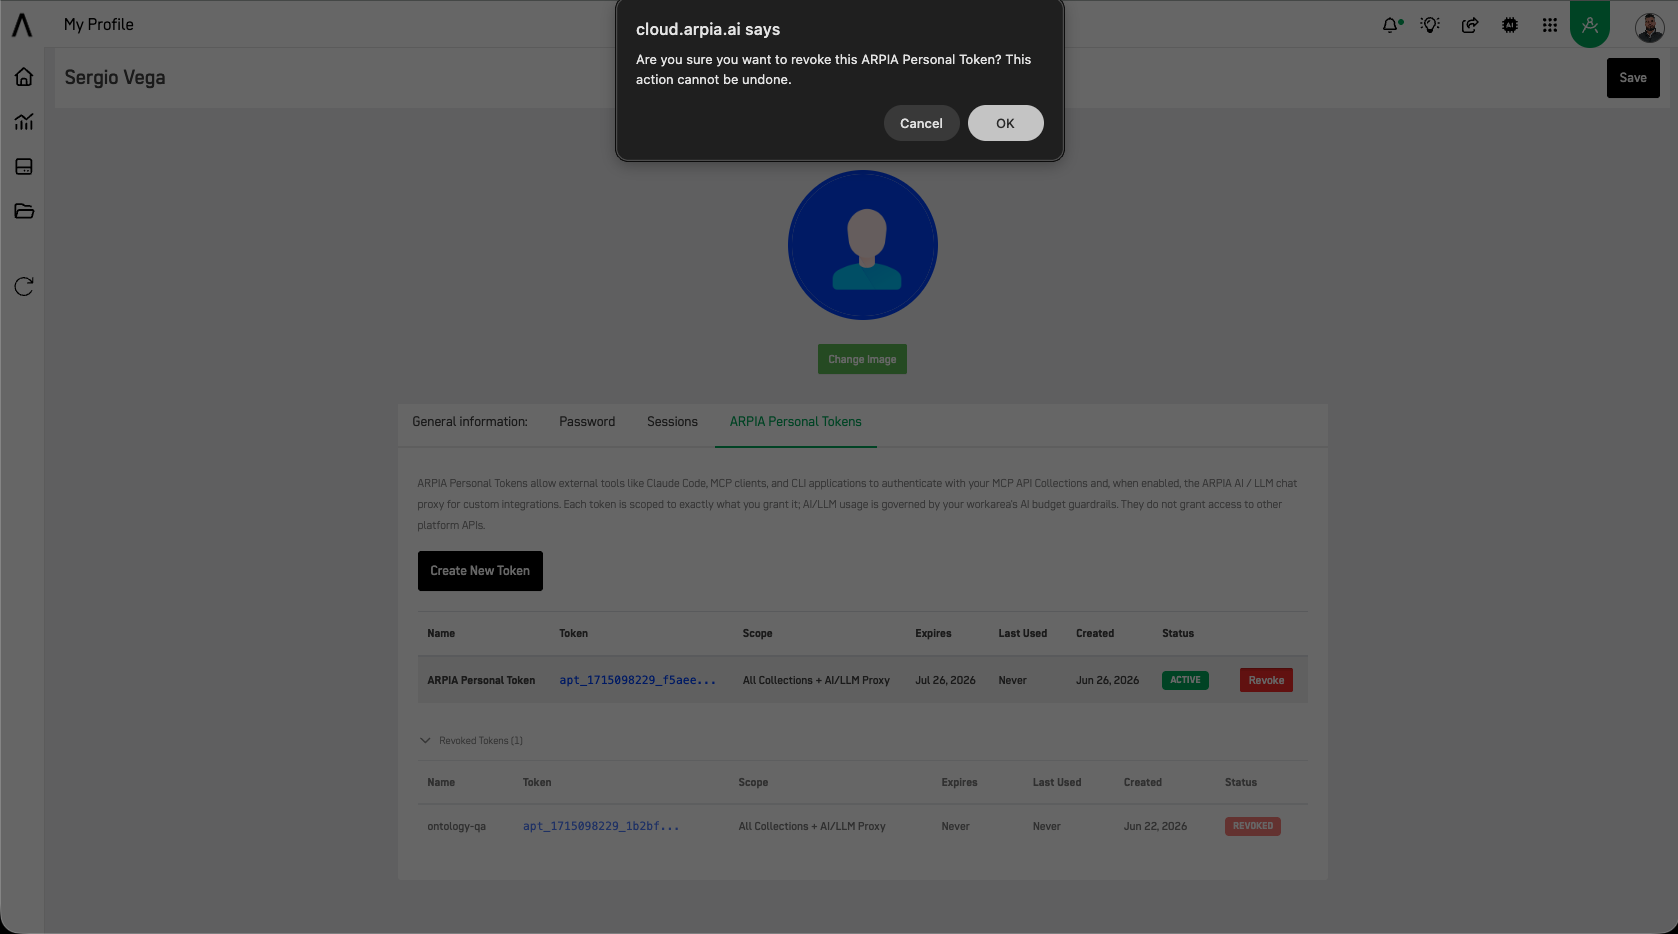
⚠️ Revocation is permanent.
Security Best Practices
Storage
- Never commit tokens to Git
- Use environment variables
- Use
.envfiles (ignored by Git)
Scope
- Apply least privilege
- Use separate tokens per tool
- Avoid "All Collections" unless necessary
- Only enable AI/LLM Proxy Access on tokens that explicitly require it; keep it disabled for MCP-only integrations
Rotation
- Set expiration dates
- Rotate regularly
- Revoke unused tokens
Monitoring
- Review last usage
- Check unknown IPs
- Remove inactive tokens
Authentication Comparison
| Method | Best For | OAuth | Scope |
|---|---|---|---|
| OAuth 2.0 | Web apps | Yes | Session-based |
| APT | CLI / AI agents / MCP | No | Per-token (collections) |
| APT + Proxy | Custom AI integrations / agents | No | Per-token (collections + LLM) |
| Collection Token | Quick tests | No | Full collection |
Troubleshooting
| Issue | Cause | Solution |
|---|---|---|
| 401 Unauthorized | Invalid token | Check token / expiration |
| 403 Forbidden | Wrong scope | Create new token with correct scope |
| 403 on proxy | Proxy access not enabled | Regenerate token with proxy checkbox enabled |
| No collections | Missing permissions | Contact admin |
| Token lost | Not copied | Create new token |
Related Docs
- MCP Server Guide
- Security Permissions
- Data Governance
✅ Summary
ARPIA Personal Tokens enable secure, flexible authentication for non-browser environments like CLI tools and AI agents. Tokens can optionally include access to the AI/LLM Chat Proxy for custom LLM integrations; all AI/LLM usage is governed by your workarea's AI budget guardrails.
Use them responsibly with proper scoping, storage, and rotation policies.
Updated 24 days ago