How to create an App Droplet
Step-by-Step Guide
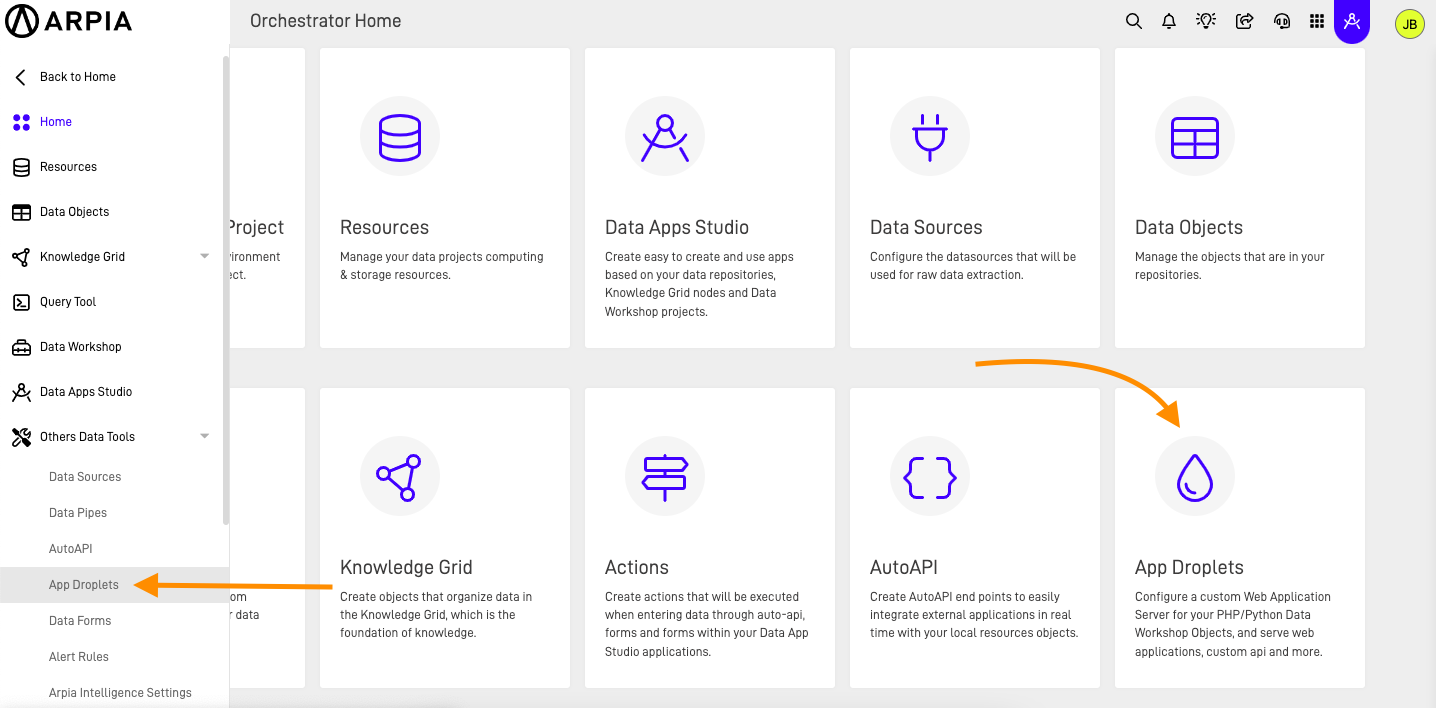
Step 1: Access App Droplets in Orchestrator
- Navigate to the Home page of your Orchestrator.
- Select the App Droplets option from the menu.
Step 2: Create a New App Droplet
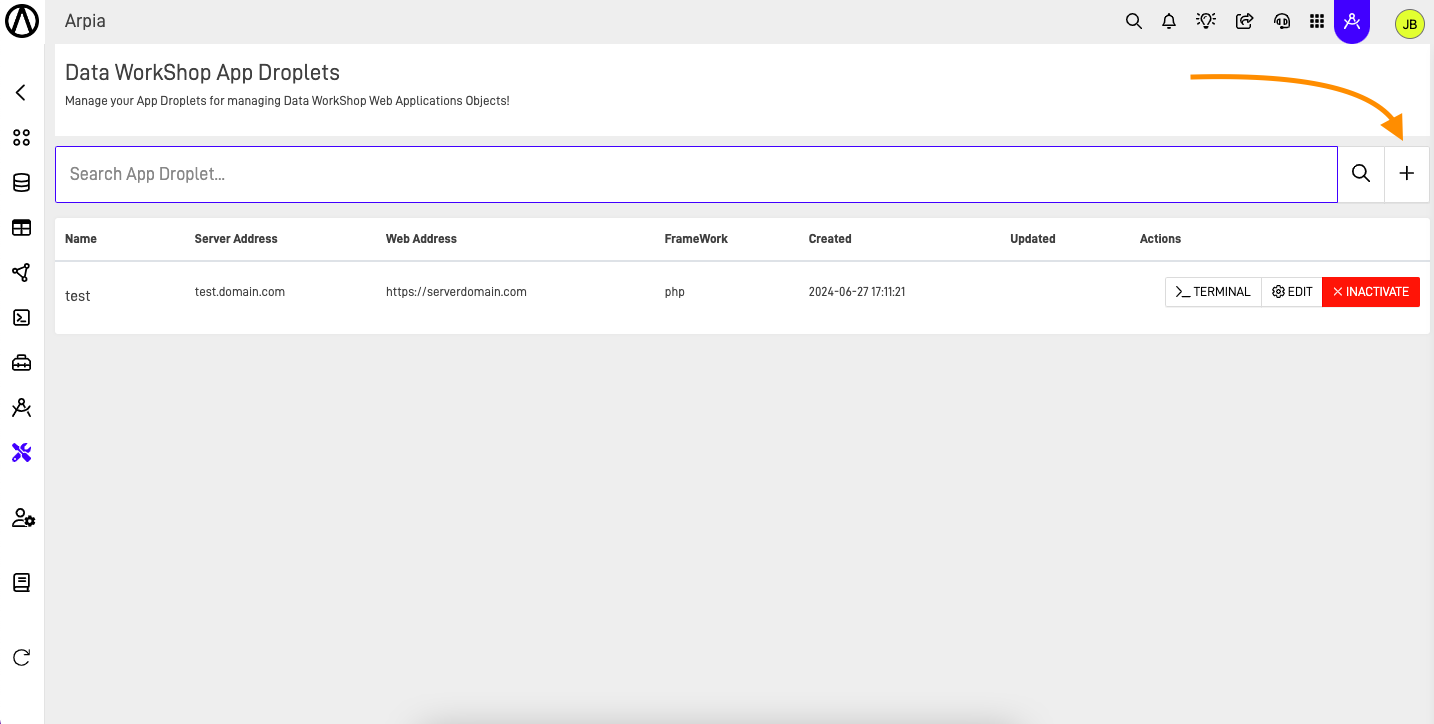
- On the App Droplets page, you will see a list of all previously created droplets.
- To create a new App Droplet, click the + button.
Step 3: Fill Out the App Droplet Form
- A new screen will open, prompting you to fill out the required details for your new App Droplet.
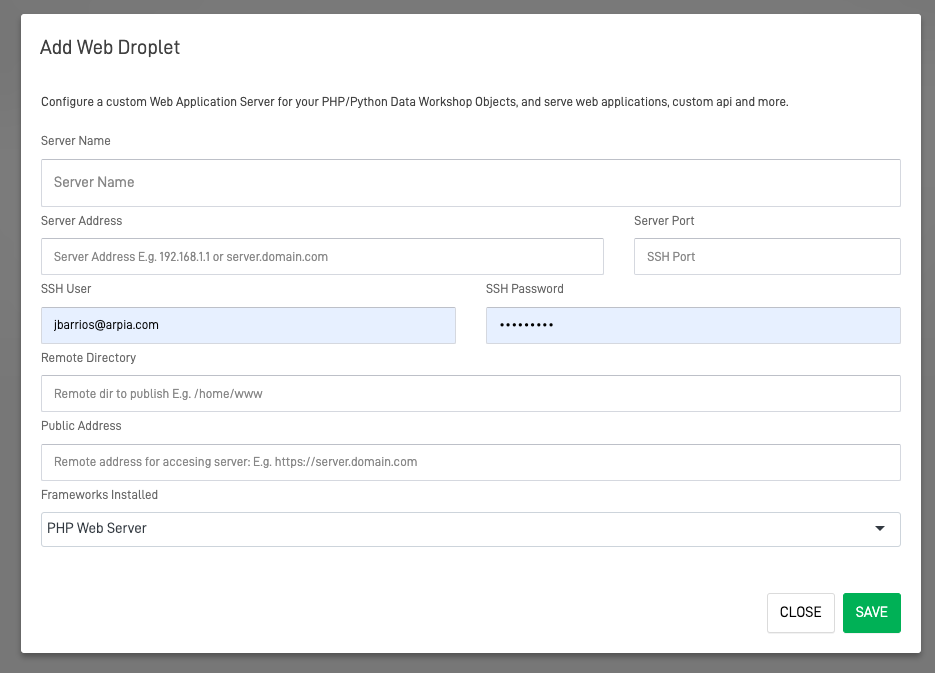
- Use the following table as a guide to complete the form:
| Section | Description |
|---|---|
| Server Name | A name for identifying the server. |
| Server Address | The IP address or domain name of the server hosting your web application. Example: 192.168.1.1 or server.domain.com. |
| Server Port | The network port number used by the server to listen for incoming requests. |
| SSH User | The username for logging into the server via Secure Shell (SSH). |
| SSH Password | The password associated with the SSH user. |
| Remote Directory | The directory path on the server where your web application files are stored. |
| Public Address | The address users can use to access your web application. |
| Framework Installed | The web development framework installed on the server (e.g., PHP, Python). |
Step 4: Create the App Droplet
- After completing the form, click the SAVE button.
- Your new App Droplet will be created and displayed in the list of droplets.
App Droplet Actions
Once your App Droplet is successfully created, three actions are available from the App Droplet main menu:
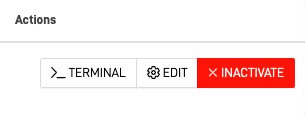
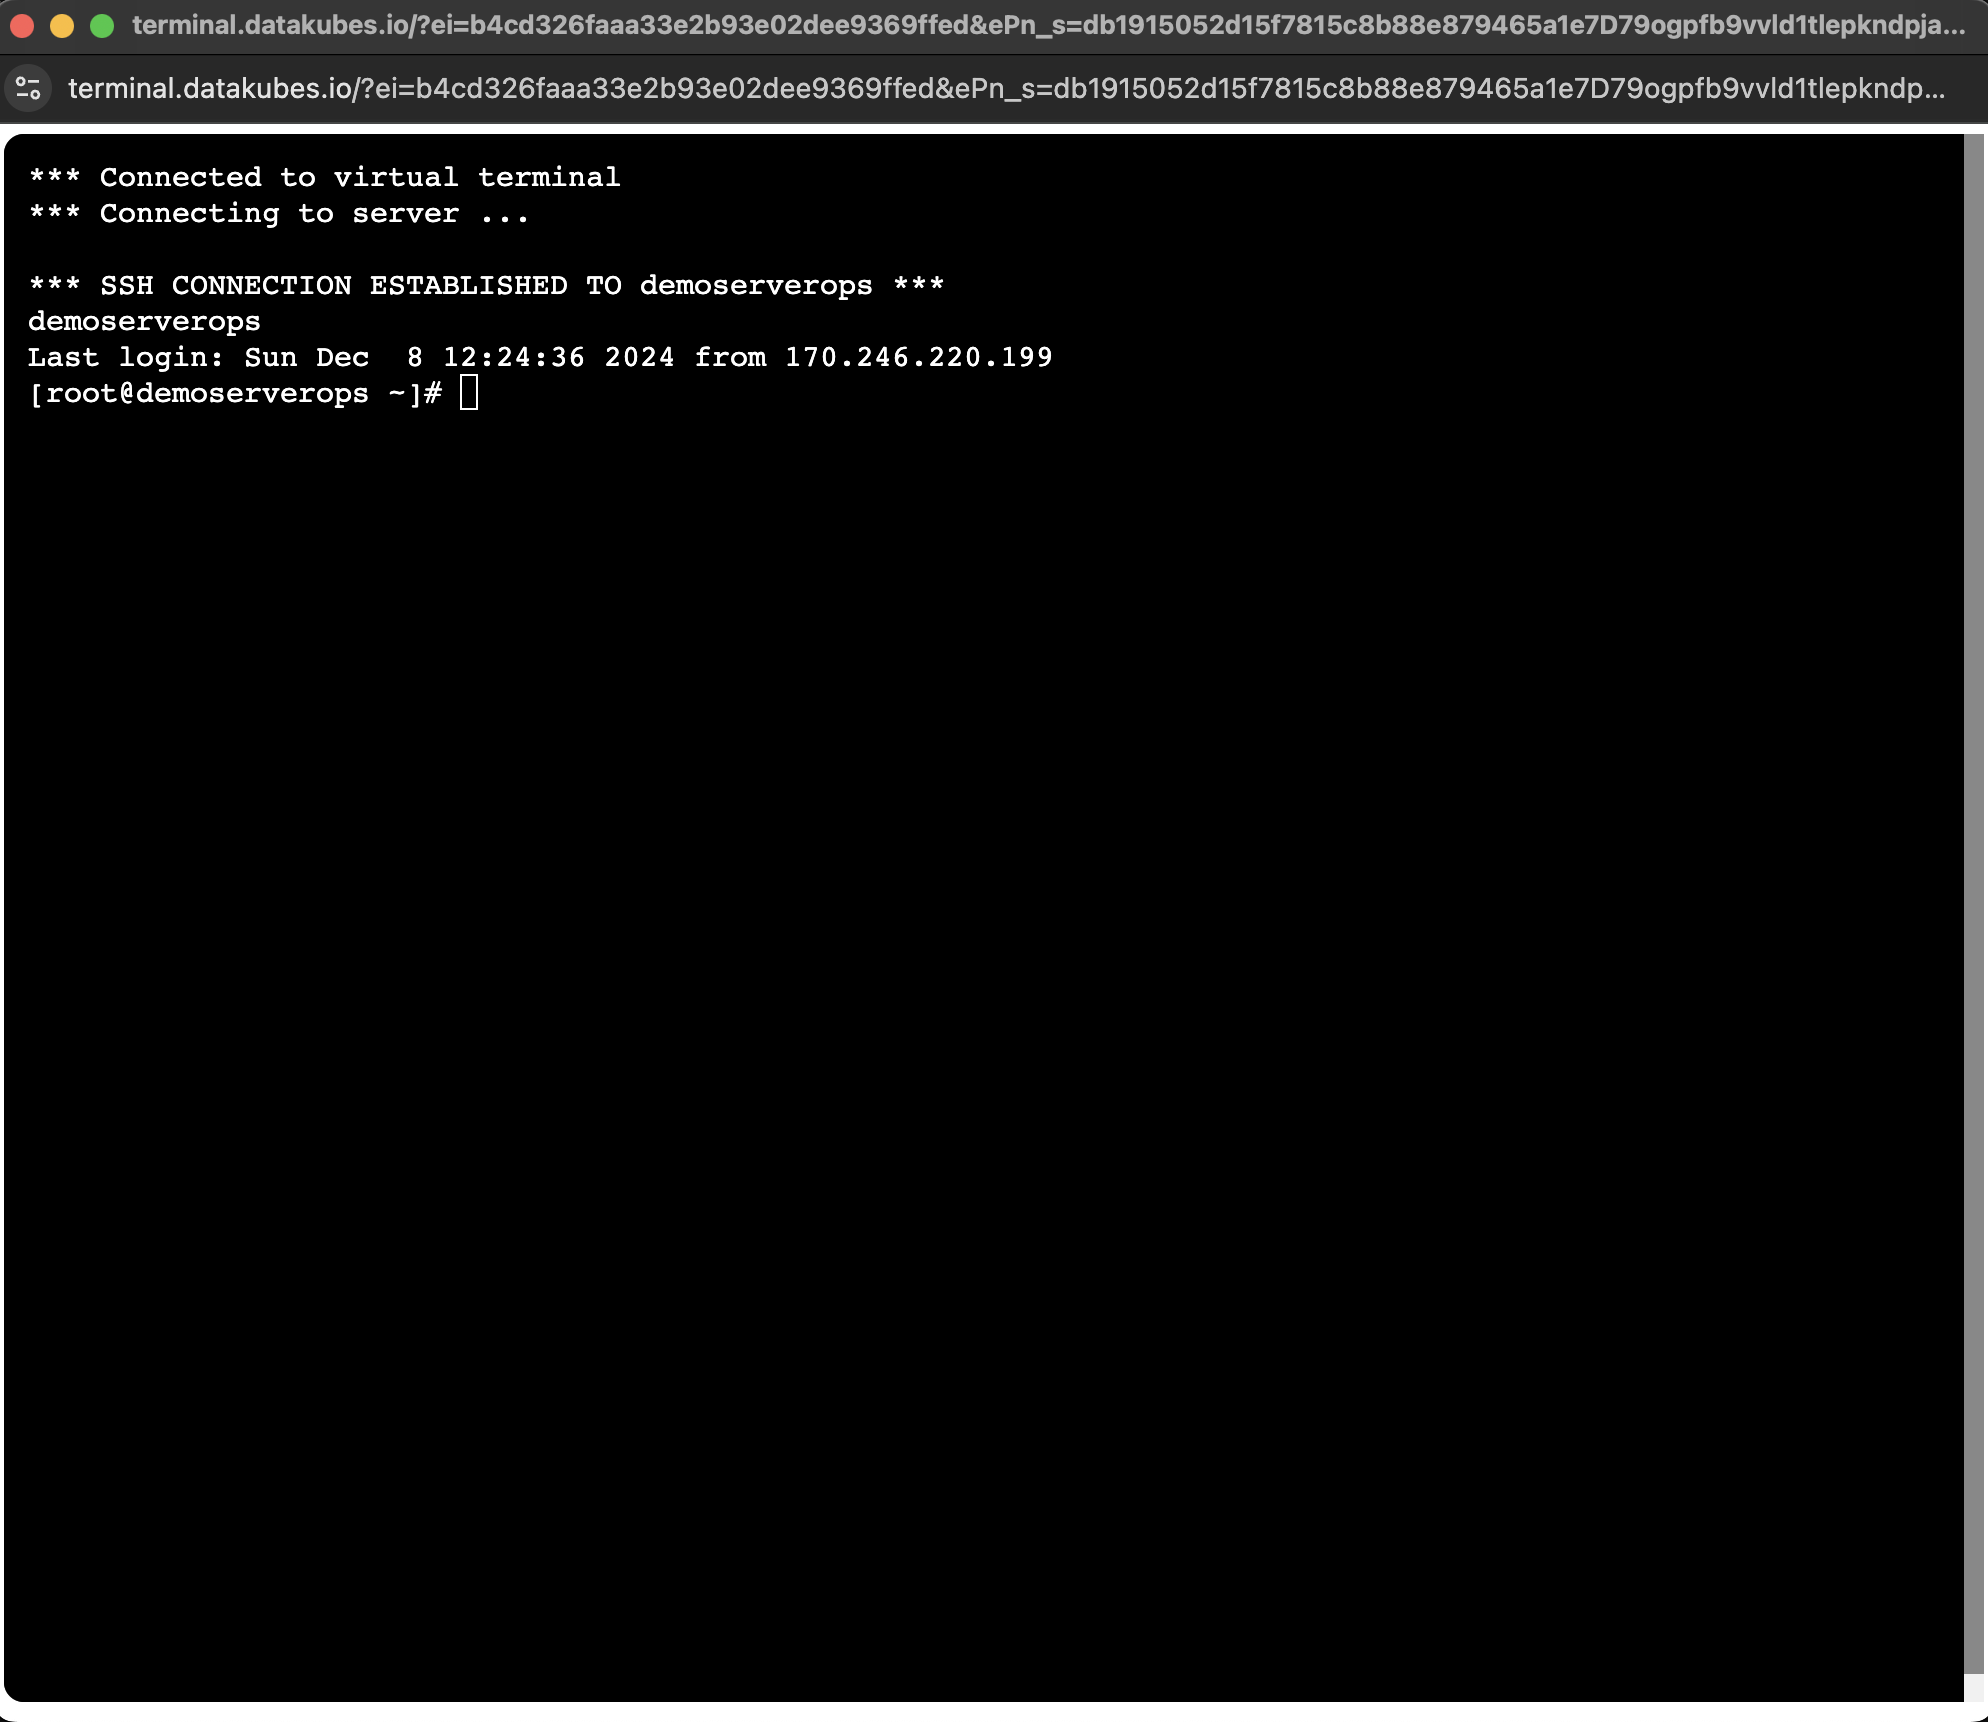
- TERMINAL: Opens a direct terminal connection to your server.
- EDIT: Allows you to modify the configuration of your App Droplet.
- INACTIVATE: Removes the App Droplet from the list. Note: This action cannot be undone.
Updated about 1 year ago
What’s Next
