
How to create a Node
Creating and Configuring KnowGraphs in ARPIA
ARPIA offers two methods for creating KnowGraphs. Once created using either method, you can then configure your KnowGraph with tables, relationships, and customizations.
Part 1: Creating a KnowGraph
Choose one of the following methods to create your KnowGraph:
Method 1: Using the Knowledge Grid Tool
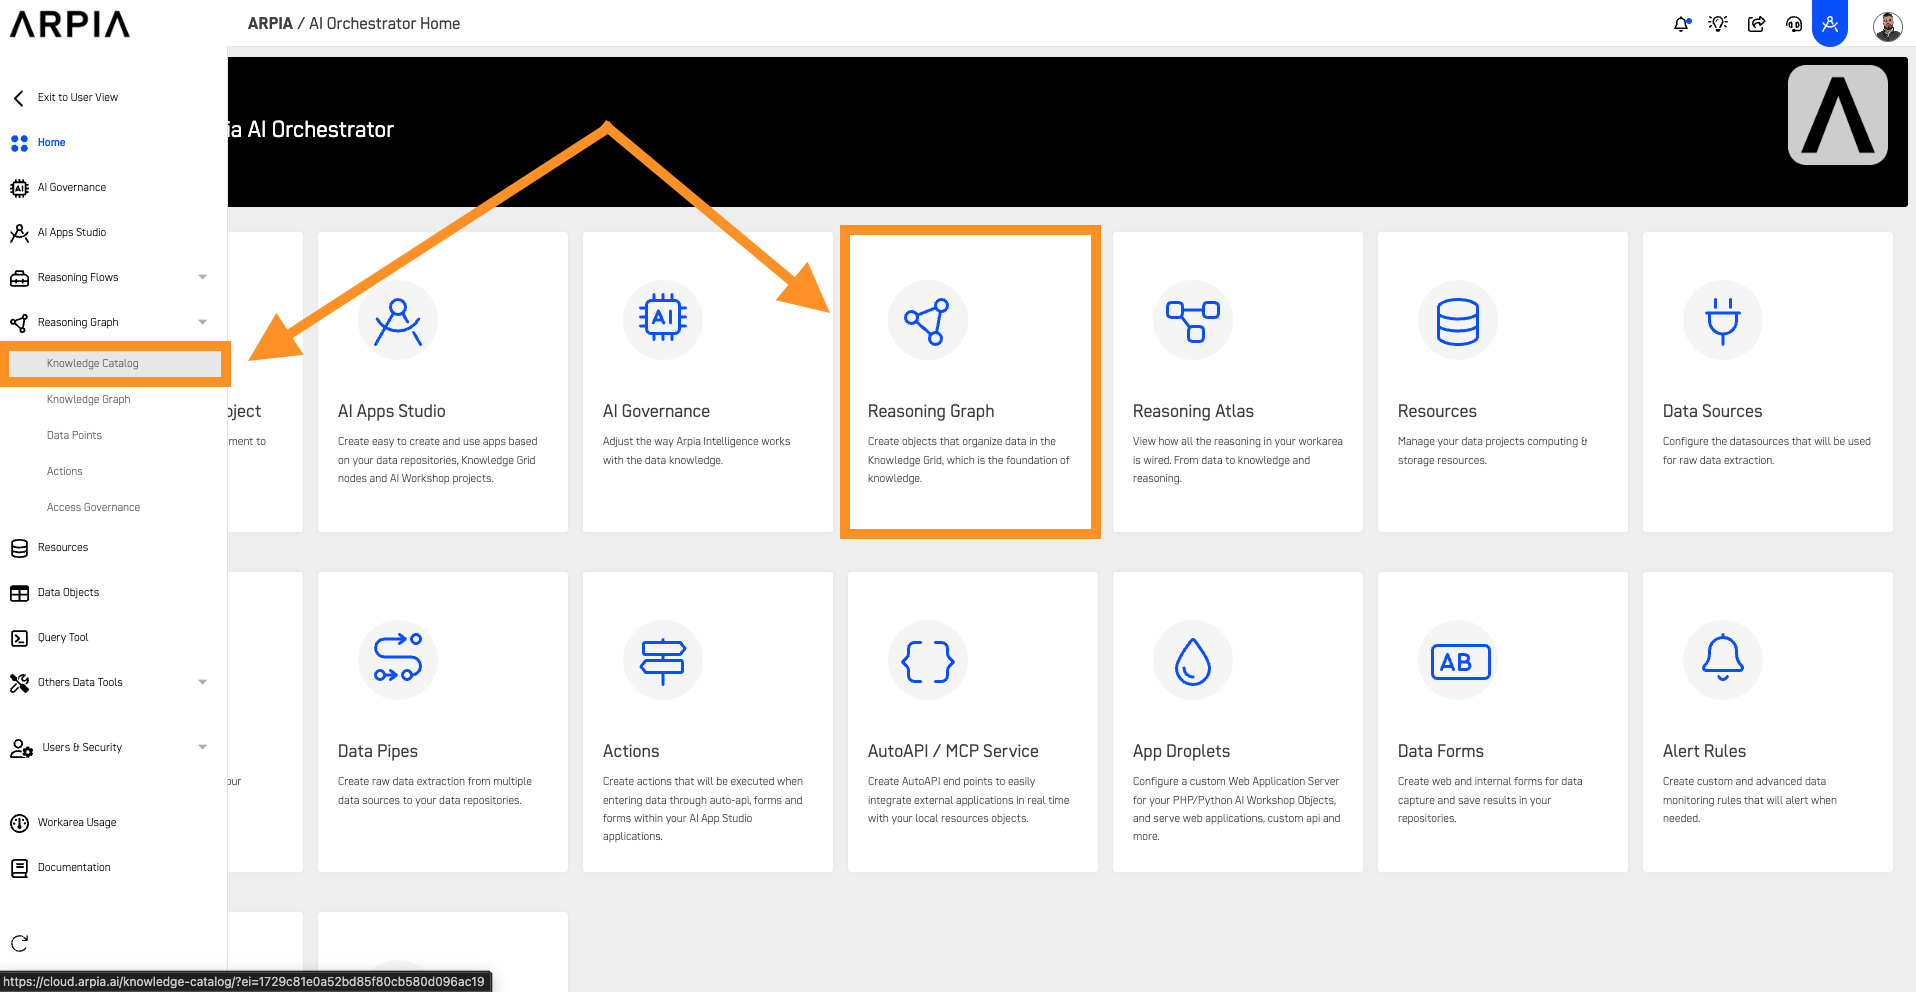
Step 1: Access the Knowledge Grid Tool
From your Orchestrator's Home page, select the Knowledge Grid tool. You can choose either of the two options indicated in the images.
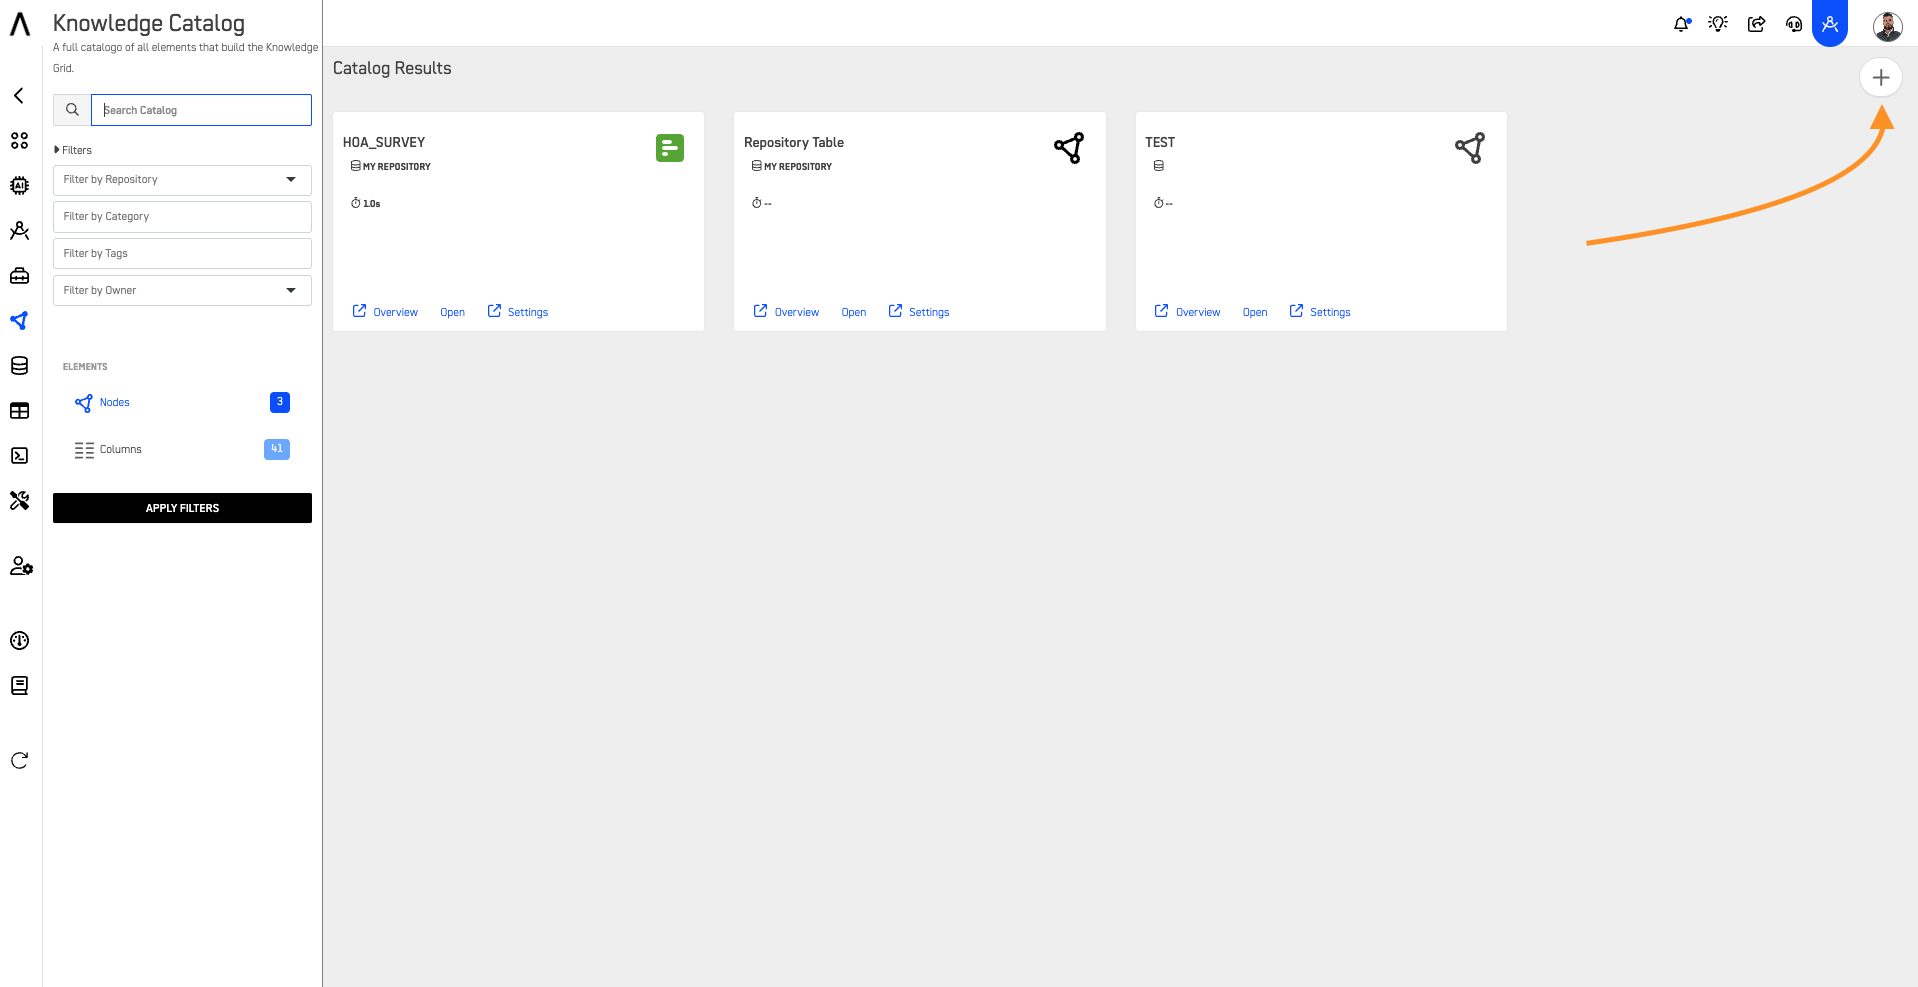
Step 2: Navigate to KnowGraphs
You will be directed to a new window displaying all the KnowGraphs you have created, listed by category. At the top, you can see the current repository. To switch to another repository, click the selection box under Choose Repository and choose the desired repository from the dropdown list. To create a new Knowledge Graph, click the + button.
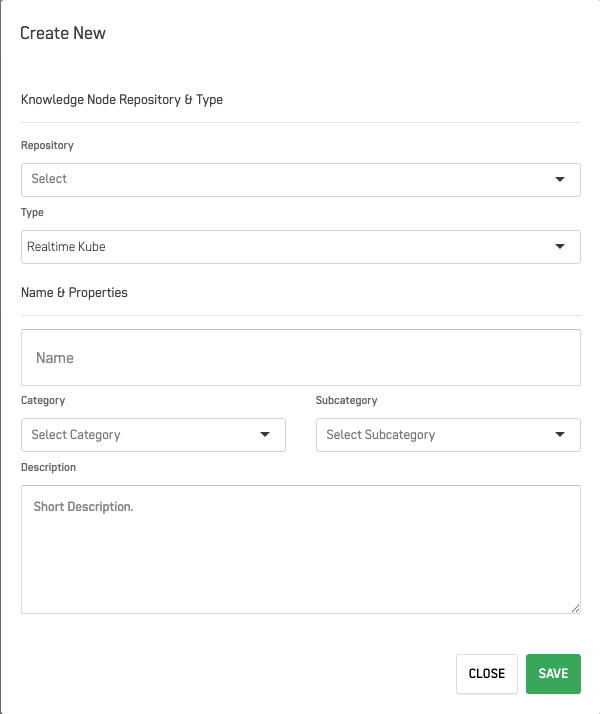
Step 3: Pre-Configuration
A new screen will open for pre-configuration. Fill in the relevant information as described in the table below:
| Section | Description |
|---|---|
| Repository | Select the repository from which data will be provided to create the new KnowGraph. |
| Type | Choose between Realtime Kube or DataWorkshop Object. |
| Name | Provide a name for your KnowGraph. |
| Category | Optionally assign a category to your KnowGraph to organize your repository's KnowGraphs more effectively. |
| Subcategory | Optionally add a subcategory to your KnowGraph. |
| Description | Optionally add a description of your KnowGraph. |
Step 4: Save the Configuration
Click the SAVE button to save your configurations and create the KnowGraph.
Method 2: Quick Creation from Data Objects
Step 1: Access Data Objects
From the Orchestrator's Home page, navigate to Data Objects using either the main menu or the side menu bar.
Step 2: Select Repository
Select the repository containing the object you want to use.
Step 3: Access Actions Menu
For the object you want to create a KnowGraph from, click the Actions button.
Step 4: Create Knowledge Node
Select the Create Knowledge Node option.
Step 5: Verify Information
Verify that the correct information is displayed in the Create Knowledge Node window.
Step 6: Confirm Creation
Click the Create Node button.
Step 7: Finalize
Click OK on the confirmation pop-up screen.
Part 2: Configuring Your KnowGraph
After creating your KnowGraph using either method above, follow these steps to configure it:
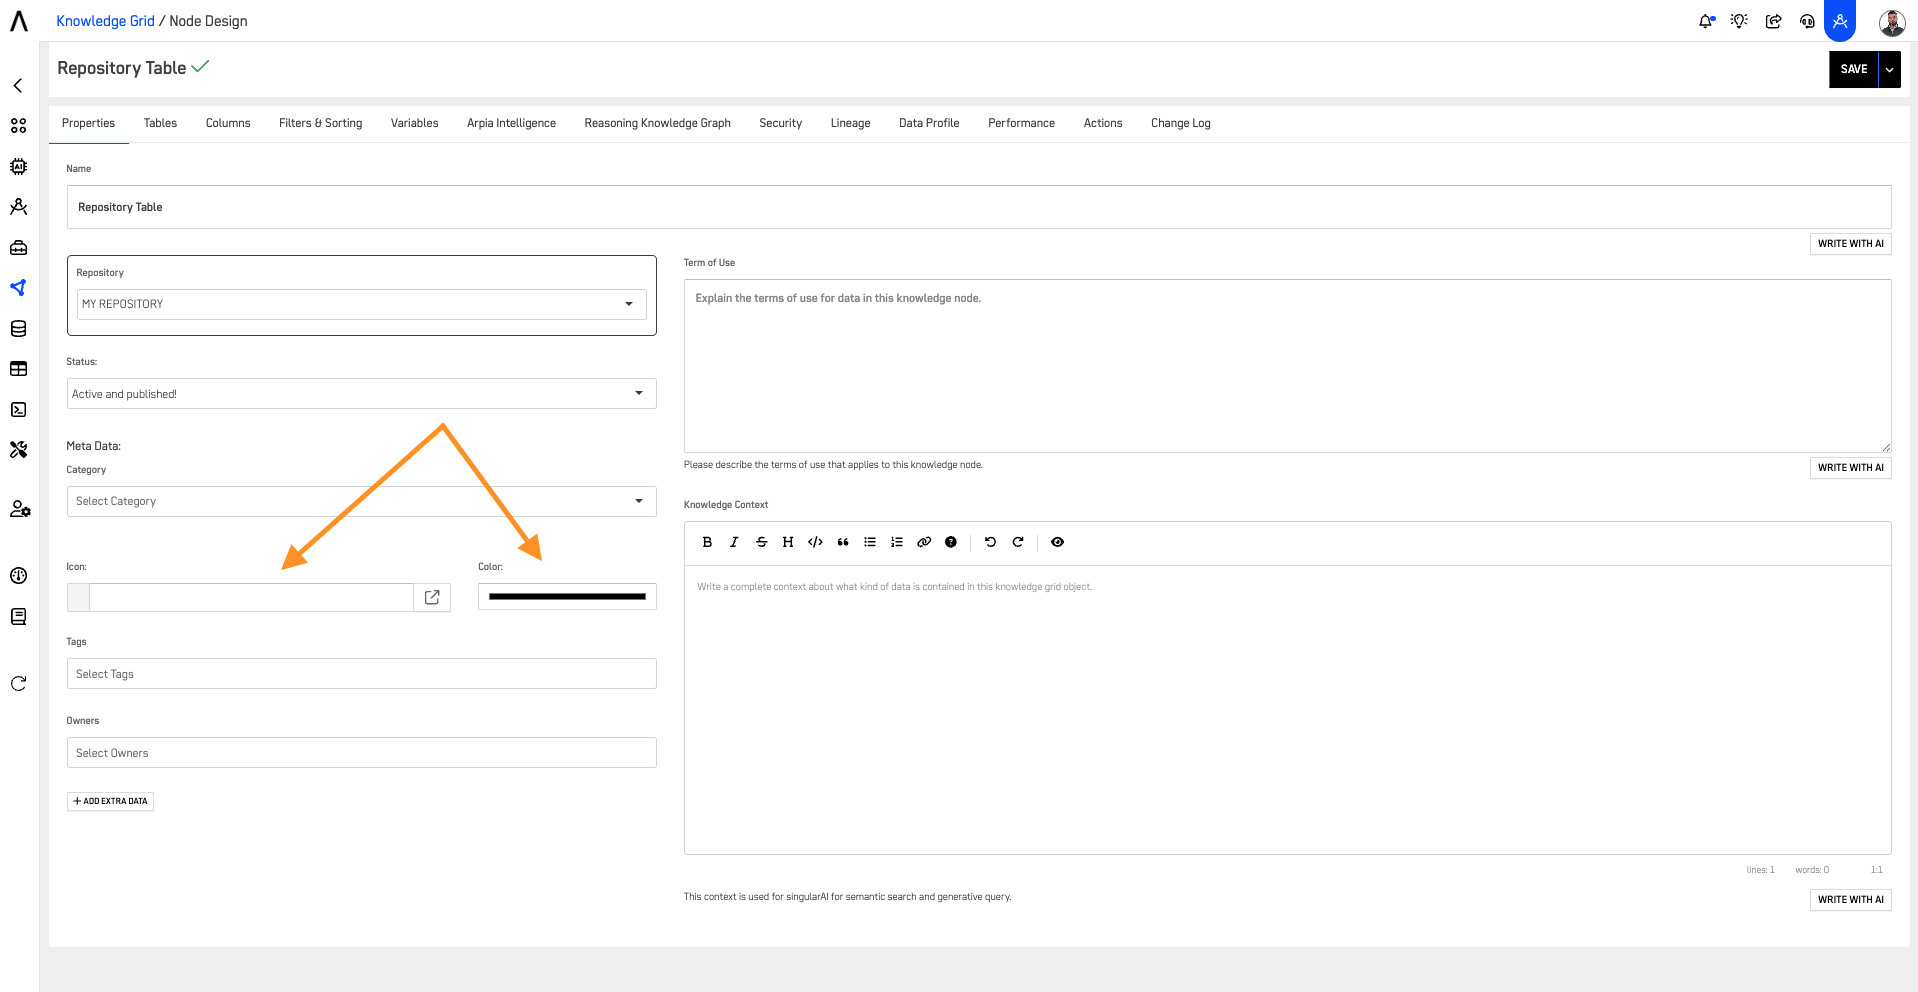
Step 1: Customize Properties
The Properties section you configured will be displayed along with two new options:
- Icon: Customize the icon that will represent your KnowGraph.
- Color: Configure the color in which your KnowGraph will be displayed.
Step 2: Select Primary Table
Select the Tables option and choose the primary table for your KnowGraph from the previously selected repository.

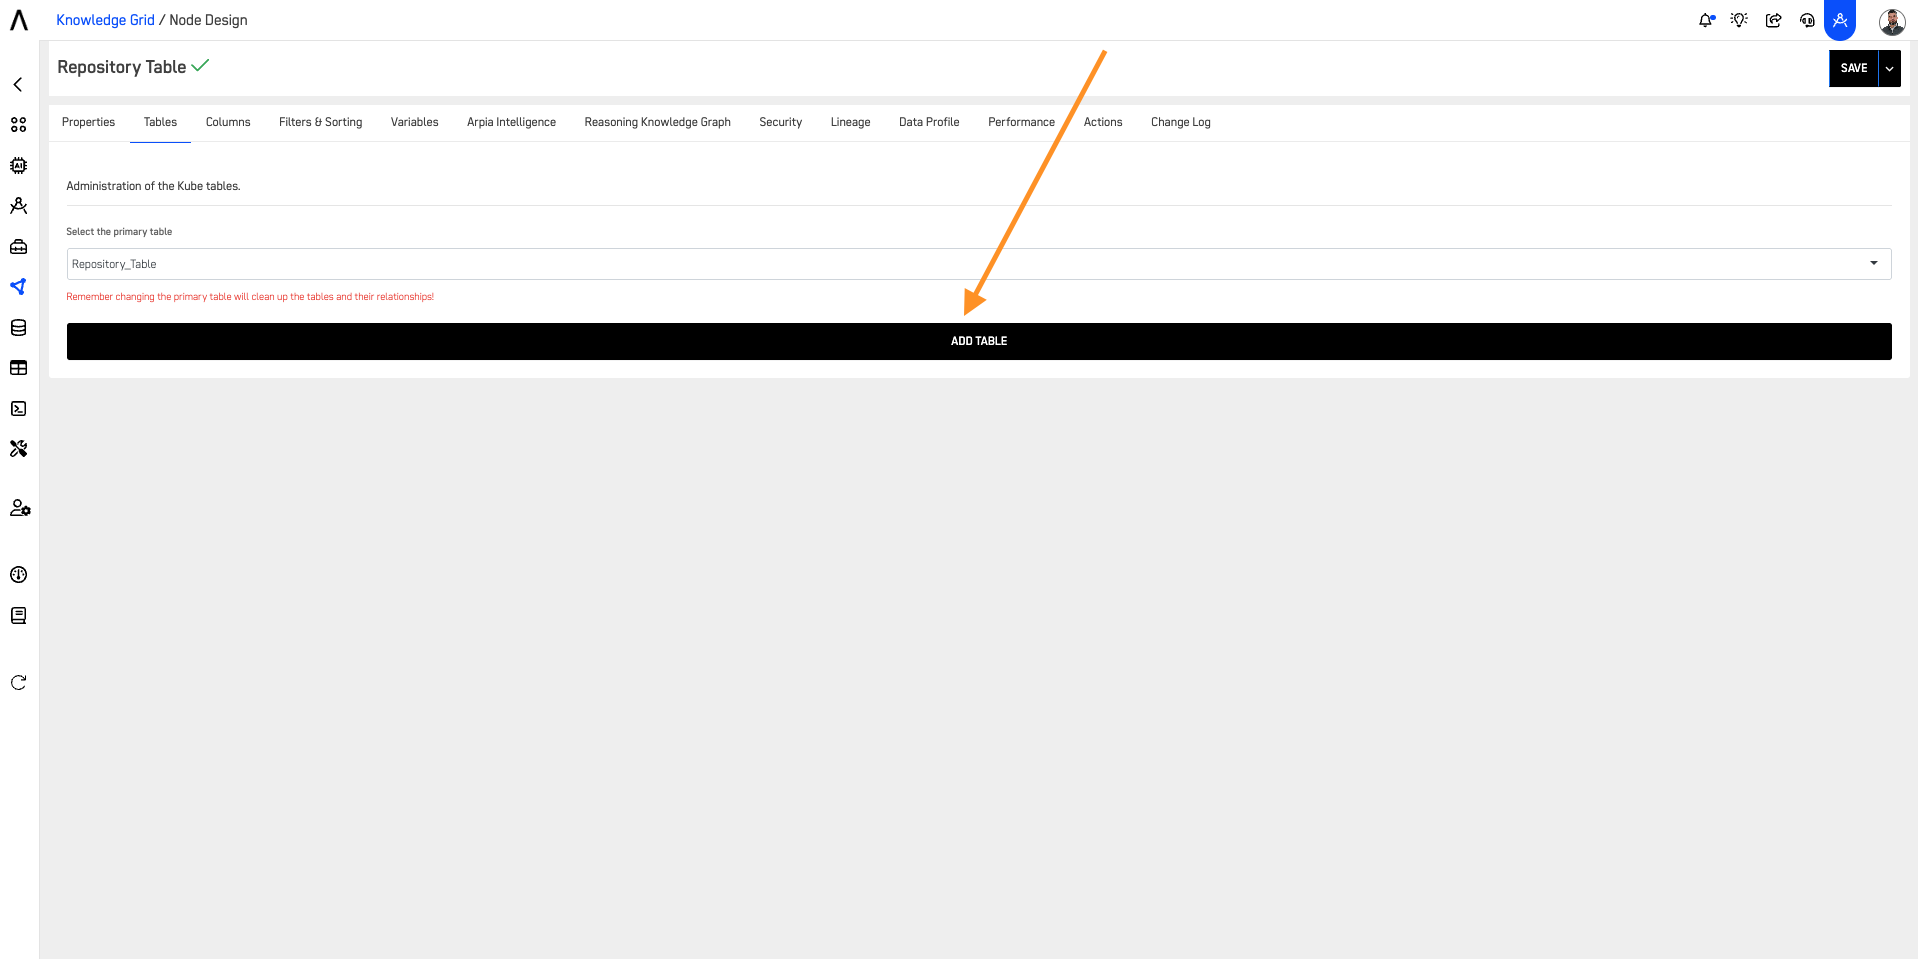
Step 3: Add Additional Tables (Optional)
To organize more data within your KnowGraph, click the ADD TABLE button.
Step 4: Relate Tables
Select the table you want to relate to the primary table.
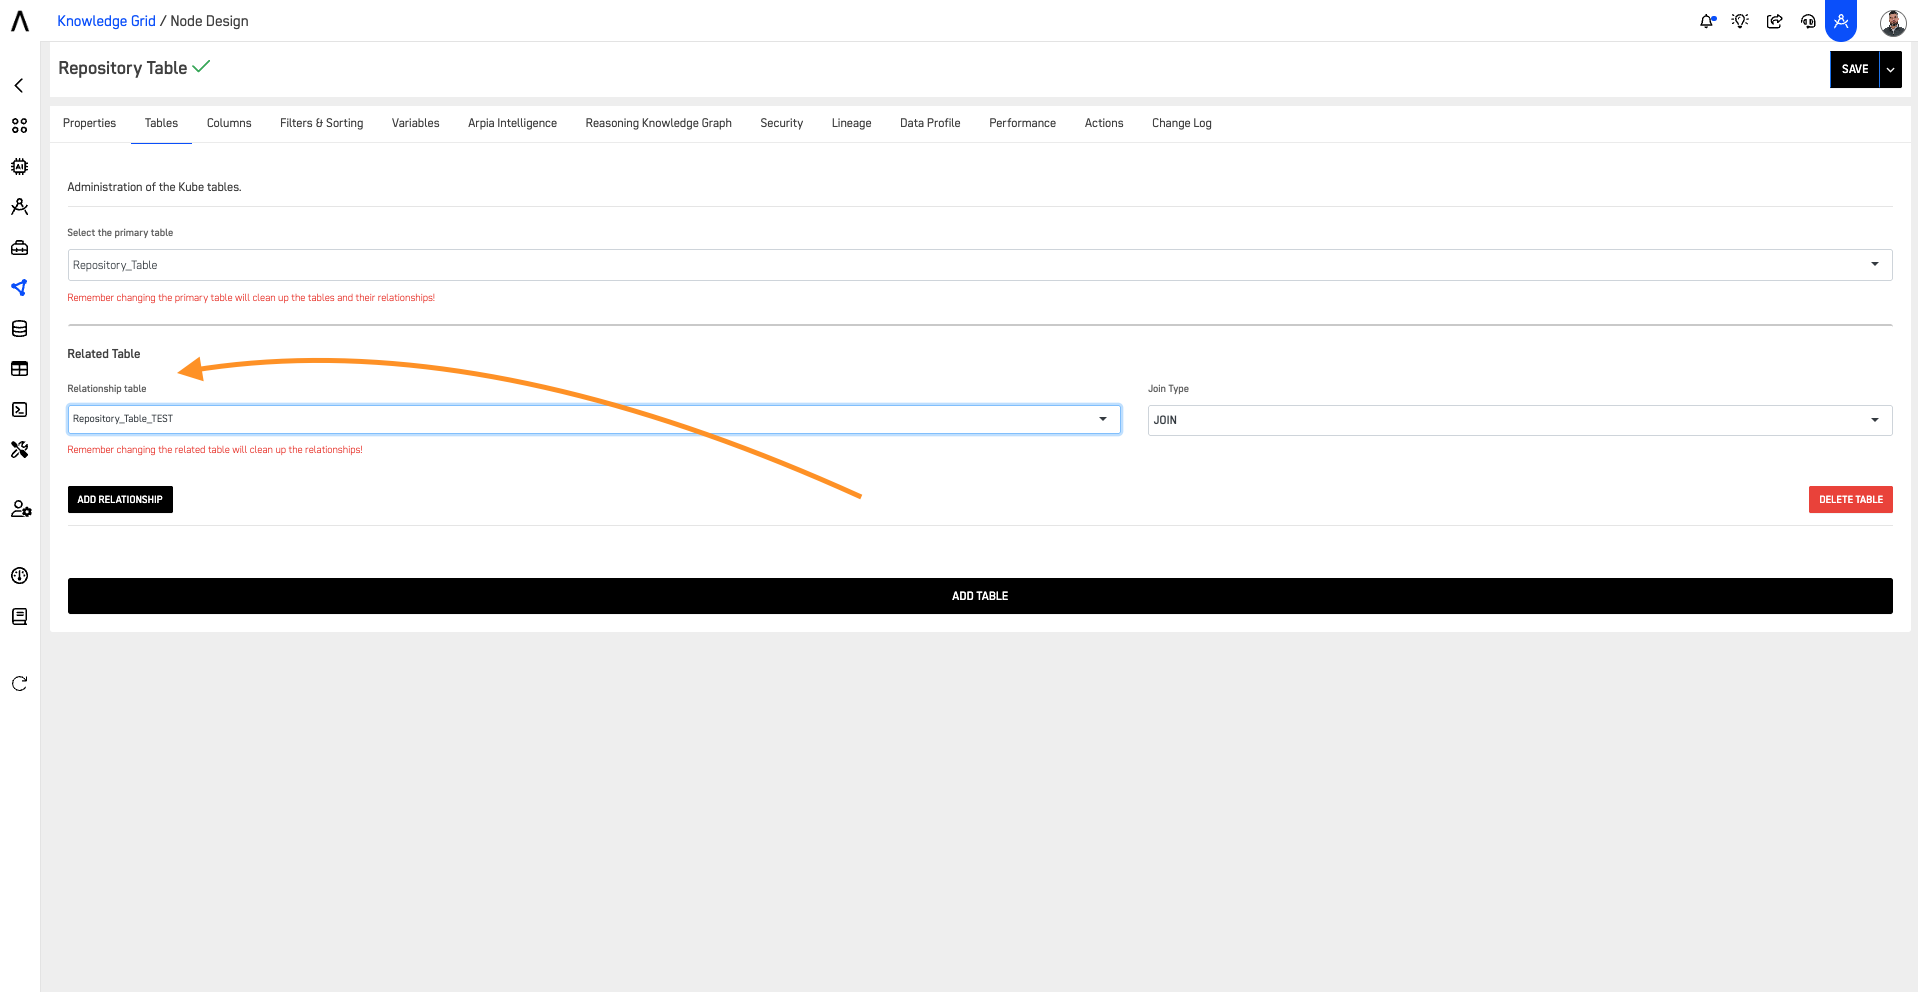
Step 5: Define Join Type
Choose the type of JOIN to perform between the two tables. The types of JOINs are explained in more detail below:
- Inner Join: Returns records that have matching values in both tables.
- Left Join (or Left Outer Join): Returns all records from the left table and matched records from the right table.
- Right Join (or Right Outer Join): Returns all records from the right table and matched records from the left table.
- Full Join (or Full Outer Join): Returns all records when there is a match in either left or right table.

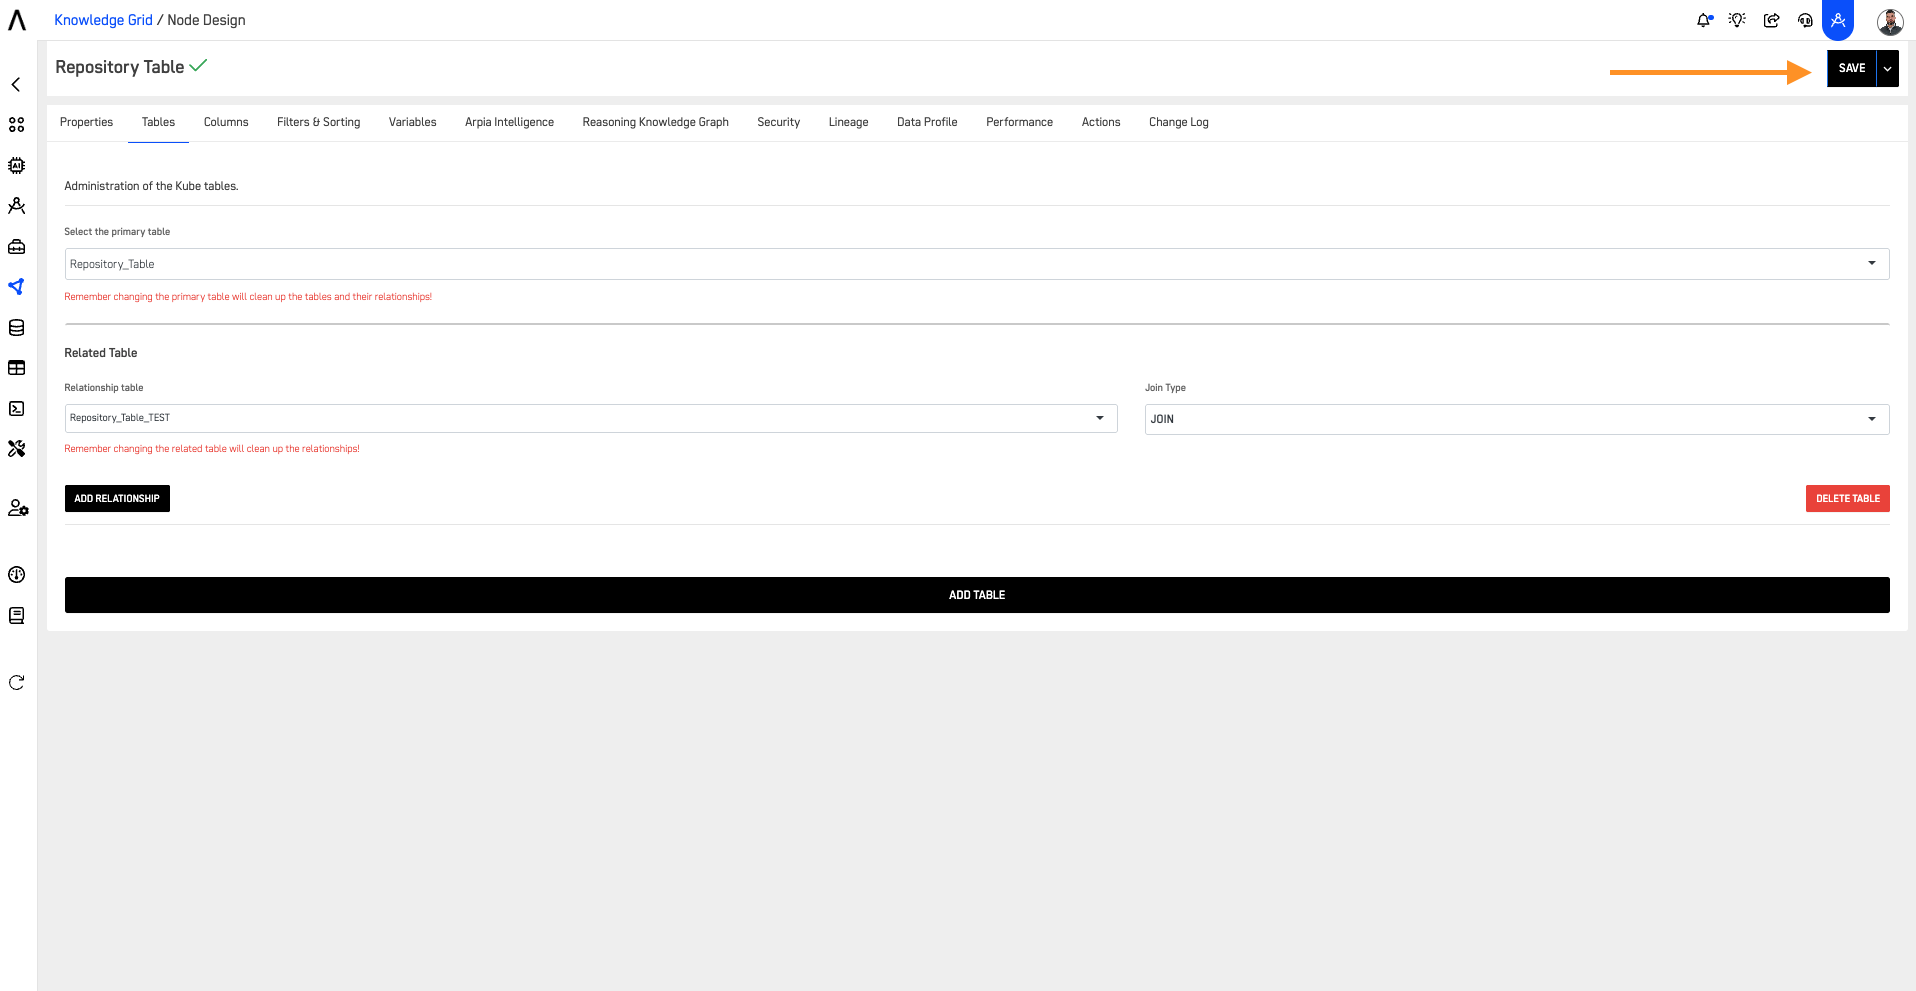
Step 6: Save Configuration
Review your configurations and click SAVE.
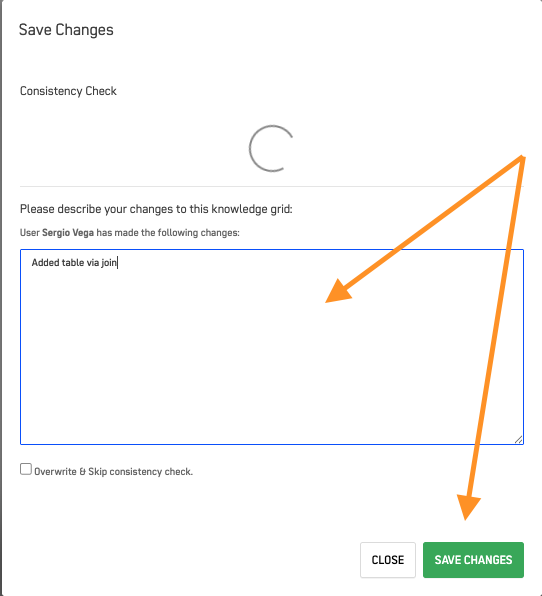
Step 7: Add Change Log Entry
Write a description of the changes you made to your node so it's stored in the change log, then press SAVE.
By following these steps, you can create and configure a KnowGraph in ARPIA, ensuring your data is well-organized and easily understandable.
Choosing the Right Creation Method
-
Use Method 1 (Knowledge Grid Tool) when you want to:
- Set up categories and subcategories during creation
- Have a guided interface through the creation process
- Start with a specific repository view
-
Use Method 2 (Data Objects) when you:
- Already know which specific data object you want to use
- Want the fastest path to create a node from an existing object
- Are working directly within the Data Objects interface
Updated 8 months ago