How to create a Data Pipe to MySQL
Requirements
A DataPipe can only be created if a Data Source exists. For more information on Data Sources, refer to the Connecting Data Sources documentation.Connecting Data Sources.
Step-by-Step Guide
Step 1: Access DataPipes in Orchestrator
On the Orchestrator Home page, navigate to the AI Workshop option.
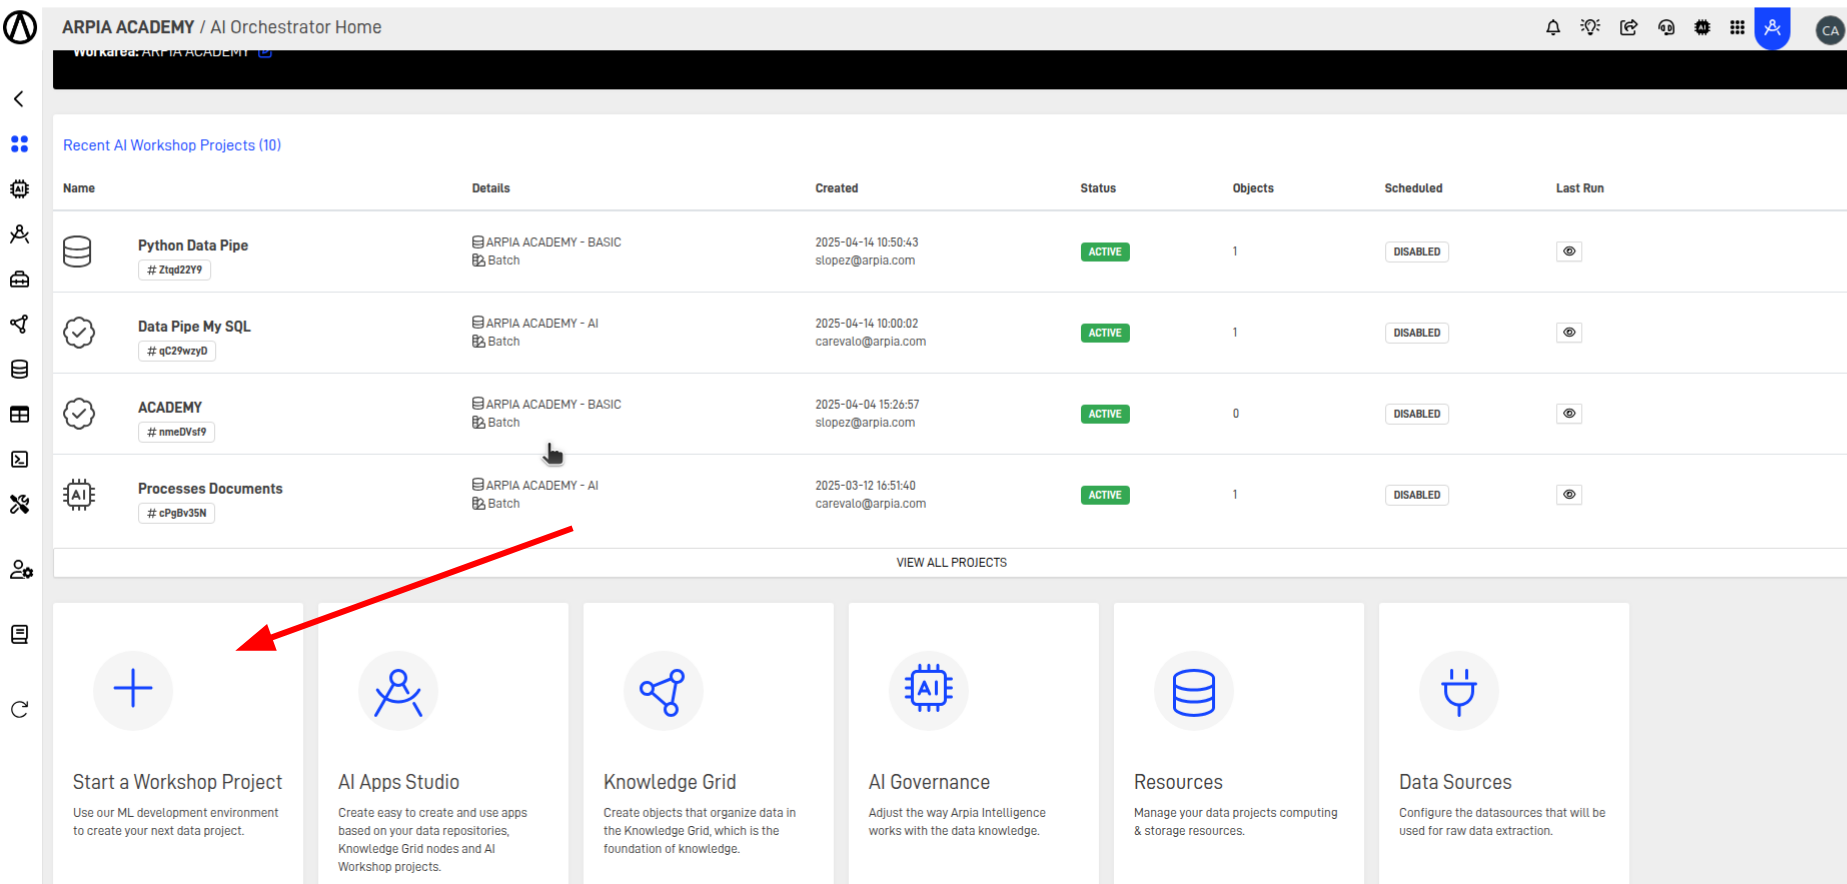
Alternatively, access it using the toolbar.

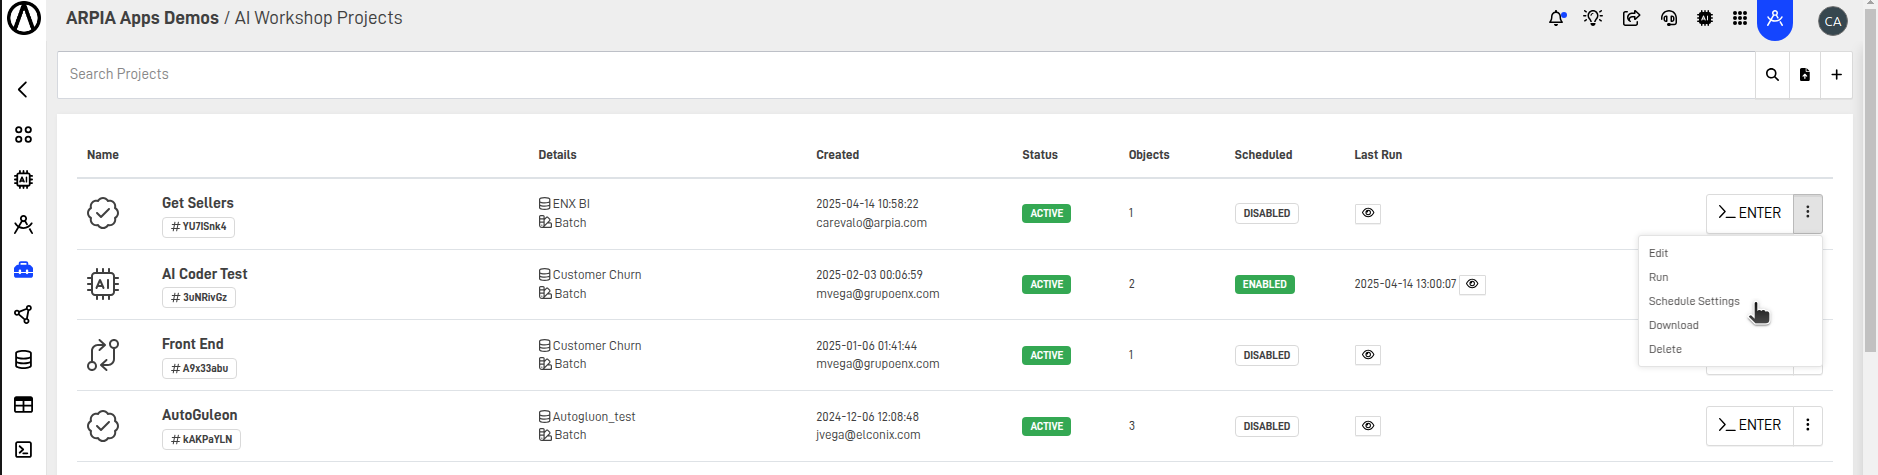
Step 2: Create a New Workshop Object
Note
You must have an existing Workshop or create a new one. For more details, refer to the documentation.AI Workshop.
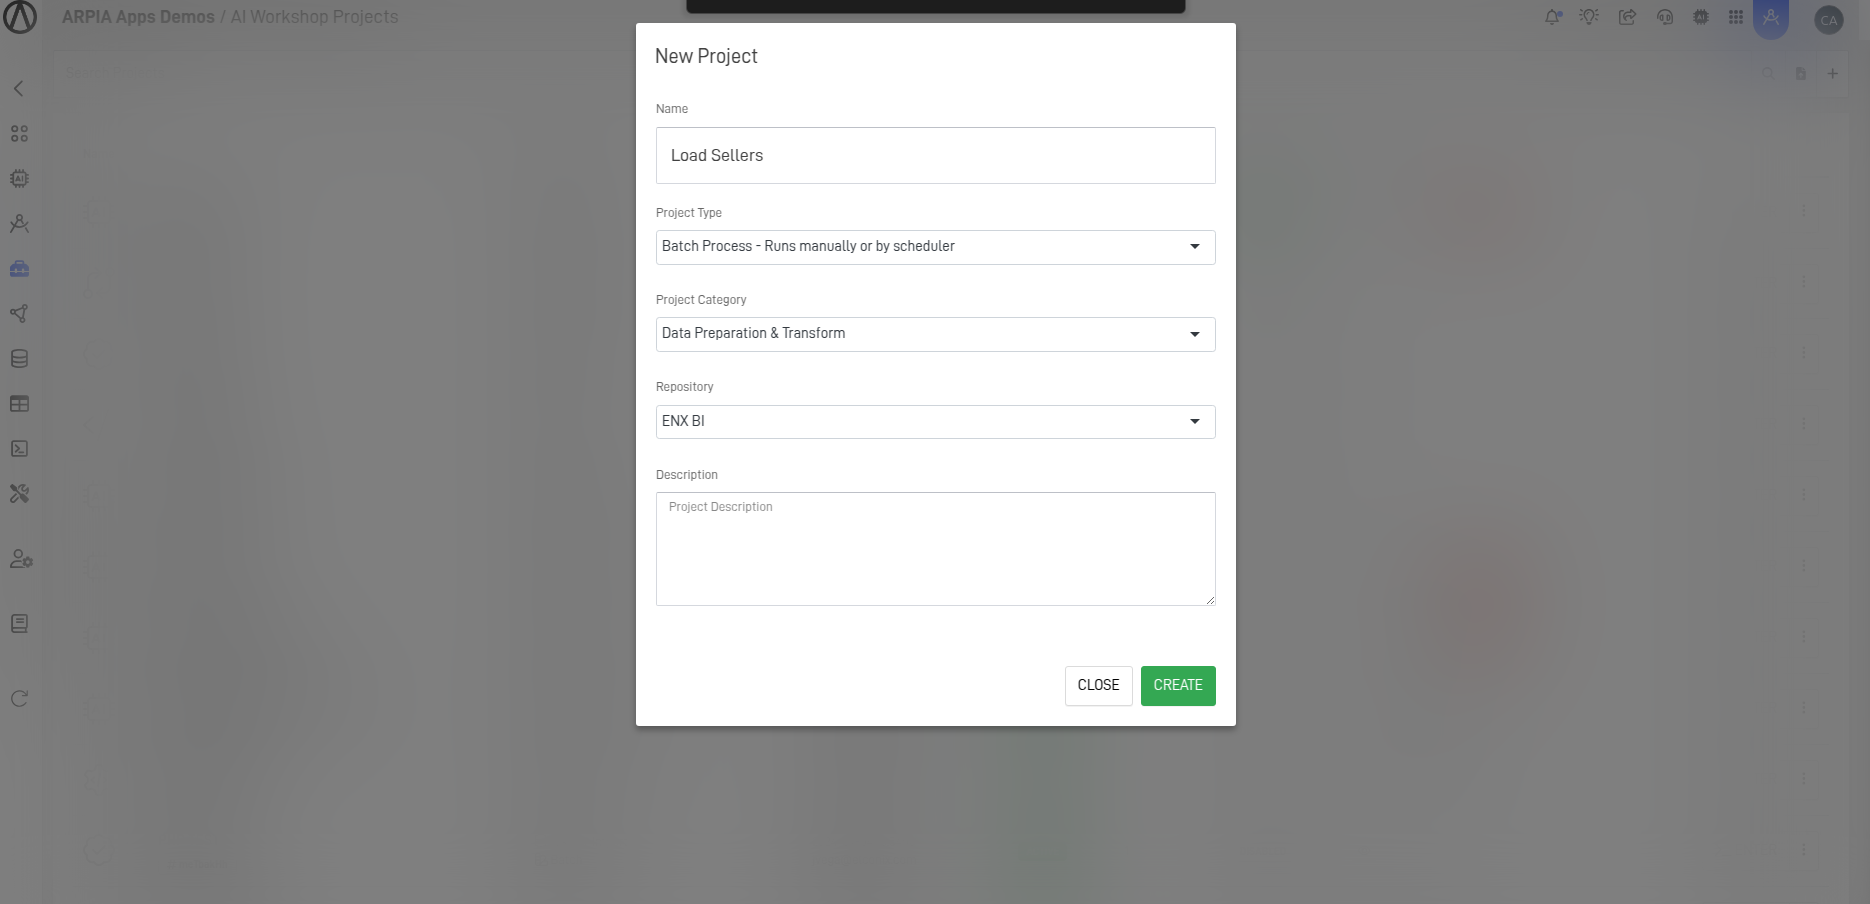
Fill out the form to create a new Workshop.
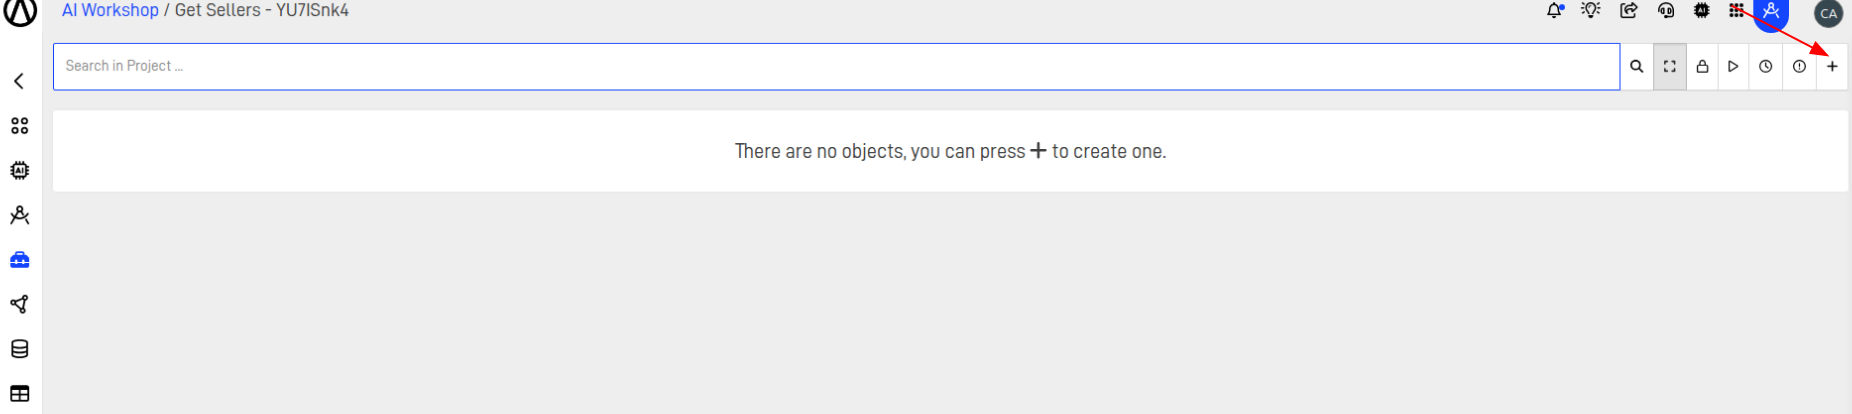
Enter the Workshop to configure additional settings and create objects.

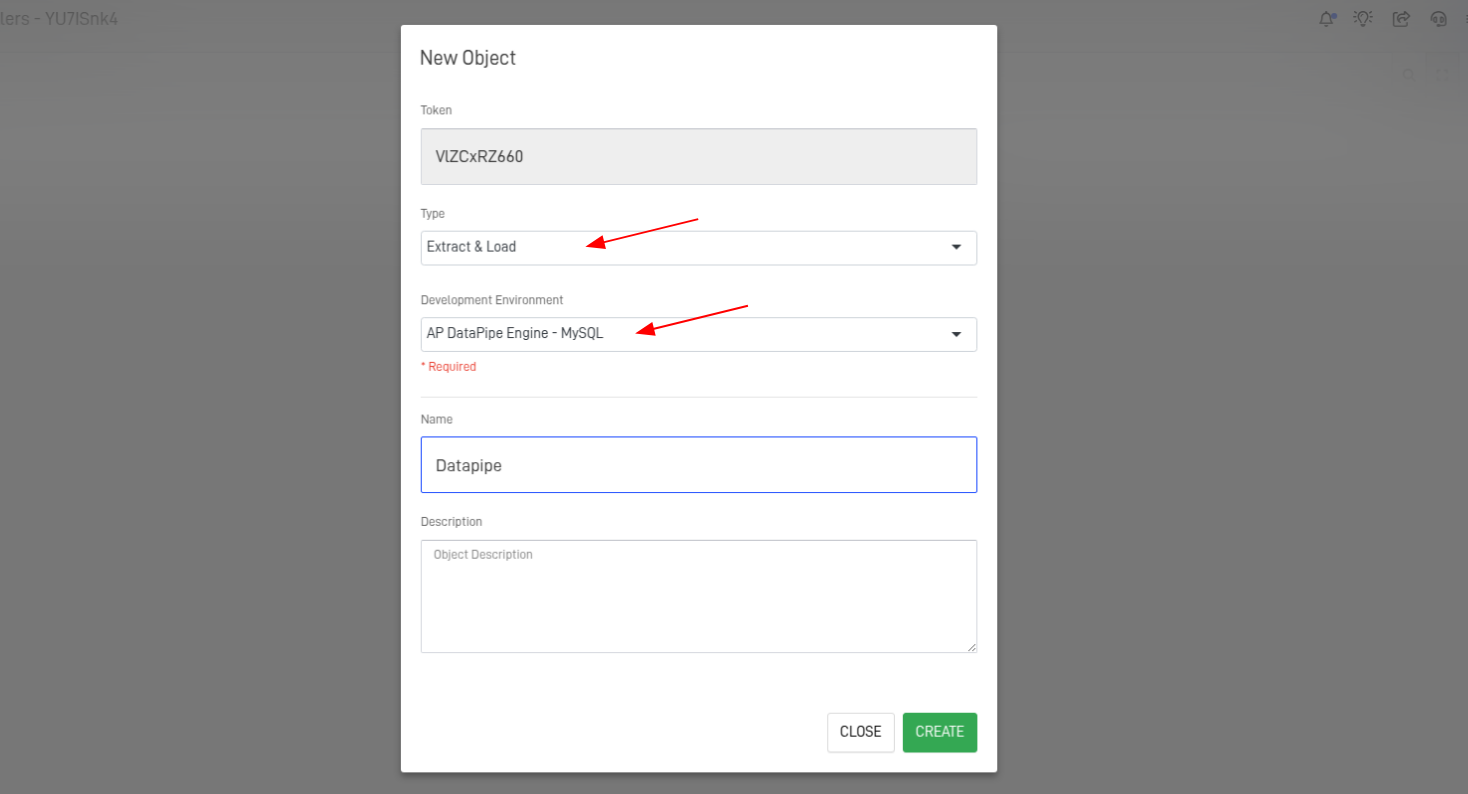
Step 3: Create a New Object
Complete the form with these configurations:
- Choose an Extract & Load Object
- Select an AP DataPipe Engine
- Save the configuration
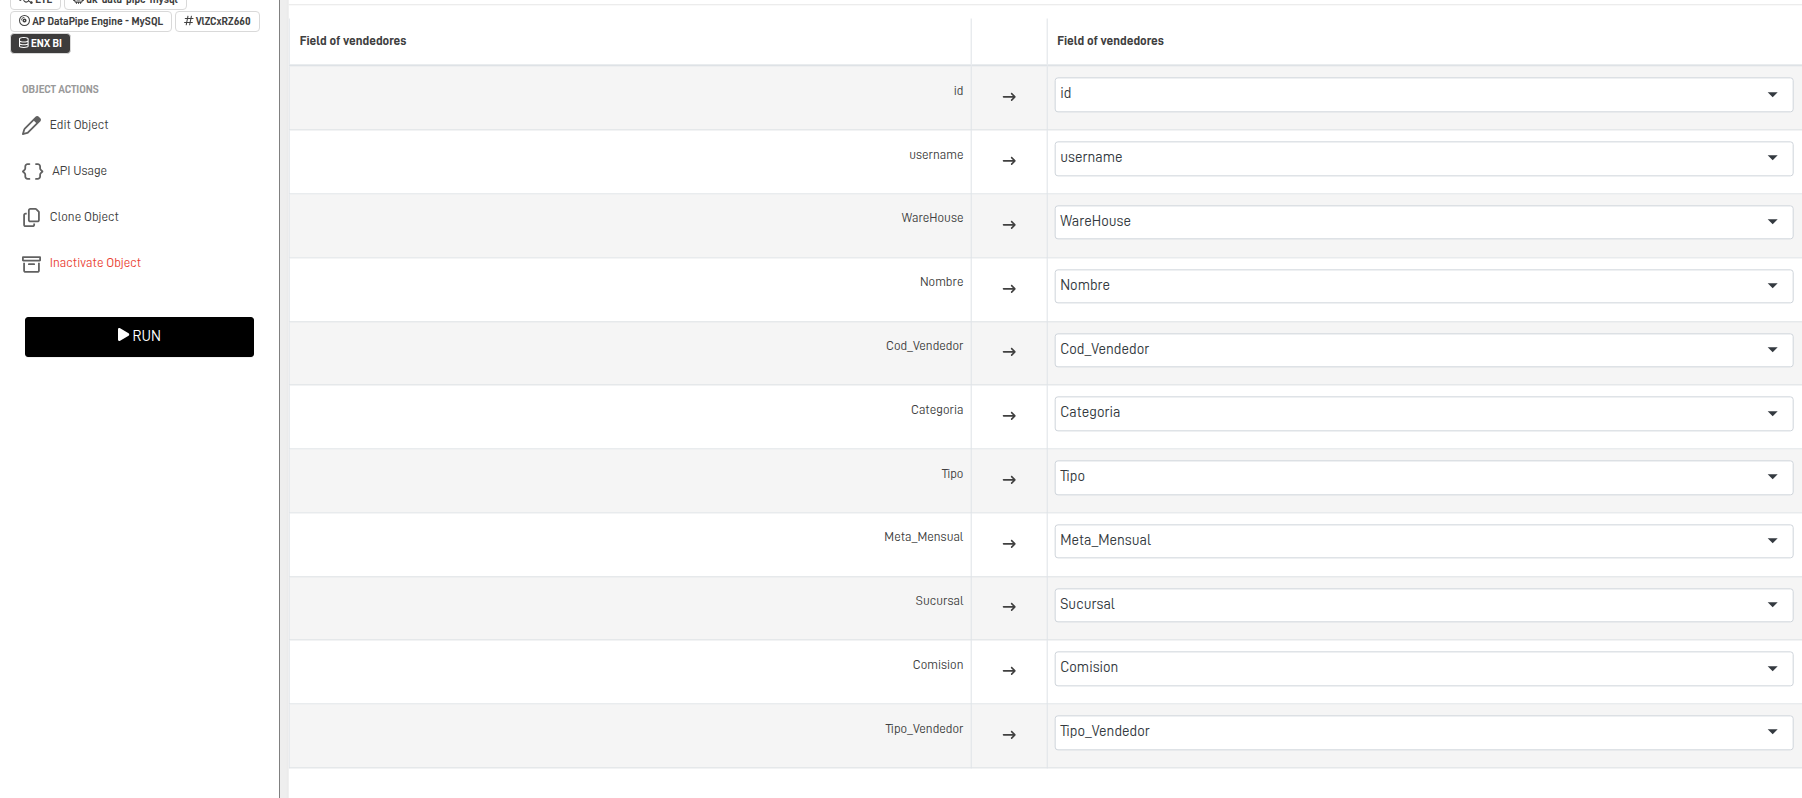
Step 4: Set the DataPipe Fields – Source and Destination
A new screen will appear, where you can configure the DataPipe.
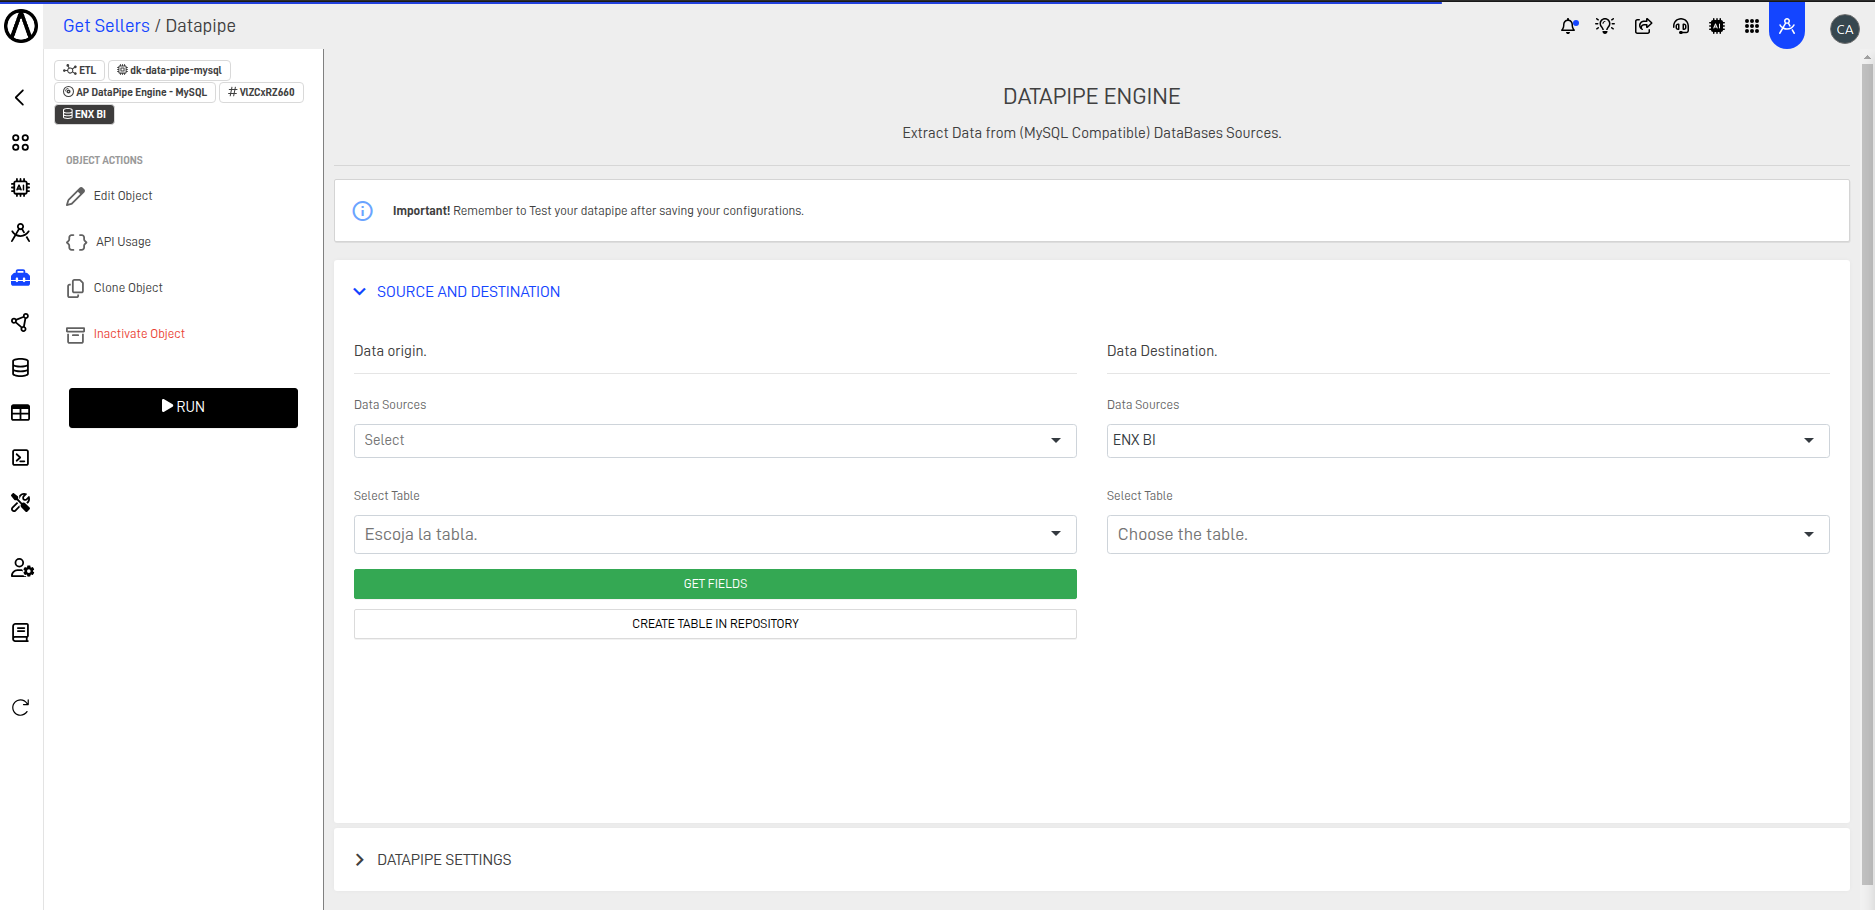
The following table explains each configuration in detail:
| Data Origin | Description | Data Destination | Description |
|---|---|---|---|
| Data Source | Defines the connection to an external system used to obtain data | Data Source | Specifies where data extracted from the source will be stored |
| Select Table | Indicates which table from the data source will be loaded | Select Table | Indicates where the data from the source table will be stored |
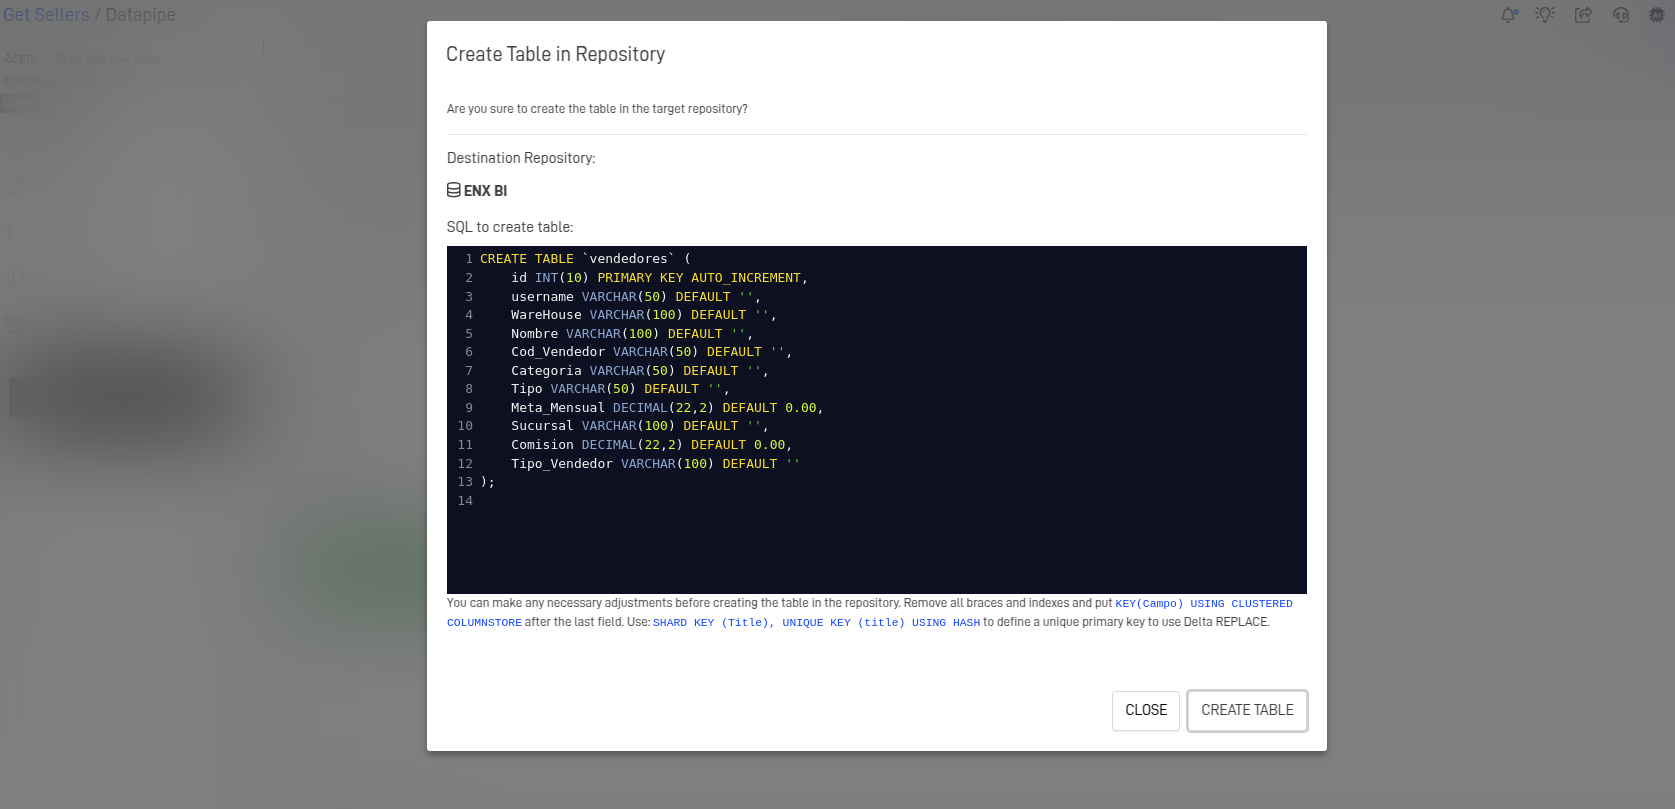
| Create Table in Repository | Generates customizable SQL code based on the Data Origin table to create a destination table in the repository |
- Select the Data Source for both Origin and Destination.
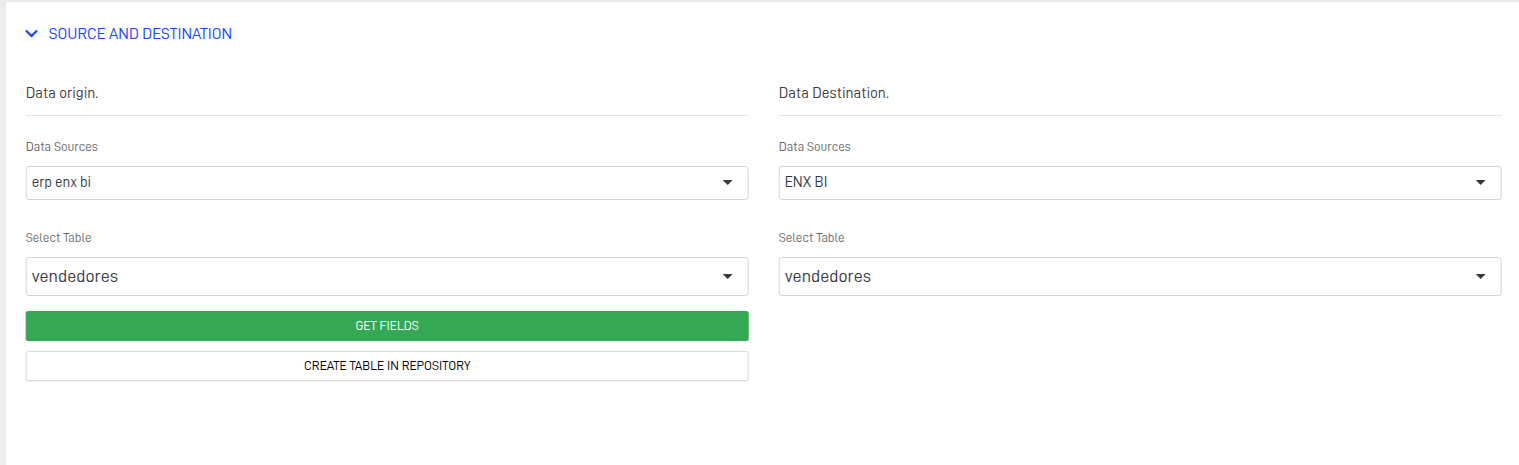
- Select the source table and create a destination table if a compatible one doesn't exist.
- Confirm that all fields are properly mapped according to the source structure.
Step 5: Configure DataPipe Settings
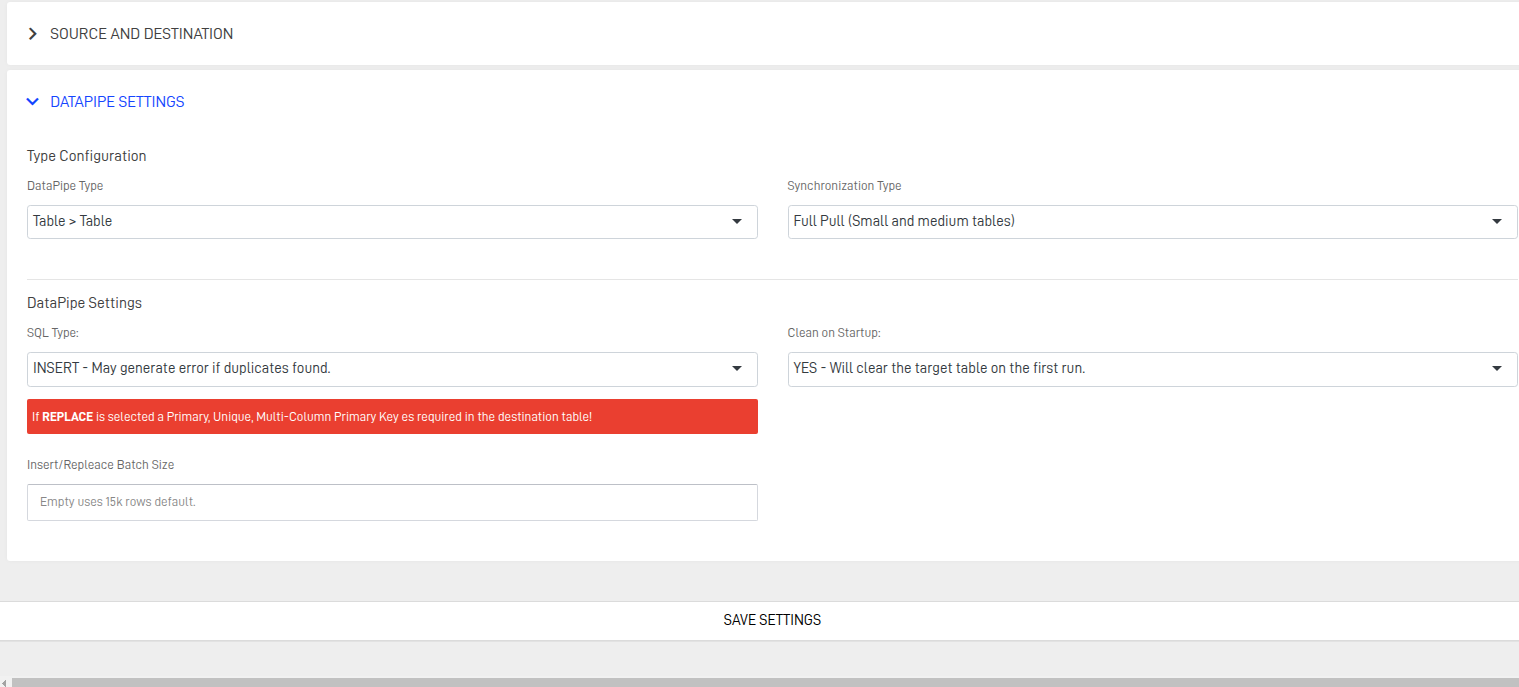
Type Configuration
Defines how data will be handled based on the selected configuration type:
- Table ➝ Table
Copies data directly from a source table to a target table. Ideal for 1:1 mappings with minimal transformation. - SQL ➝ Table
Uses a custom SQL query to extract, filter, or transform data before loading it into the target table. Best for complex logic or joins.
Important
When selecting the SQL ➝ Table option, you must provide a SQL query to fetch the desired data from the source.

Synchronization Type
- Full Pull
Loads all data from the source each time, regardless of changes. - SQL ➝ Table
Loads only records that have changed since the last sync, based on a field such asupdated_at.
DataPipe Settings
- Insert
Adds new records to the target table without modifying existing data. This method assumes data is additive and does not check for duplicates. - Replace
Overwrites existing records based on a matching key (e.g., primary key or unique constraint). Ideal when data may change and requires refreshing in the target table.
Step 6: Save Settings and Run
After configuring everything, run the object to verify the setup and troubleshoot any issues.
- Click the Run button.
- Click the run icon in the console.
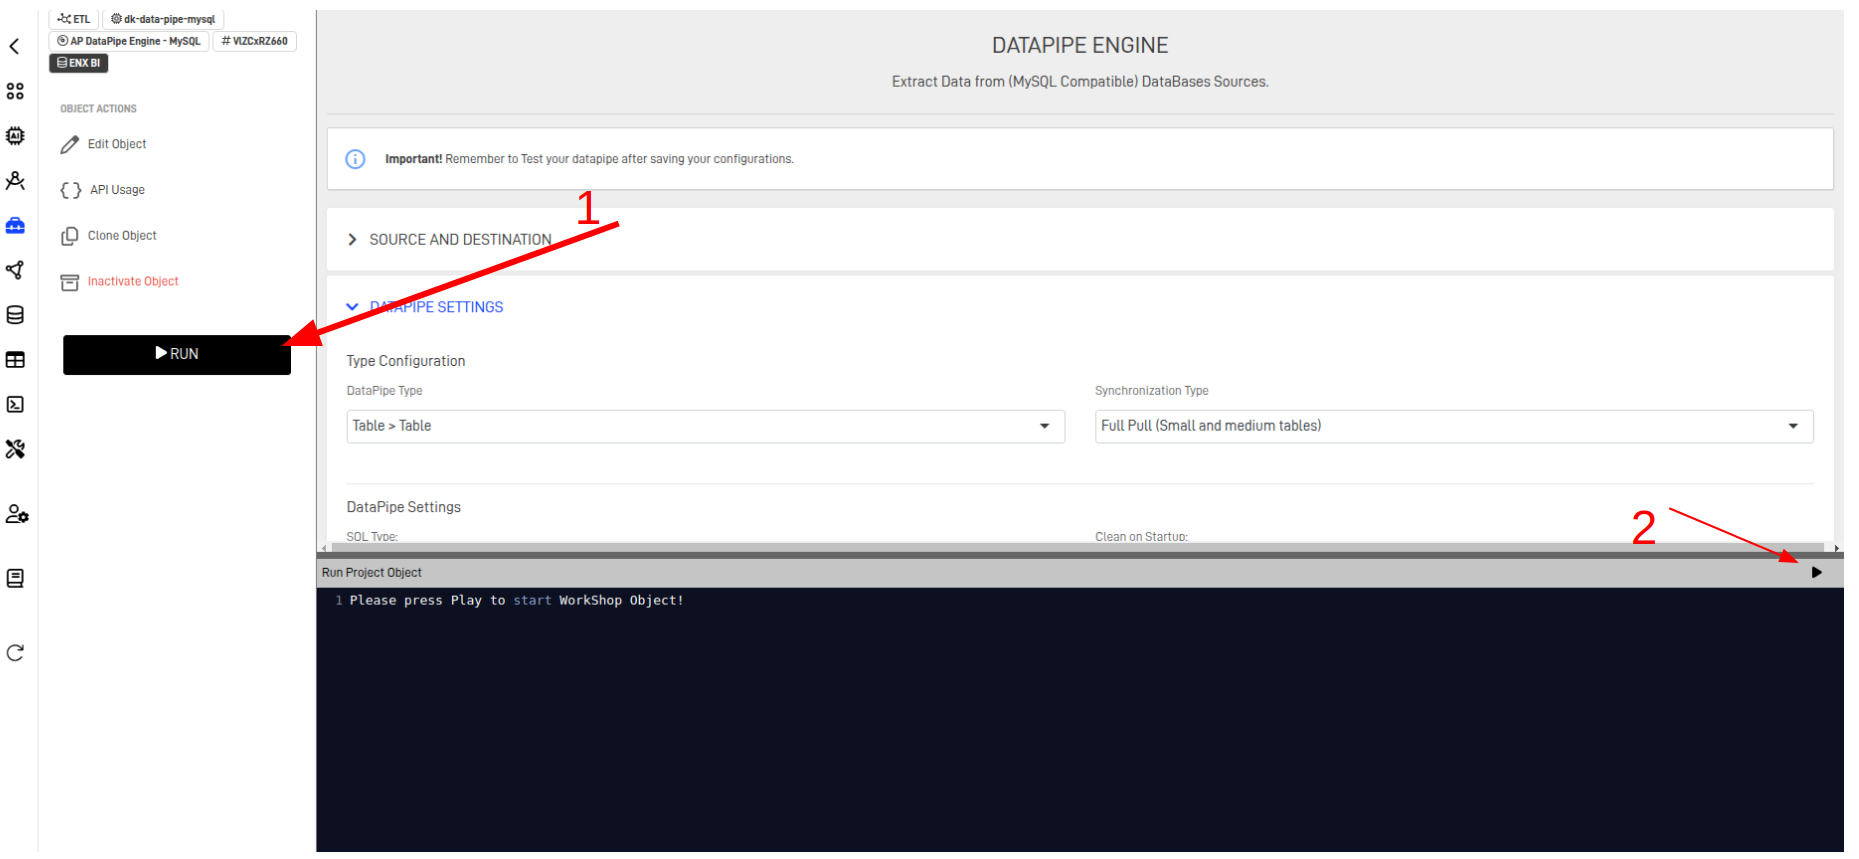
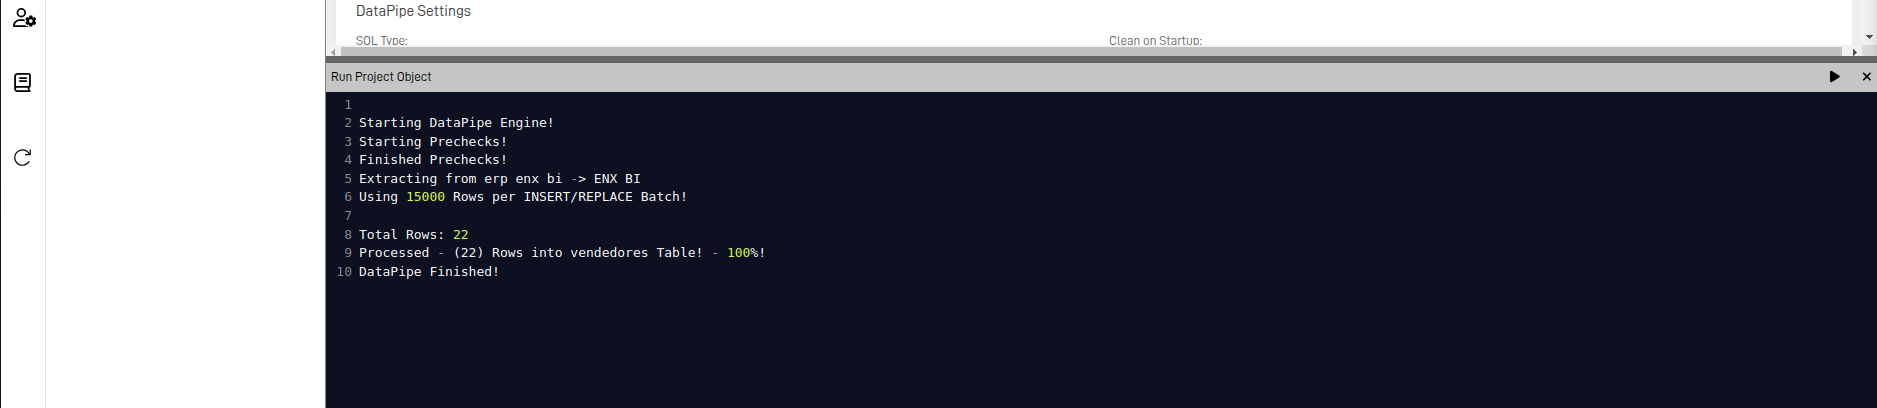
If there are no errors, the output should look like this:
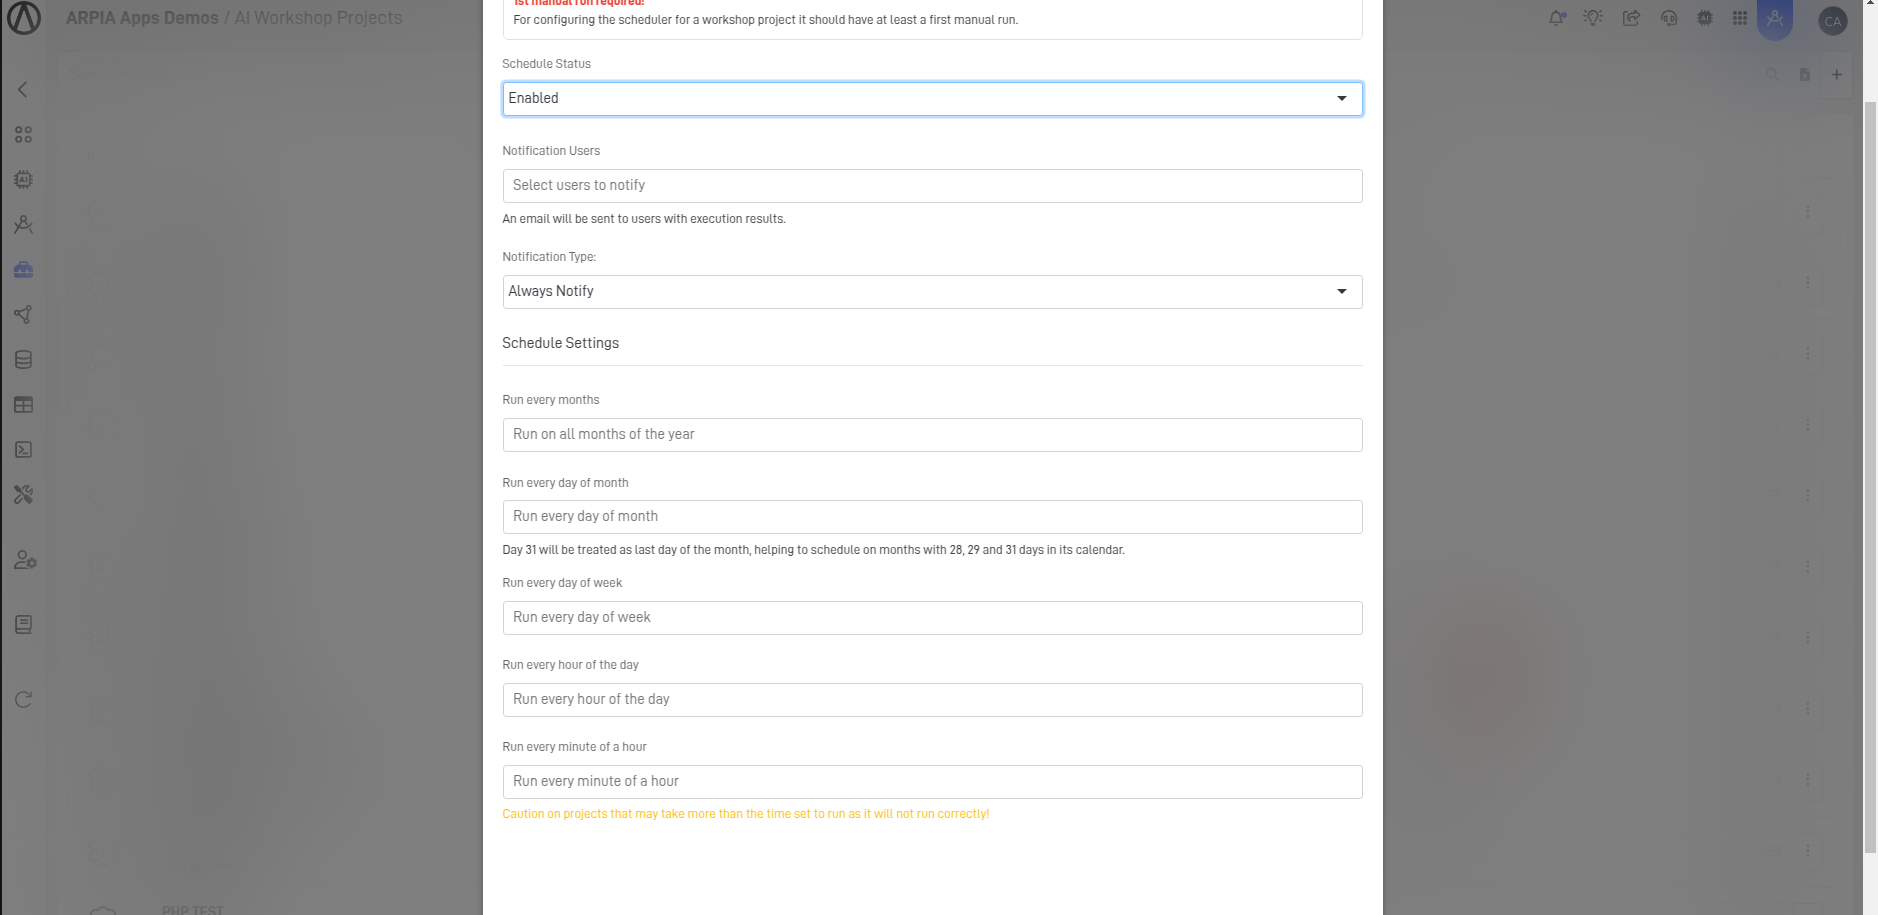
Step 7: Scheduling the Process
- Go back to the Workshop screen
- Click on the Workshop options
- Select Schedule Settings
- Fill out the form and configure the desired execution schedule