How to use the Screens Group Menu?
Step-by-Step Guide: Screens Group Menu
In this article, we will provide a step-by-step guide on how to use the screen group menu. This feature allows us to create a customized menu with the desired screens from our current application. The screen group menu does not require any complex configuration, making it simple and straightforward to use..
Step 1: Add Screen to the Screen Group
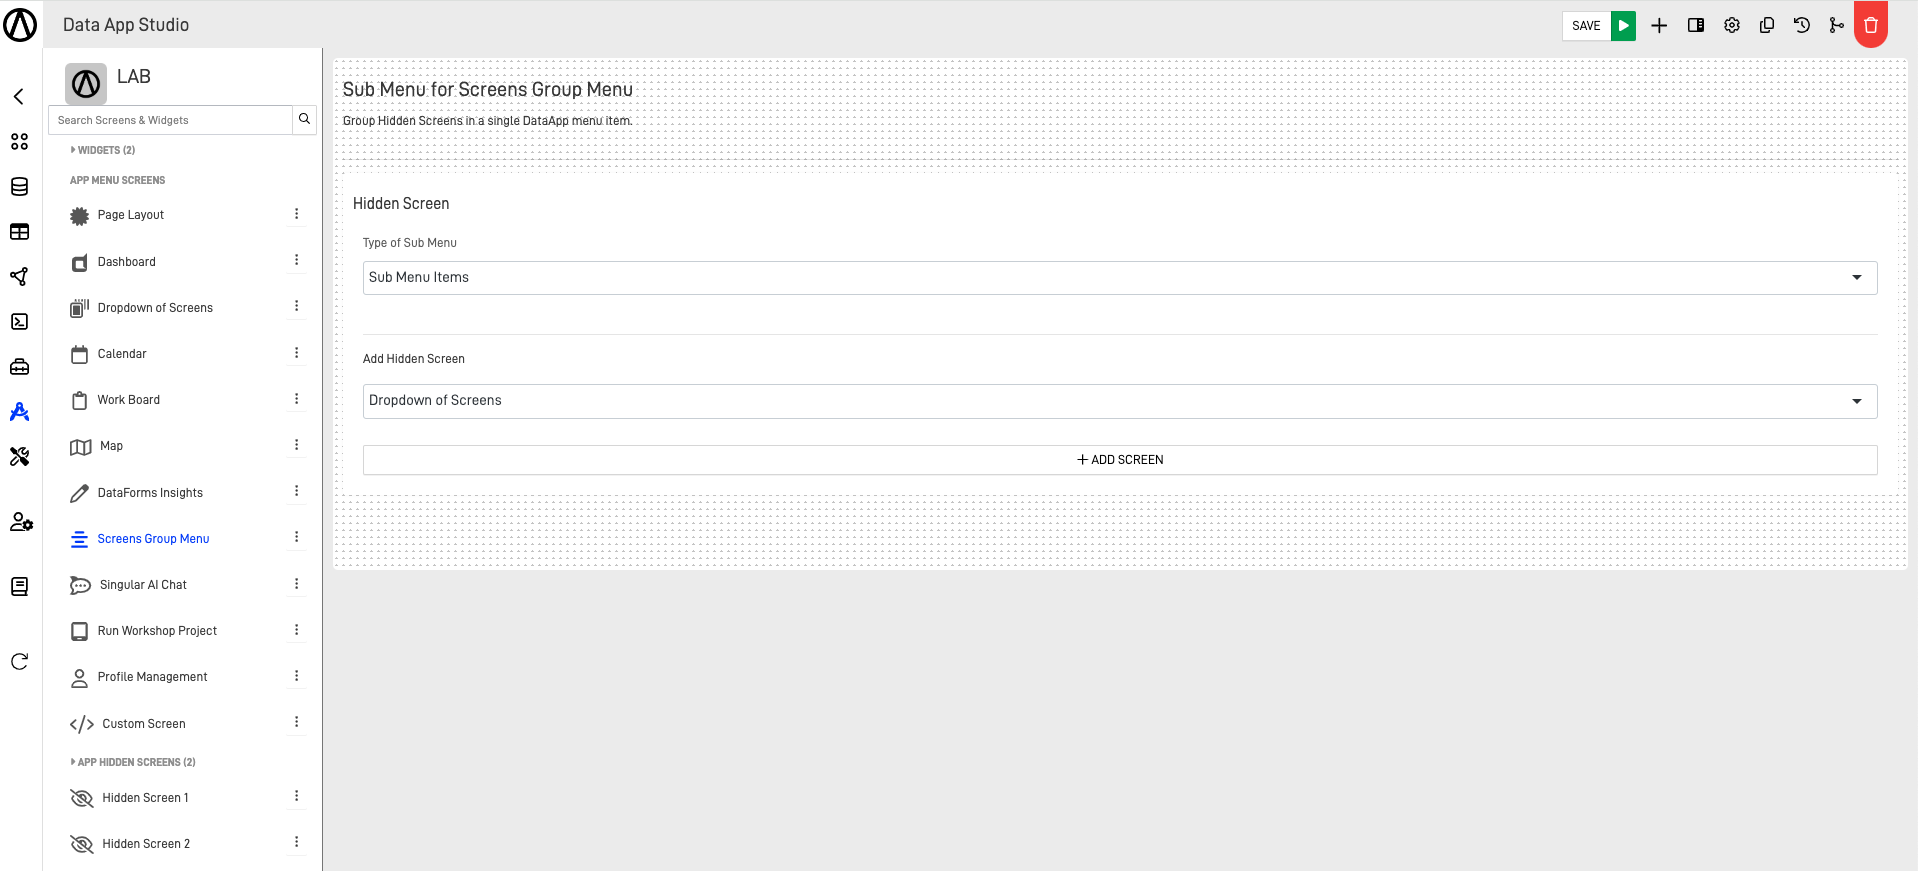
First we gonna add screens to our menu, this will allow us to directly go the screen selected, this could be hidden or shown screens.
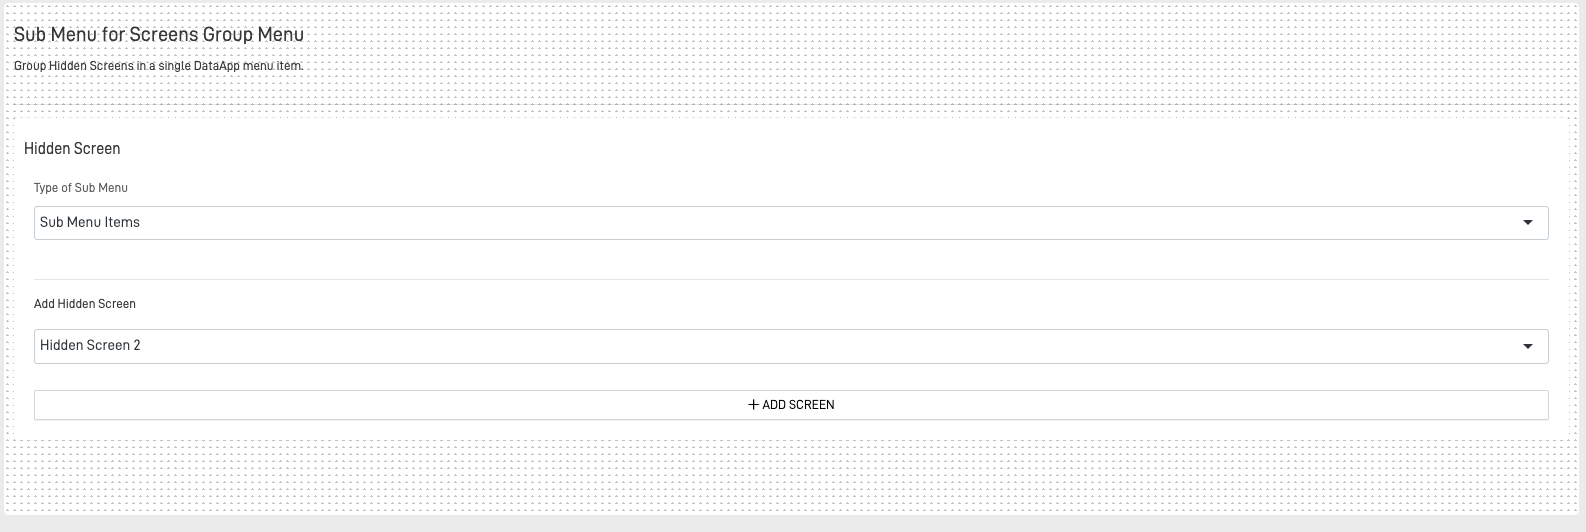
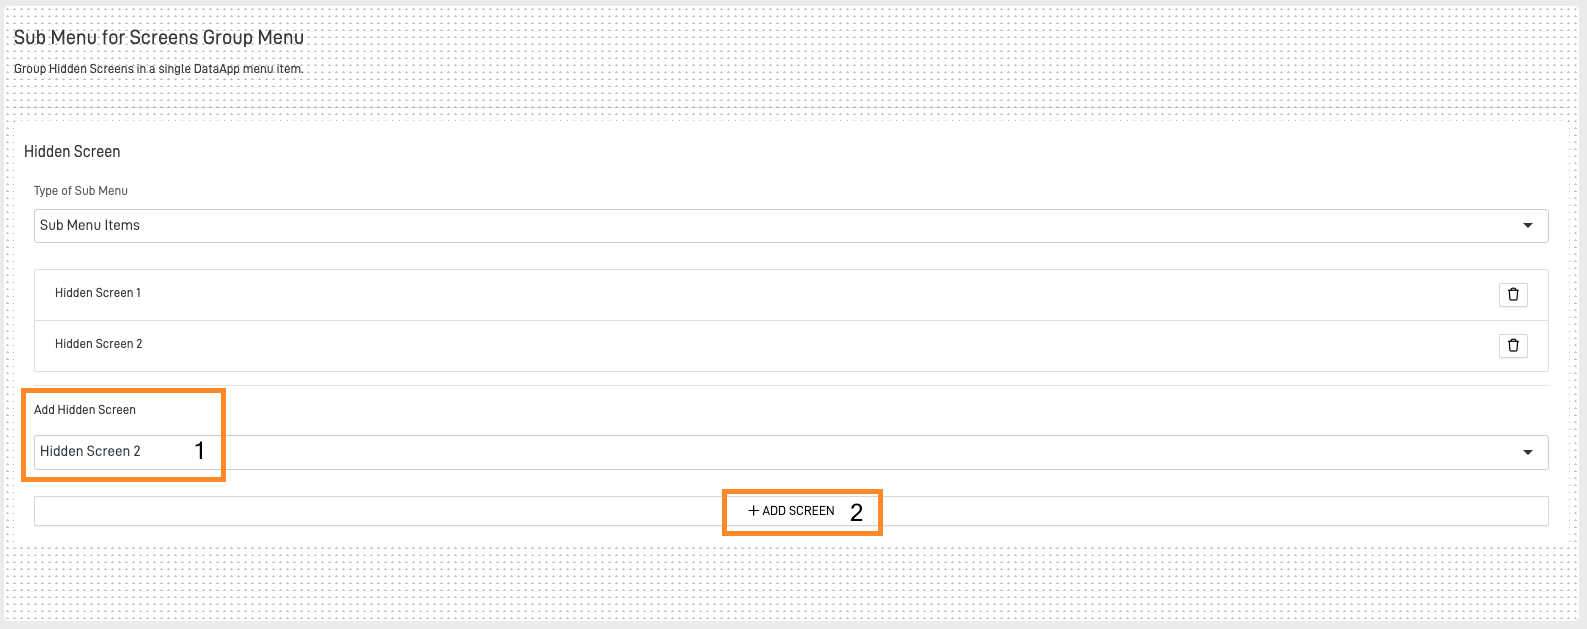
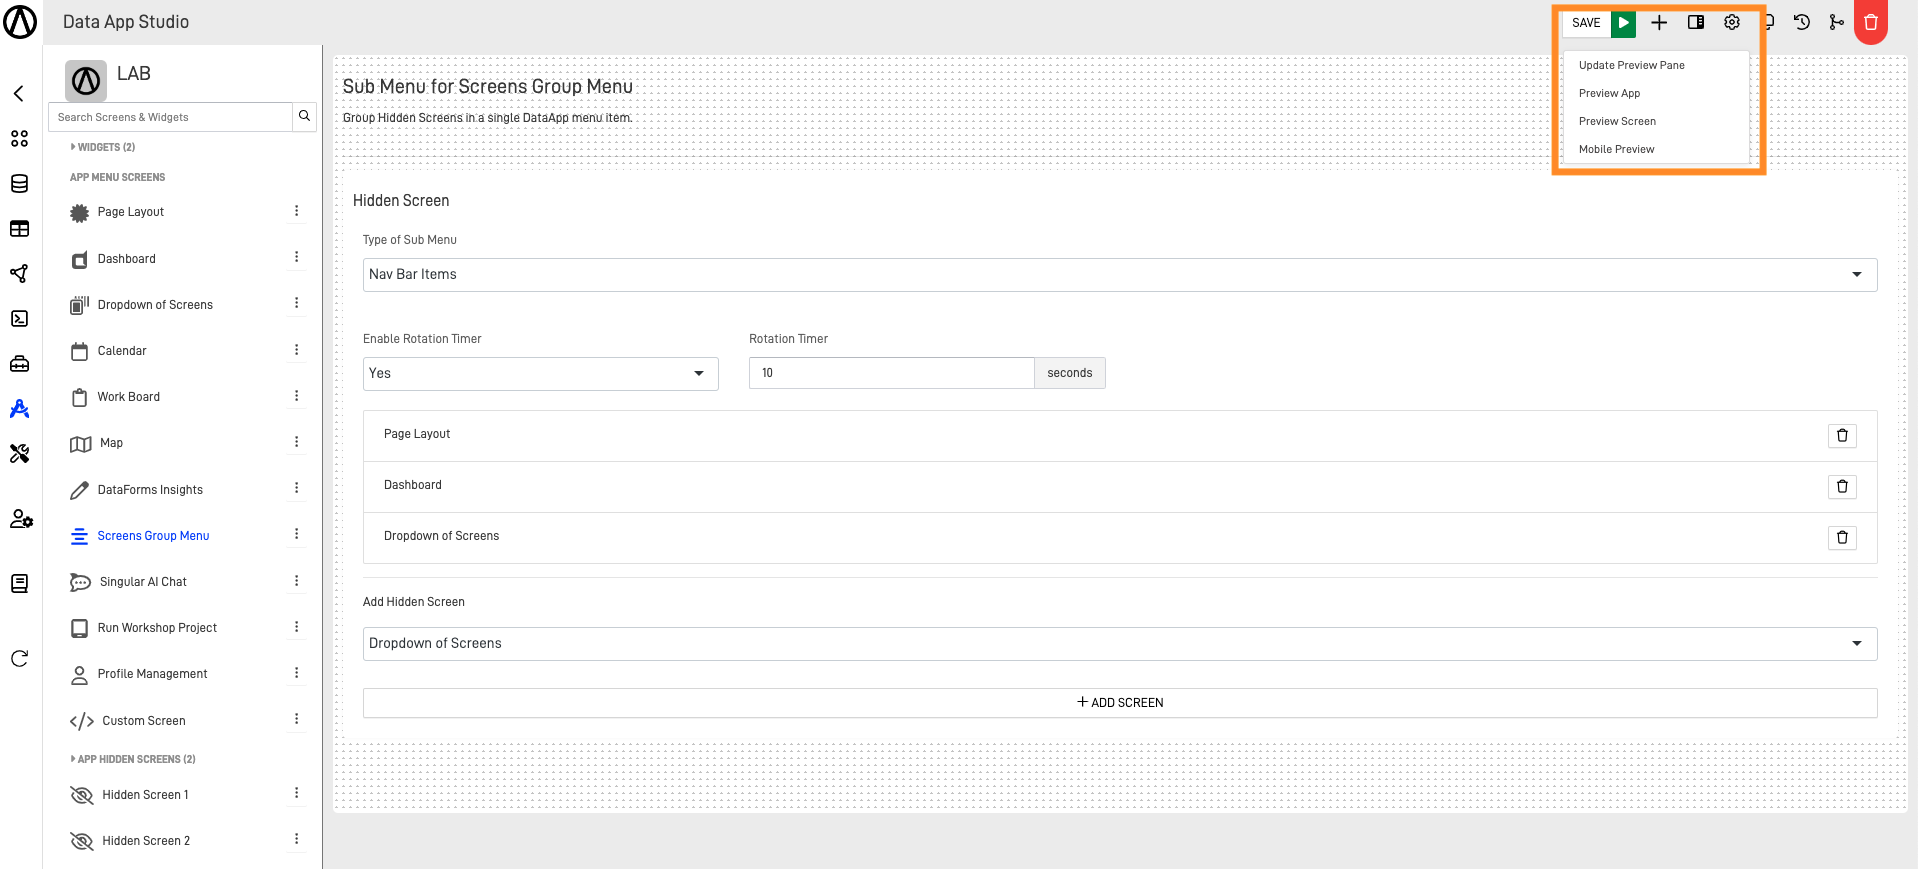
To add screens, first select the desired screen you want to include. Then, click on the "+ ADD SCREENS" button. The name of the selected screen will be displayed above the "Add Hidden Screen" field as a list. Next to each screen name is a "Delete" button, represented by a trash can icon, allowing you to remove the screen from the menu if needed.
Step 2: Customize the Sub Menu type
The Sub Menu Type field allows us to configure the visualization type of the screen menu.
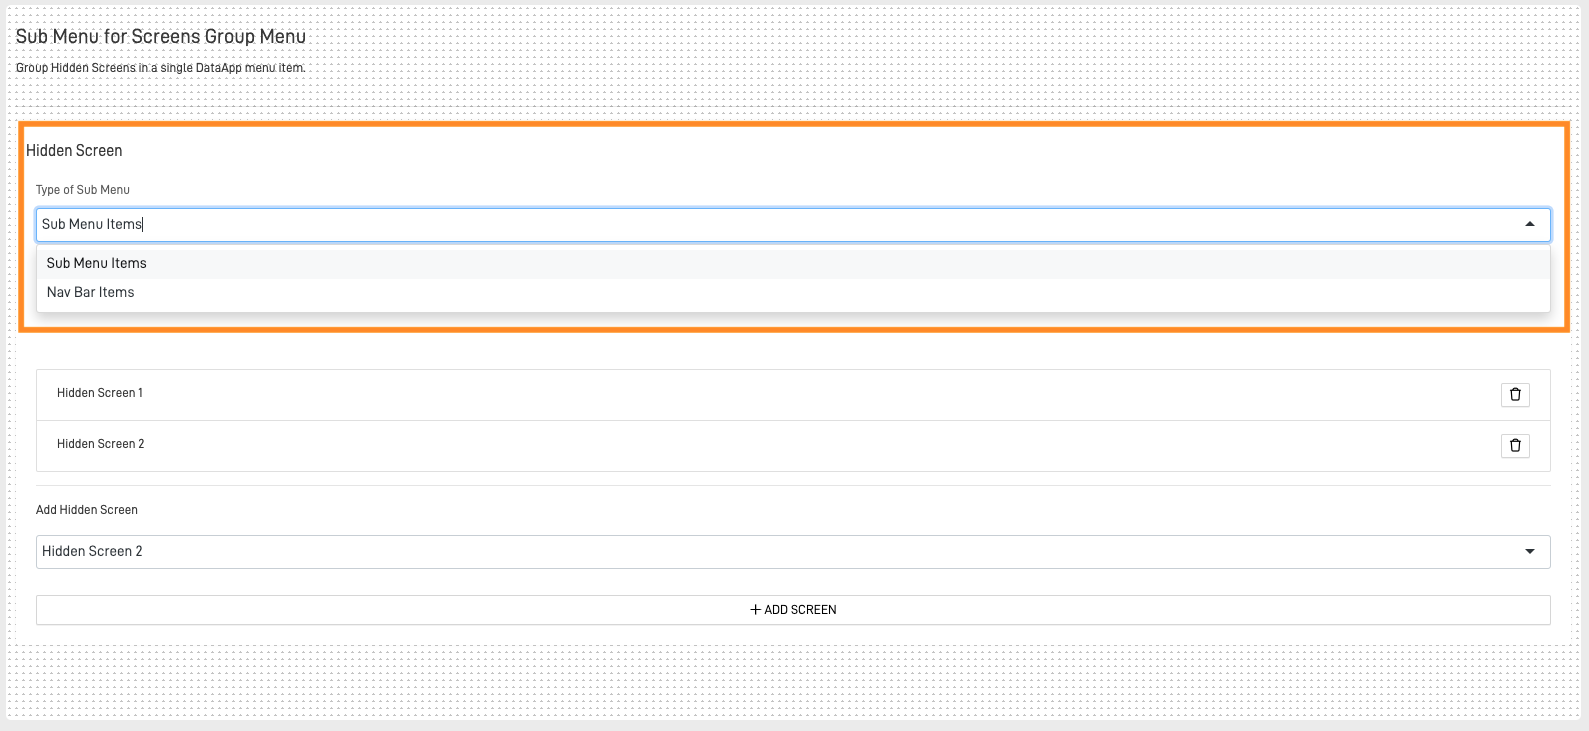
In this field we have 2 options of customization:
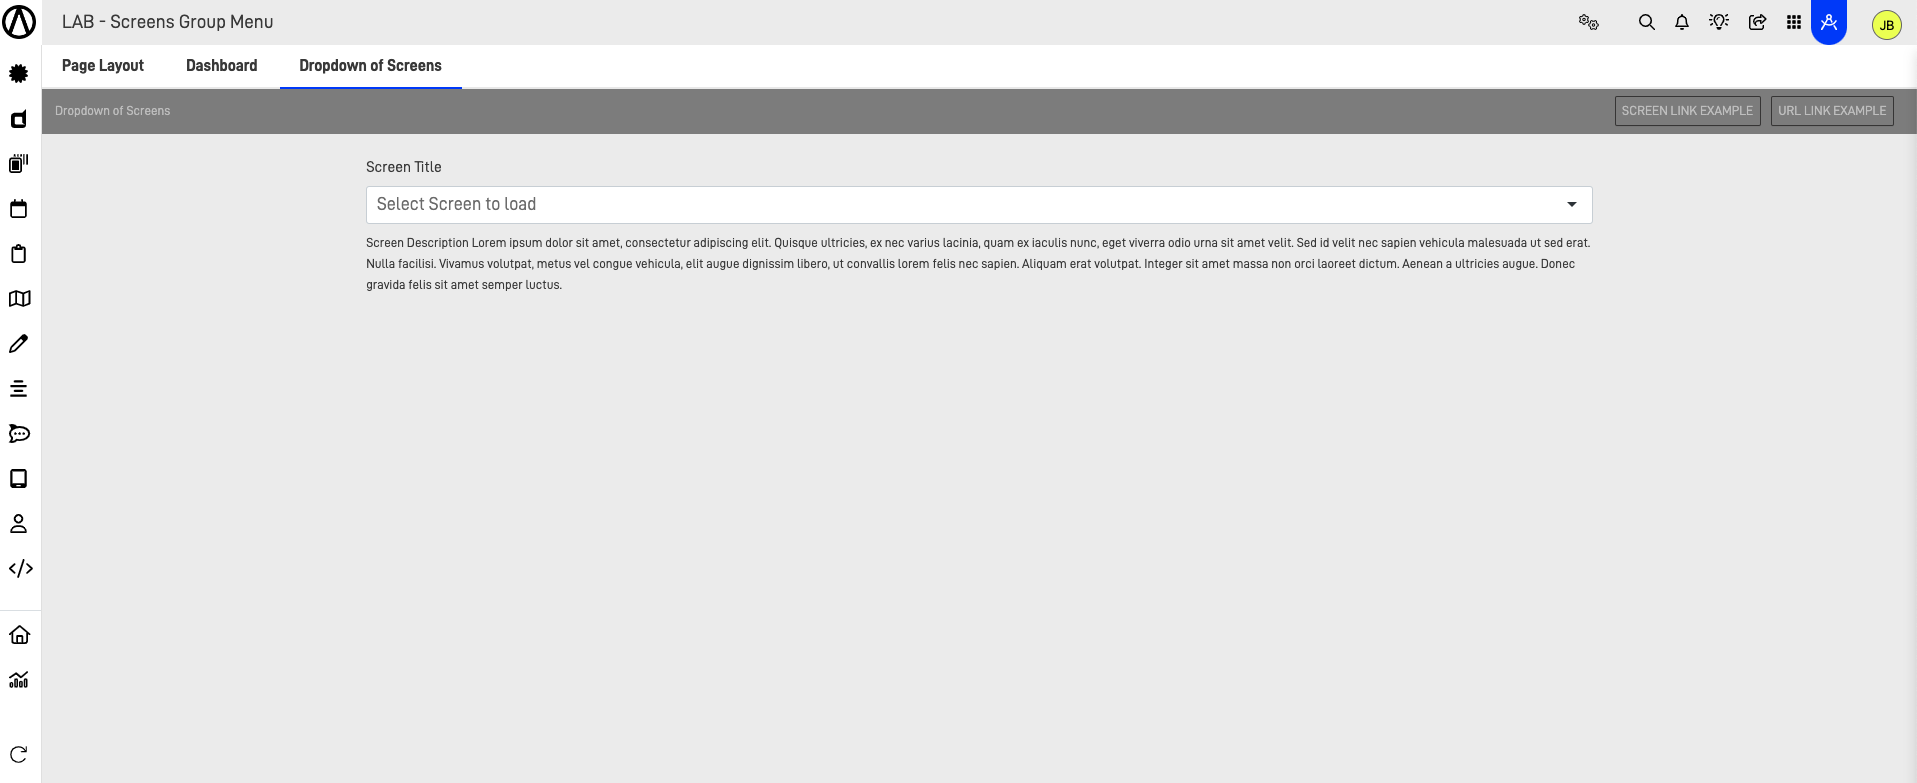
- Sub Menu Items: The default option, allows us to see the menu items next to each other in the header of the screen.
- Nav Bar Items: Allows to enable a rotation timer that will change the screen being shown after an established time period .

Step 3: Preview your Menu
Lastly, preview the screen group menu to ensure it is working as intended. First, save your progress by clicking the "SAVE" button in the top right corner. After saving, click on the arrow icon next to the "SAVE" button. This will open a dropdown menu where you can select the "Preview App" option to review your form.
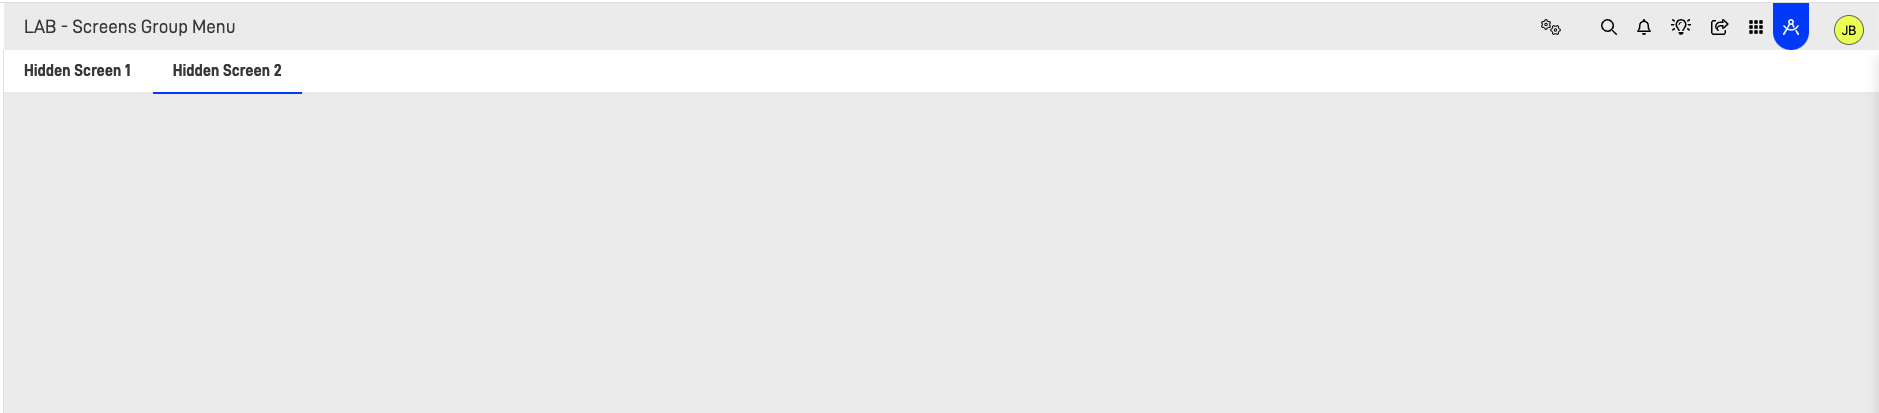
As you can see there are the screen we add, and every 10 seconds the application will change the screen the menu is showing.