
How-To: Build a Configurable Object in Arpia Workshop (0 → Functional)
🚀 Workshop Config Demo — Foolproof Step-by-Step Guide
This guide shows you exactly how to create a configurable object in Arpia Workshop that:
- Uses PHP for backend execution
- Lets users configure options via config.html
- Saves settings in config.json (automatically created)
- Runs the code with those settings in index.php
1️⃣ Create a Workshop Project
- Go to Arpia Workshop.
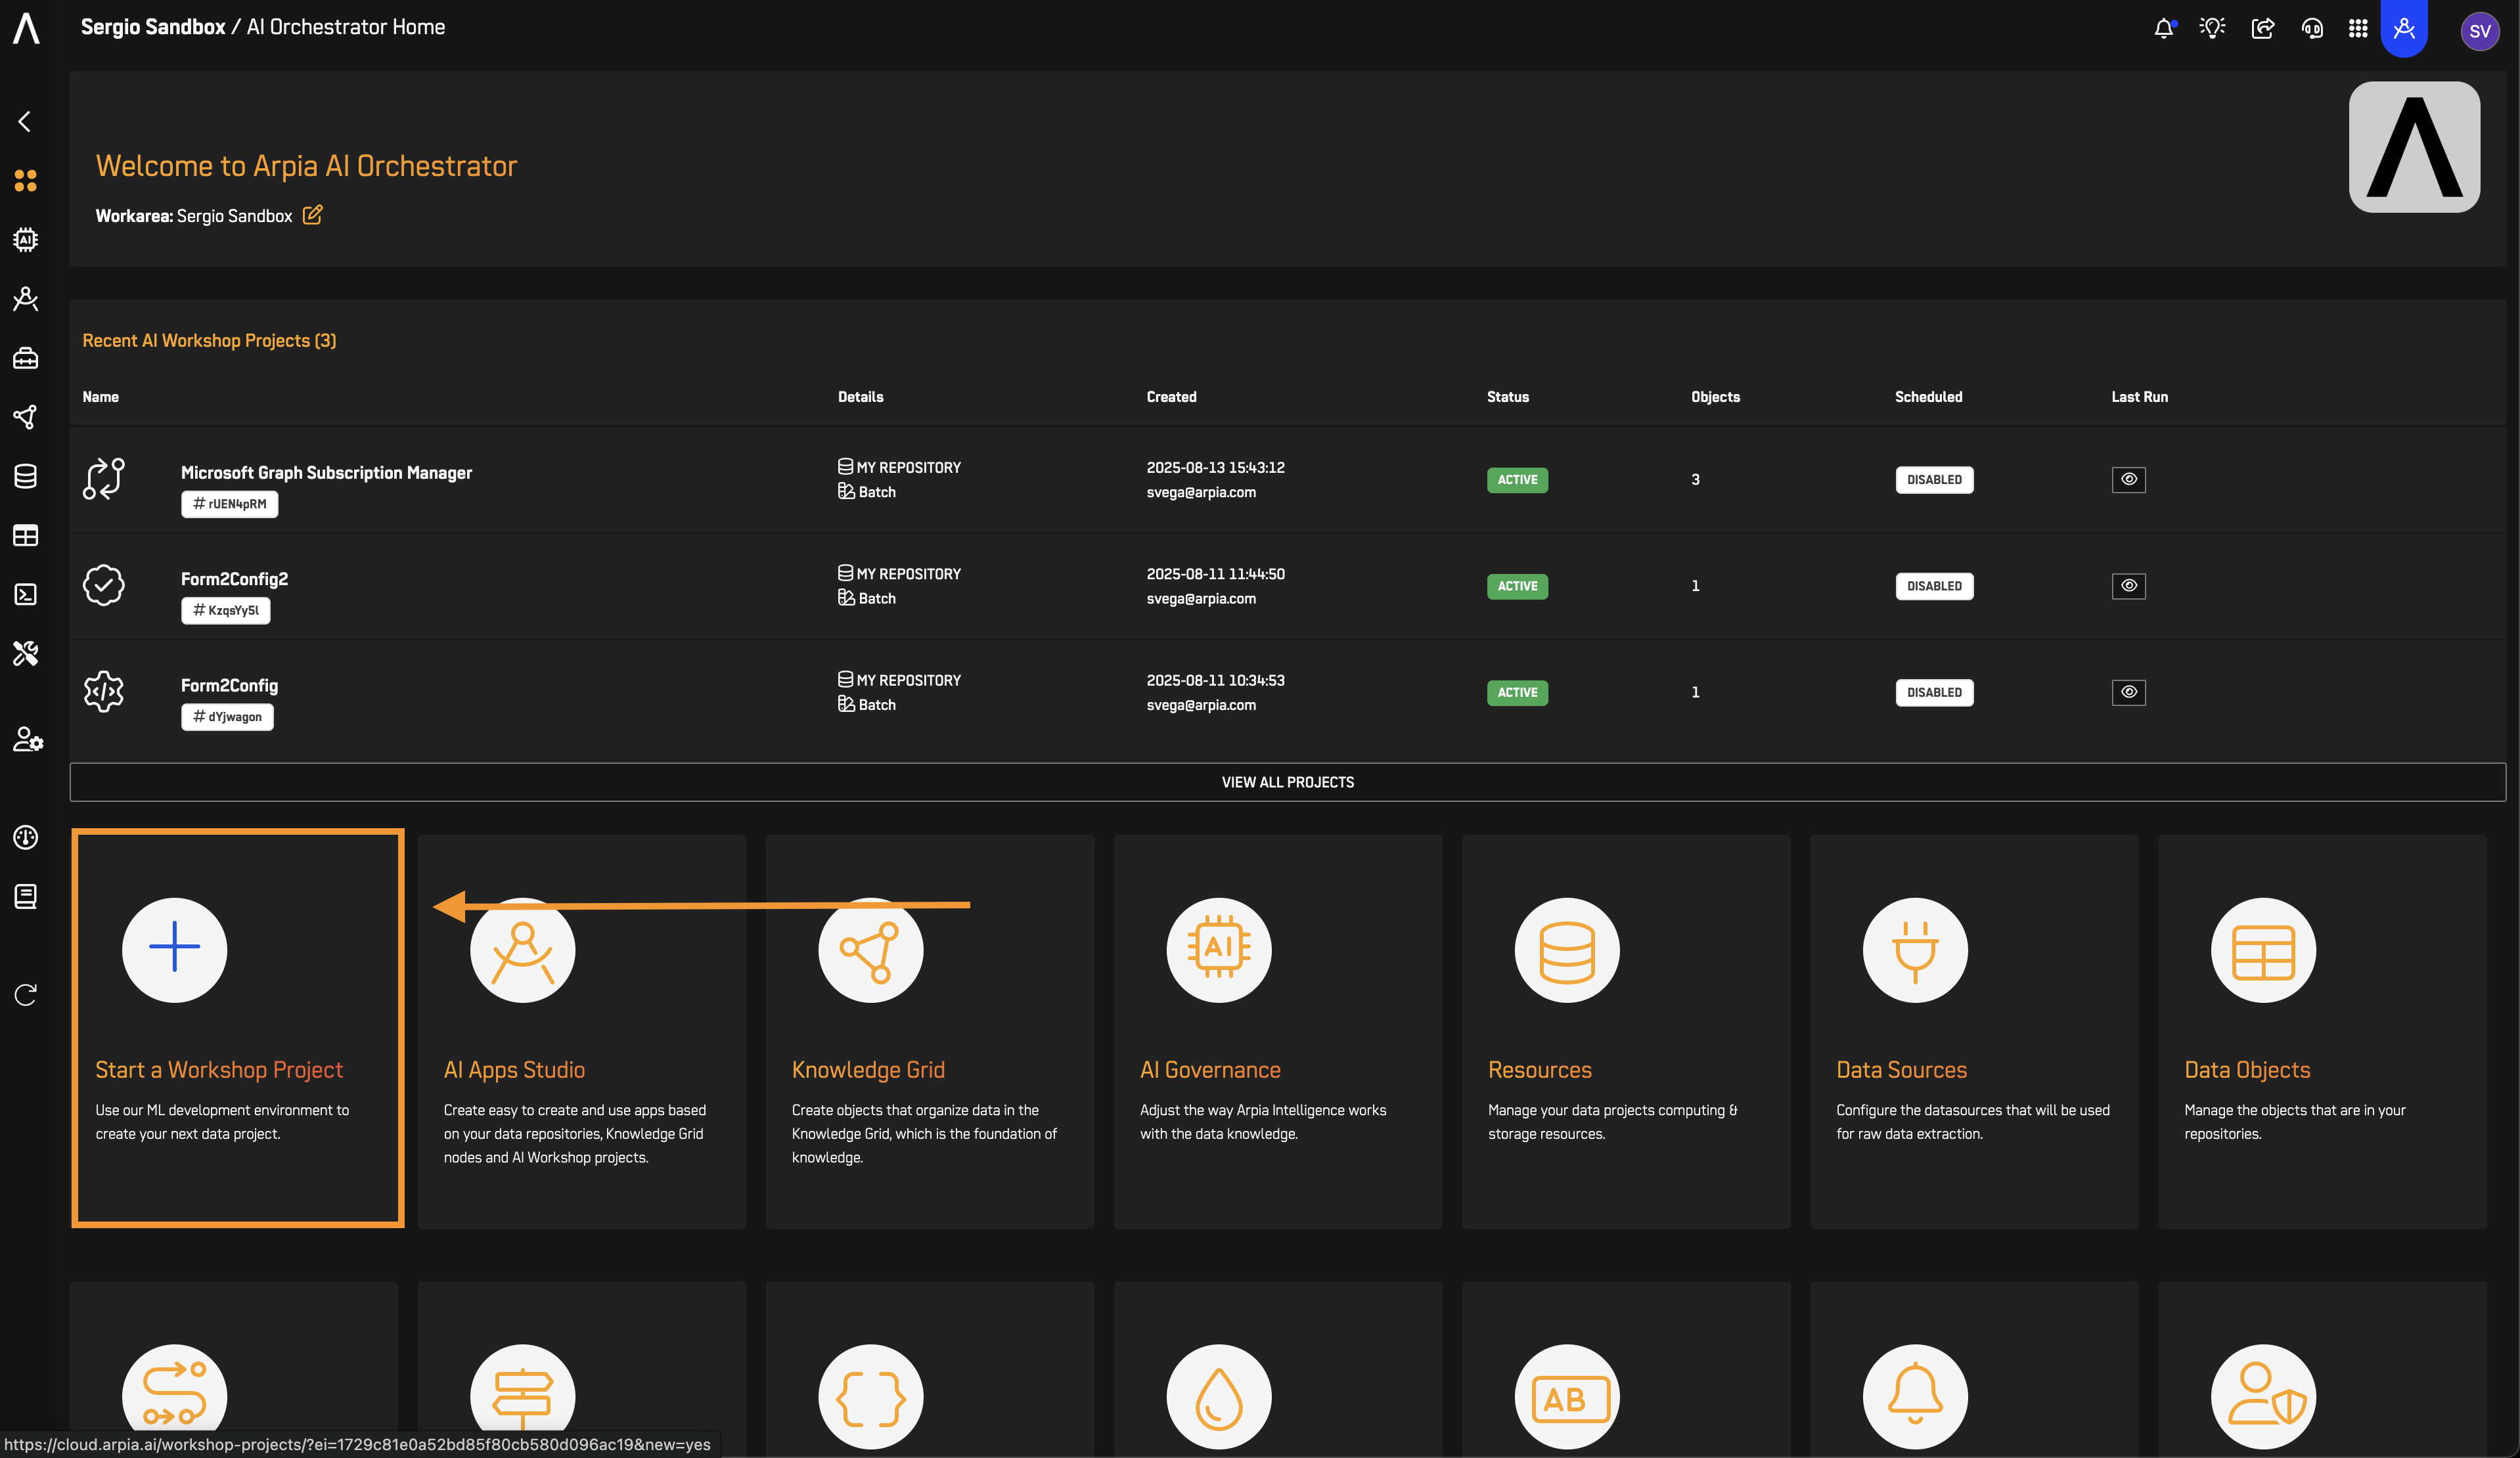
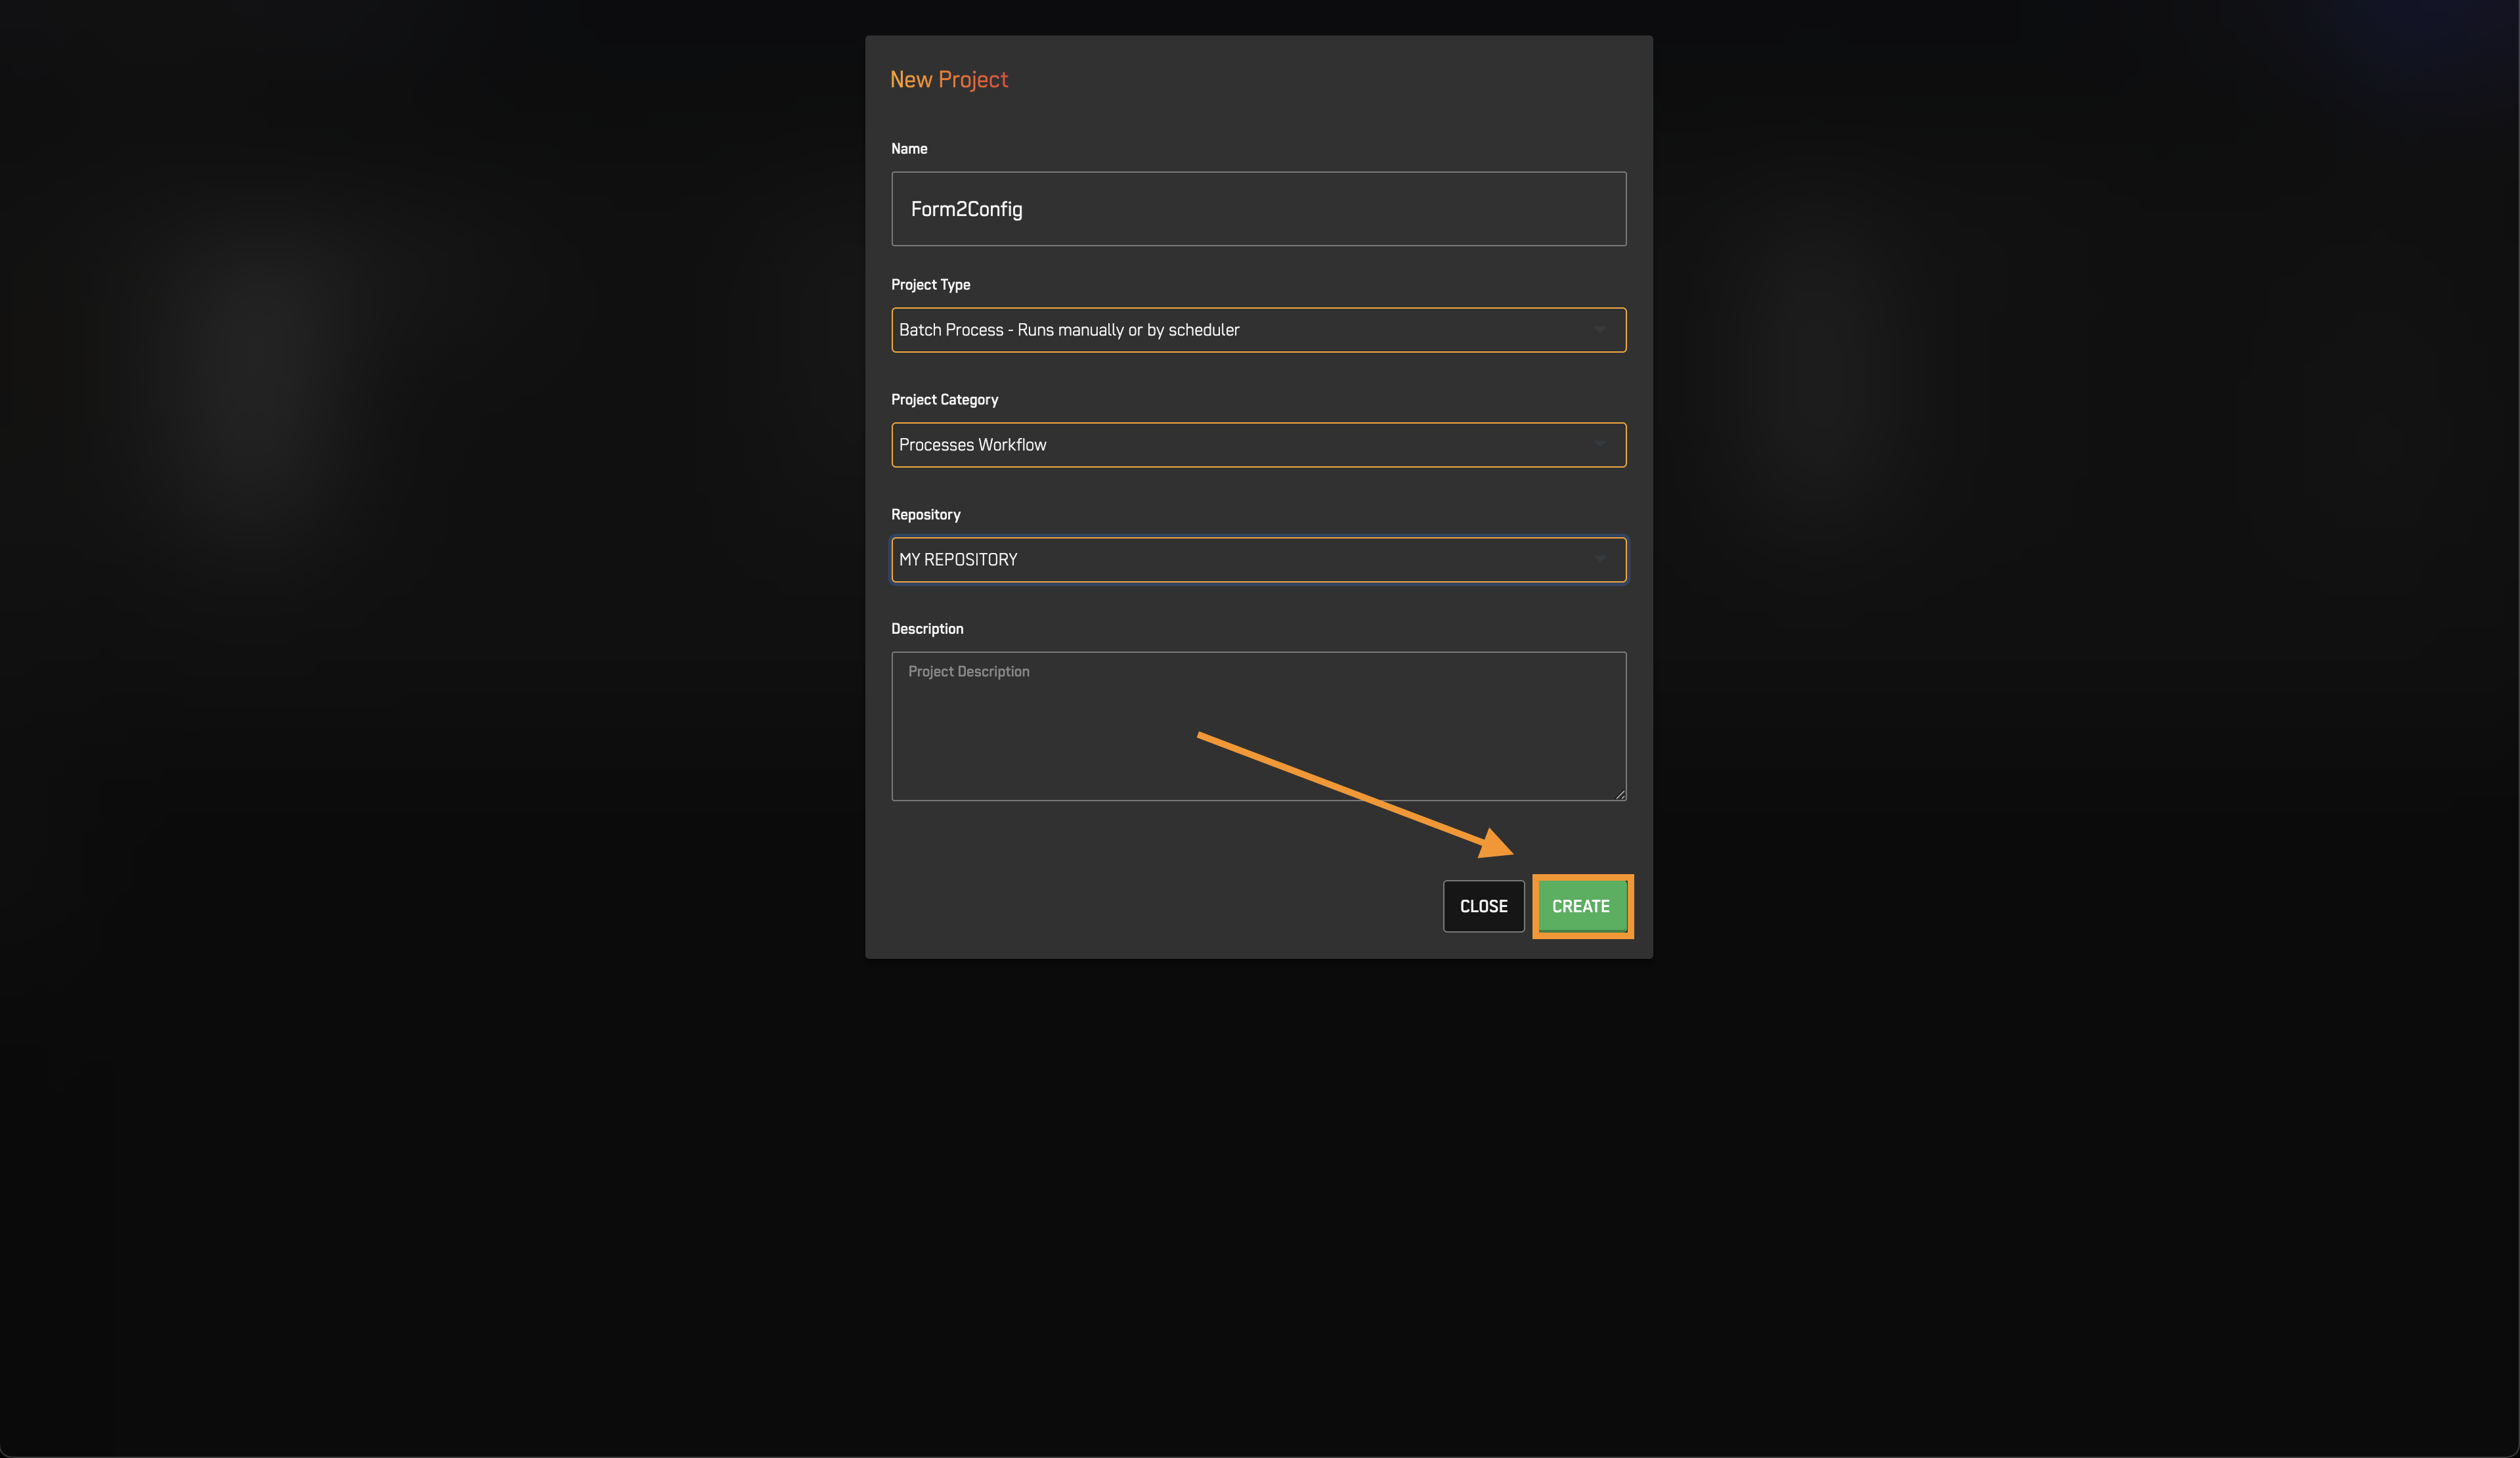
- Fill New Project form:
-
Project Name: Form2Config
-
Project Type: Batch Process - Runs manually or by scheduler
-
Category: Processes Workflow
-
Repository:
-
Select an existing repository from your list.
If you don’t have one yet, follow this guide:
📄 How to Create a Data Repository -
Description: (Optional — leave blank if you want)
-
Press Create.
- Press OK when prompted.
-

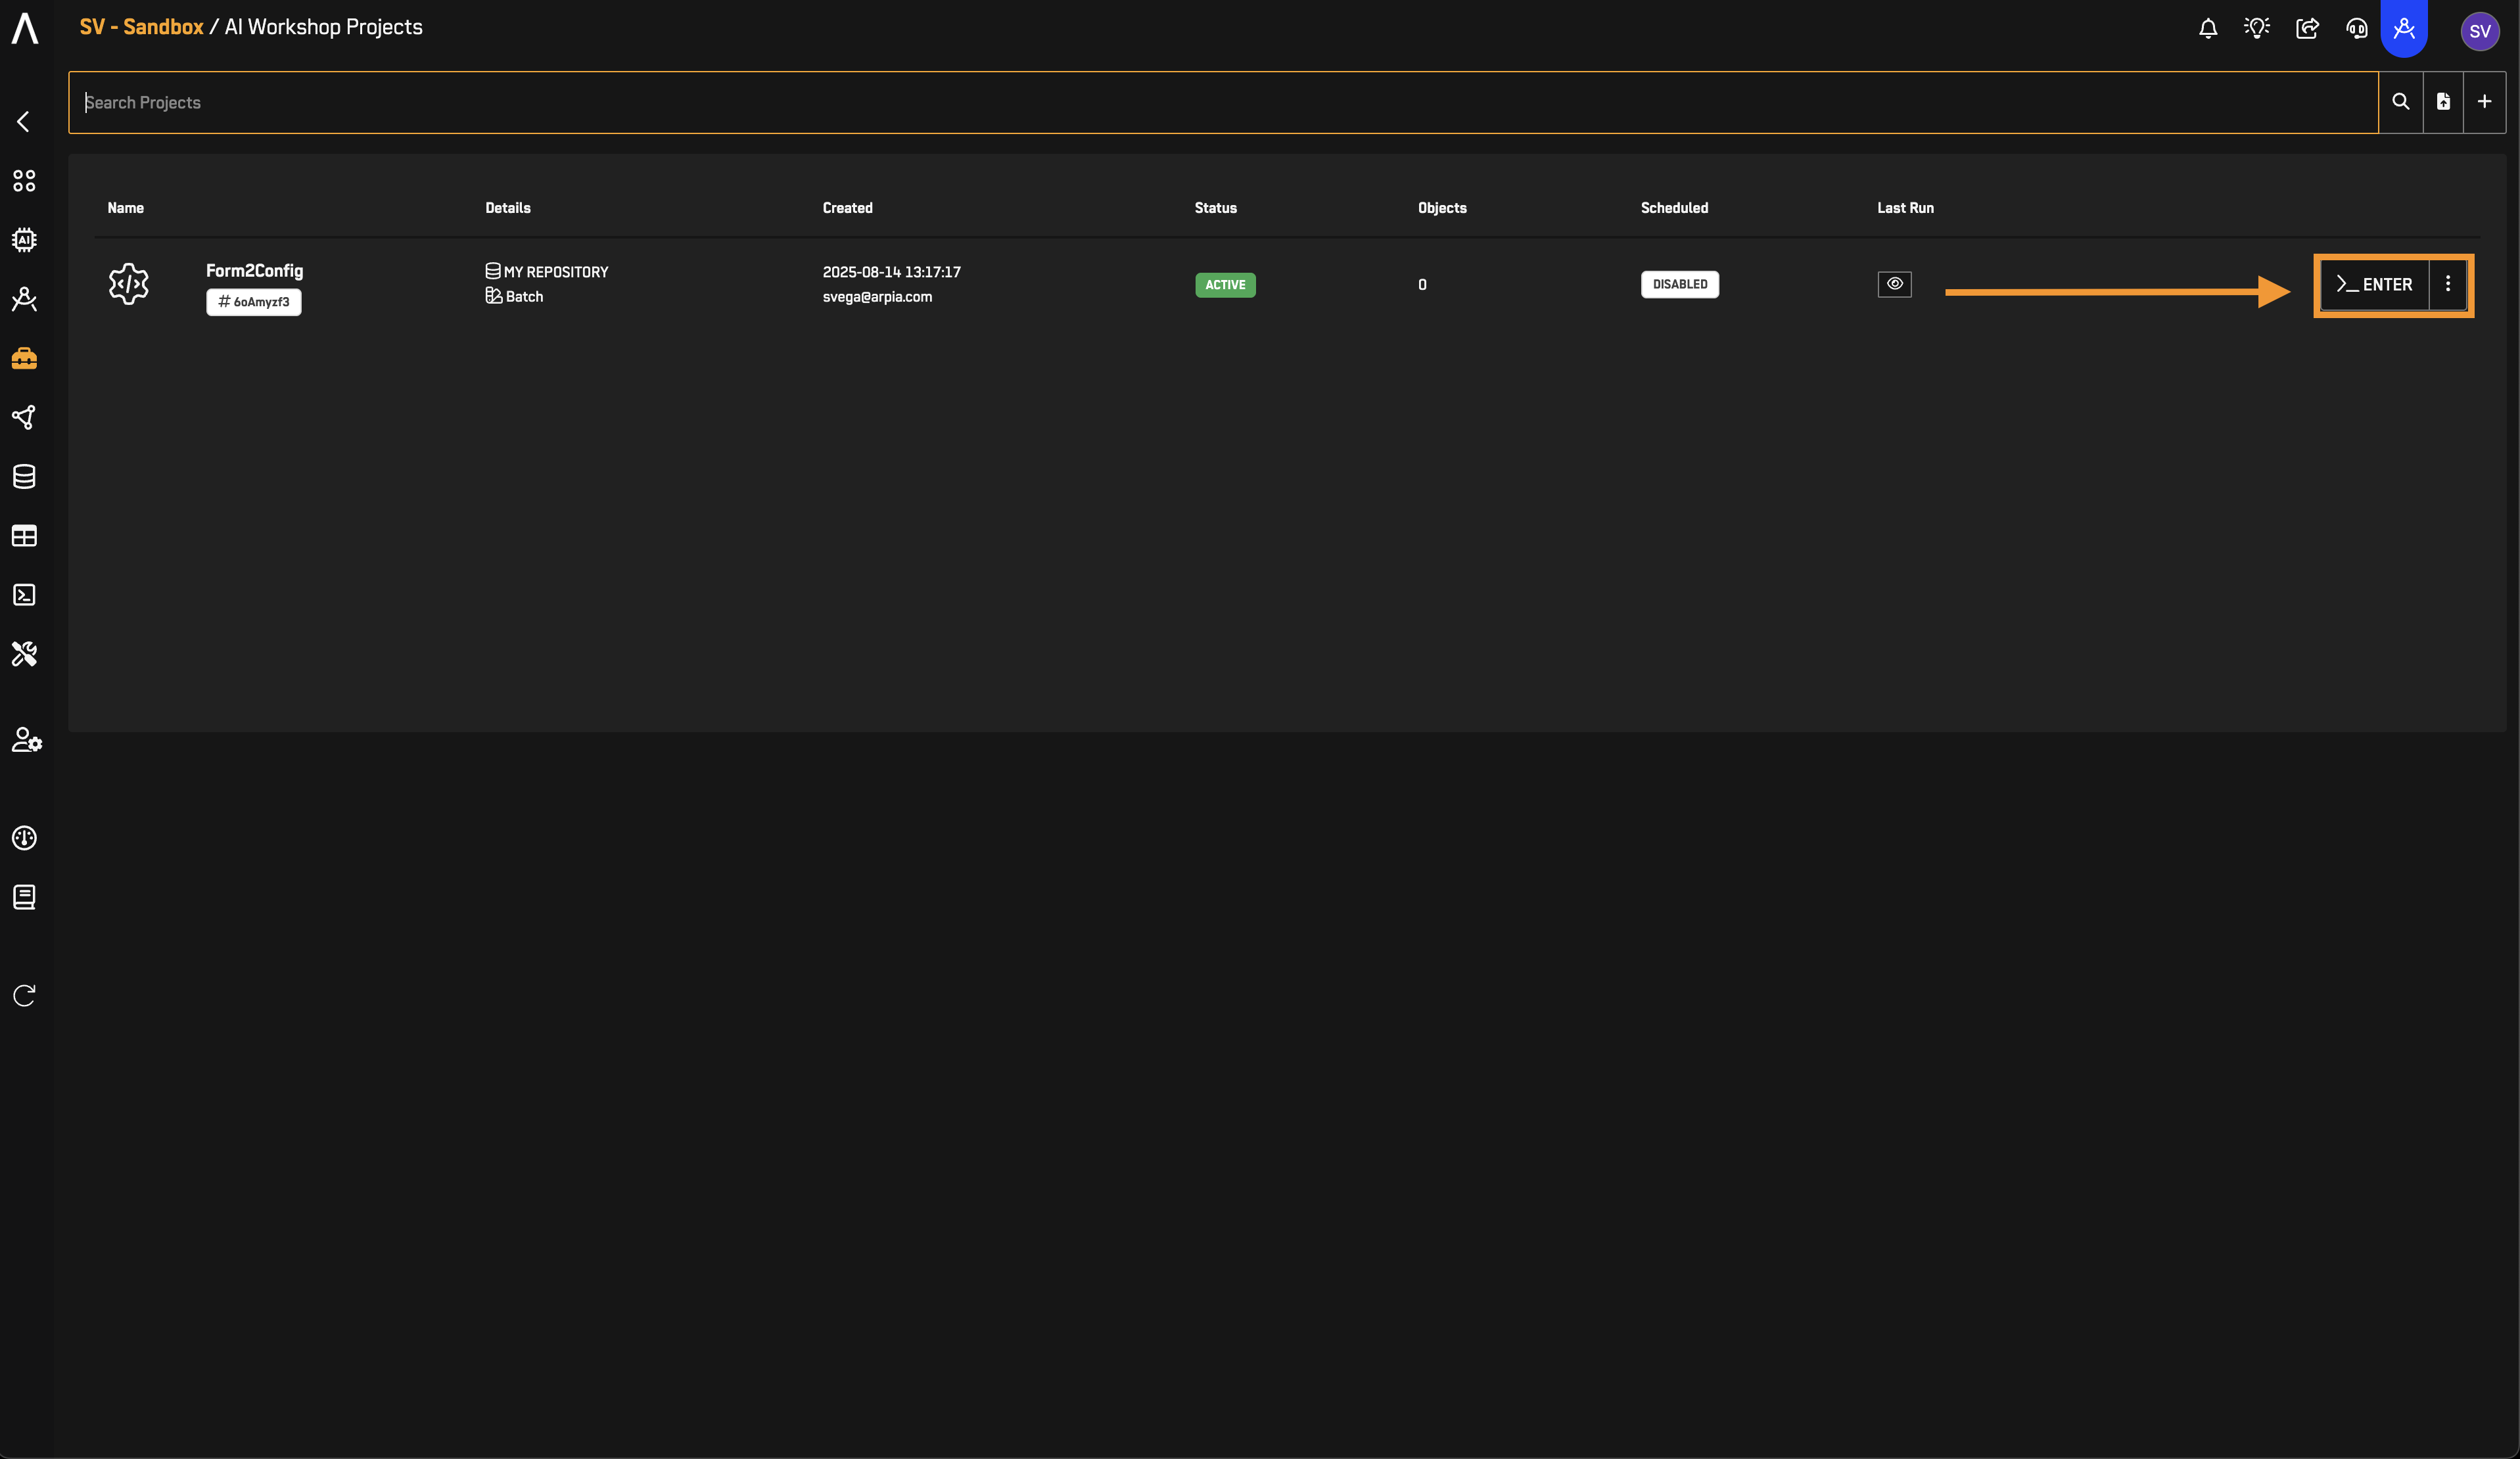
✅ Checkpoint: You should now see your new project in the AI Workshop Projects Screen.
2️⃣ Create a Workshop Object
- Click on Enter to access the Workshop Project you just created.
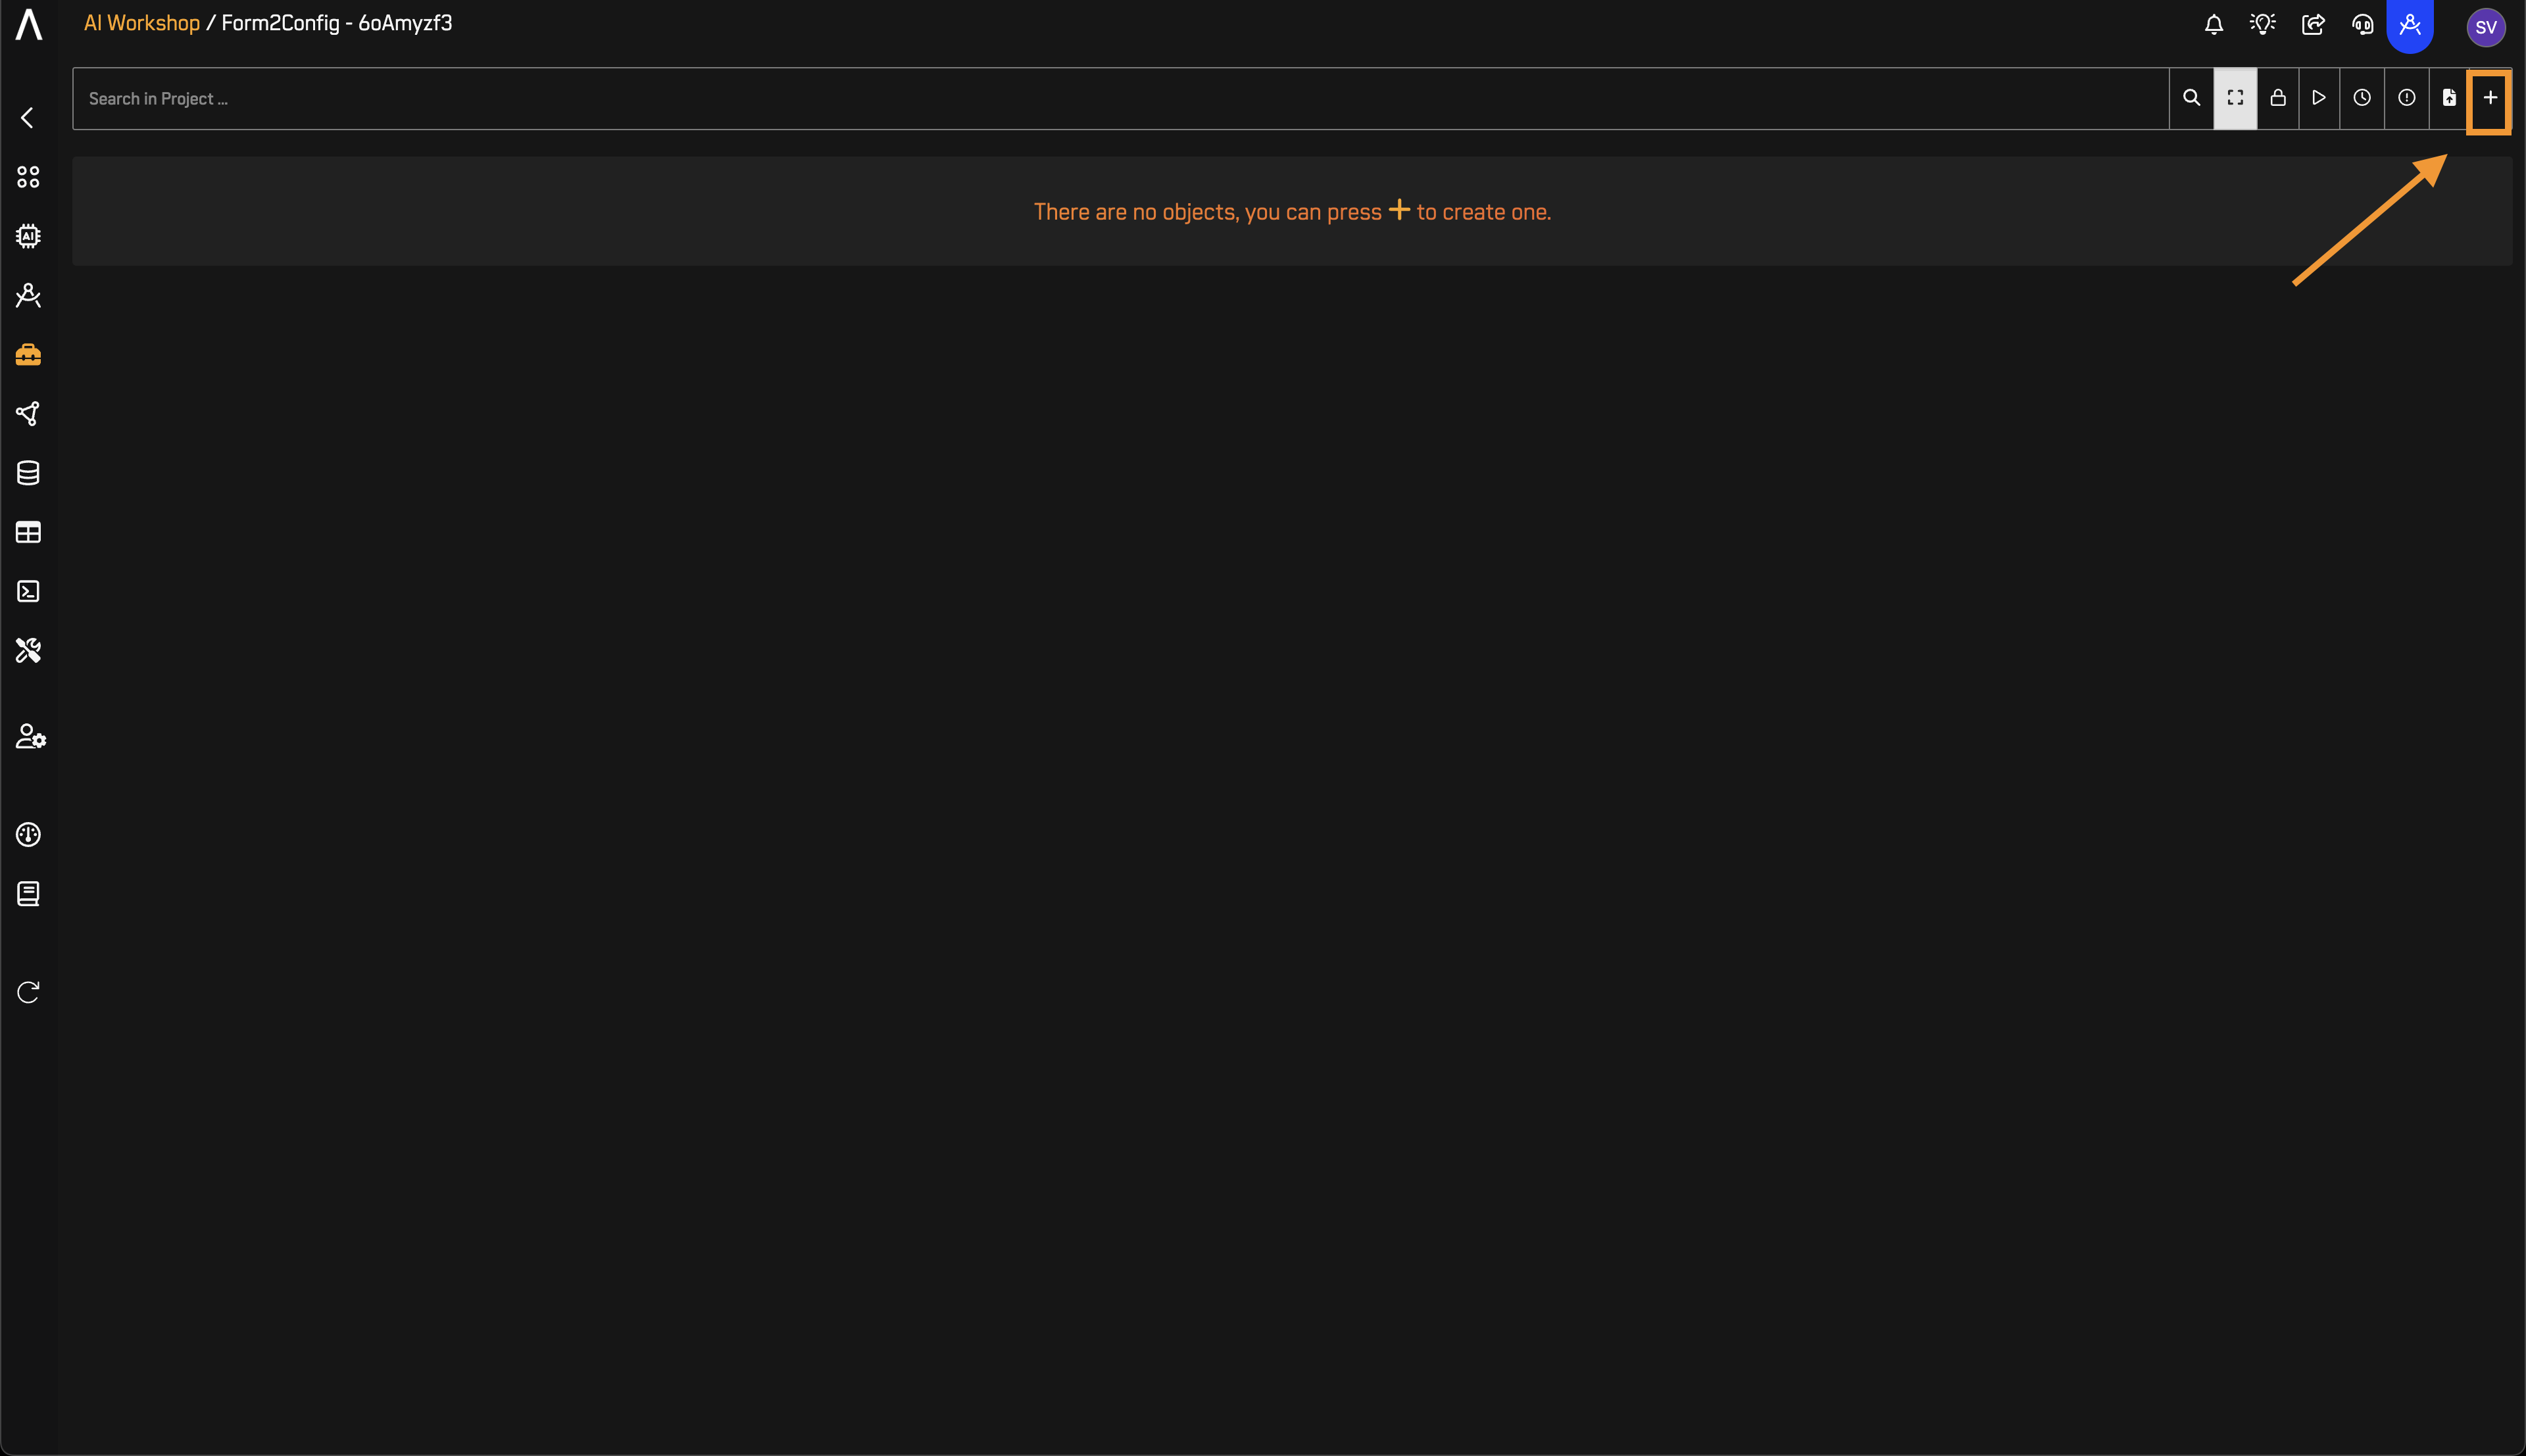
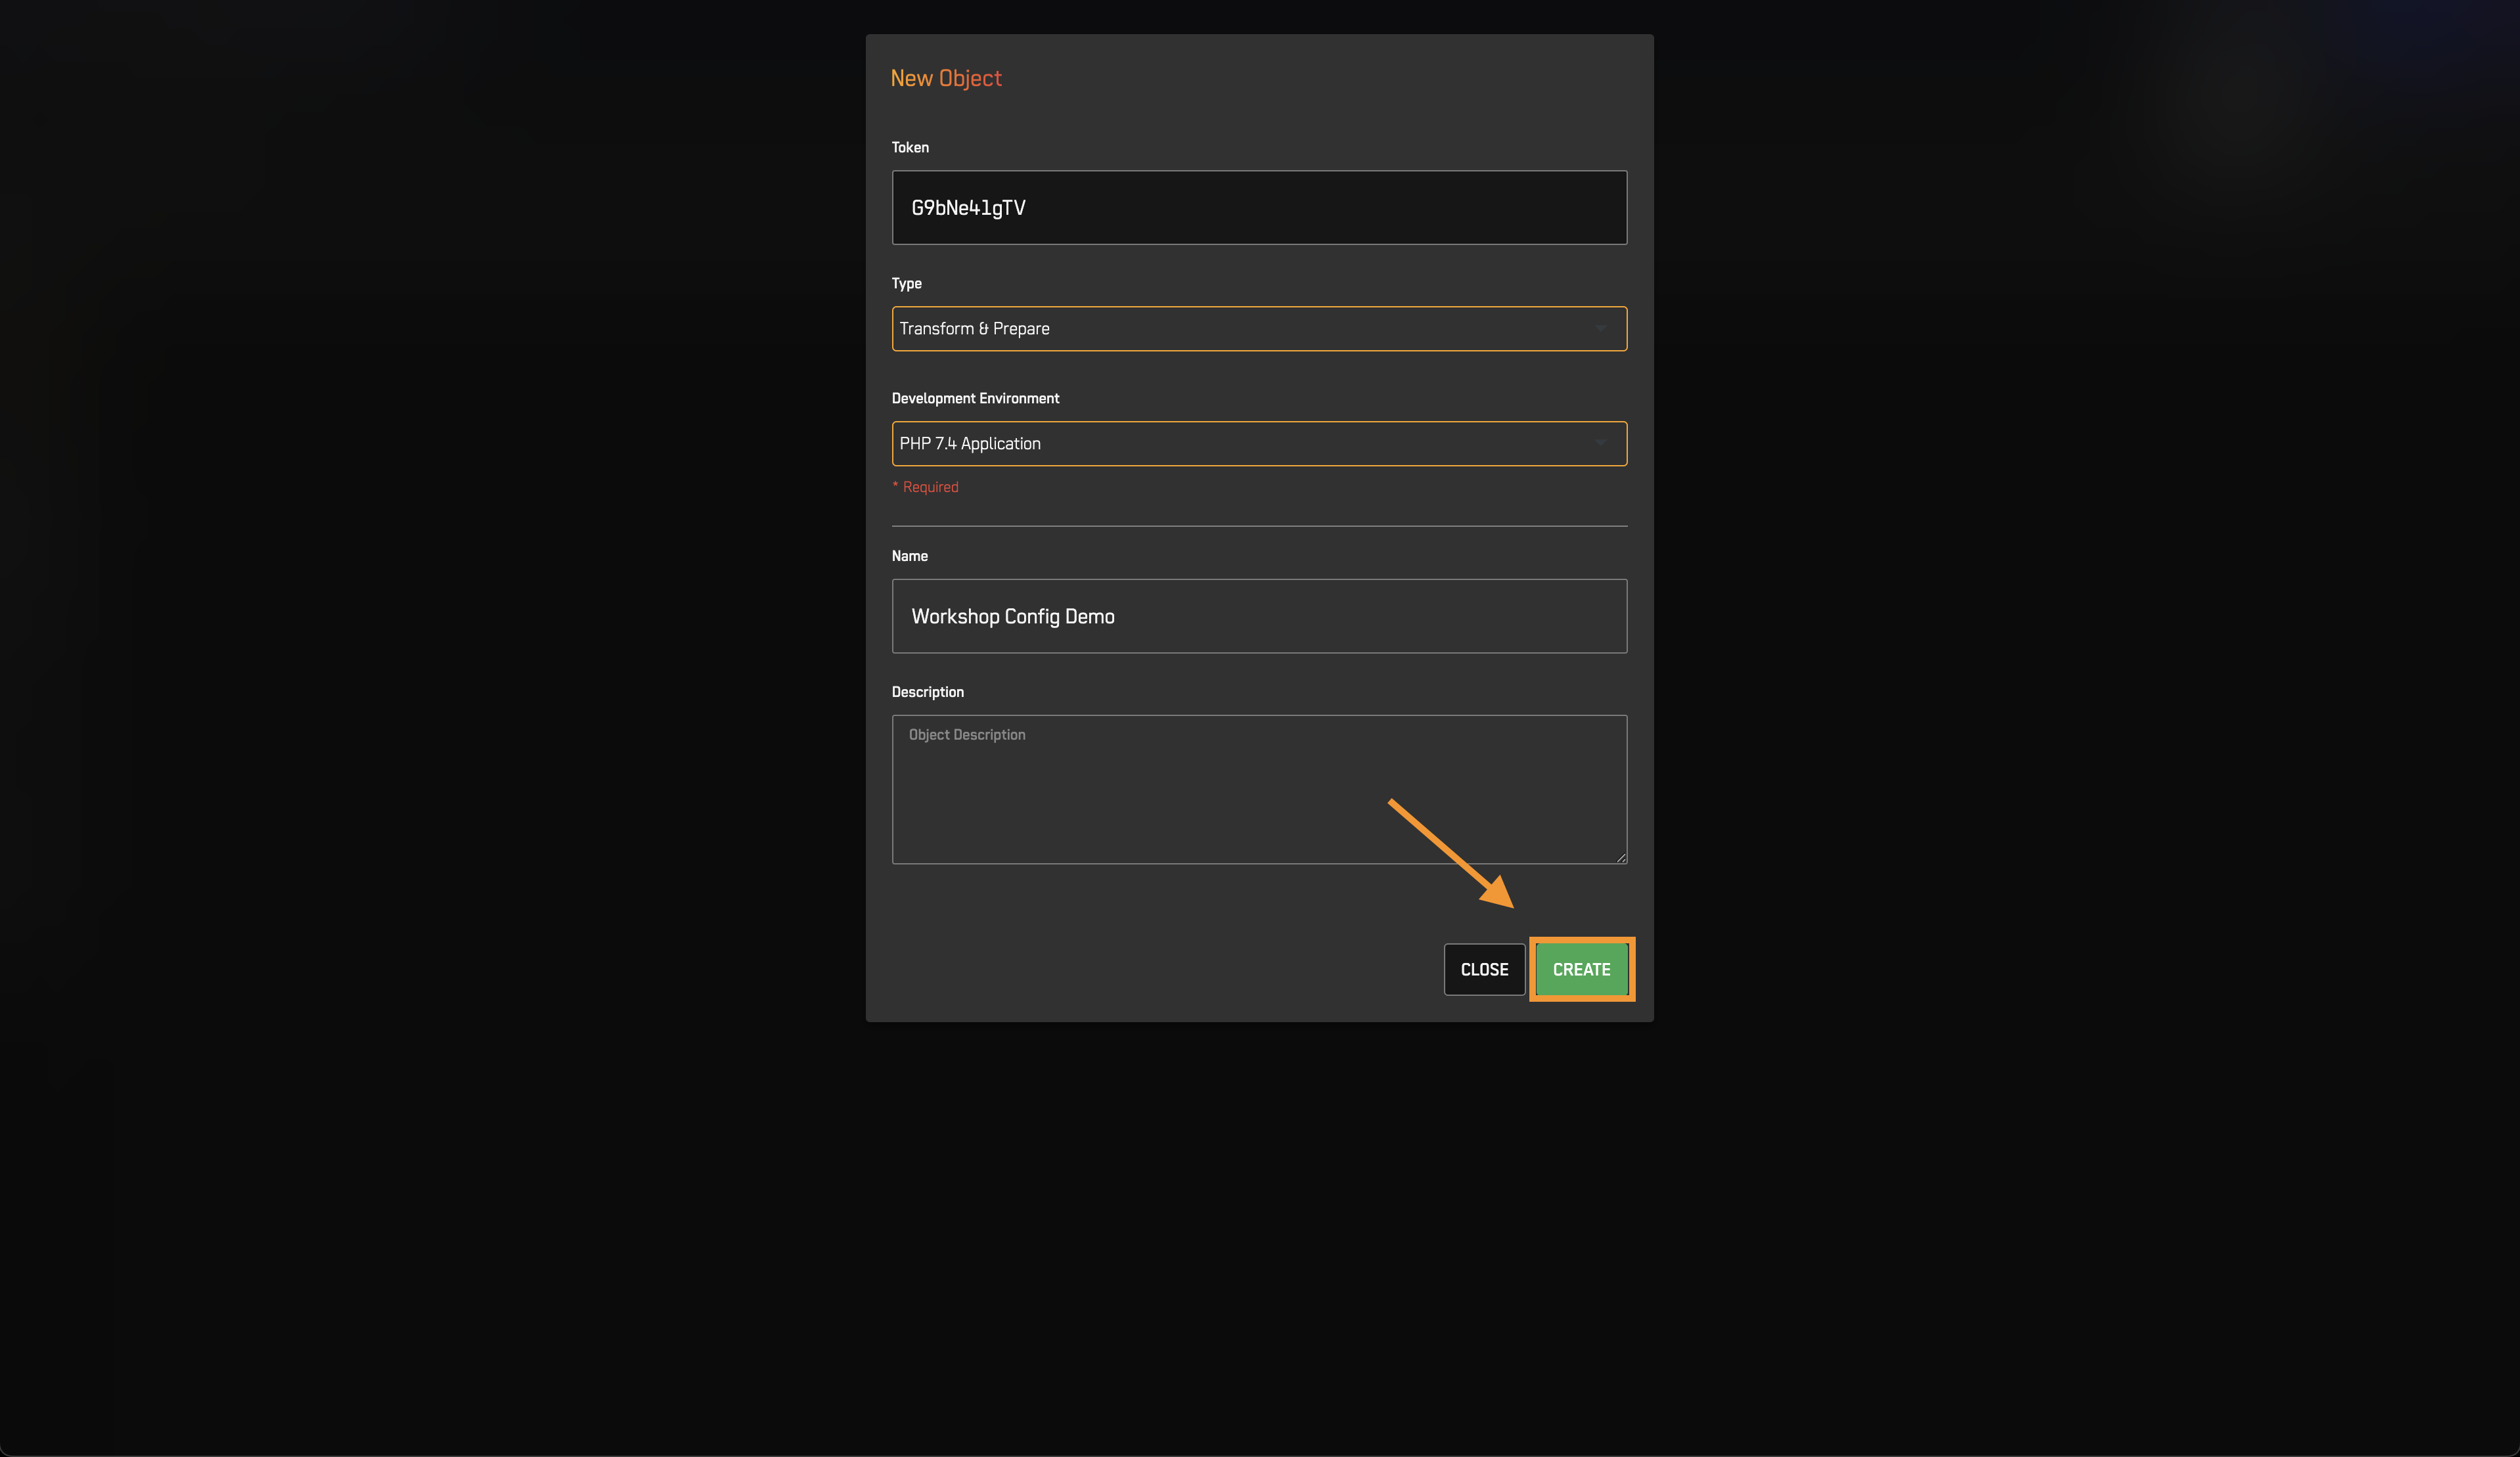
- Inside the Workshop Project Screen, click New Object.
- Fill the New object form
- Type: Transform & Prepare
- Development Environment: PHP 7.4 Application
- Name: Workshop Config Demo
- Description: (Optional)
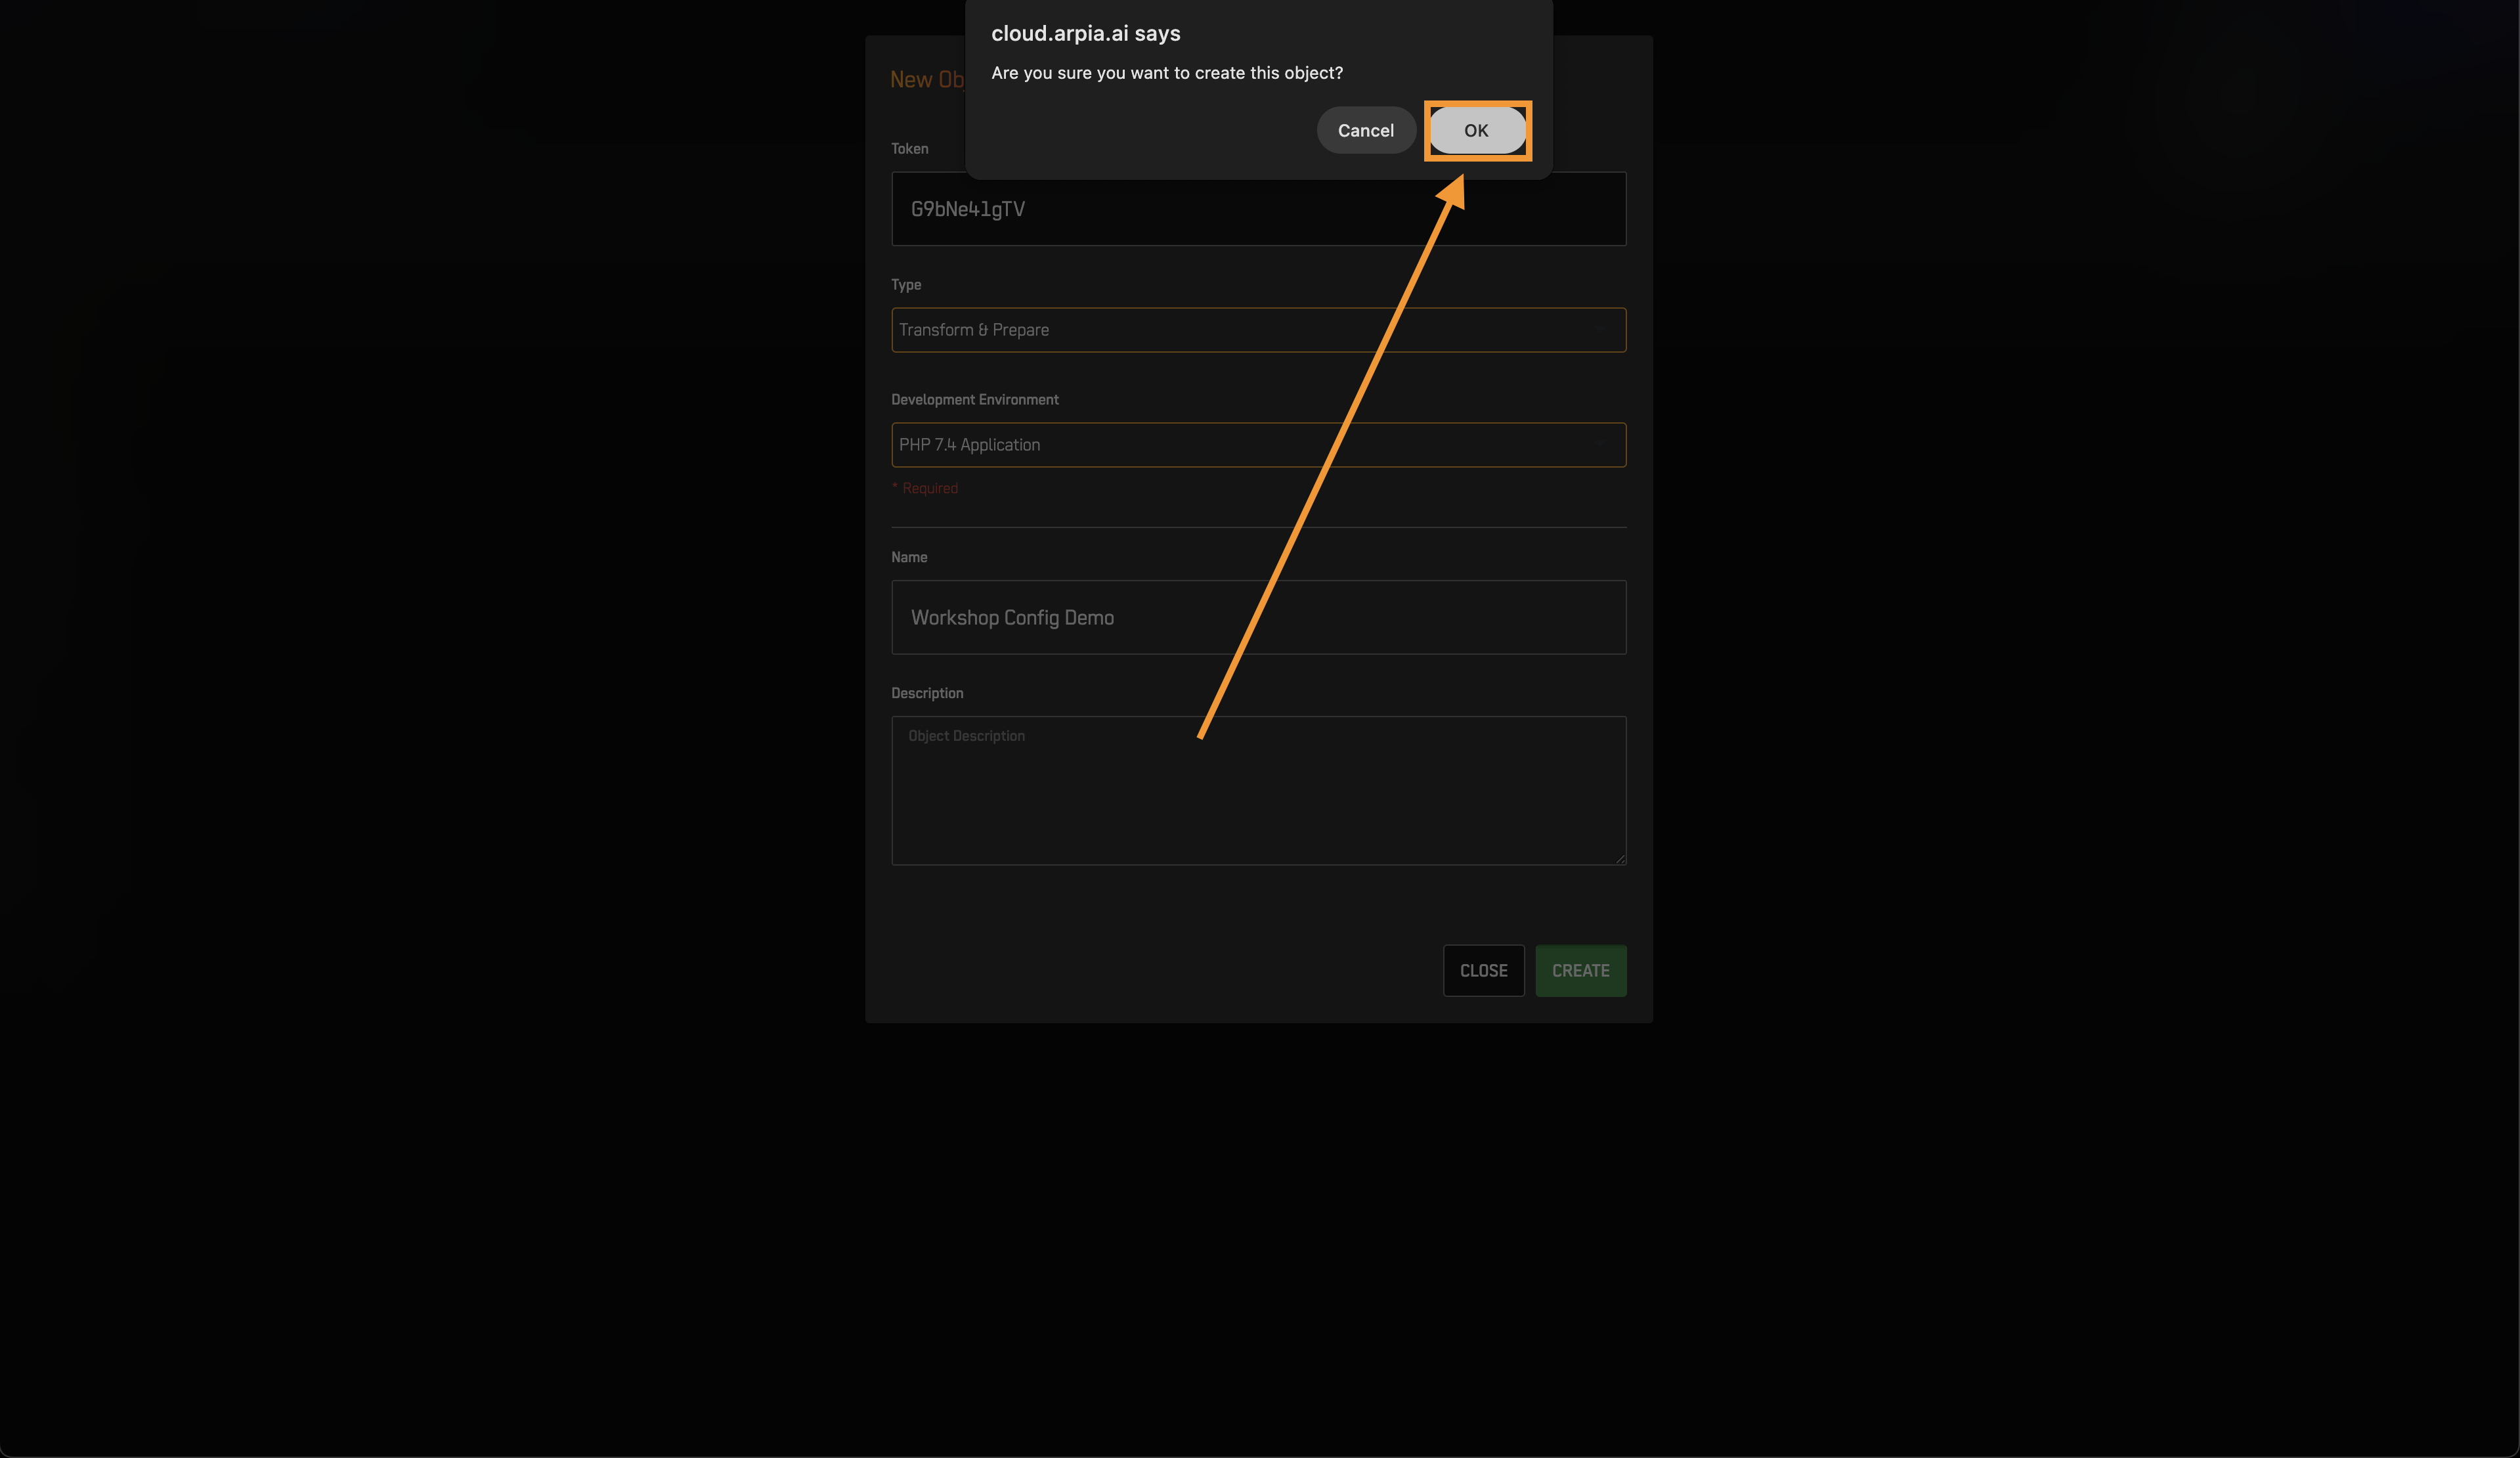
- Press Create.
- Press Ok on pop up.
- Your Workshop Object screen will apear.
3️⃣ Create config.html
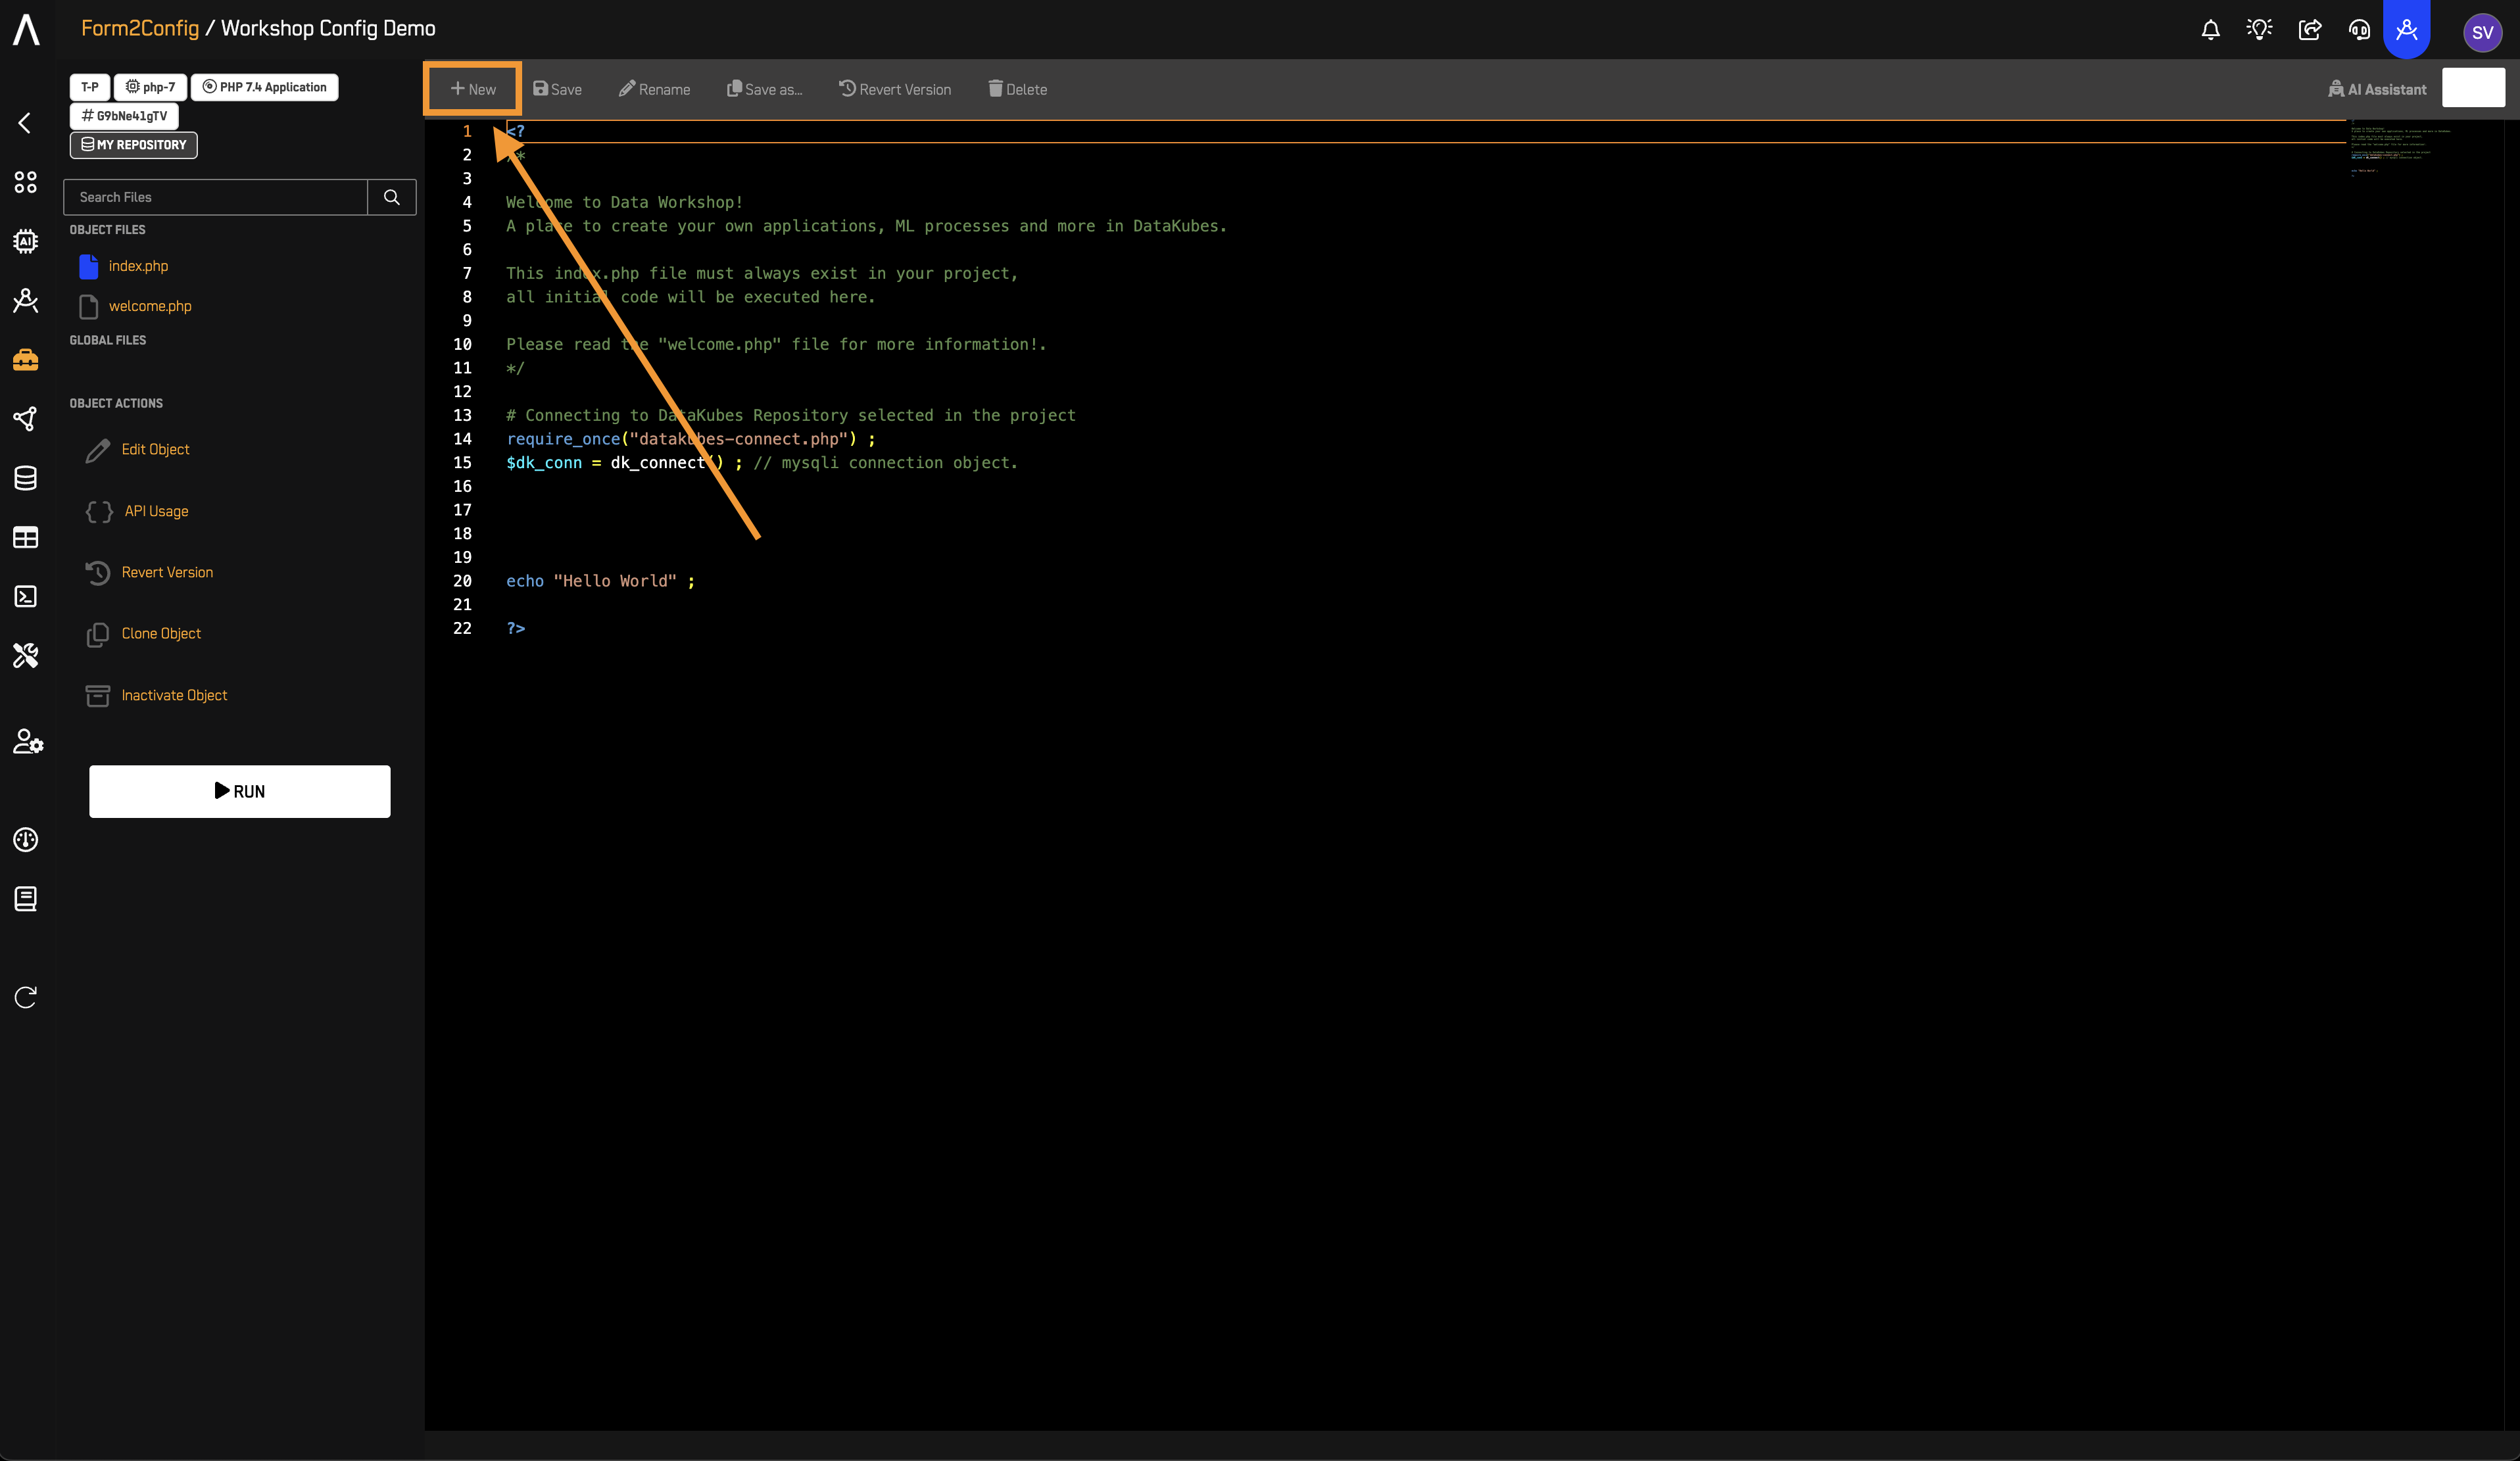
- In the object screen, click New File.
- File name: config.html
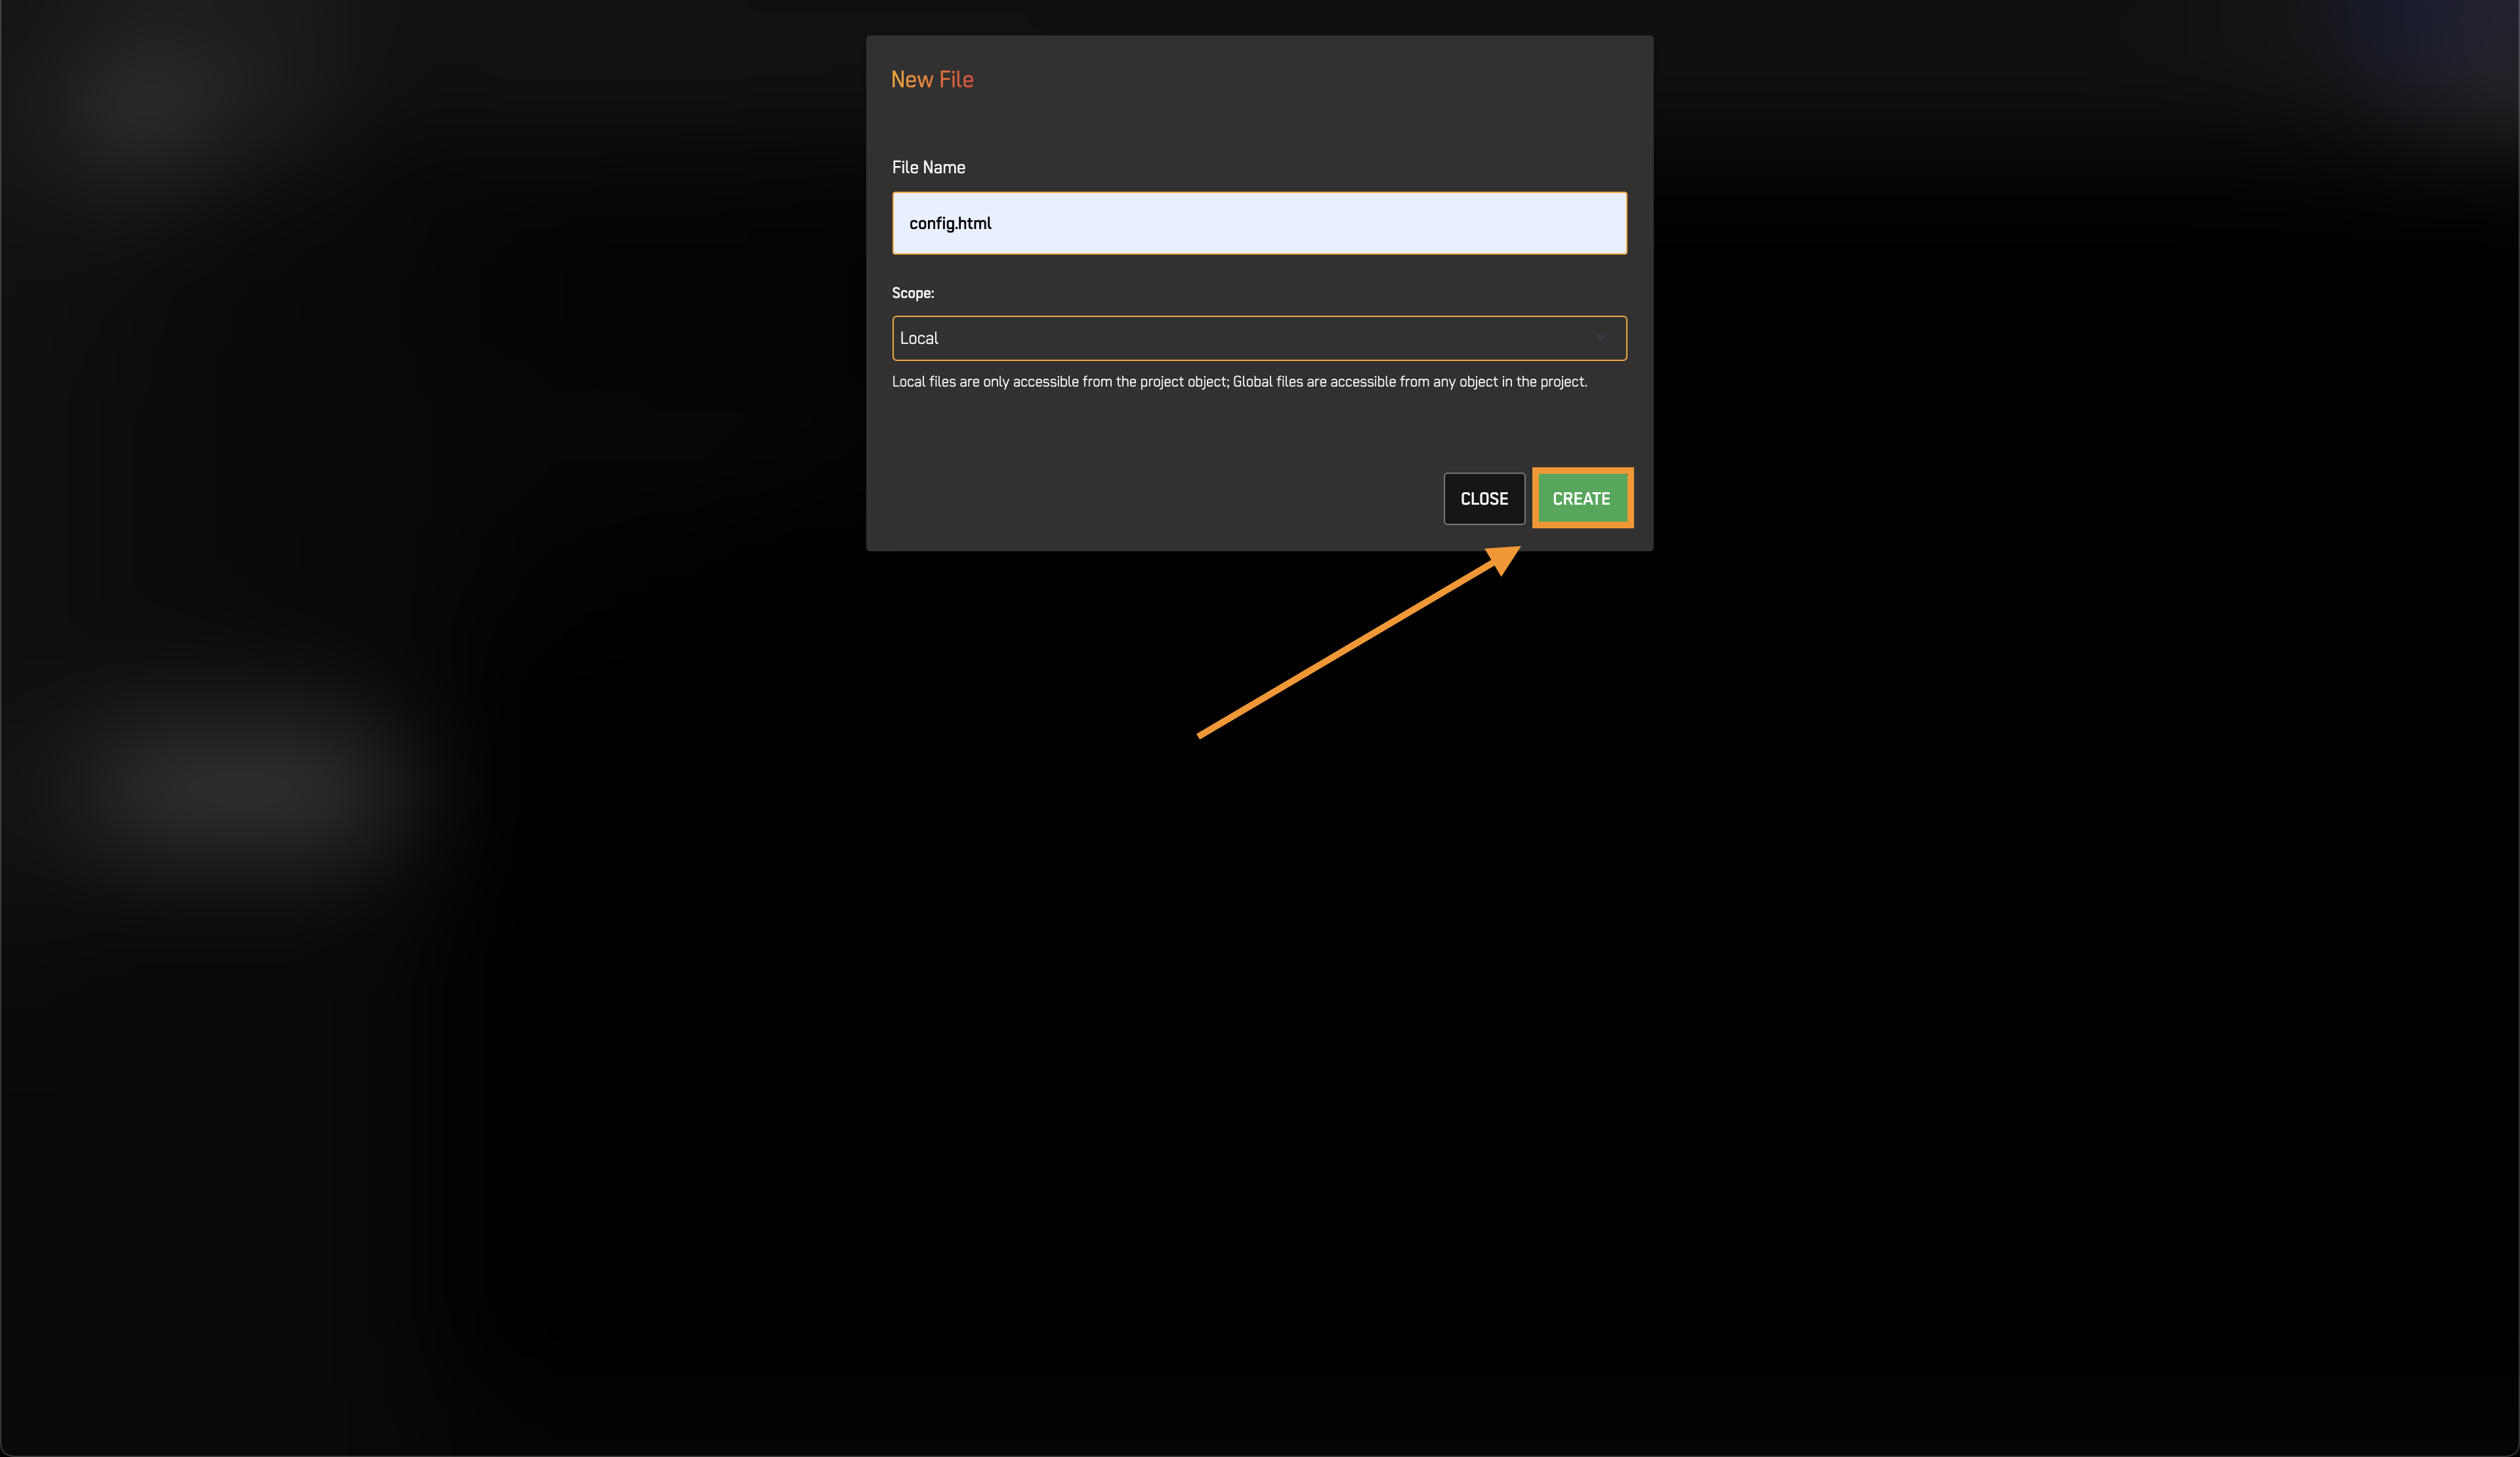
- Scope: Local
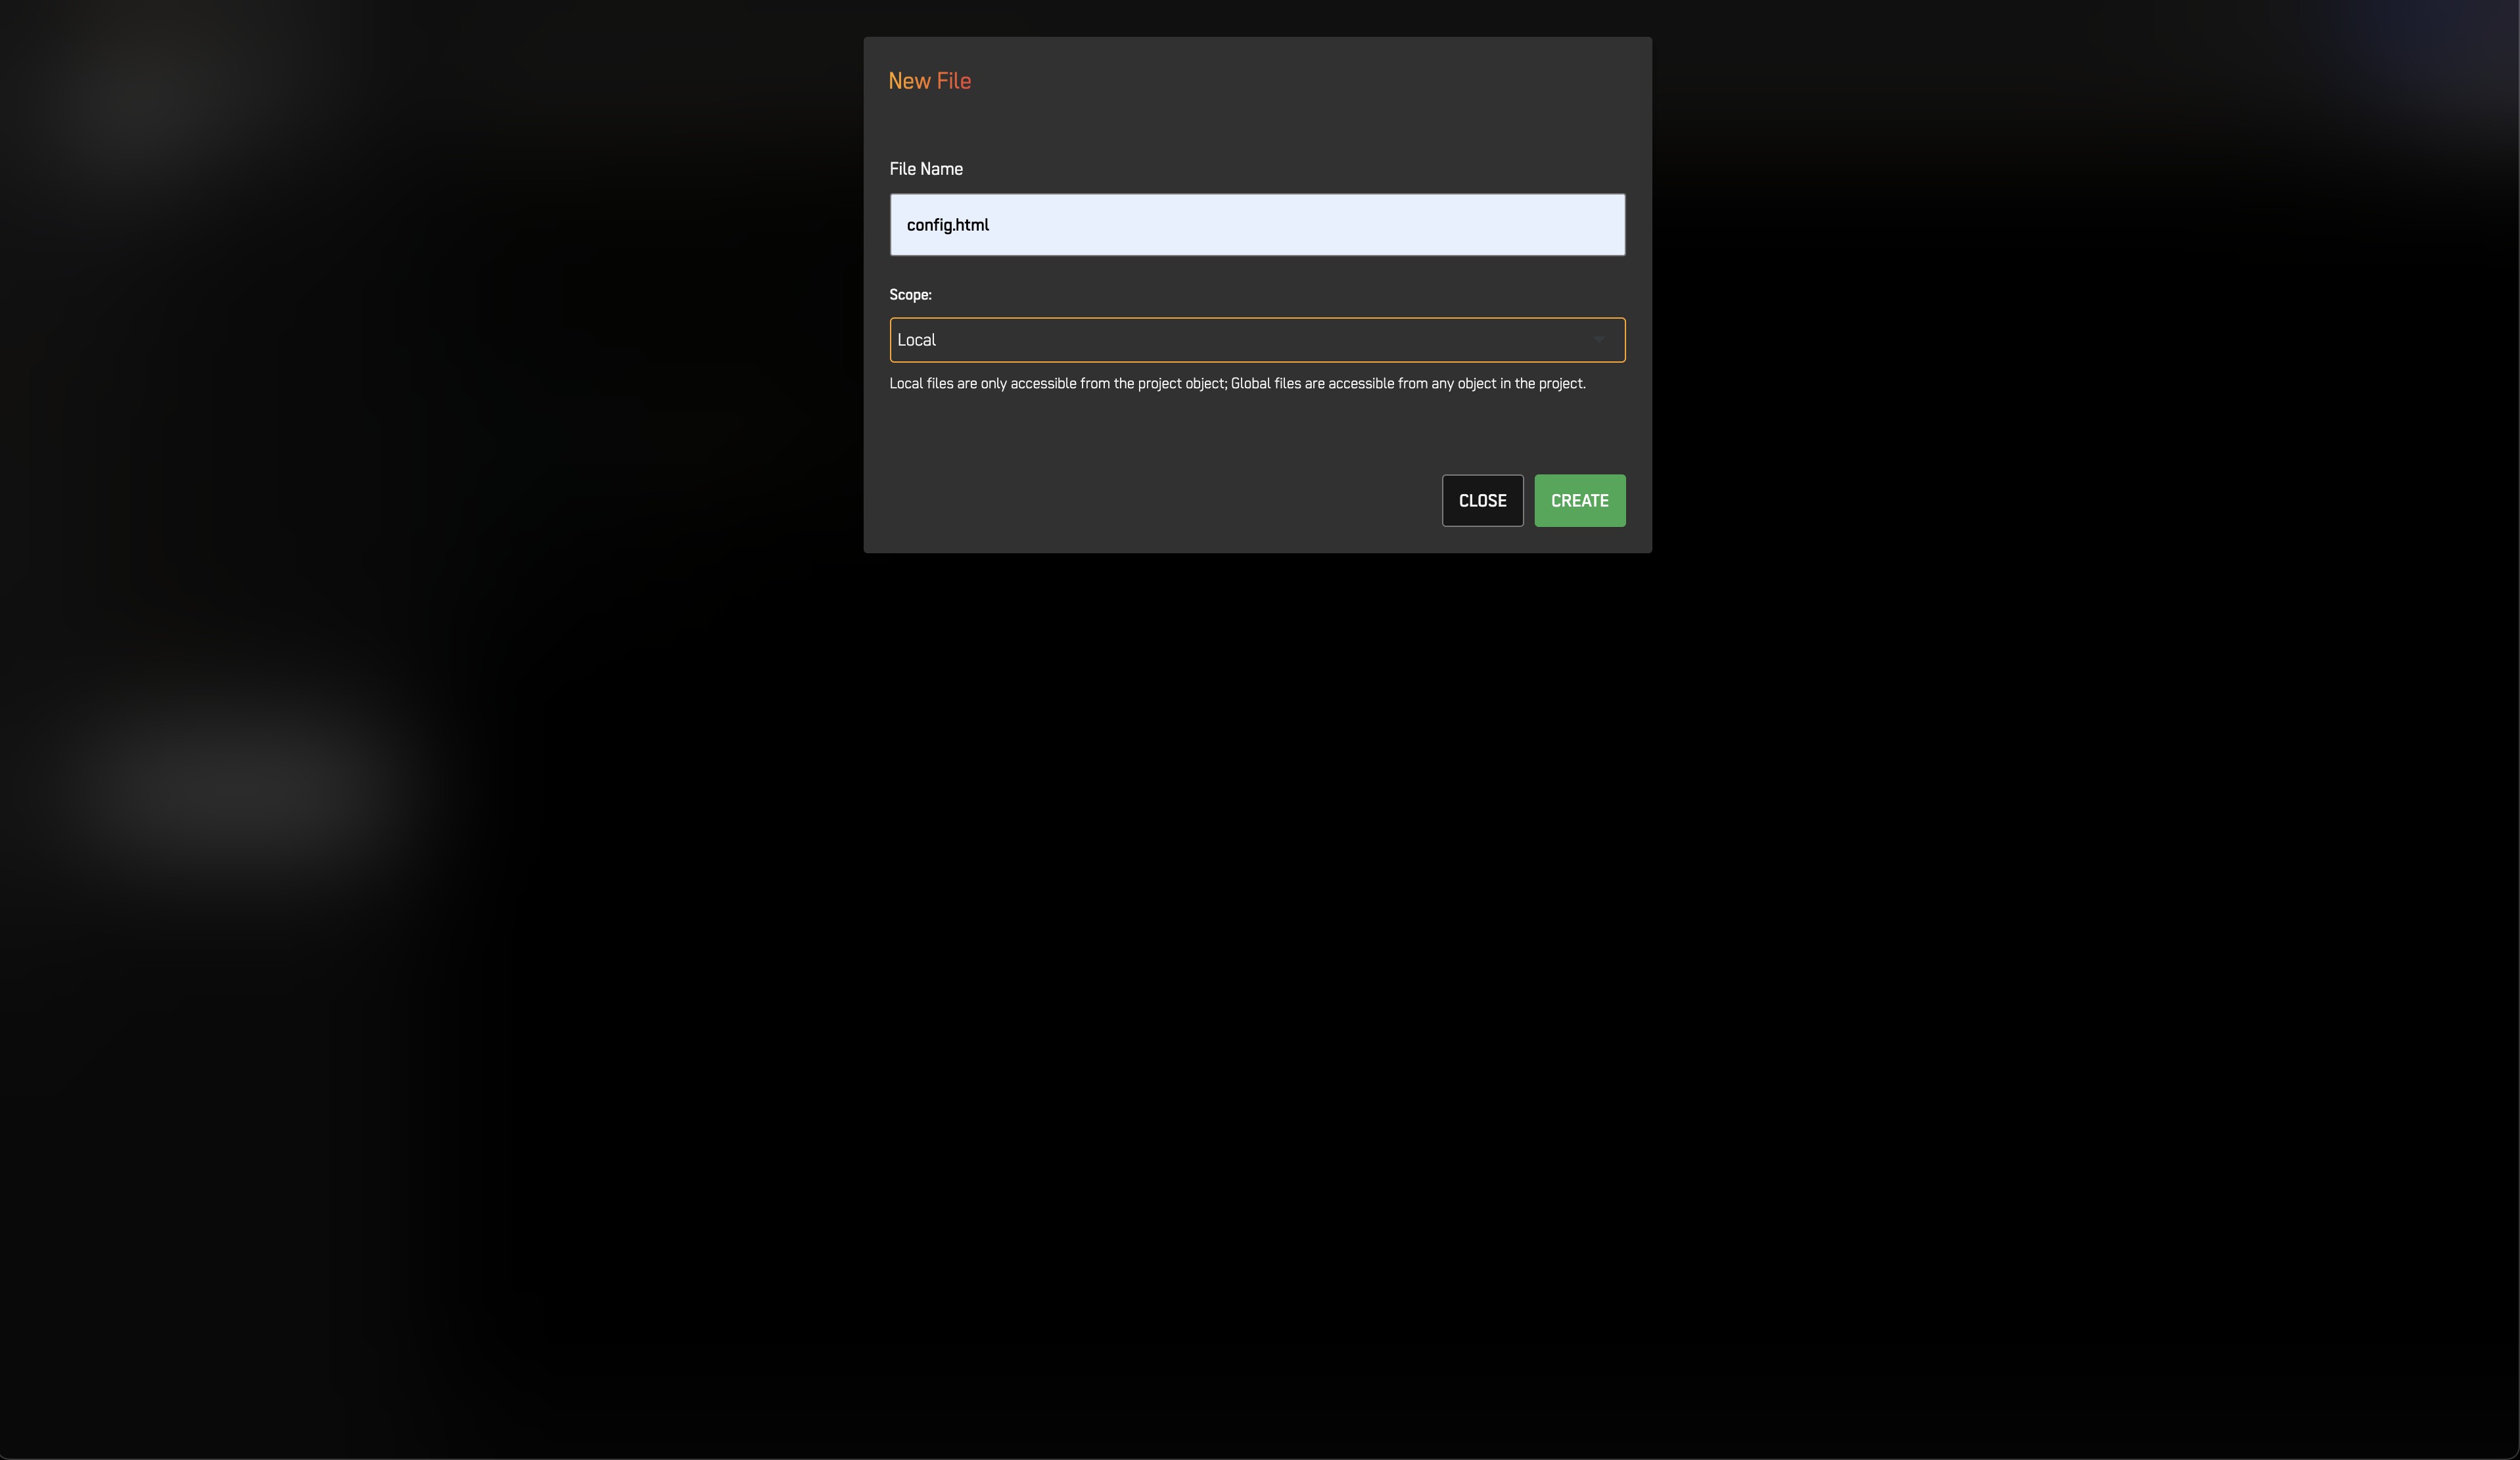
- Press Create.
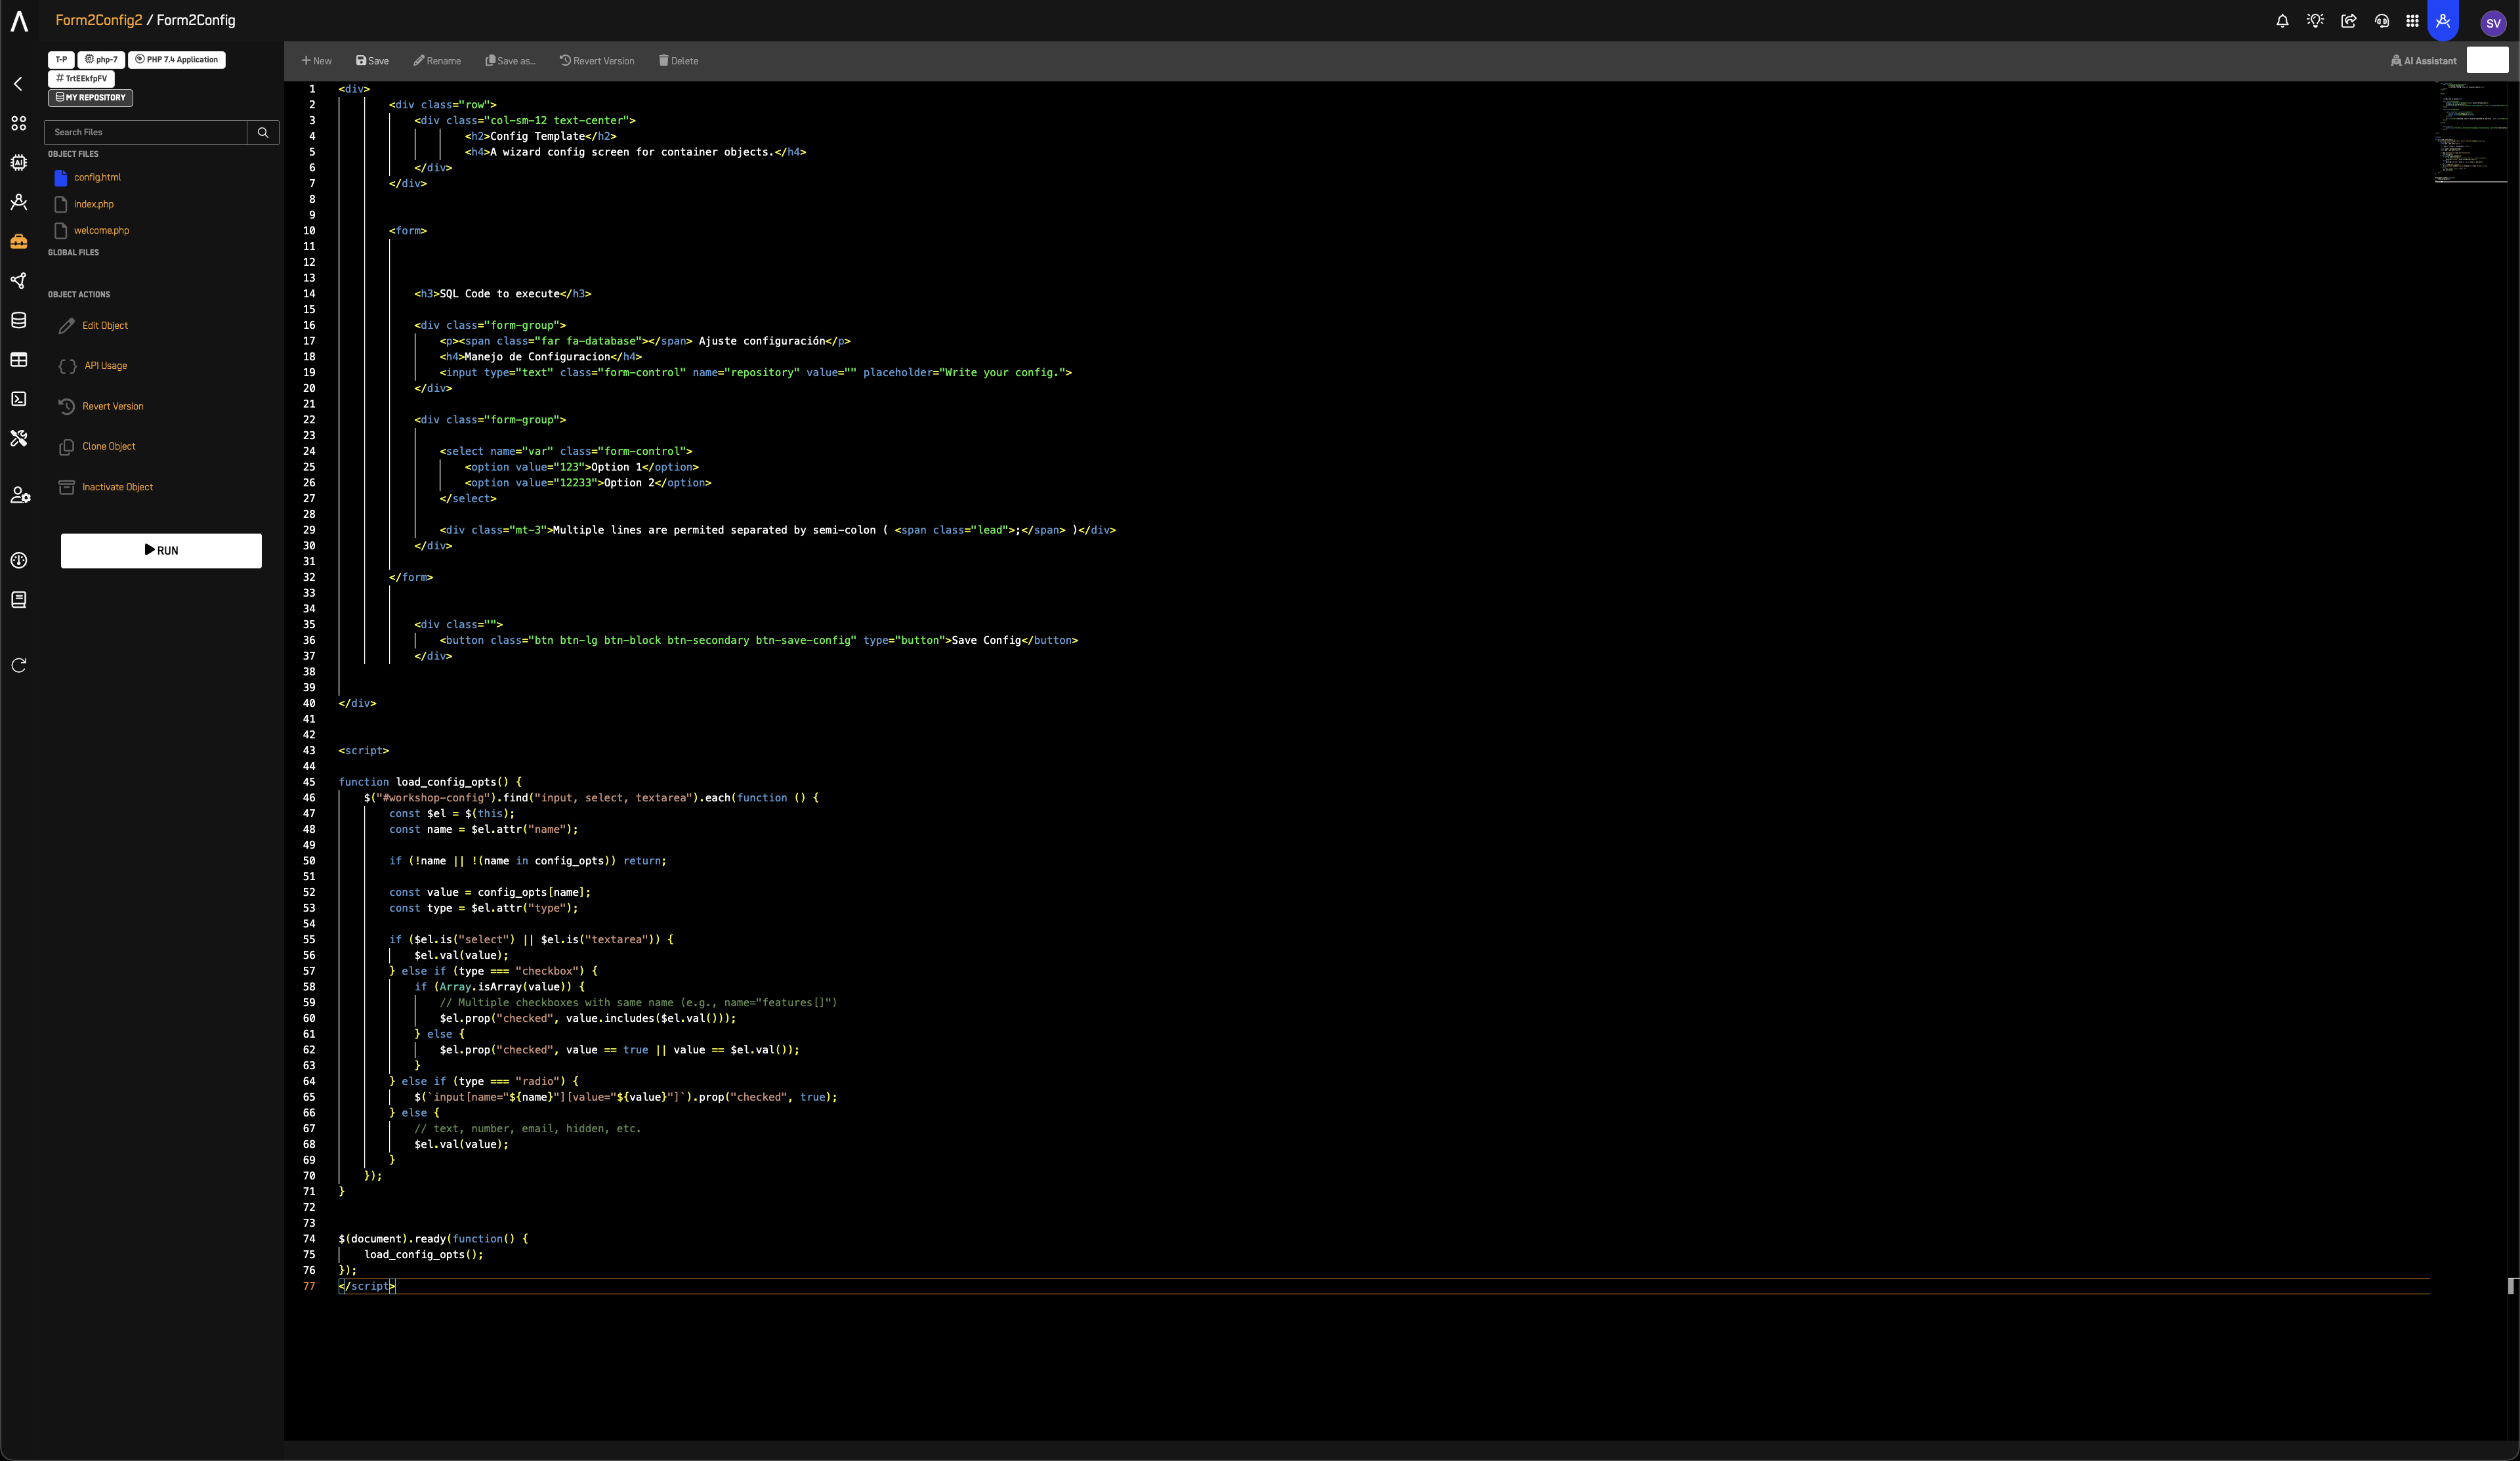
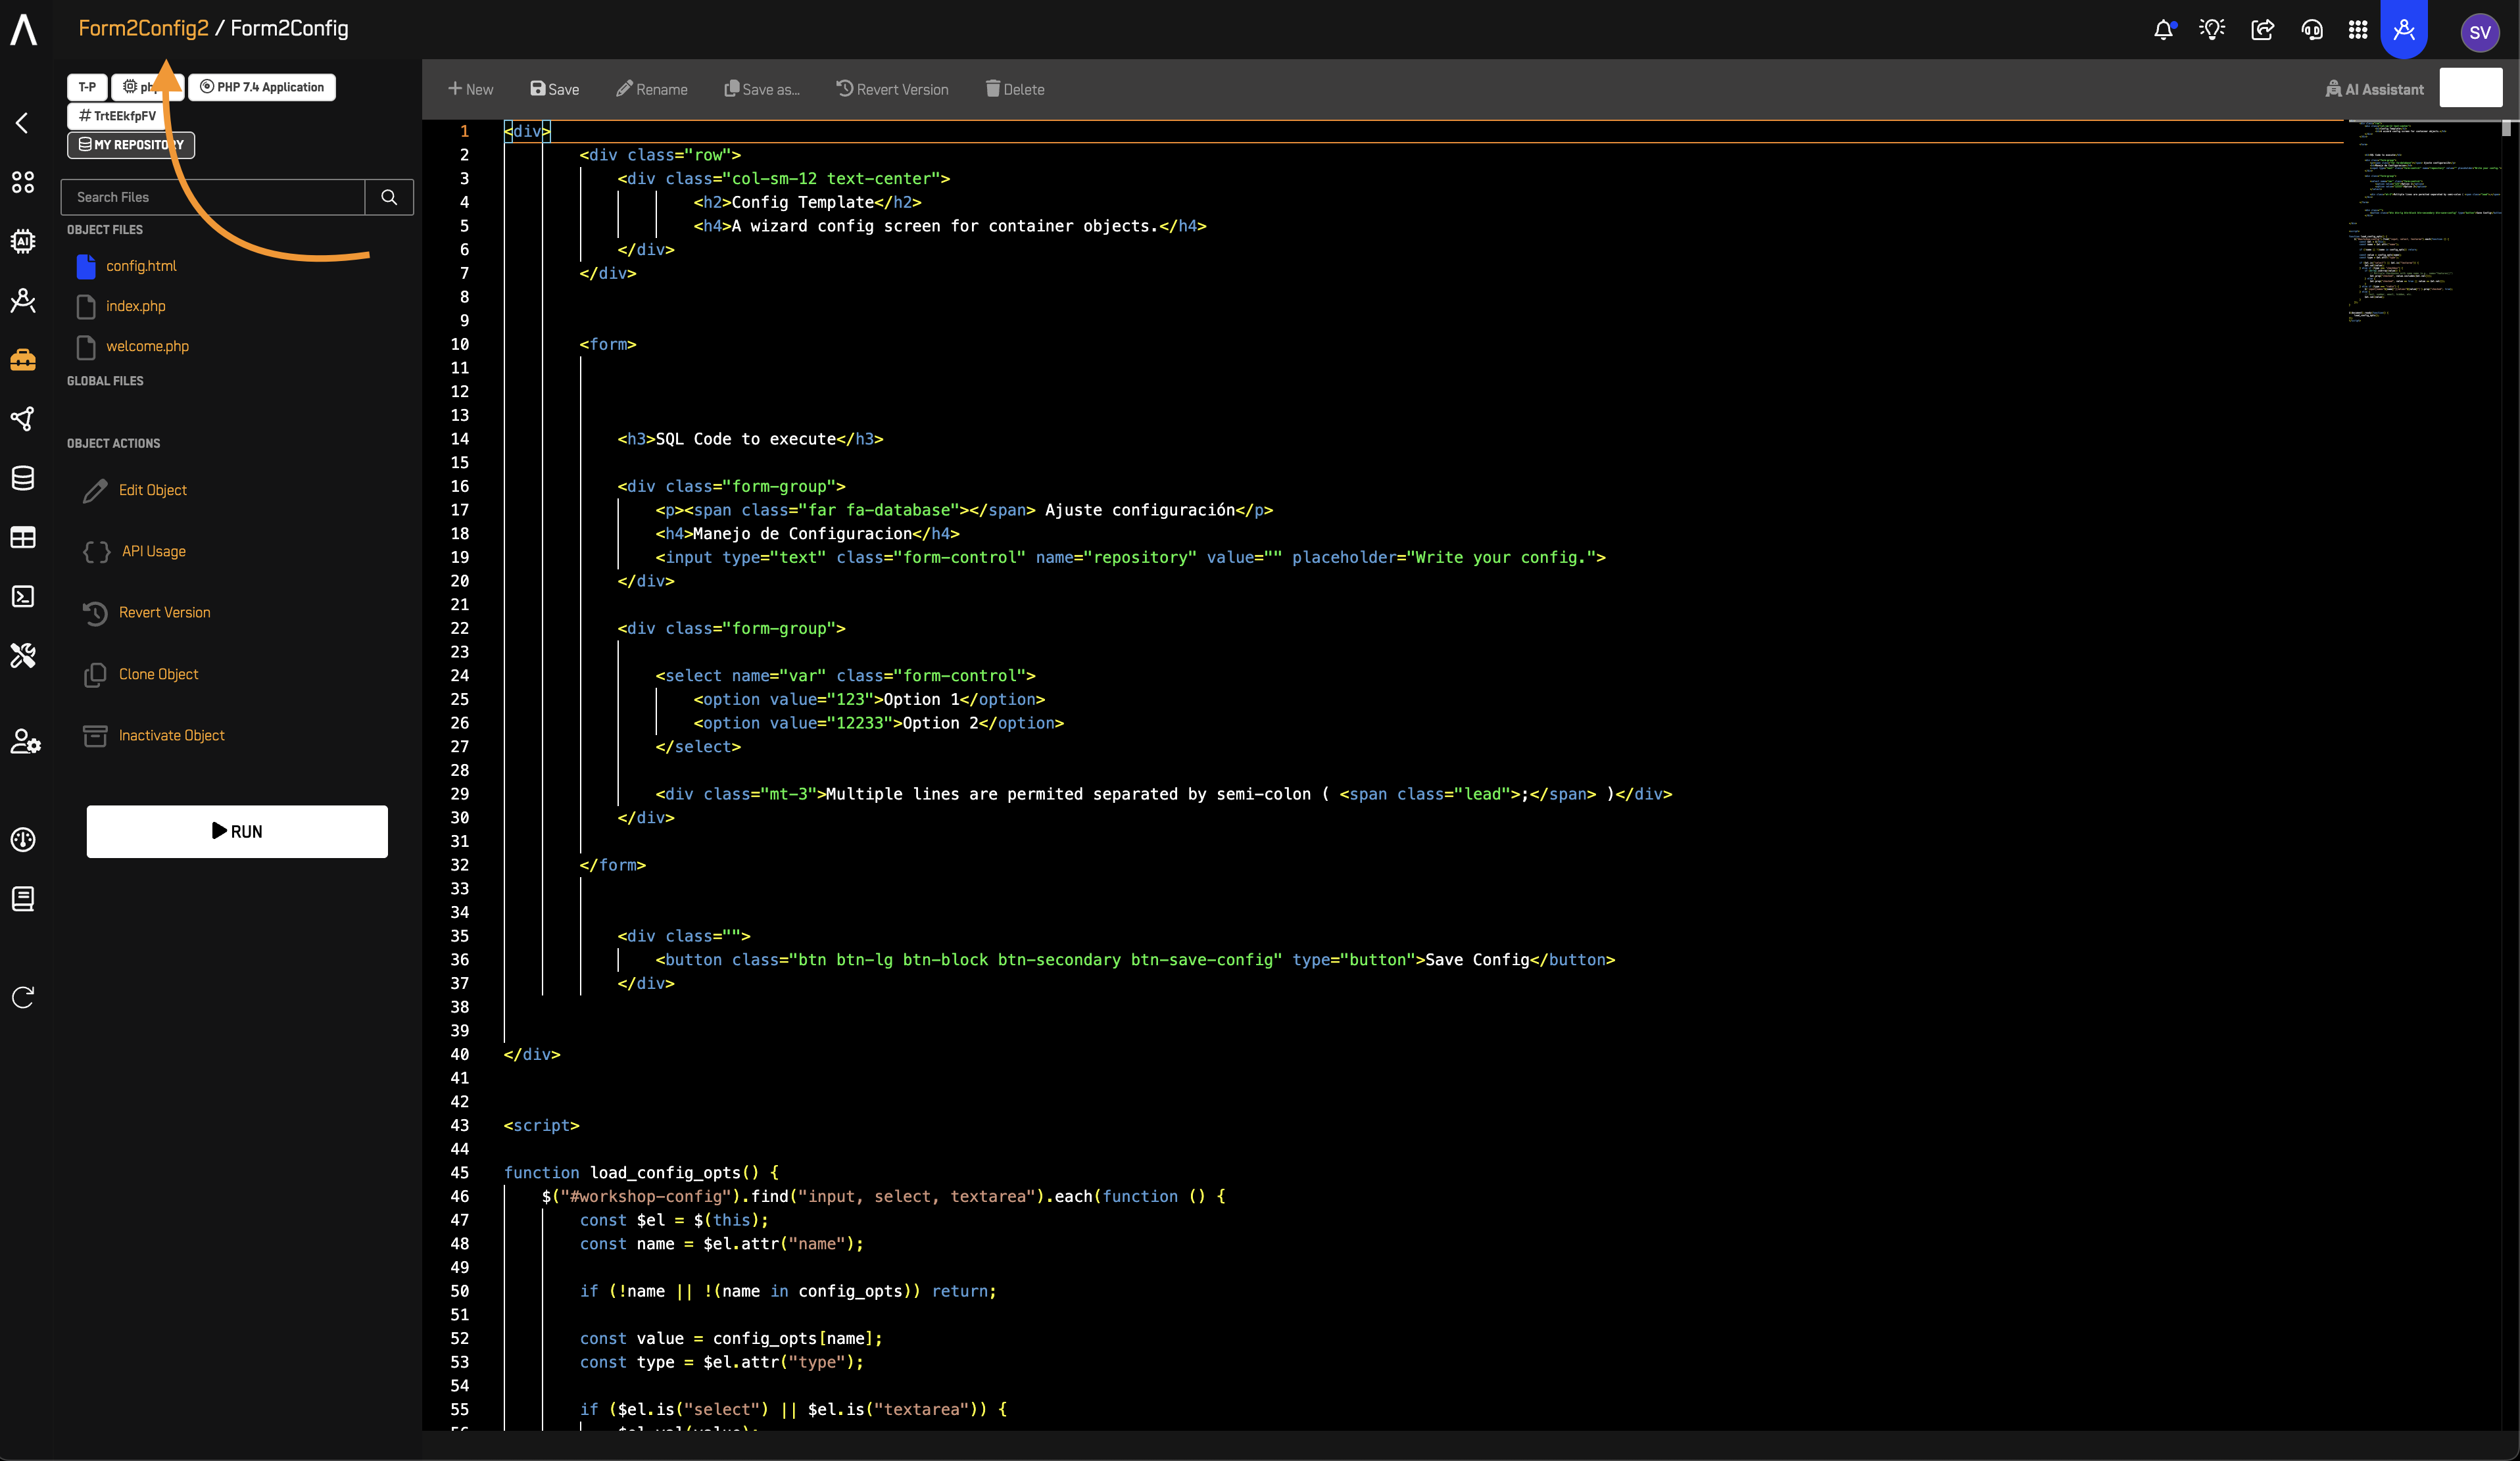
- Copy and paste the example config HTML code from below into the HTML object.
💻 Example config.html Code
Just copy and paste this into your project if you want to use the default configuration template.
No edits needed — it will work as-is.
<div>
        <div class="row">
            <div class="col-sm-12 text-center">
                    <h2>Config Template</h2>
                    <h4>A wizard config screen for container objects.</h4>
            </div>
        </div>


        <form>


            <h3>SQL Code to execute</h3>

            <div class="form-group">
                <p><span class="far fa-database"></span> Ajuste configuración</p>
                <h4>Manejo de Configuracion</h4>
                <input type="text" class="form-control" name="repository" value="" placeholder="Write your config.">
            </div>

            <div class="form-group">

                <select name="var" class="form-control">
                    <option value="123">Option 1</option>
                    <option value="12233">Option 2</option>
                </select>

                <div class="mt-3">Multiple lines are permited separated by semi-colon ( <span class="lead">;</span> )</div>
            </div>

        </form>


            <div class="">
                <button class="btn btn-lg btn-block btn-secondary btn-save-config" type="button">Save Config</button>
            </div>


</div>


<script>

function load_config_opts() {
	$("#workshop-config").find("input, select, textarea").each(function () {
		const $el = $(this);
		const name = $el.attr("name");

		if (!name || !(name in config_opts)) return;

		const value = config_opts[name];
		const type = $el.attr("type");

		if ($el.is("select") || $el.is("textarea")) {
			$el.val(value);
		} else if (type === "checkbox") {
			if (Array.isArray(value)) {
				// Multiple checkboxes with same name (e.g., name="features[]")
				$el.prop("checked", value.includes($el.val()));
			} else {
				$el.prop("checked", value == true || value == $el.val());
			}
		} else if (type === "radio") {
			$(`input[name="${name}"][value="${value}"]`).prop("checked", true);
		} else {
			// text, number, email, hidden, etc.
			$el.val(value);
		}
	});
}


$(document).ready(function() {
	load_config_opts();
});
</script>
- Press save.
4️⃣ Create config.json
You do not need to create this file yourself.
When you fill out the form and click Submit, the system will automatically create the config.json file for you.
You will see it after you save the form for the first time — no extra steps needed.
💡 Tip: Just complete the form and save. The file will appear by itself.
5️⃣ Fill Form to Save Data
- You must open the form, to do so, follow these steps:
a. Look at the top right corner of your screen.
b. Click on the name of your object.
c. You will now see the Workshop Project screen.
d. Find and click on your Workshop Object.
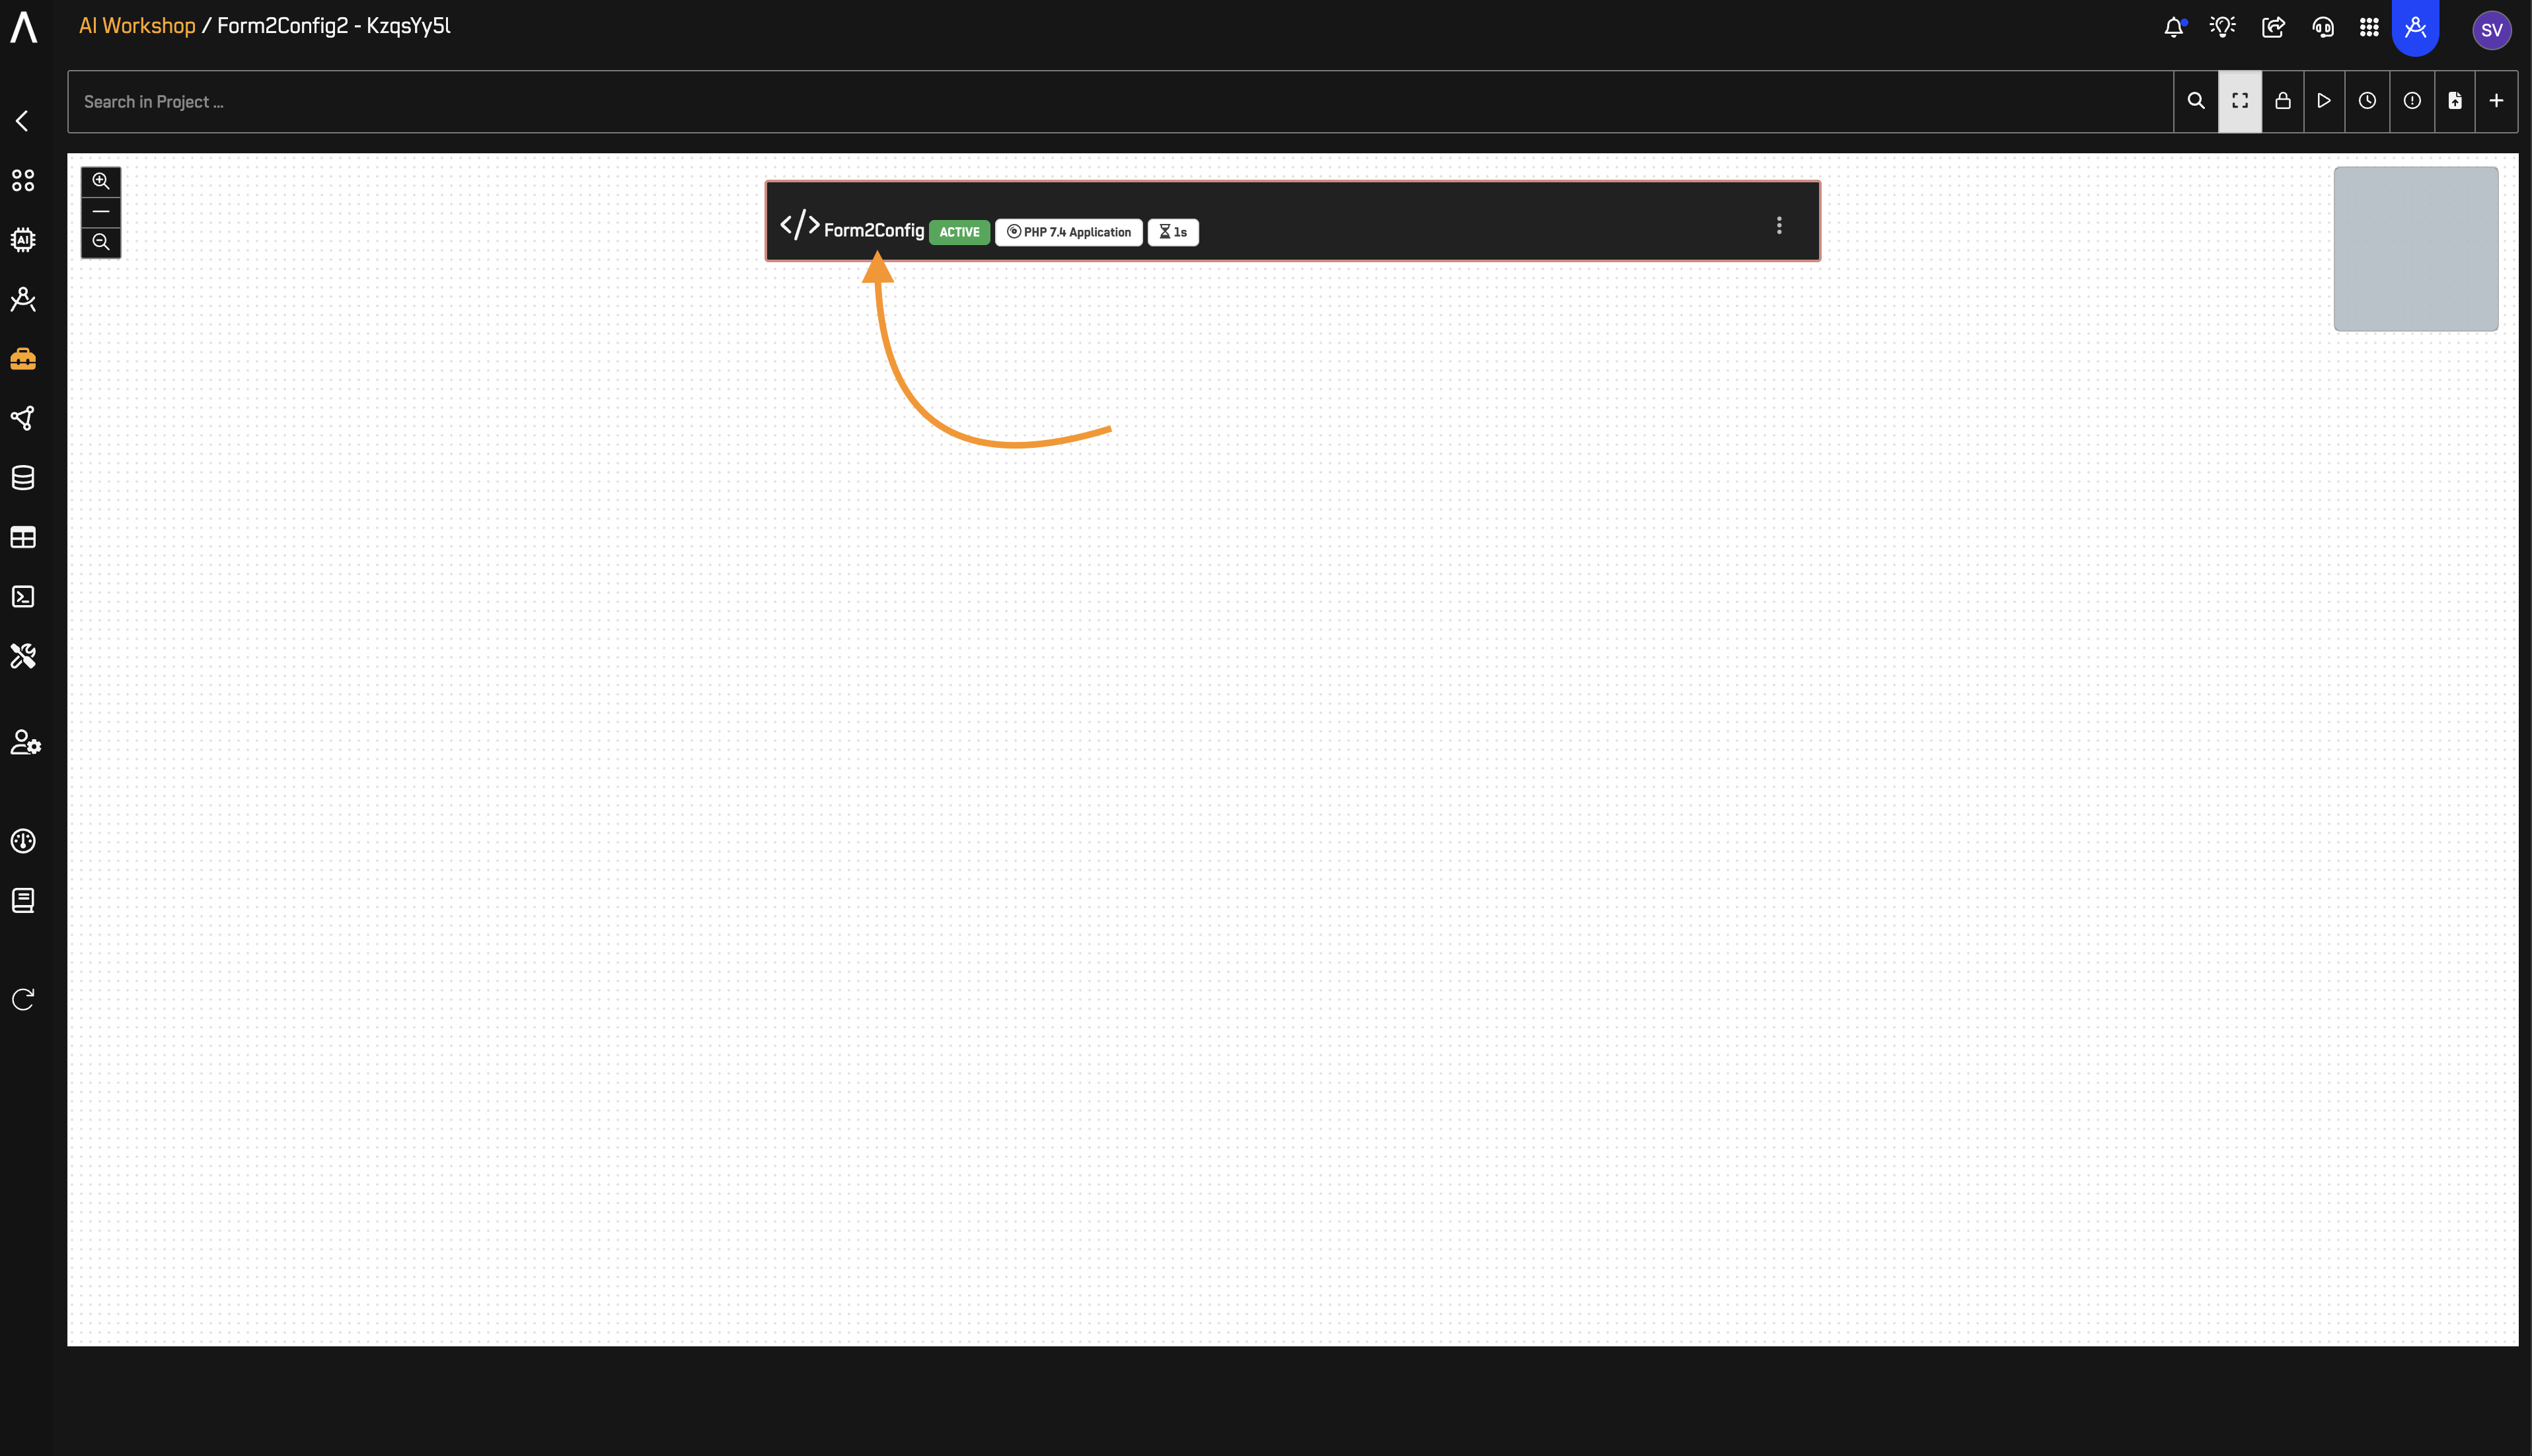
e. Your form will now open.
-
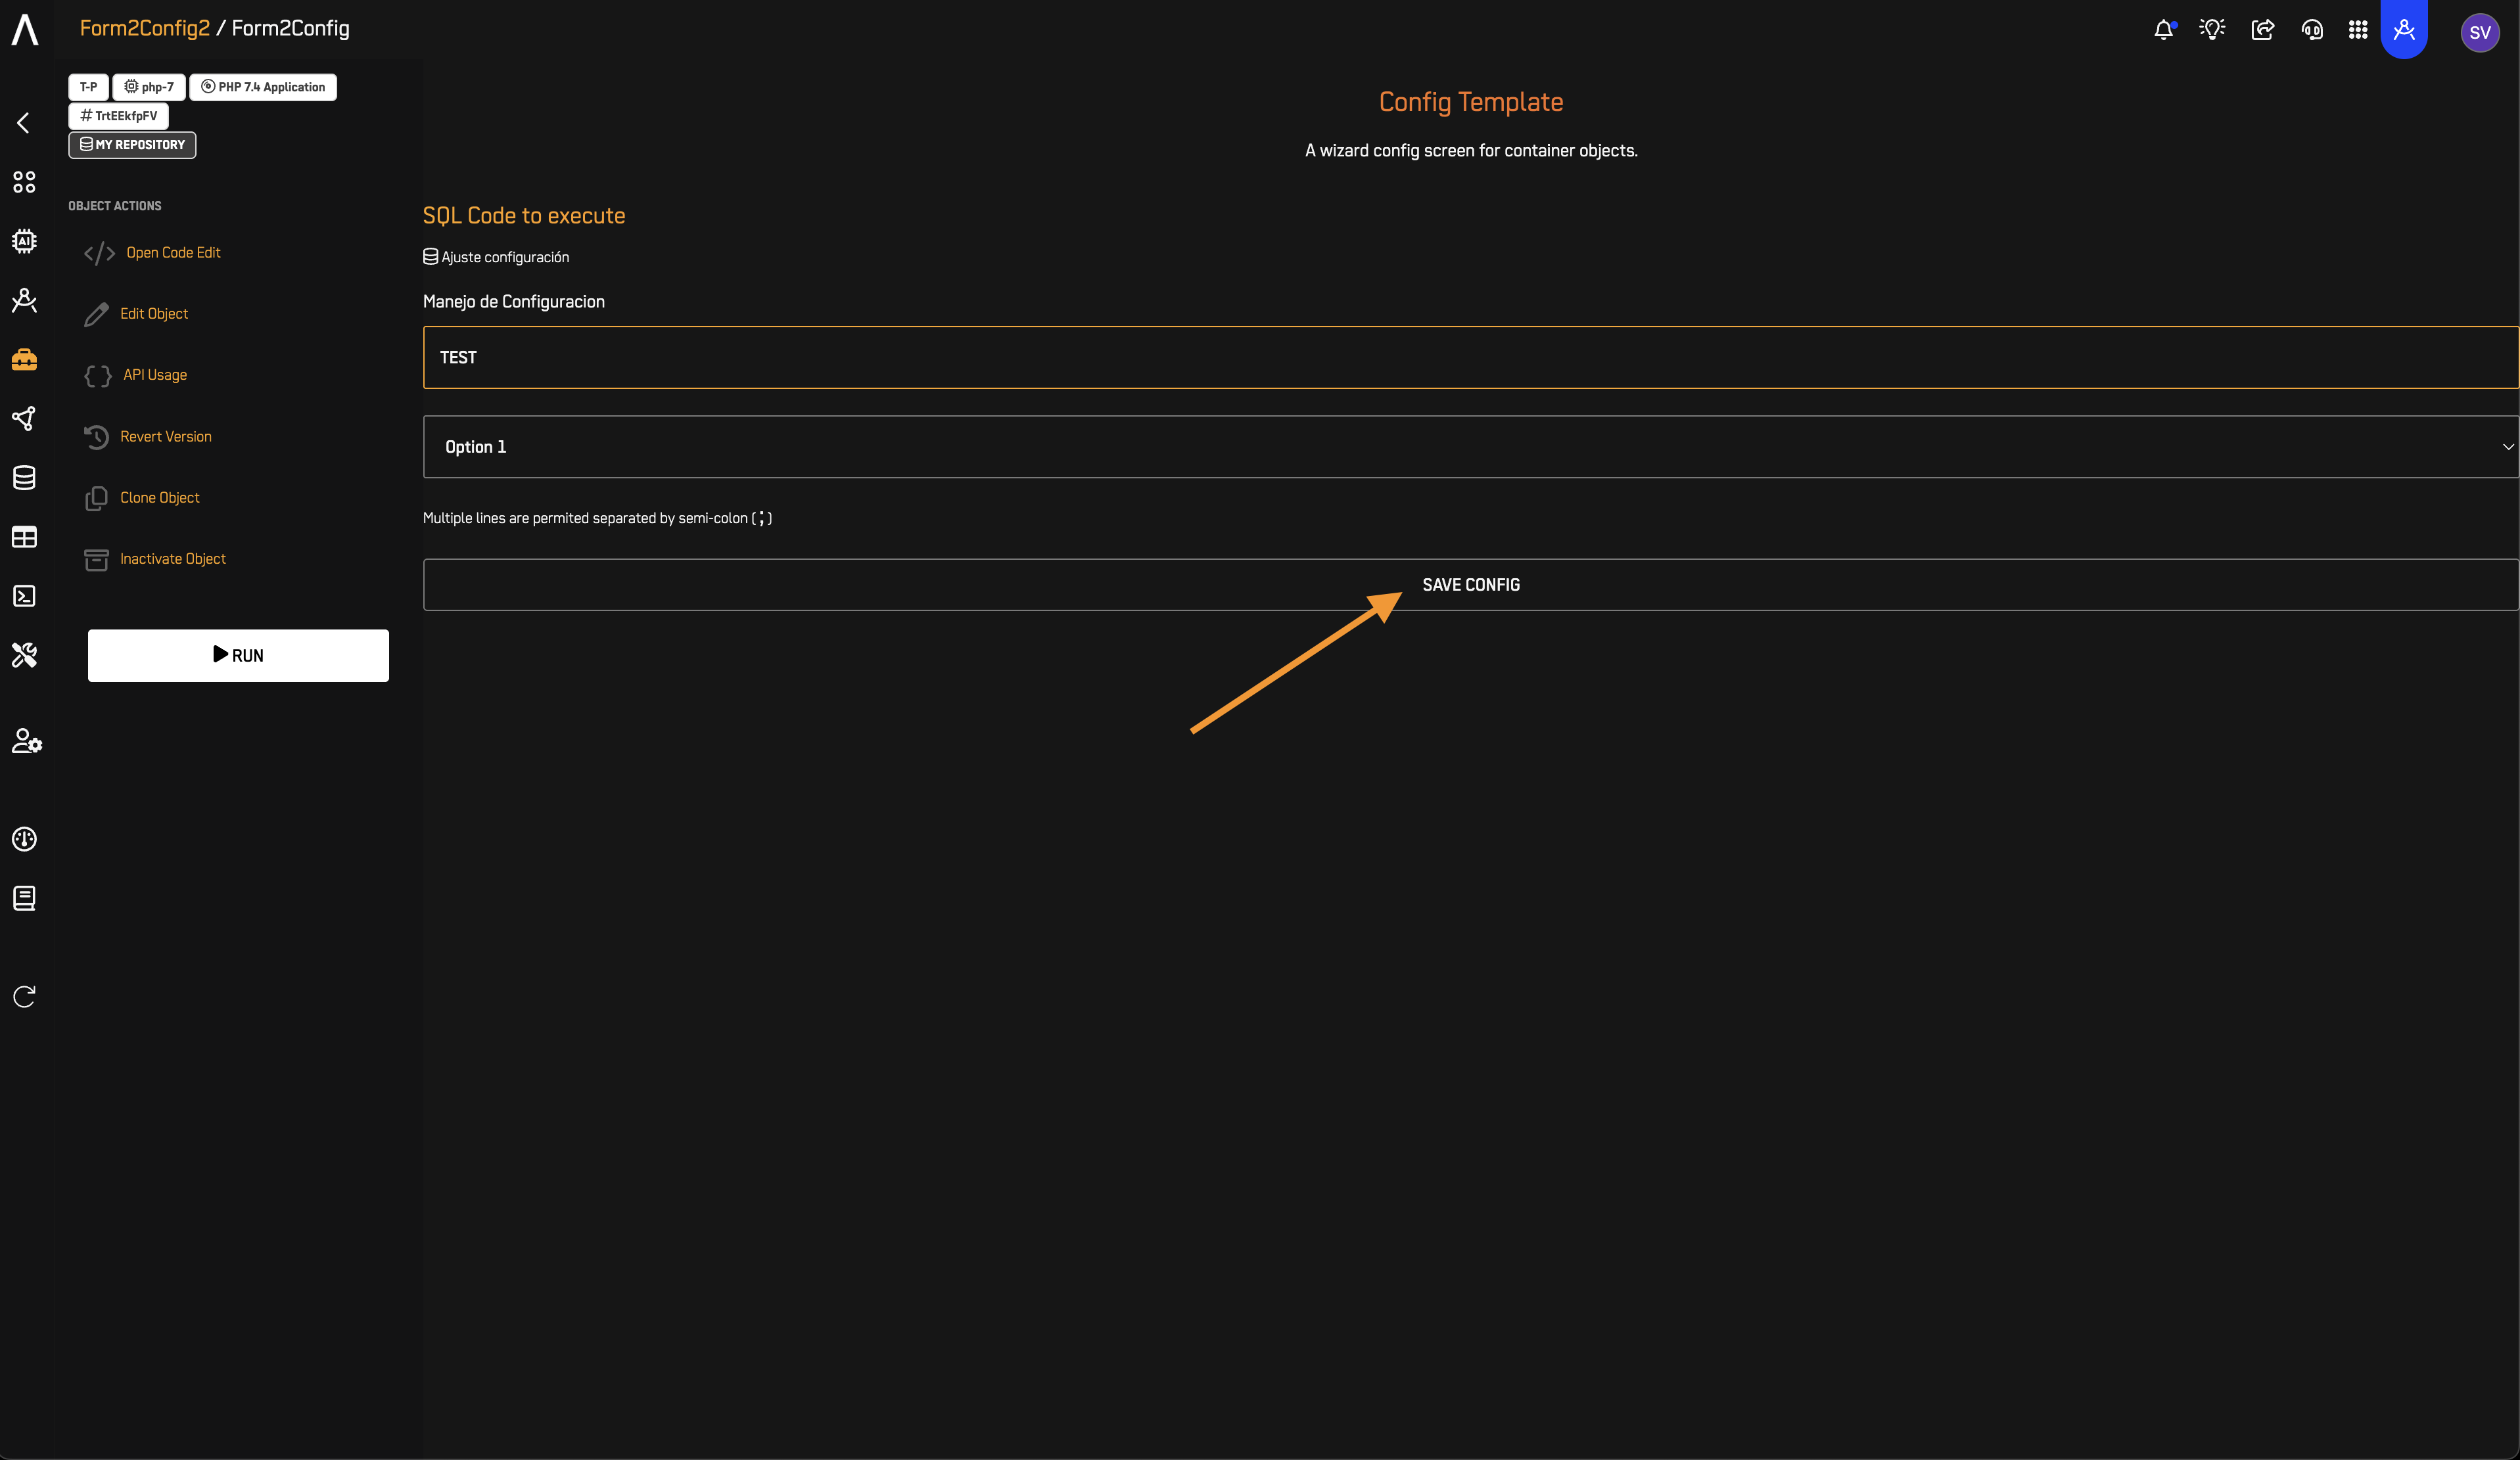
Fill in the fields:
- Repository:
TEST - Option:
Option 1(value="123")
- Repository:
-
Click Save Config.
- Click Open Code Edit
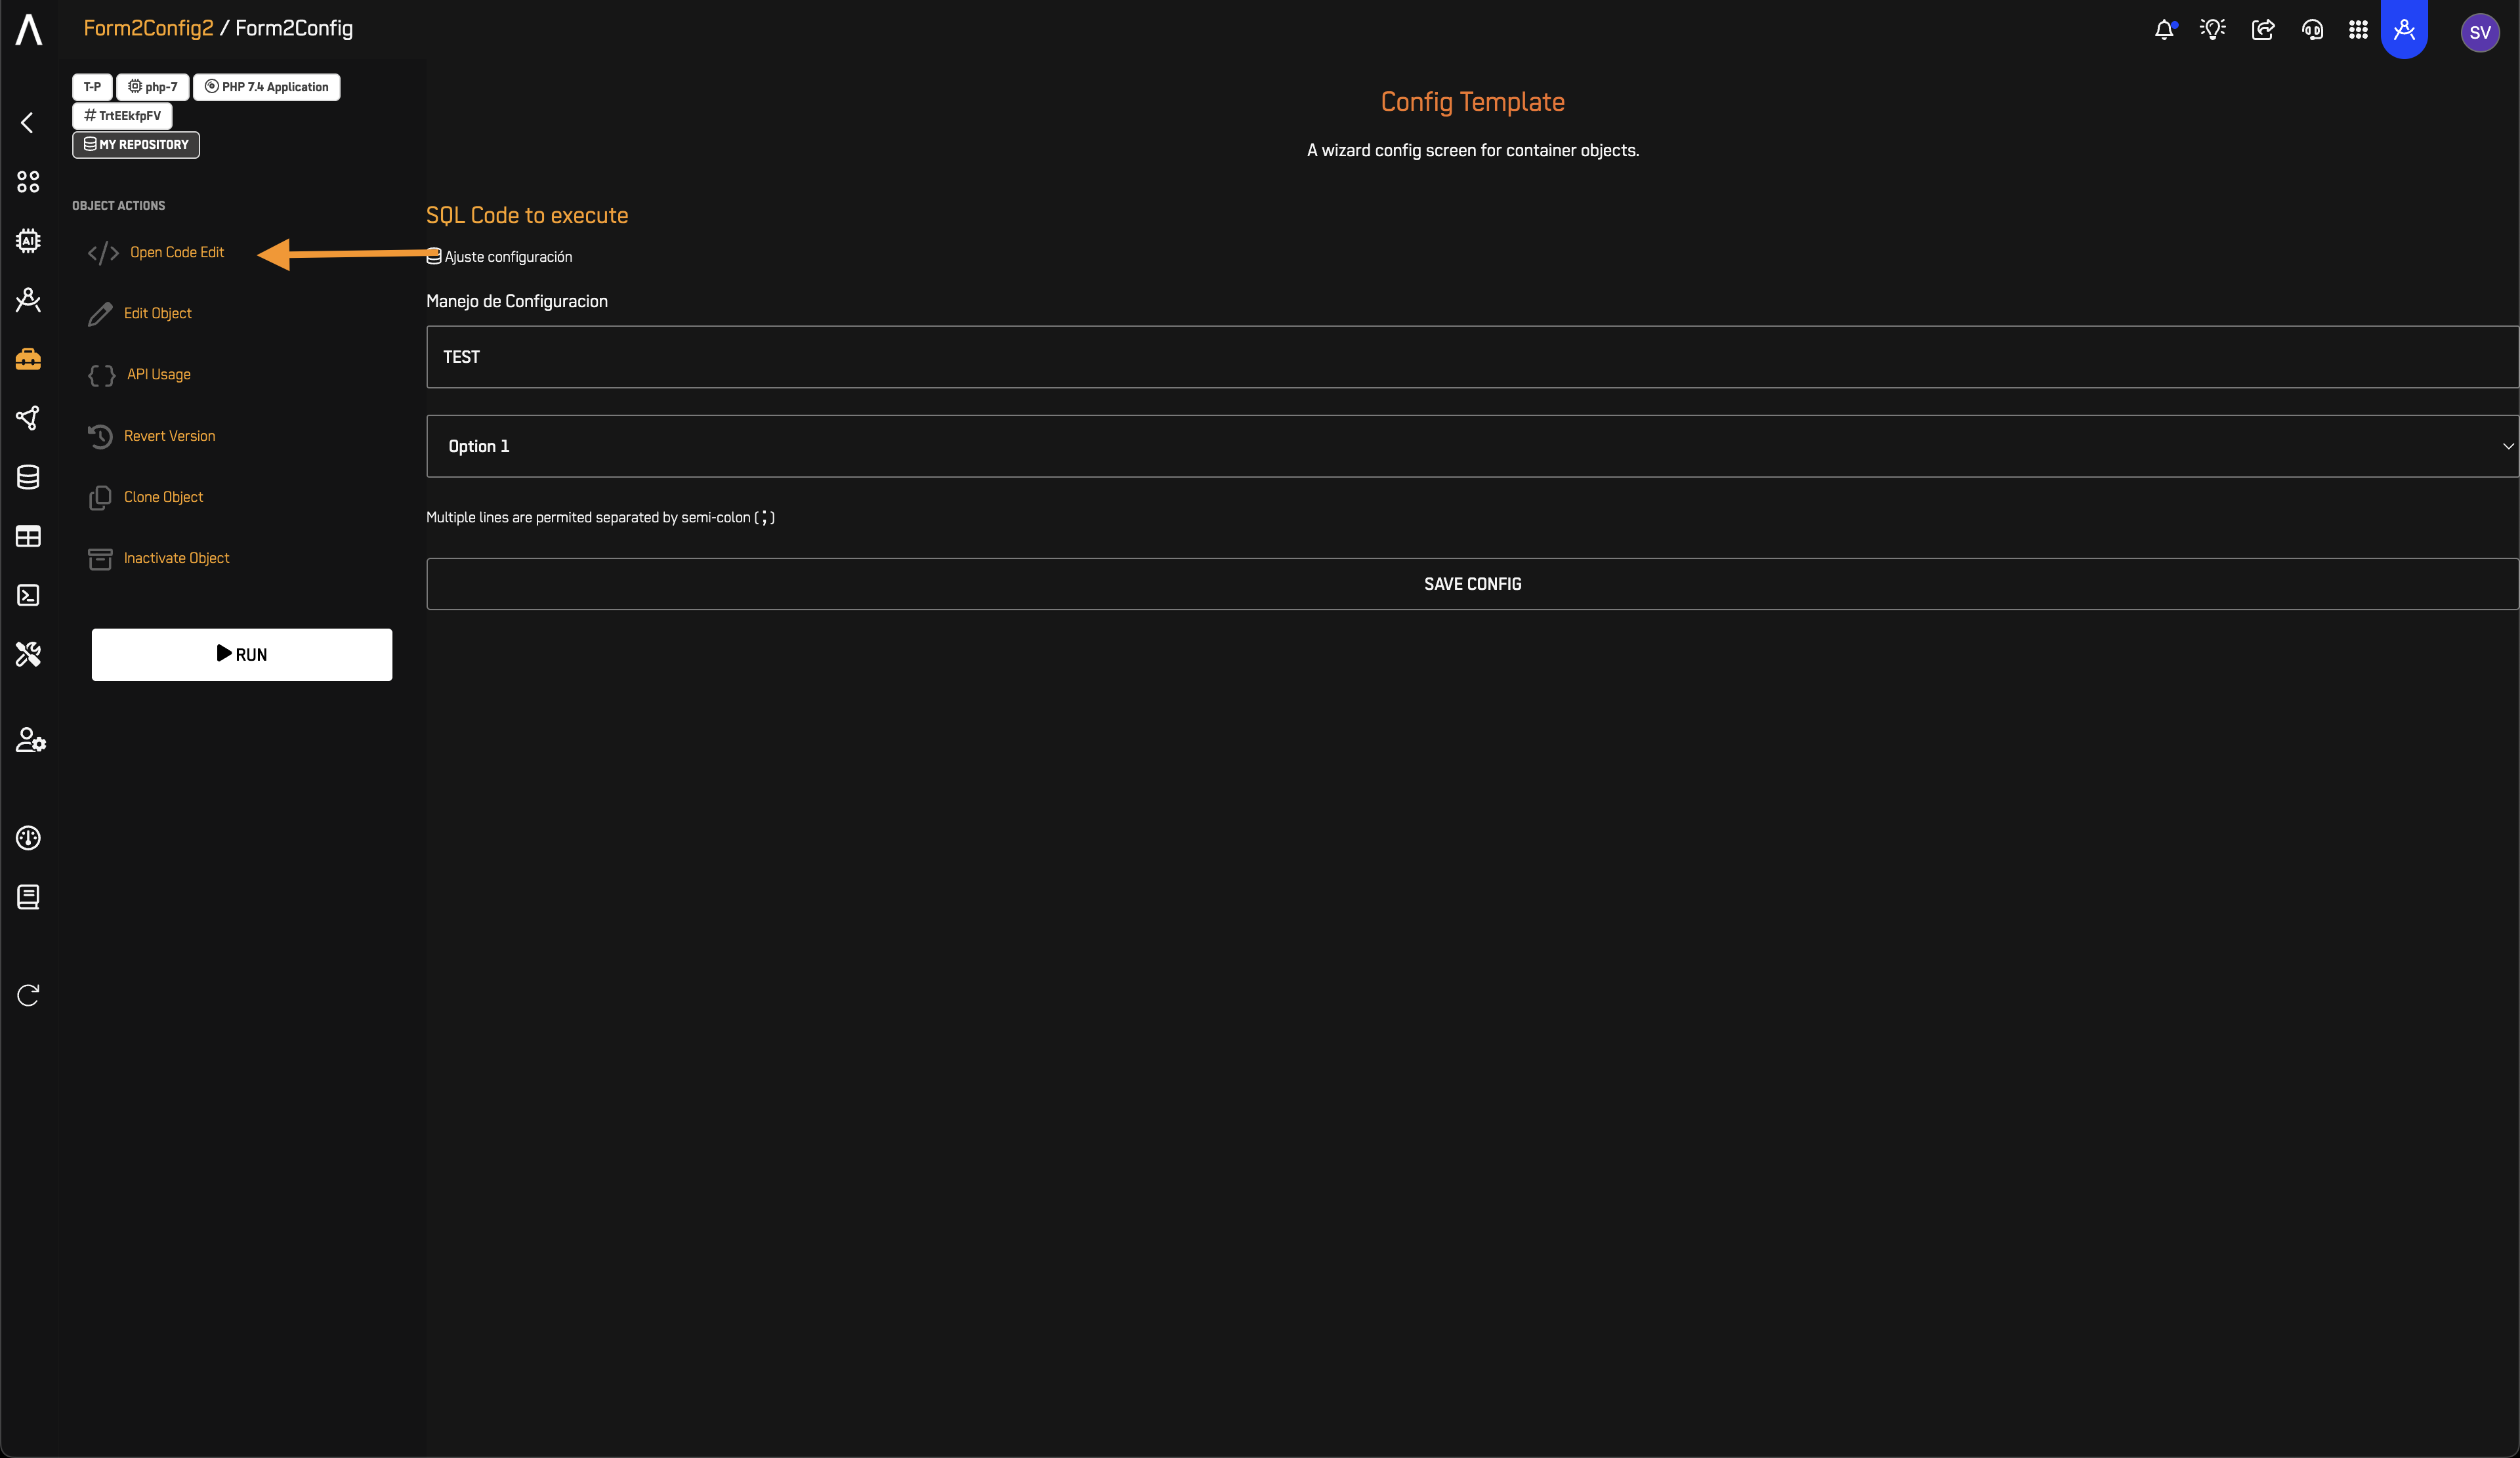
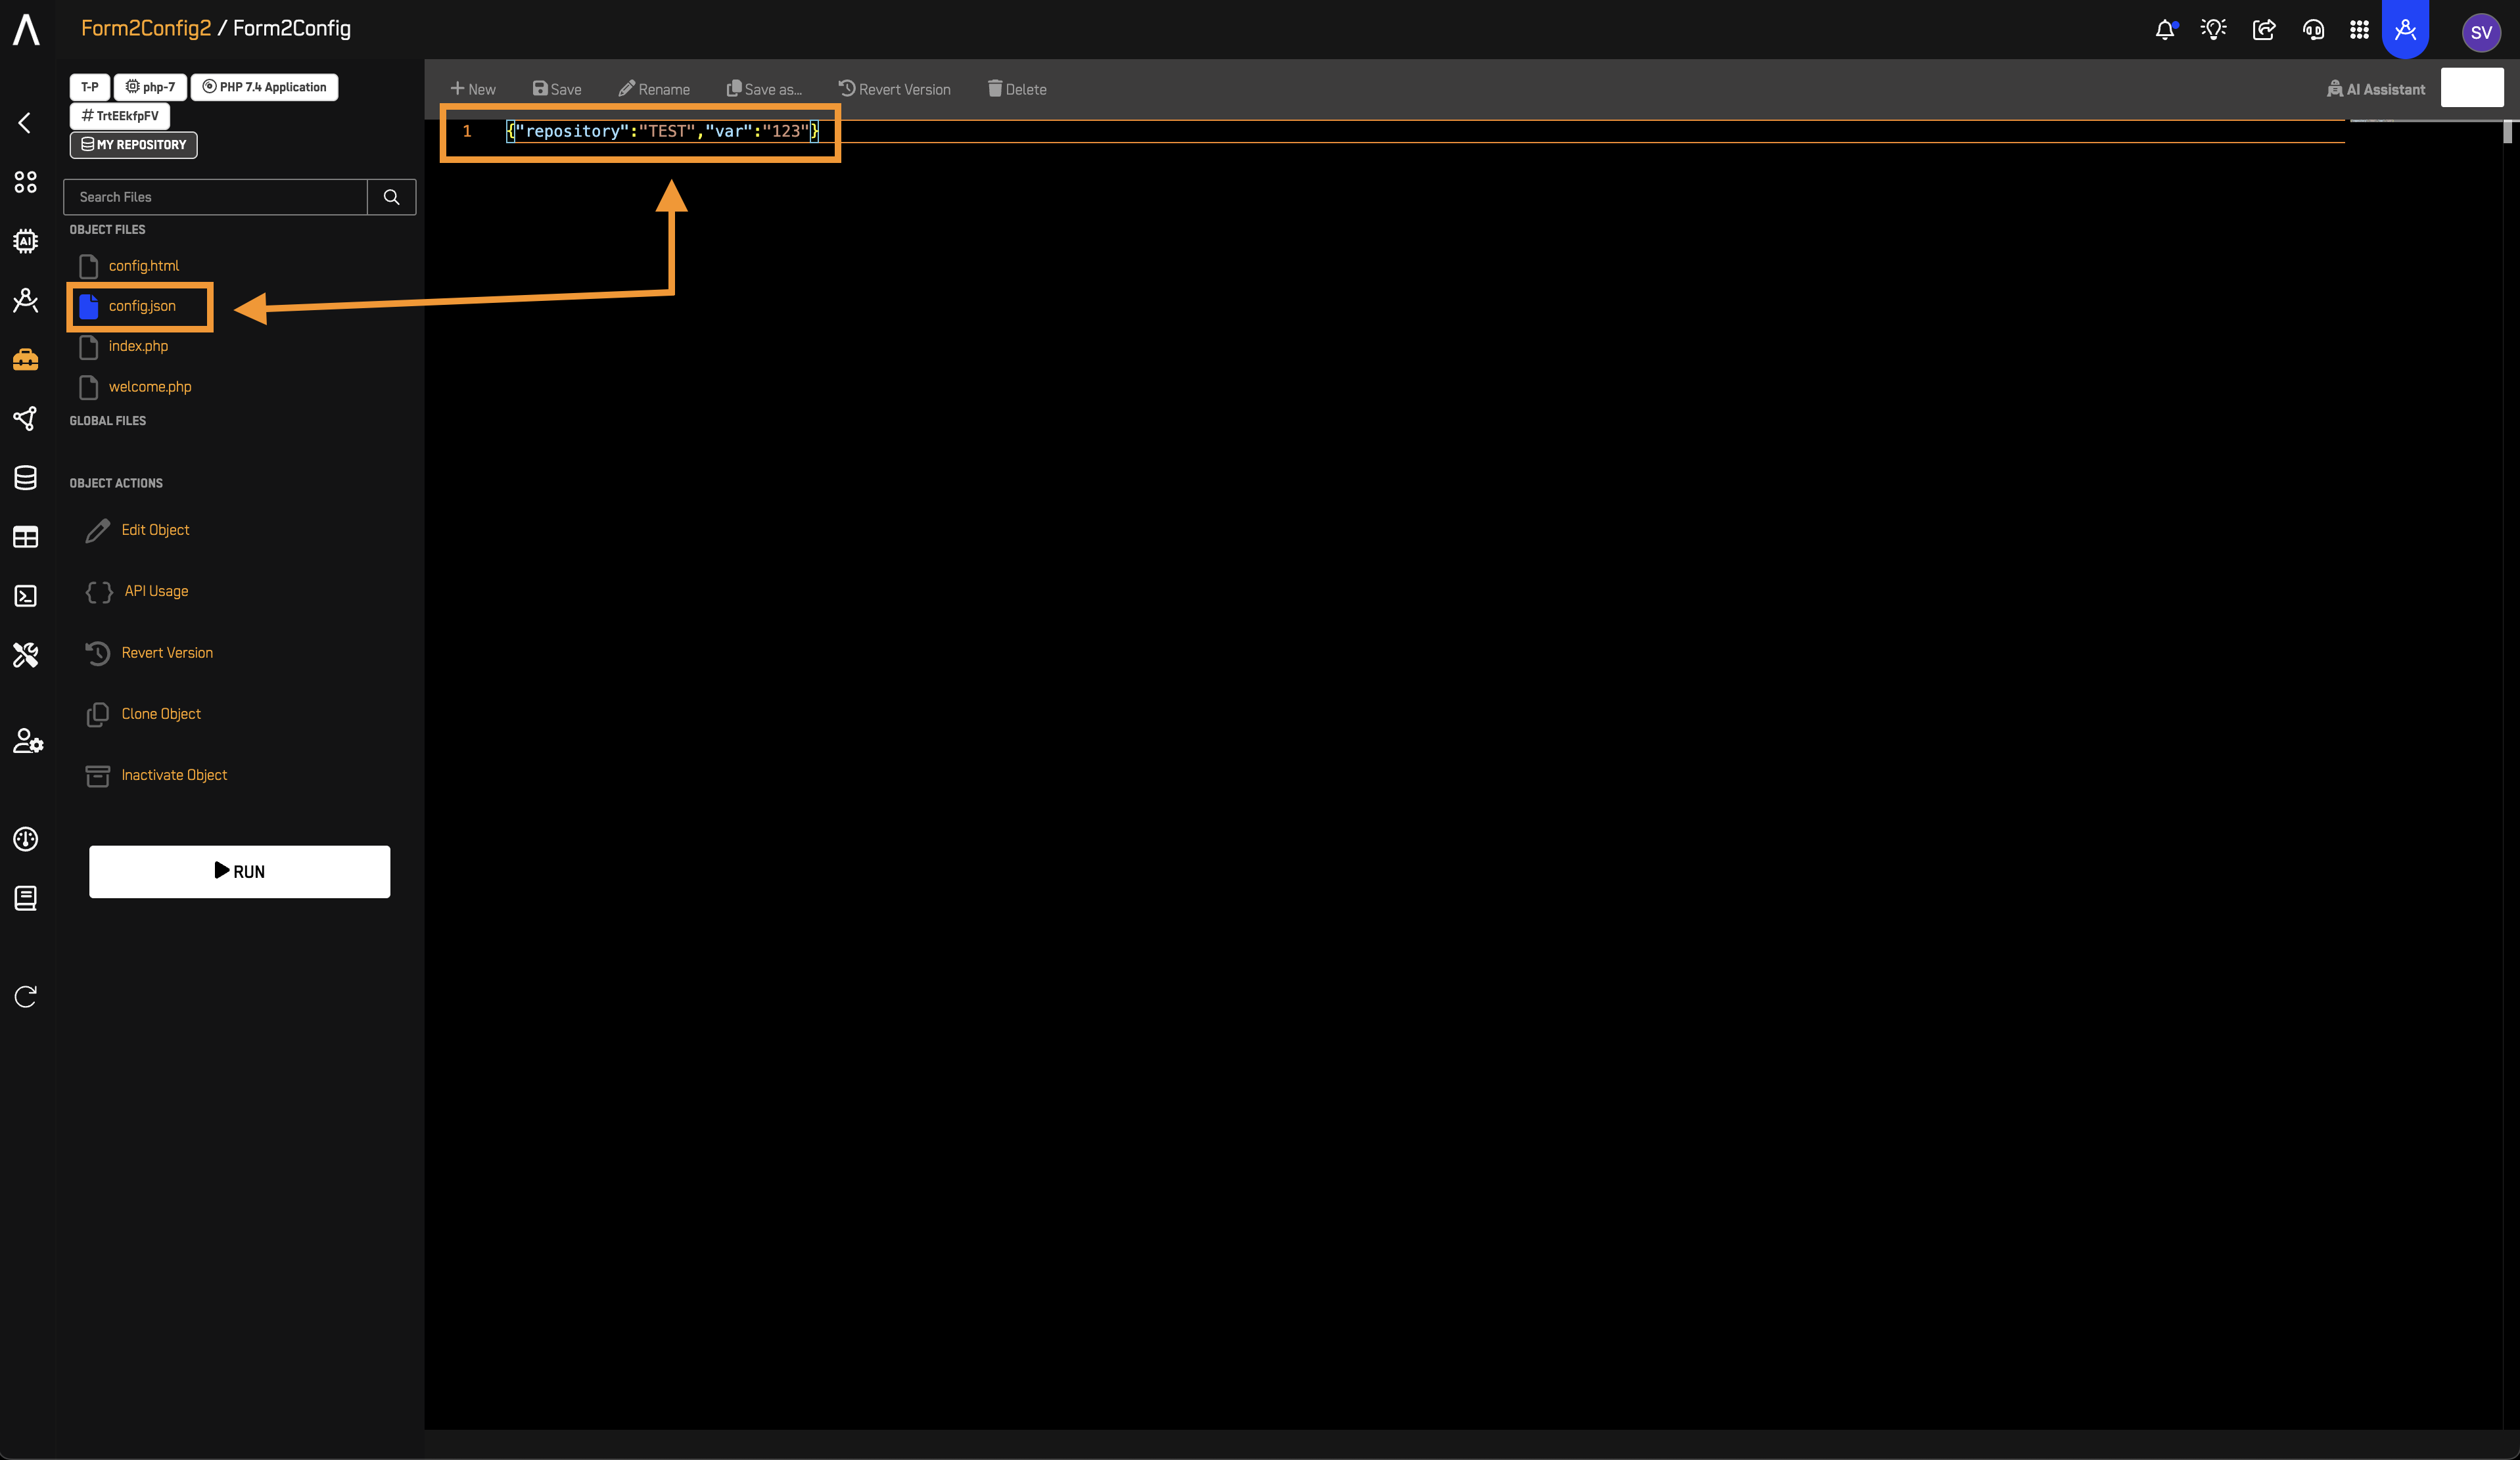
- Open
config.jsonto confirm it contains:
{
  "repository": "TEST",
  "var": "123"
}
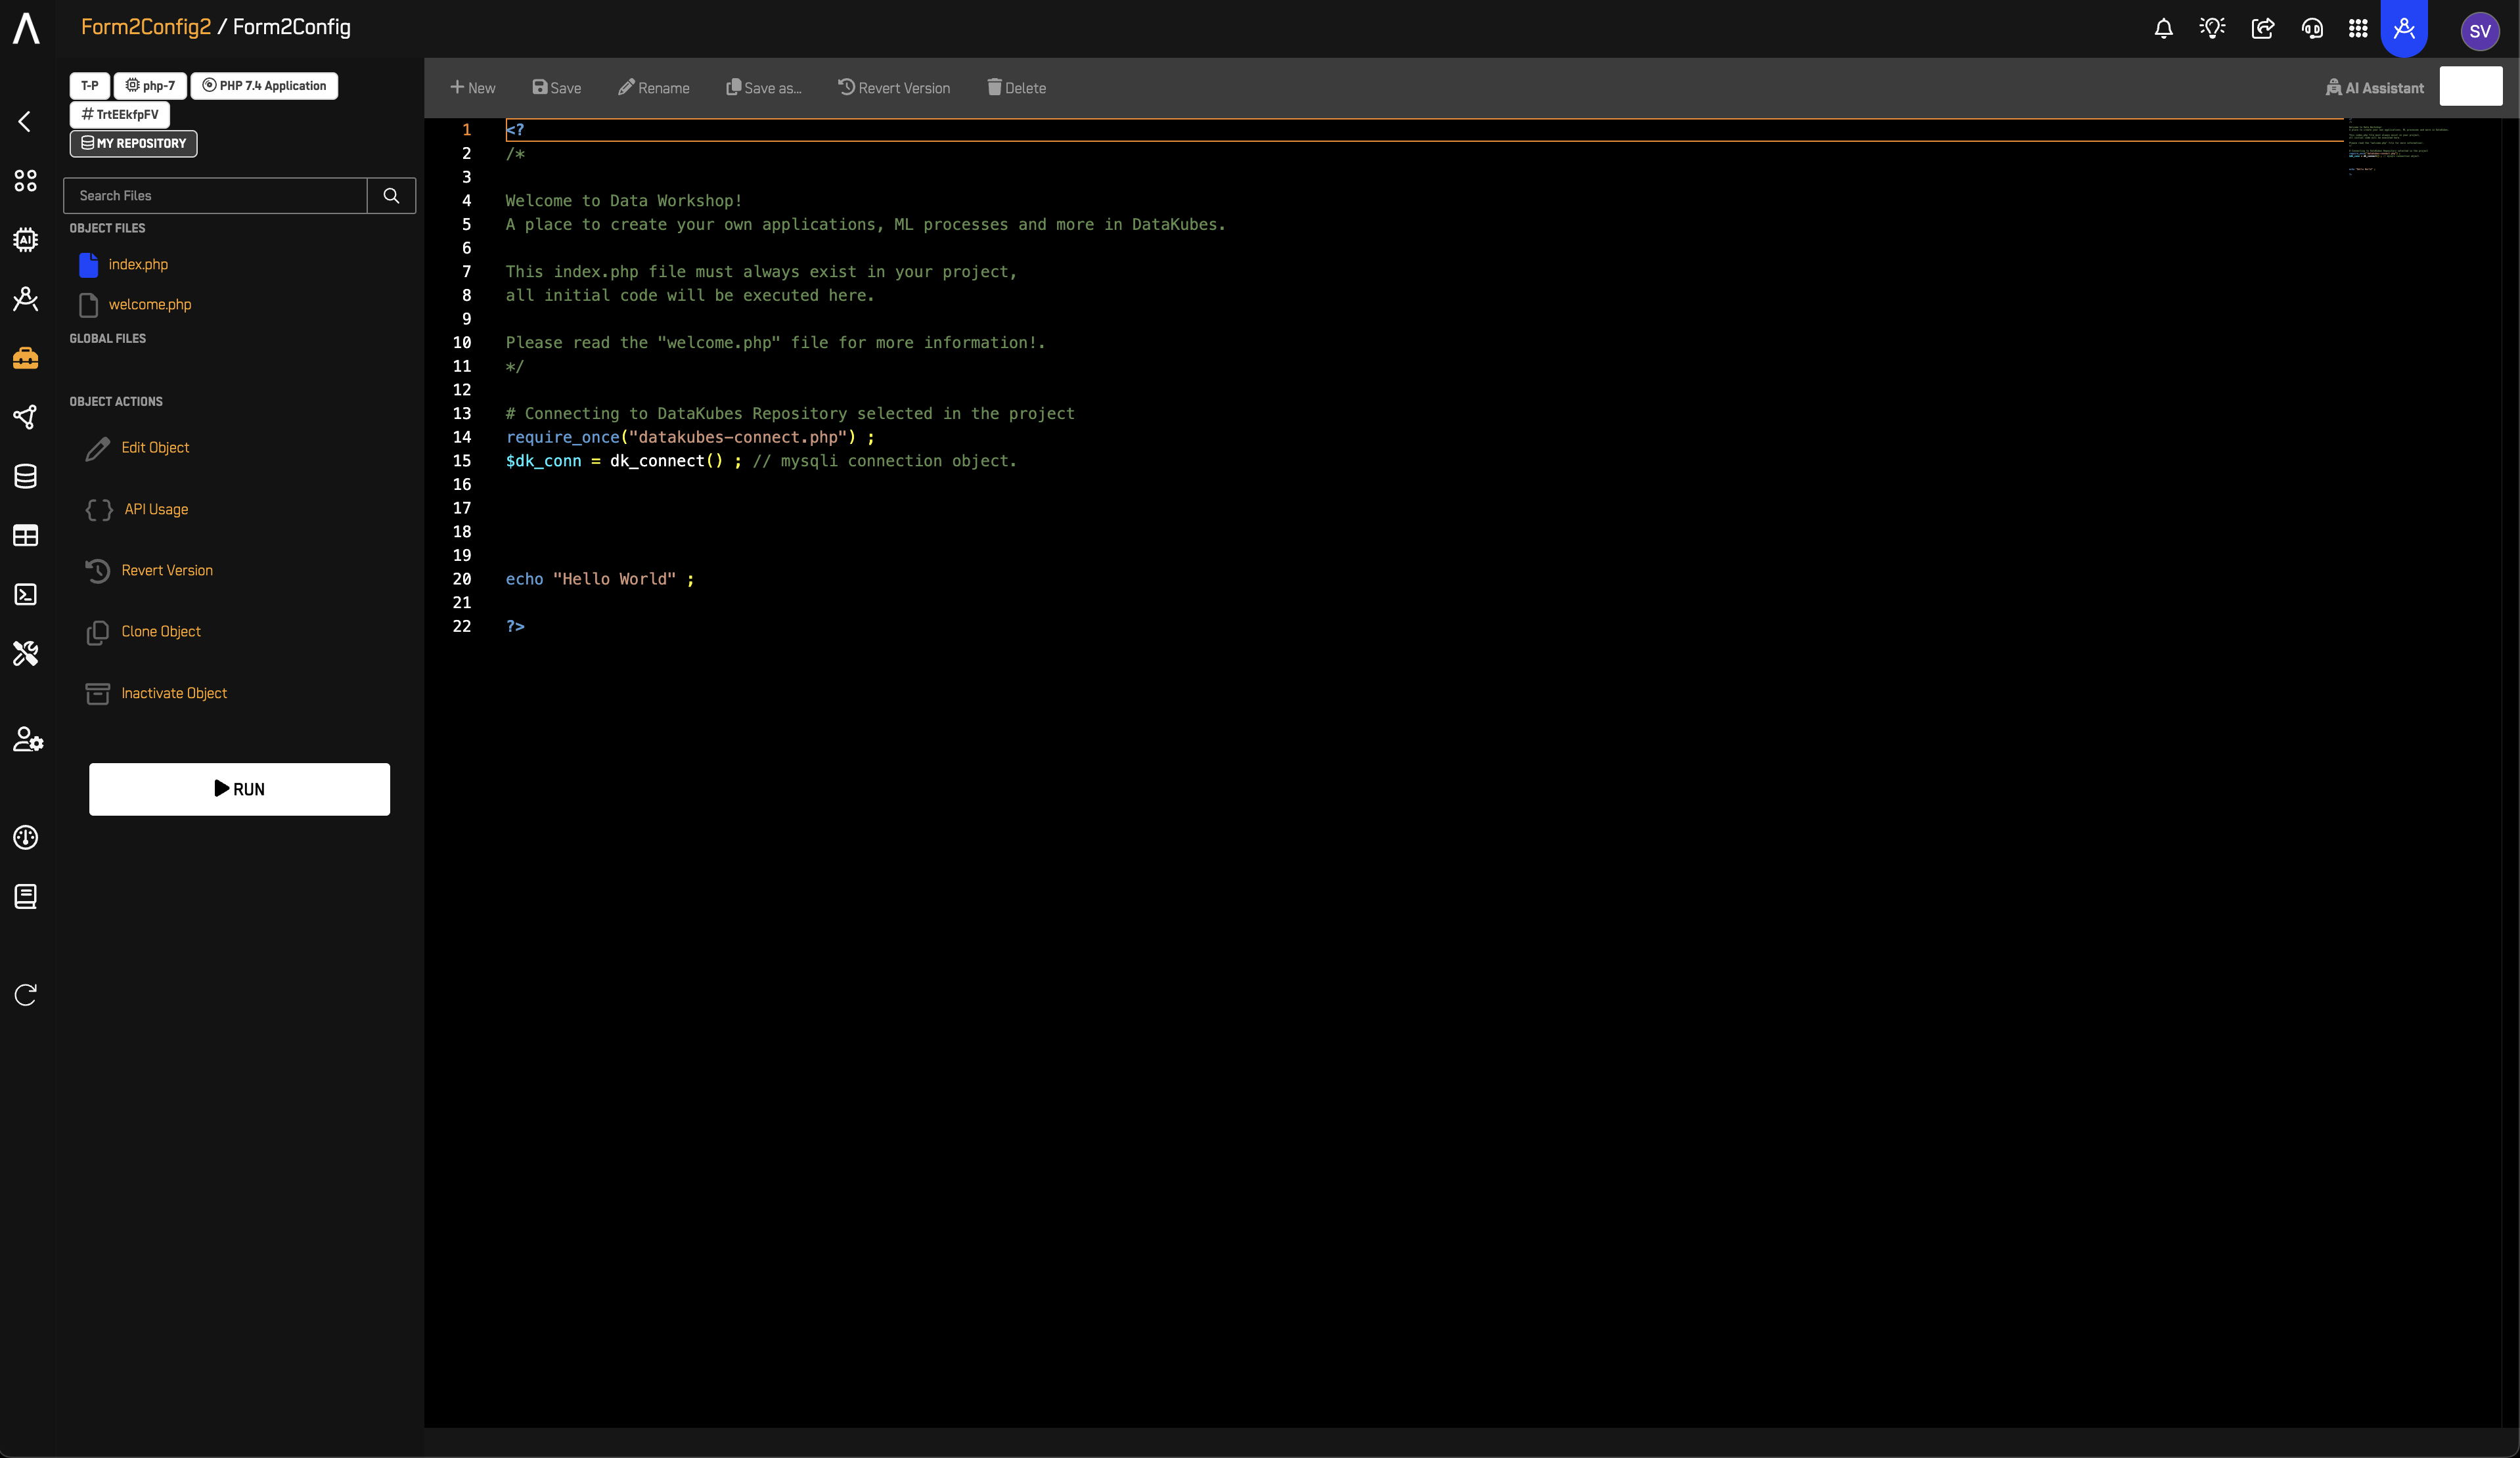
6️⃣ Modify index.php
- Open index.php.
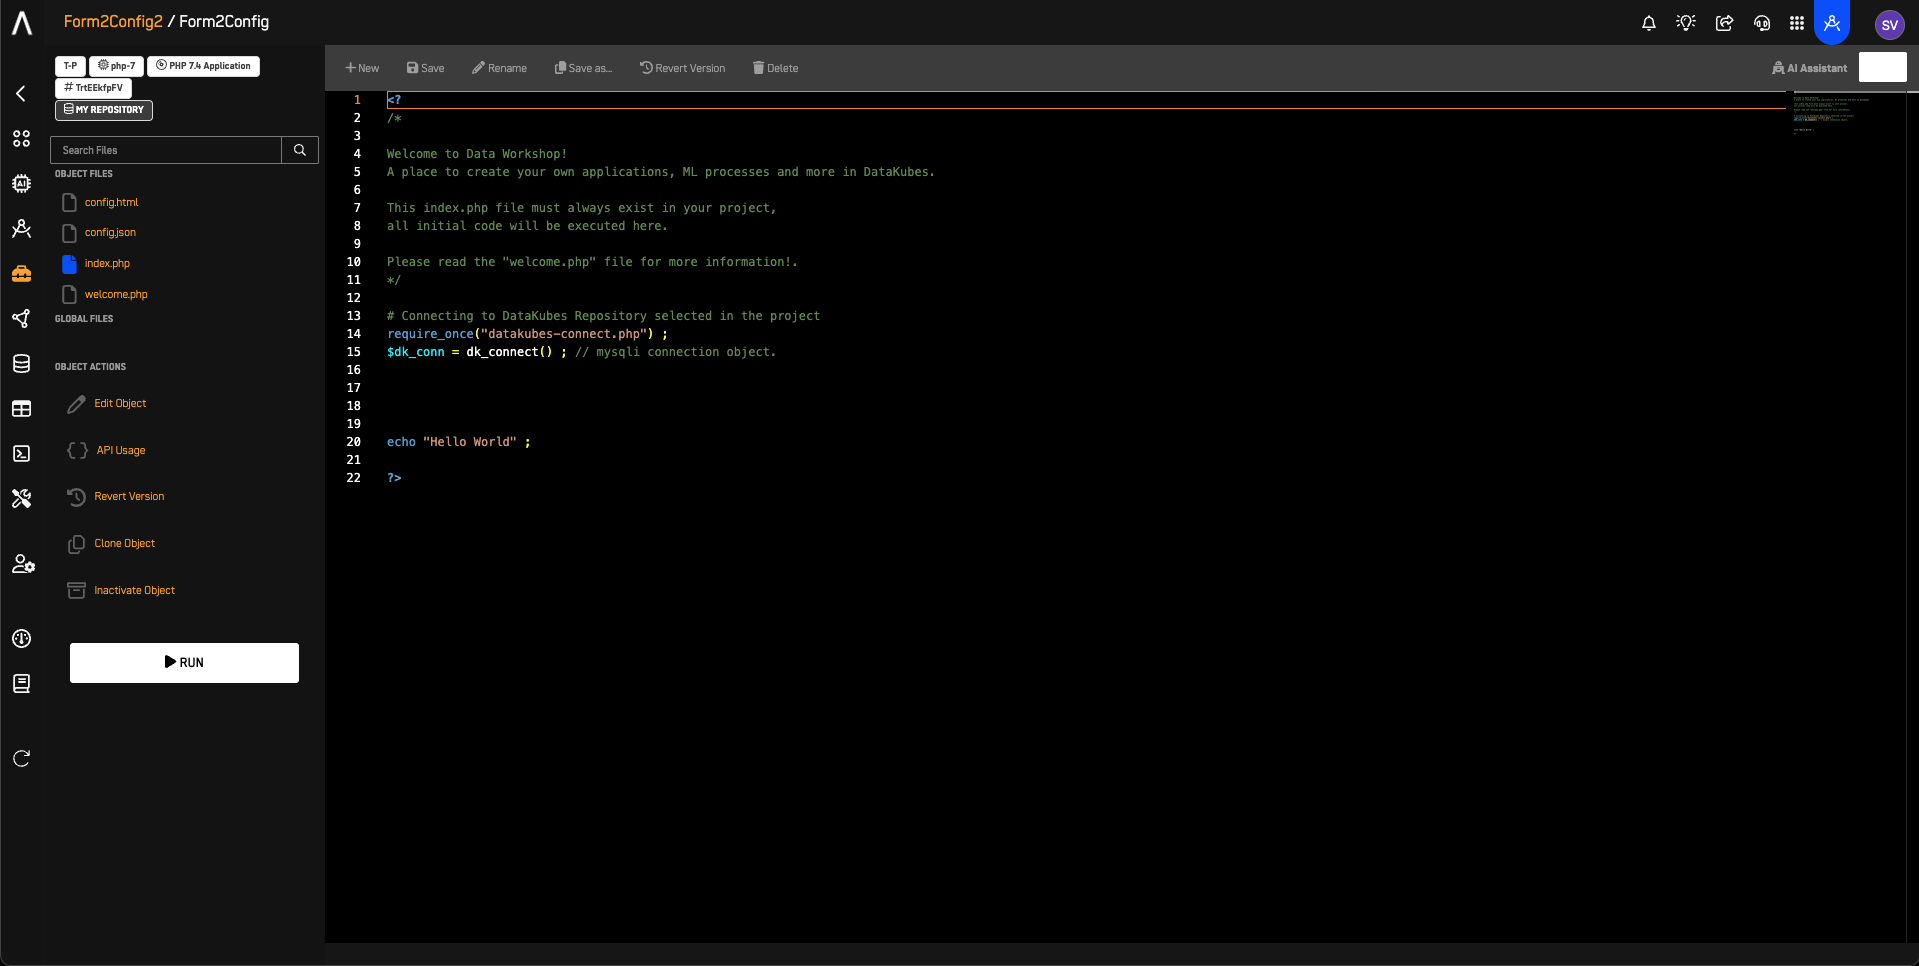
- Remove placeholder code (Hello World).
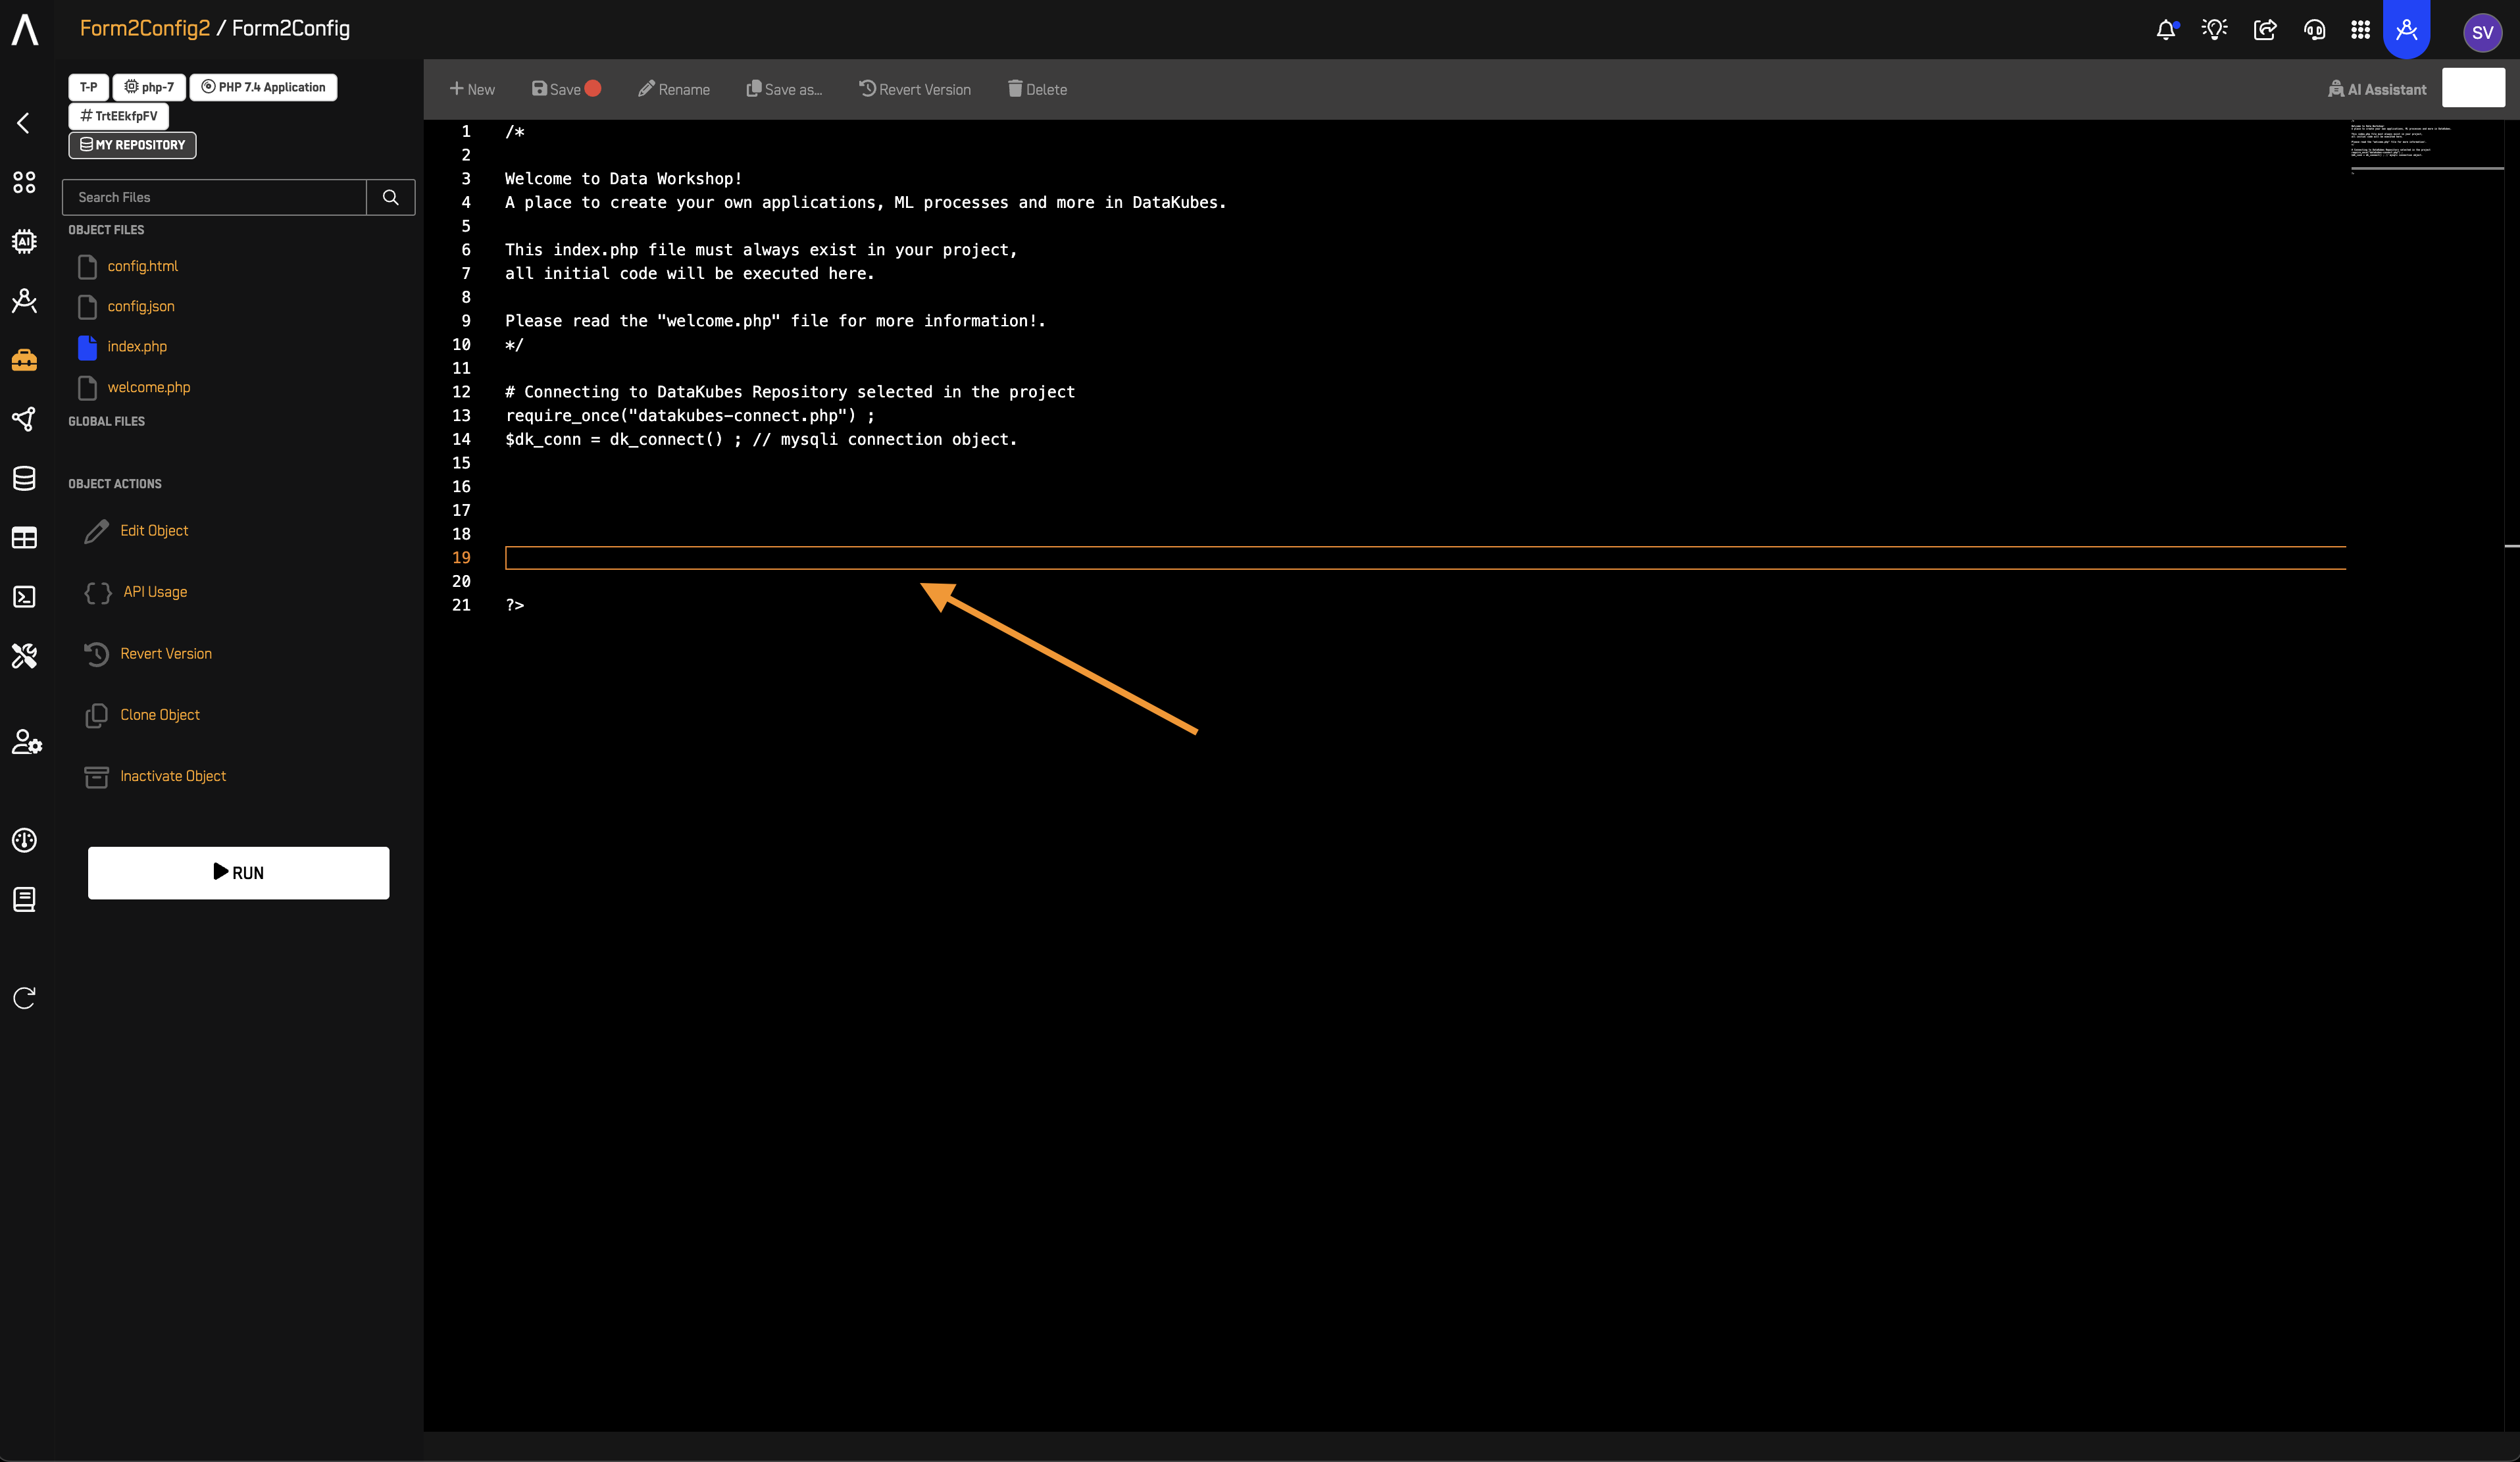
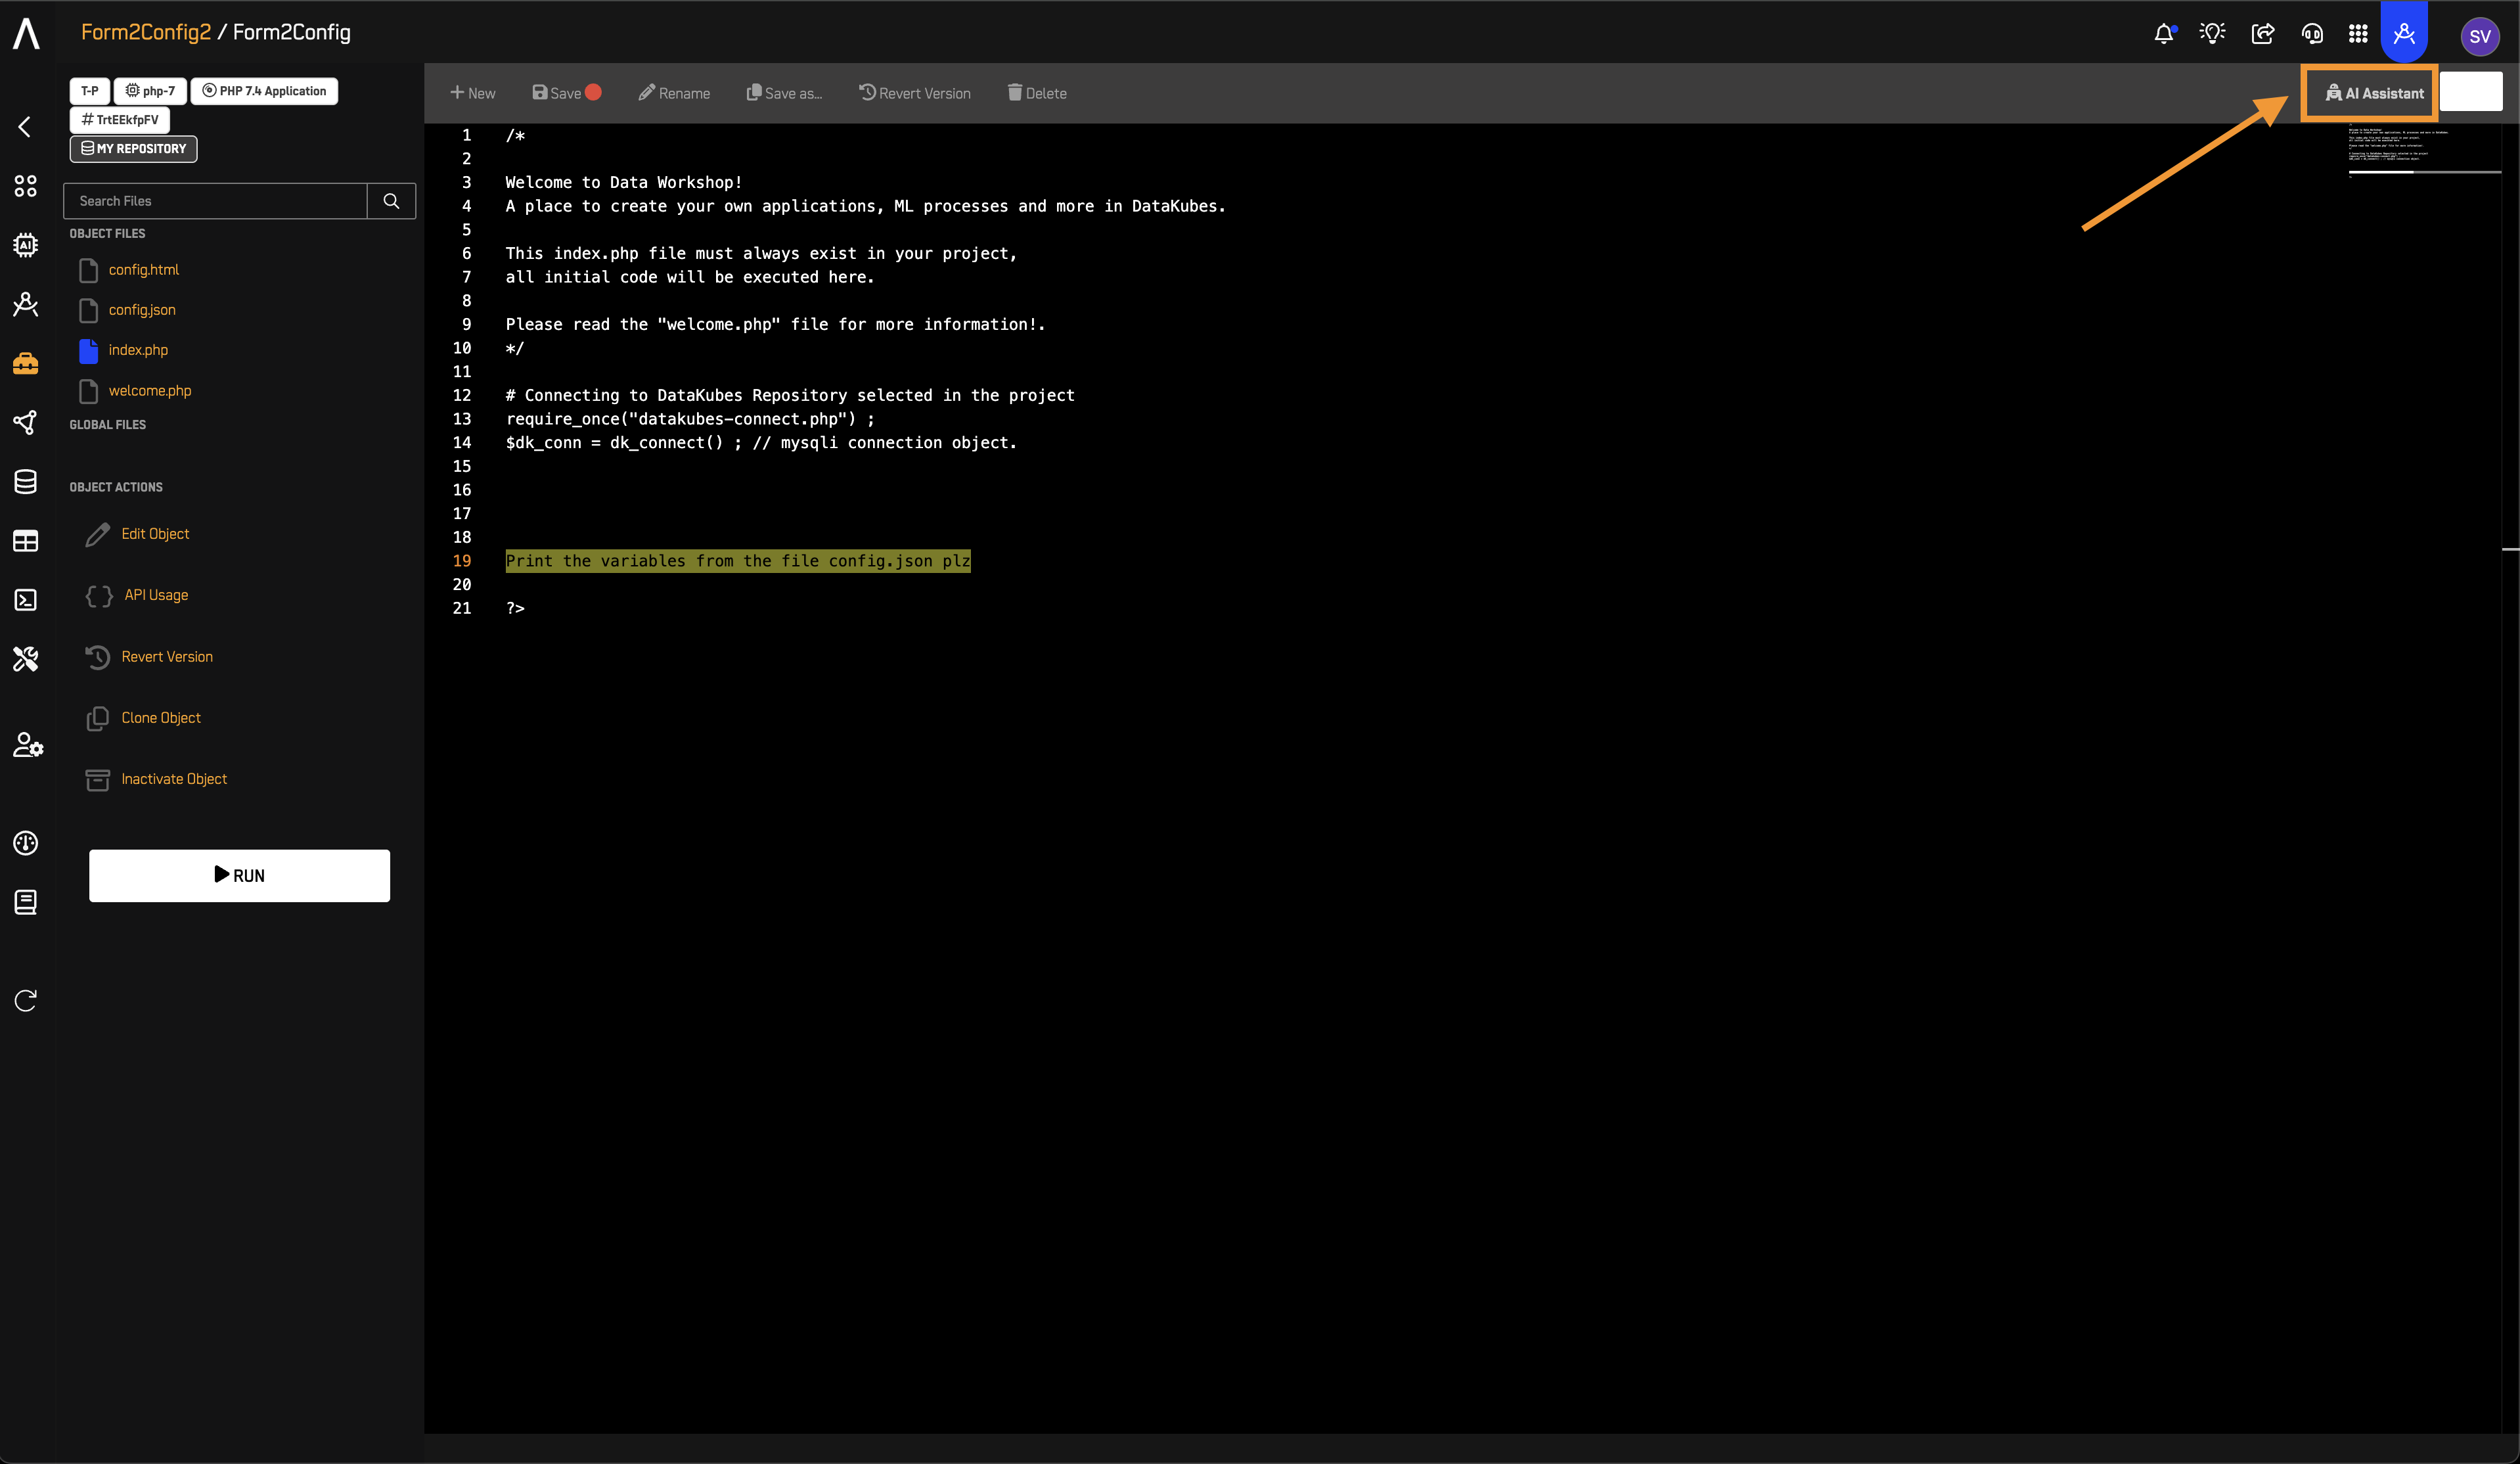
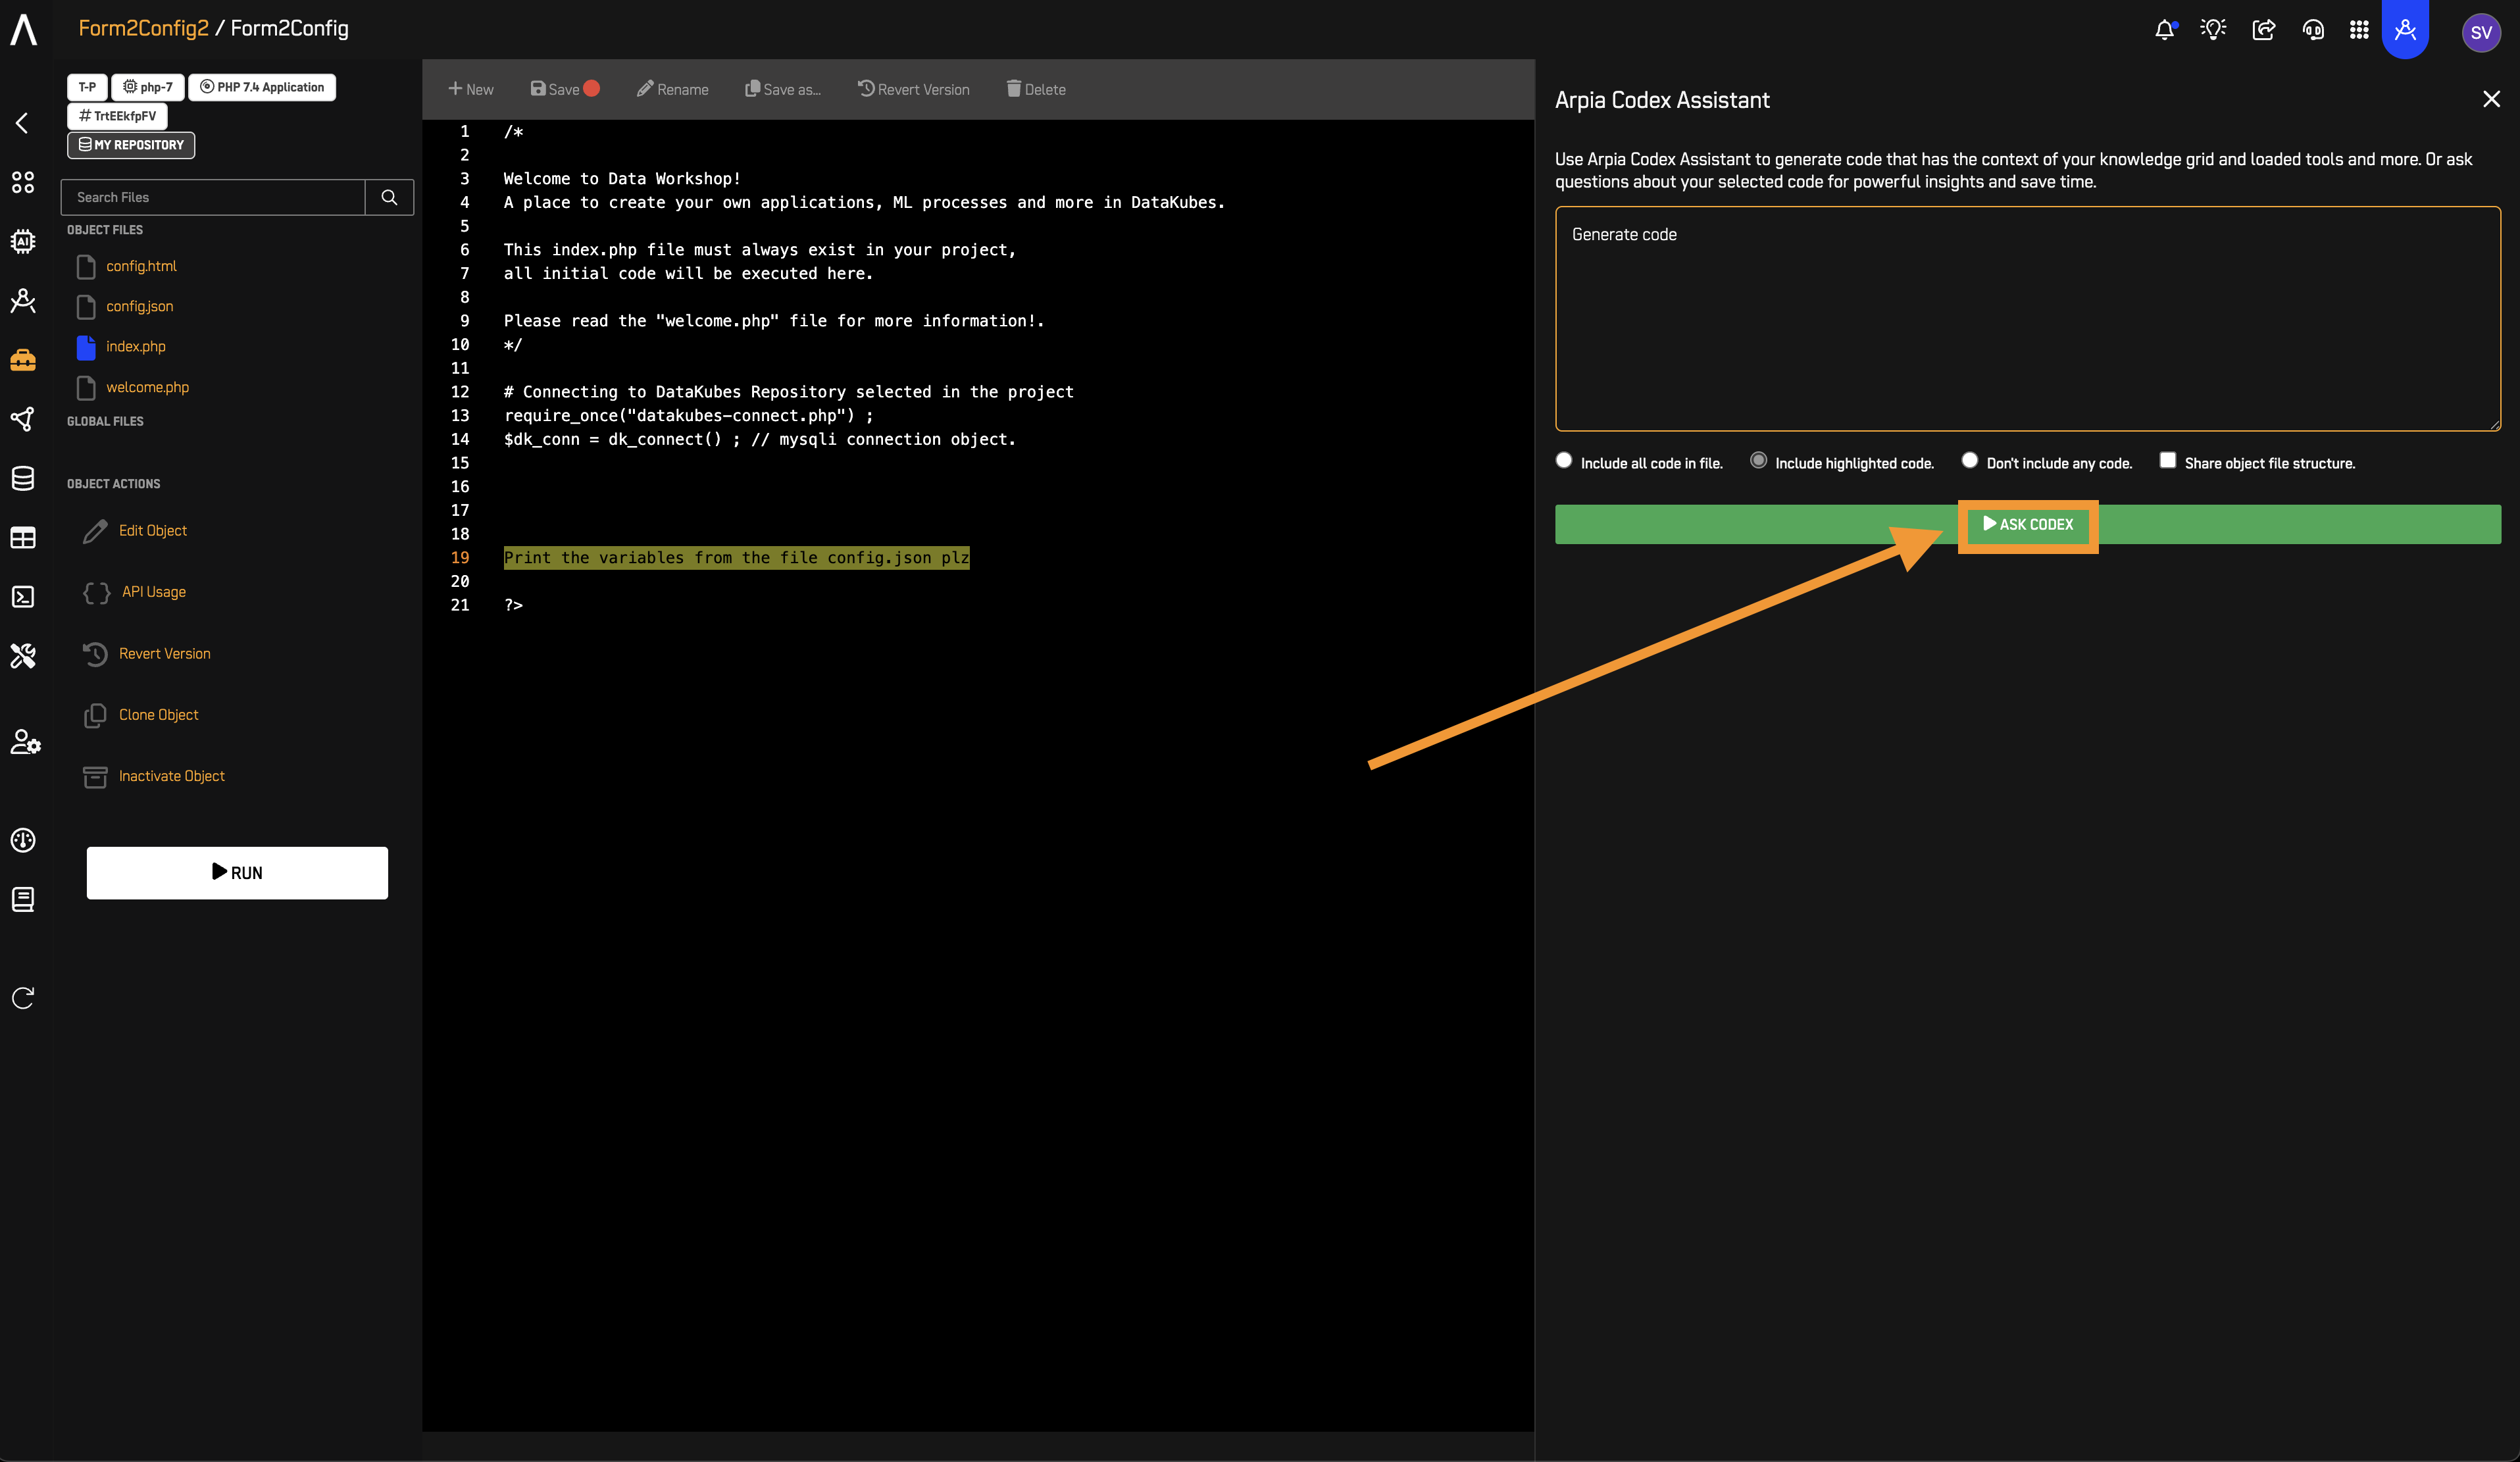
- On line 19, type: Print the variables from the file config.json plz
- Highlight the text.

- Click on AI Assistant
- From the radio option select *Include Highlighted Code.**

- In the text space Type: Generate code
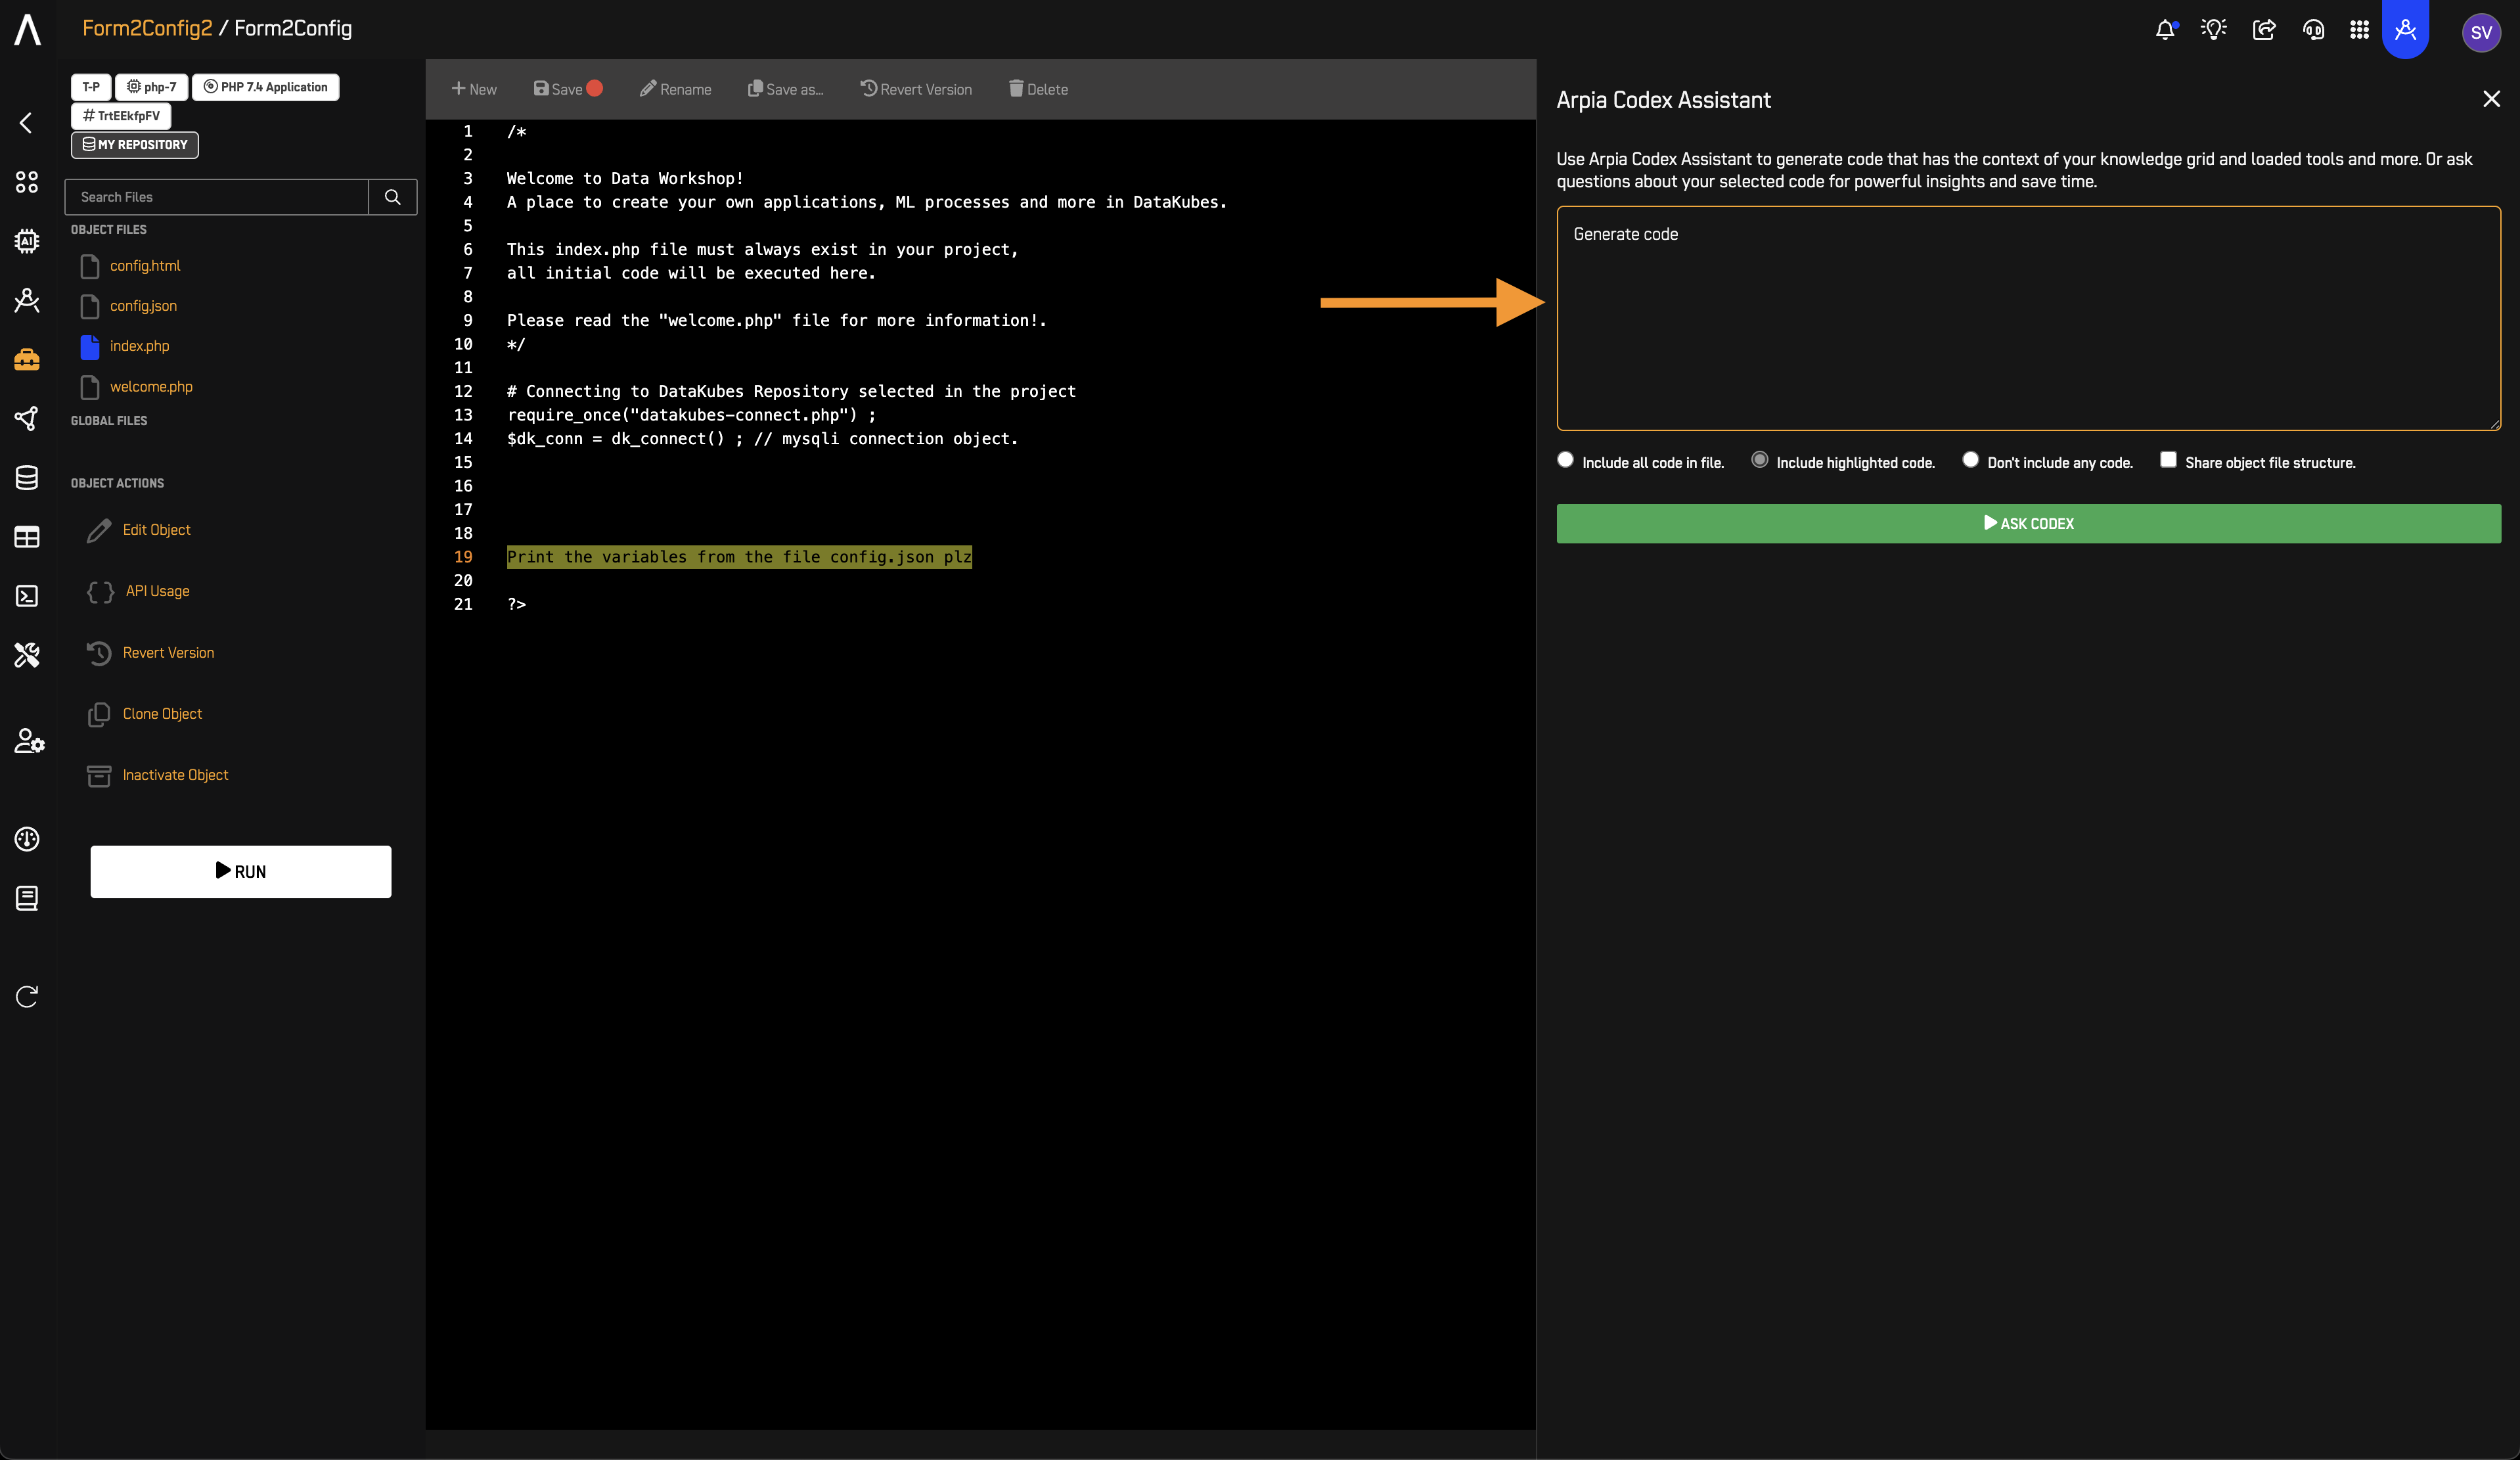
- Click Ask Codex.
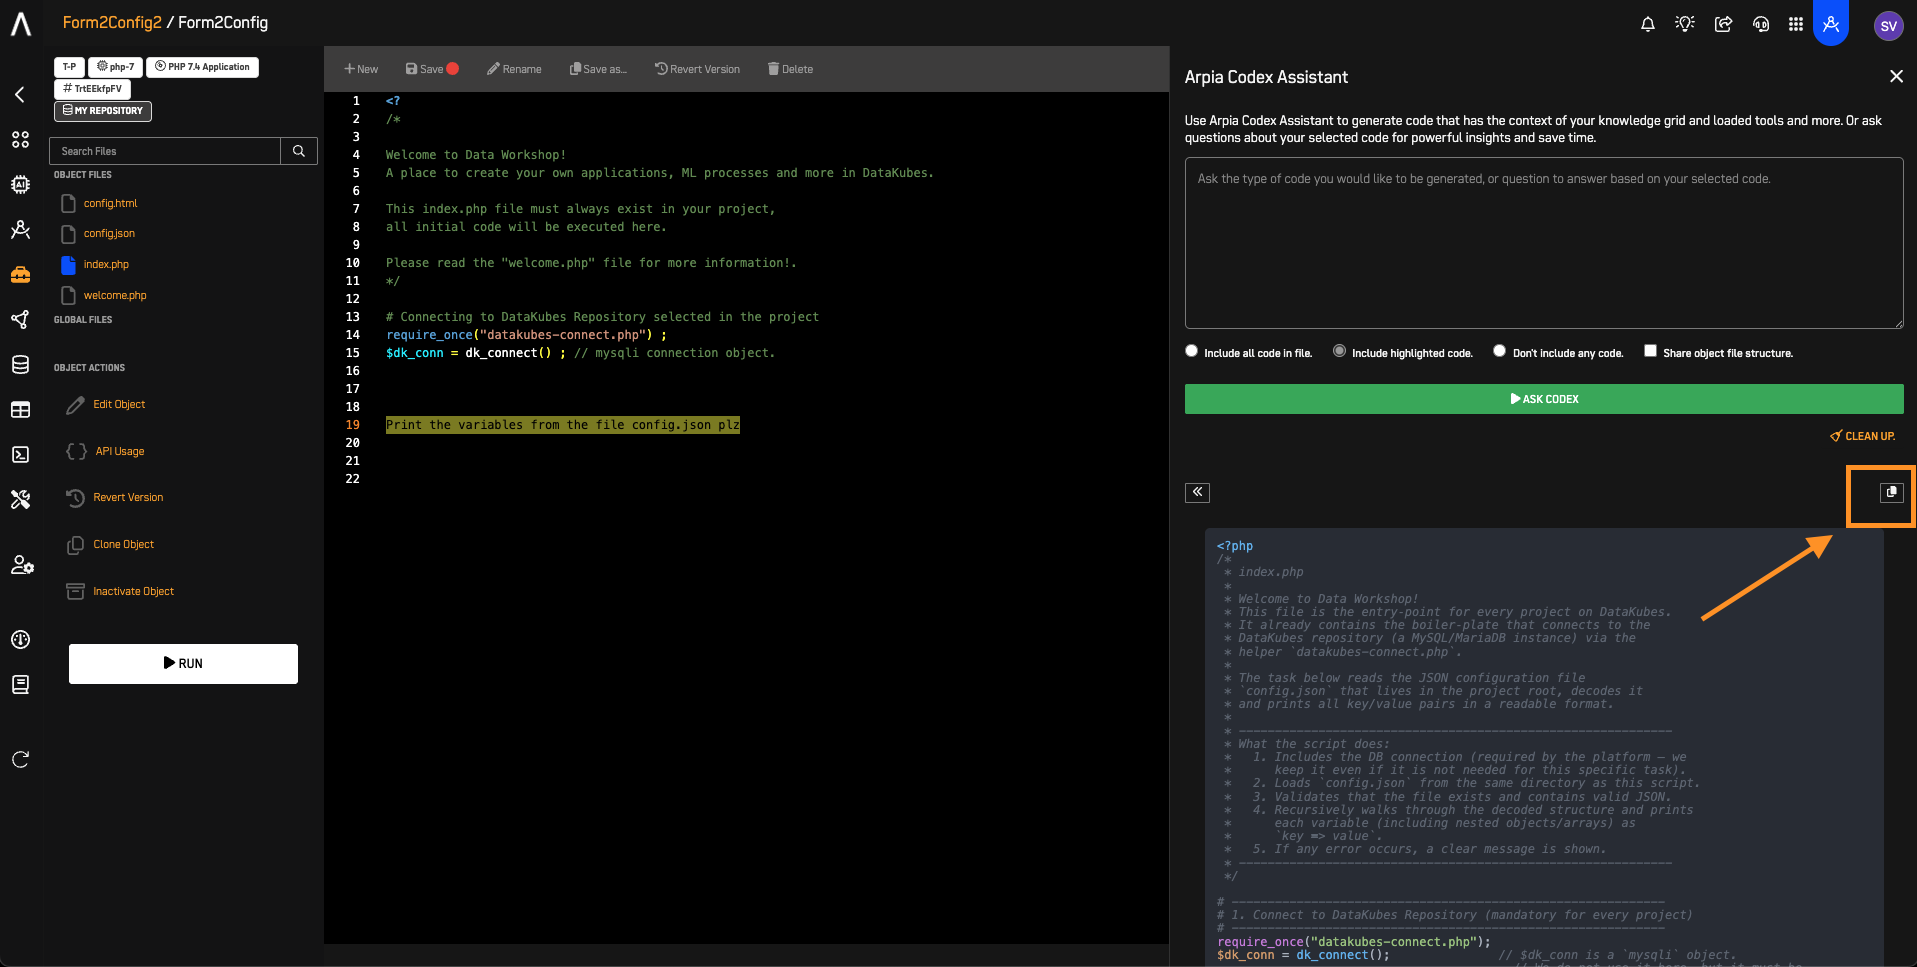
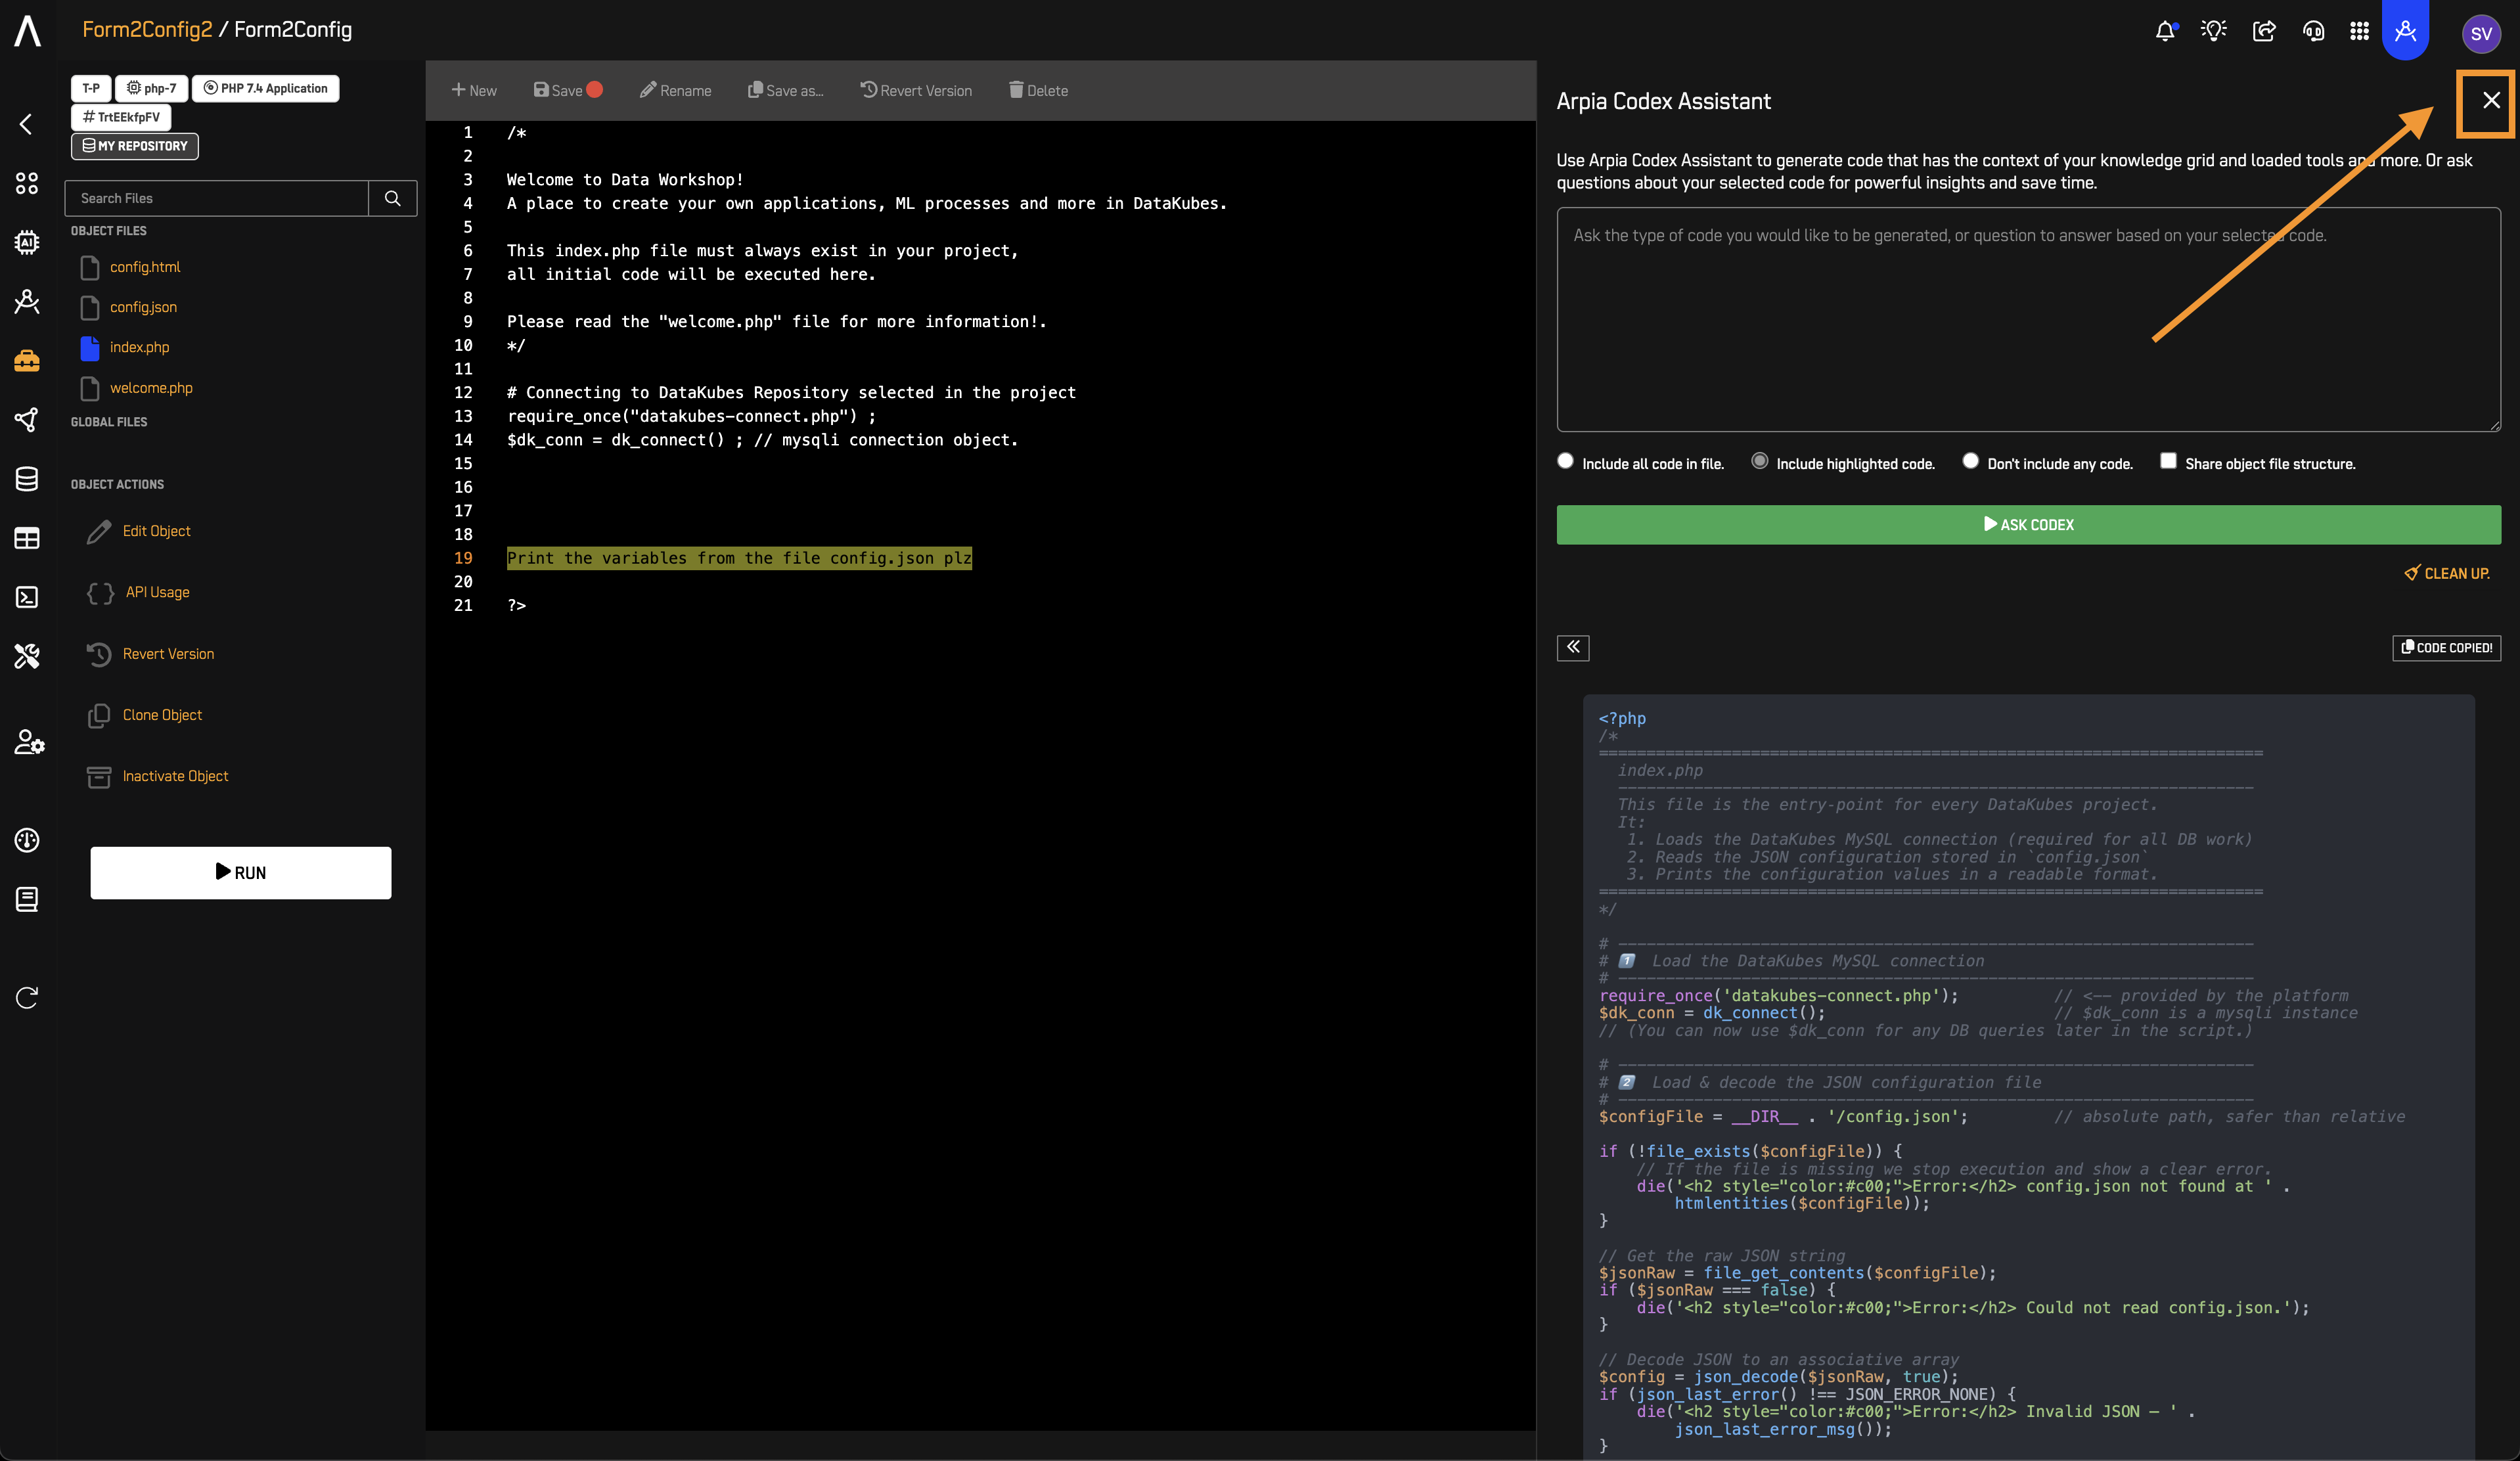
- Copy the generated PHP code.
- Press X to close the Arpia Codex Assistant Window
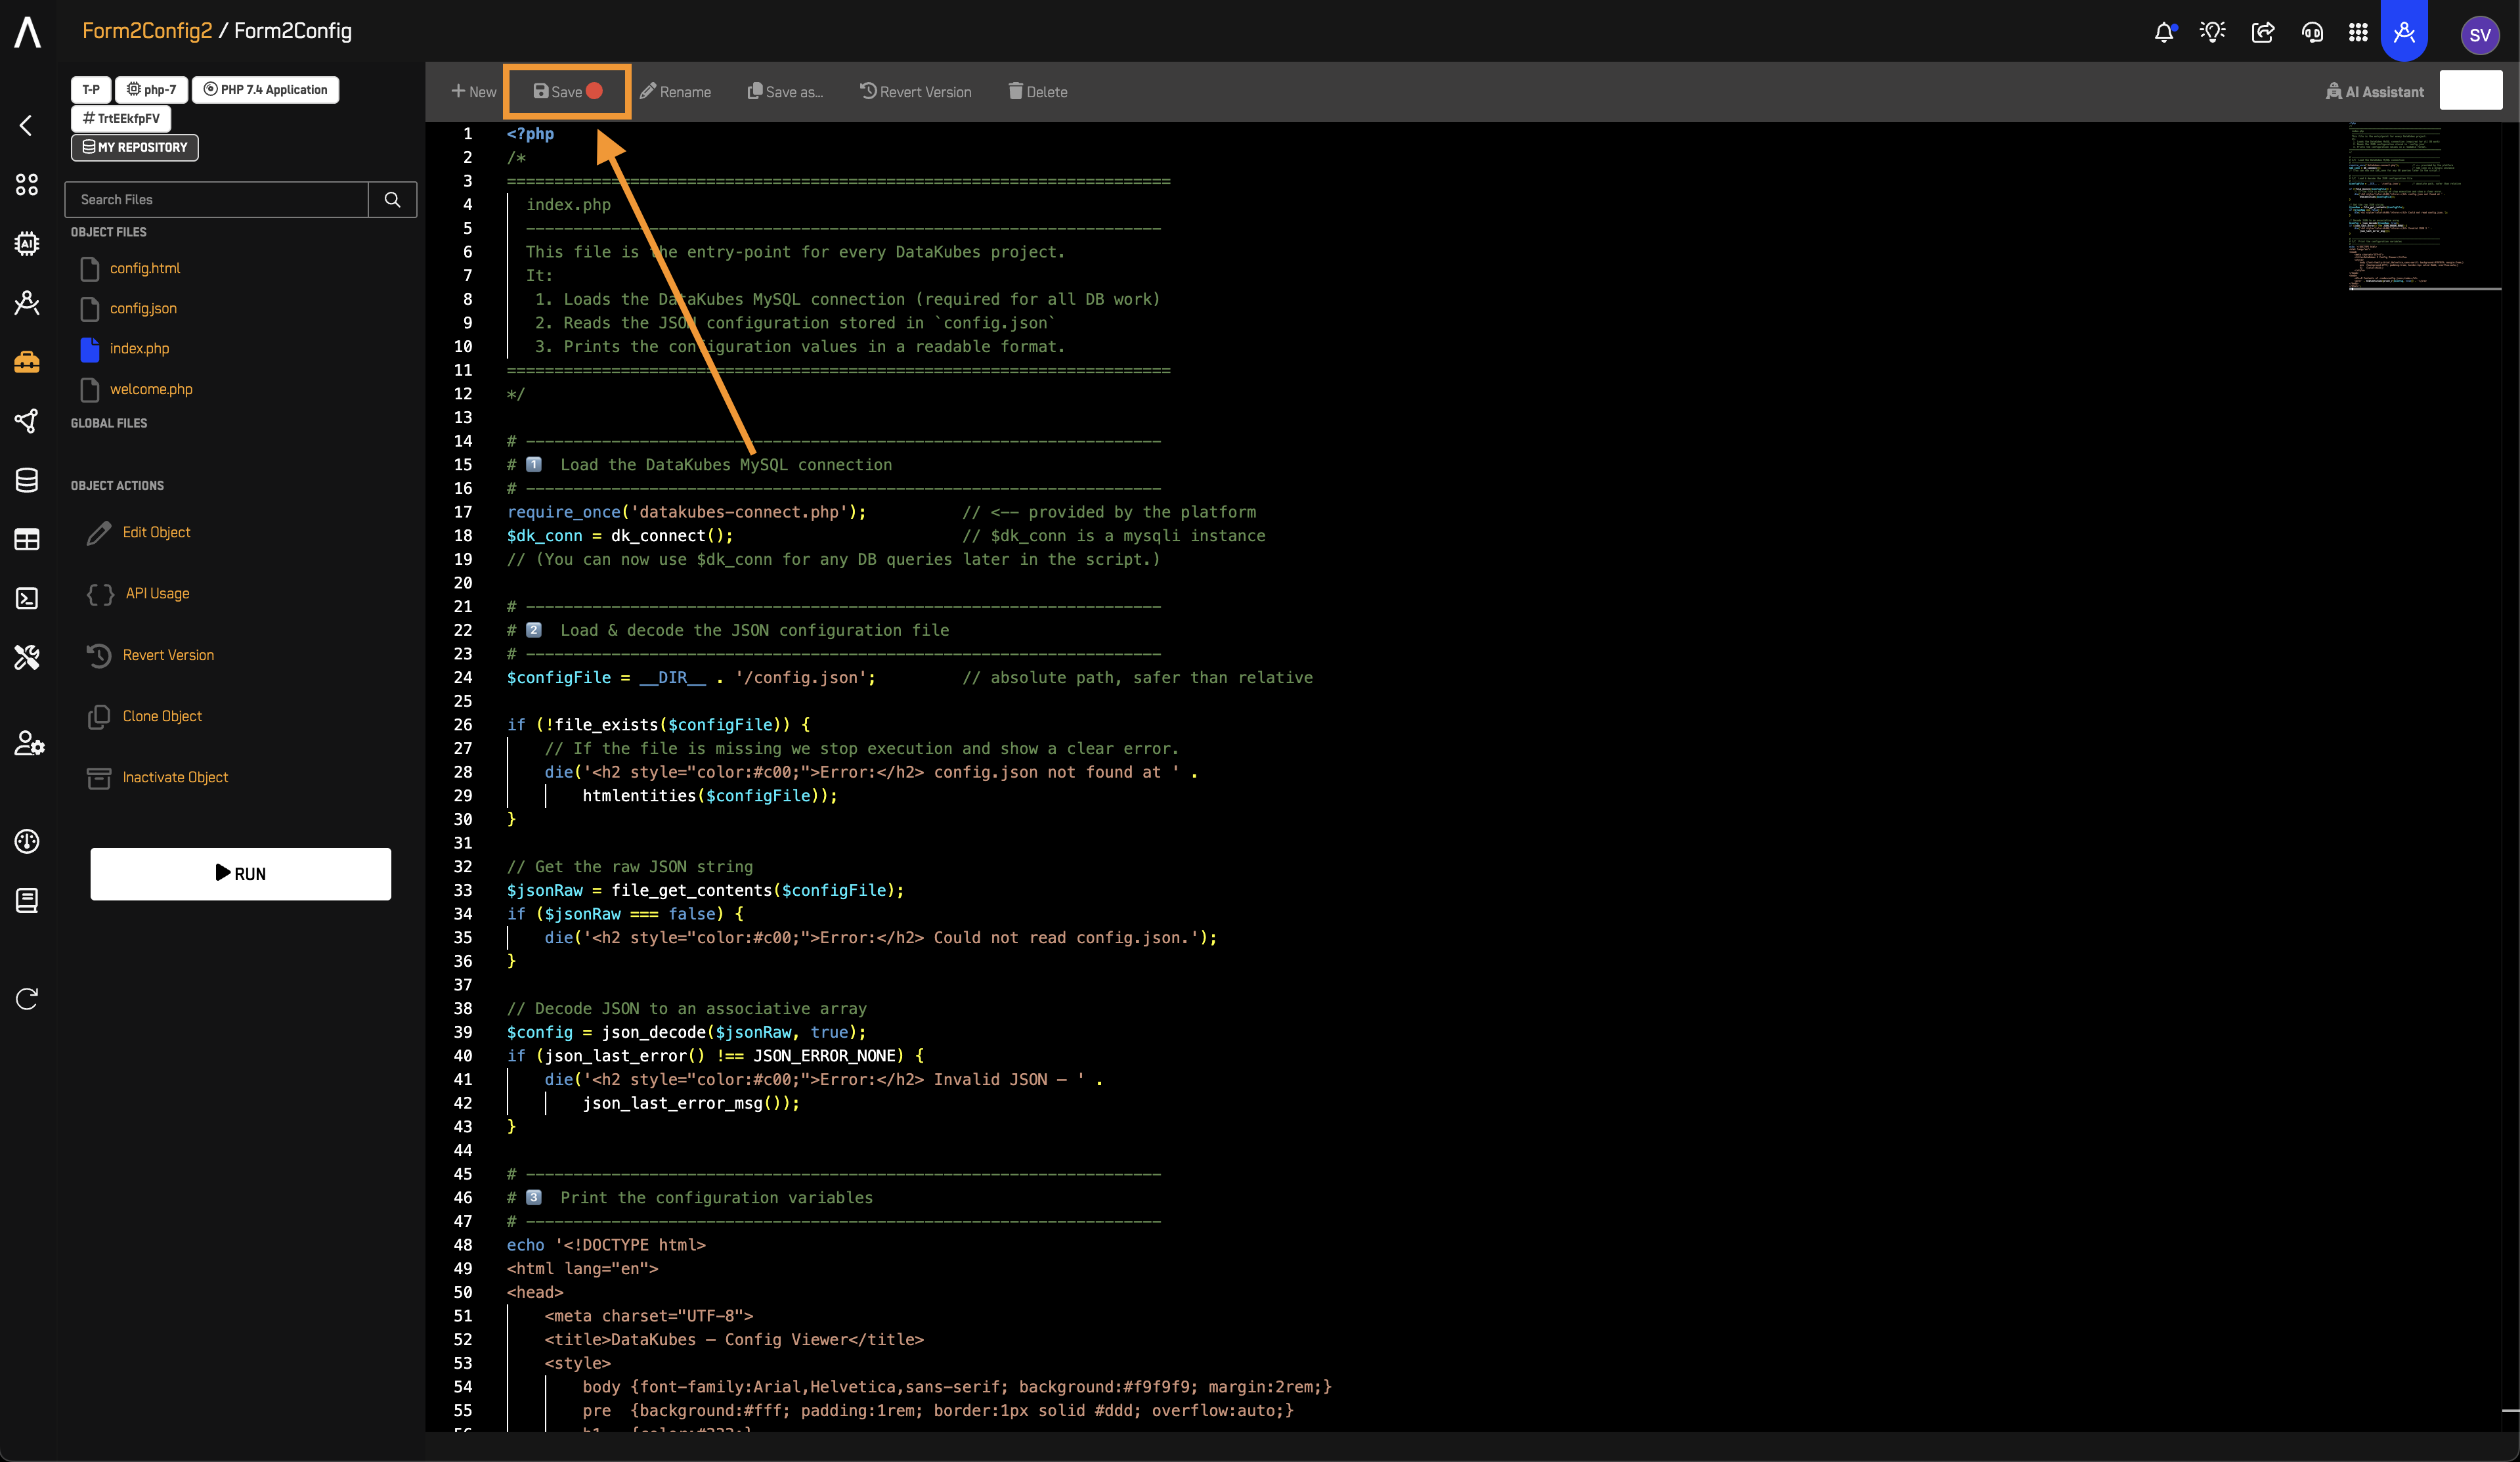
- Replace the code in index.php:
- Delete all the existing PHP code.
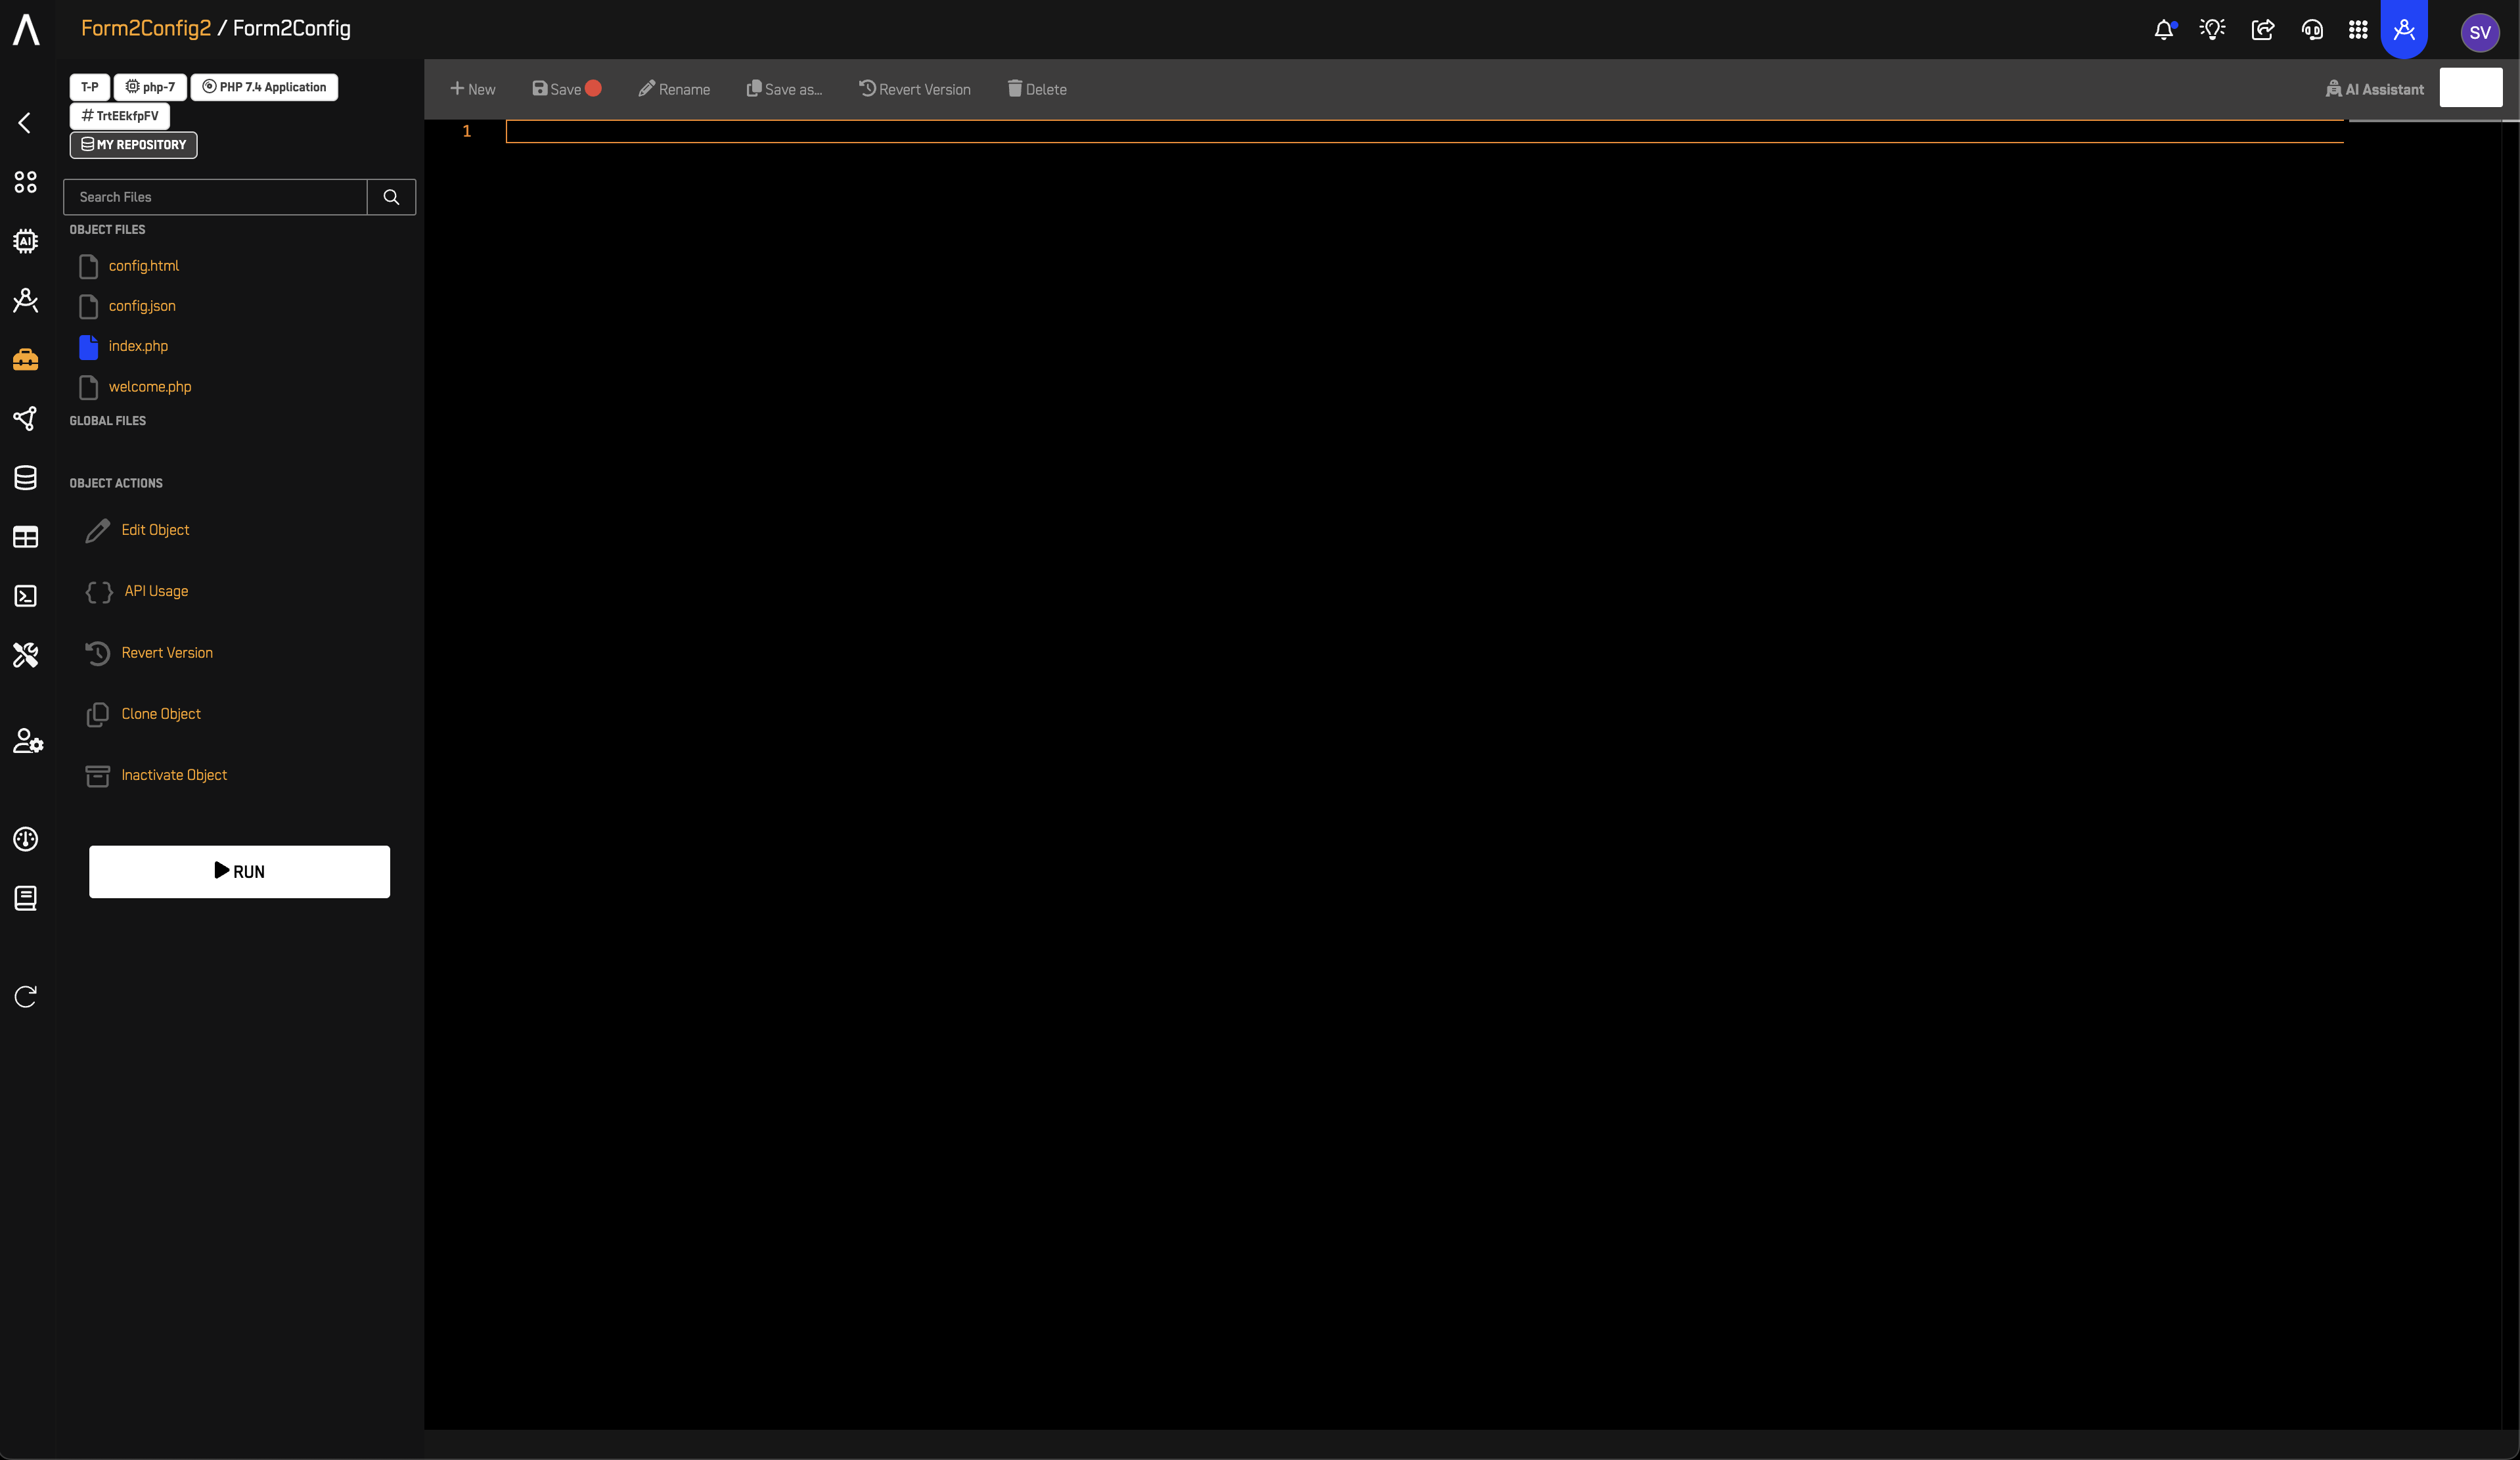
- Paste the new generated PHP code into the file.
- Press Save
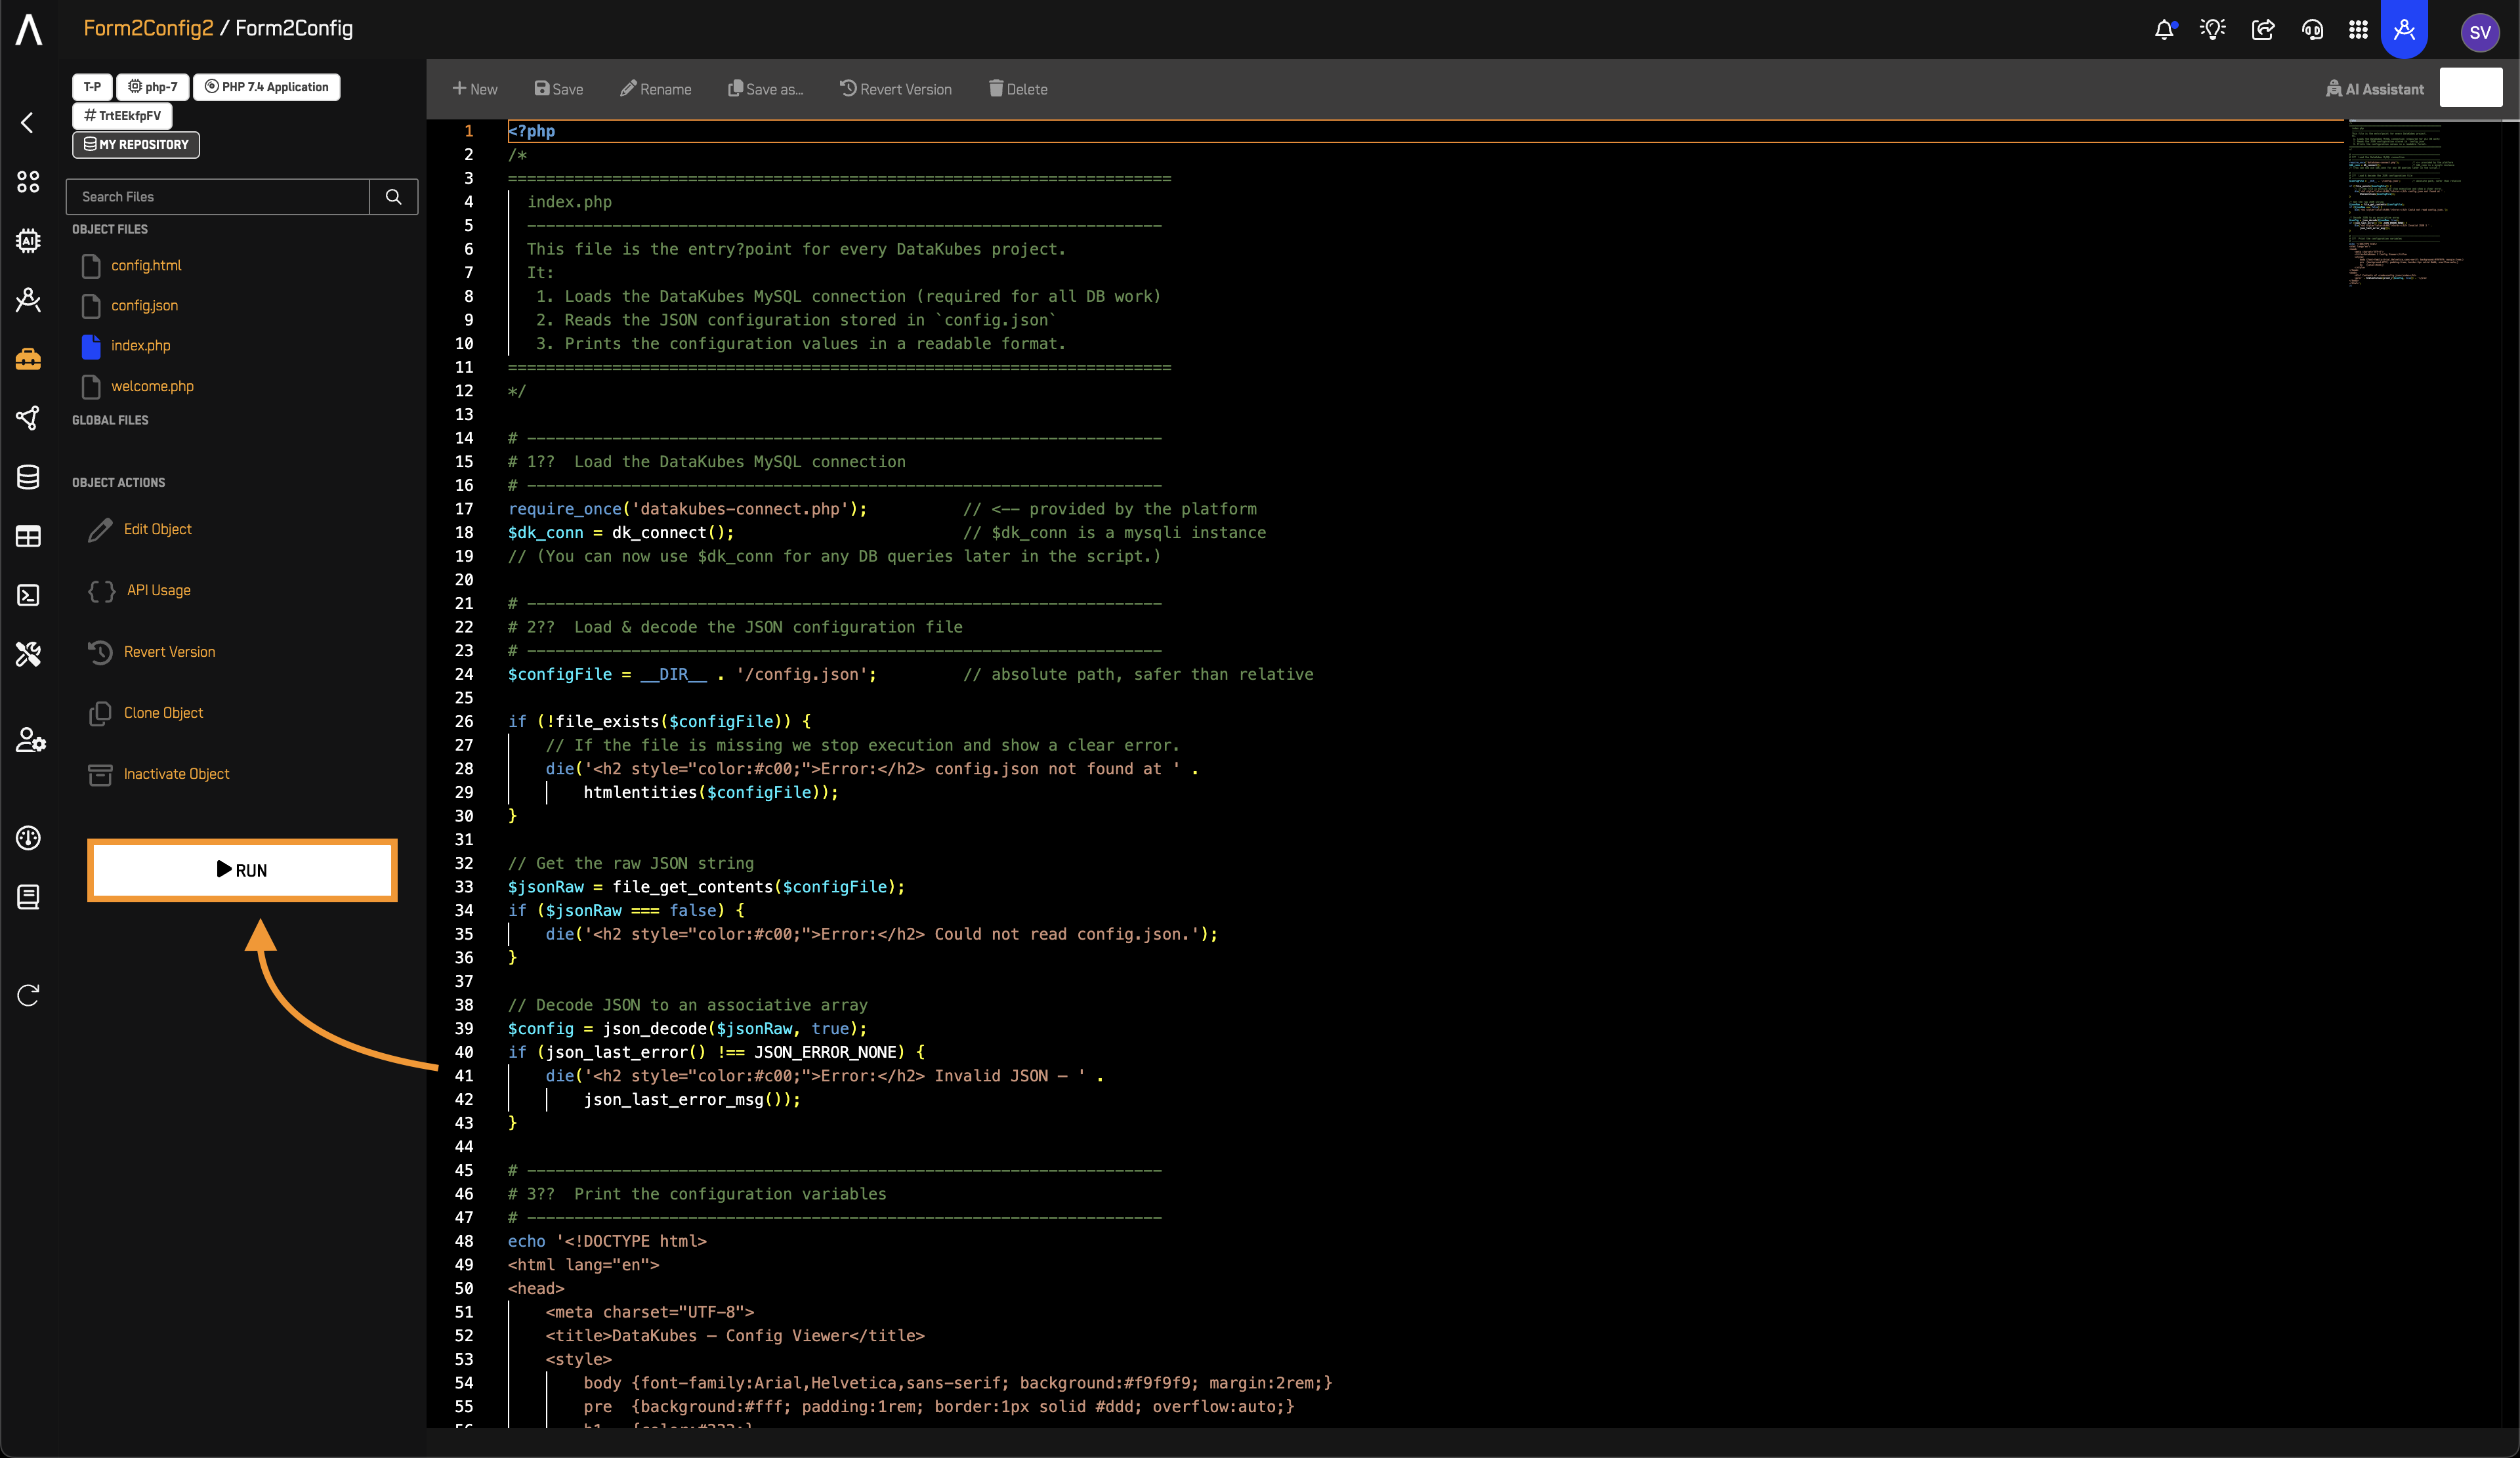
7️⃣ Run the Workshop Object
- Click Run.
- Press Start to execute the object.
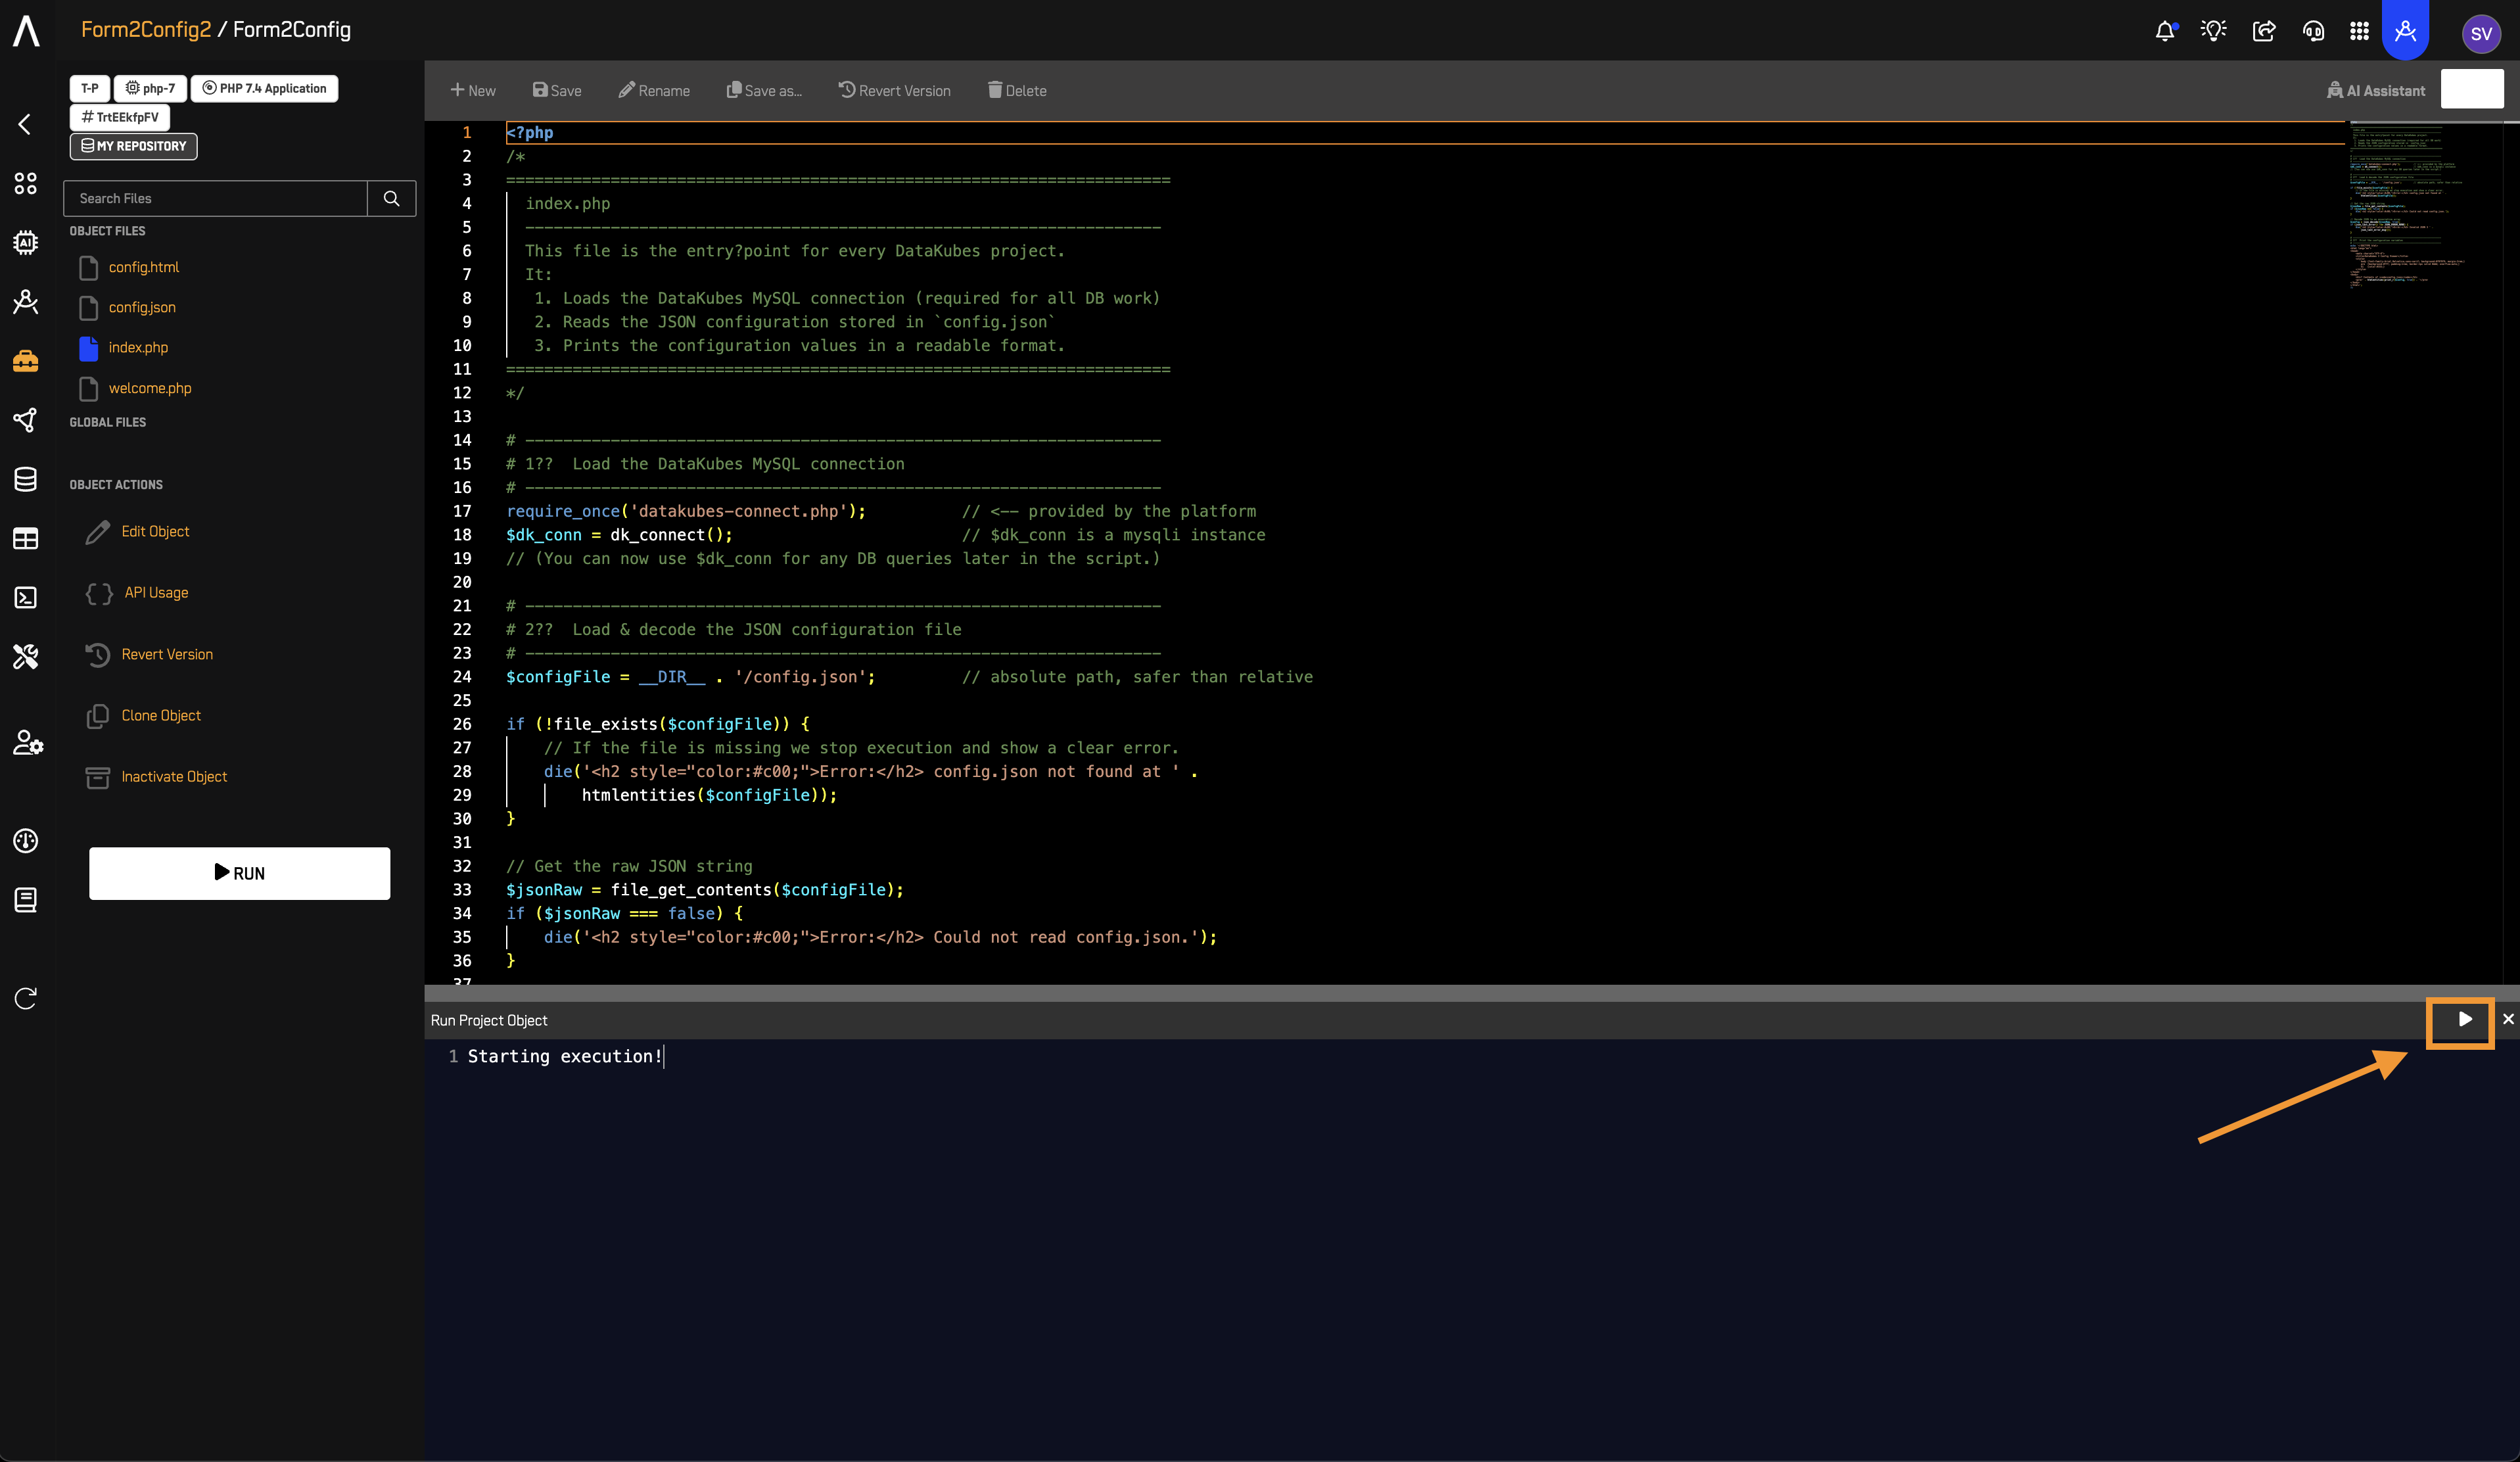
- When you run the Project Object, you should see the output data appear without errors.
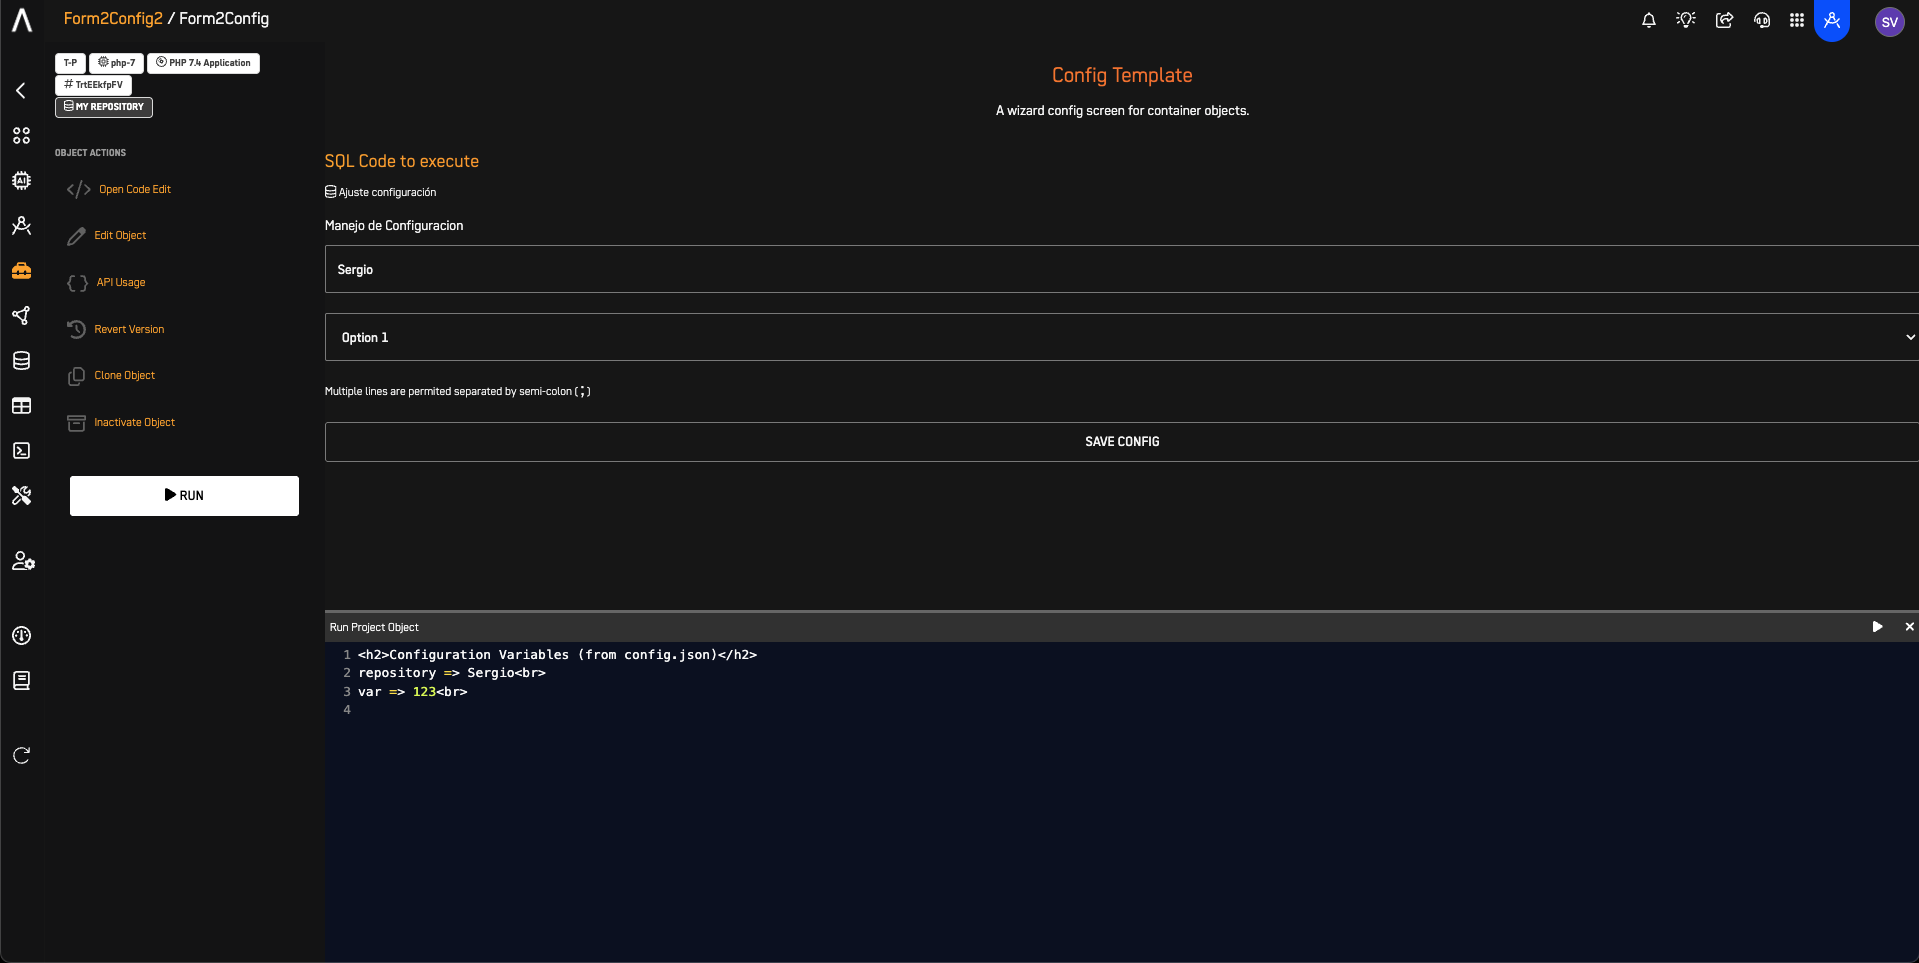
8️⃣ Run with Option 1
- Repeat Step 5.
- Run the object. Repeat Step 7.
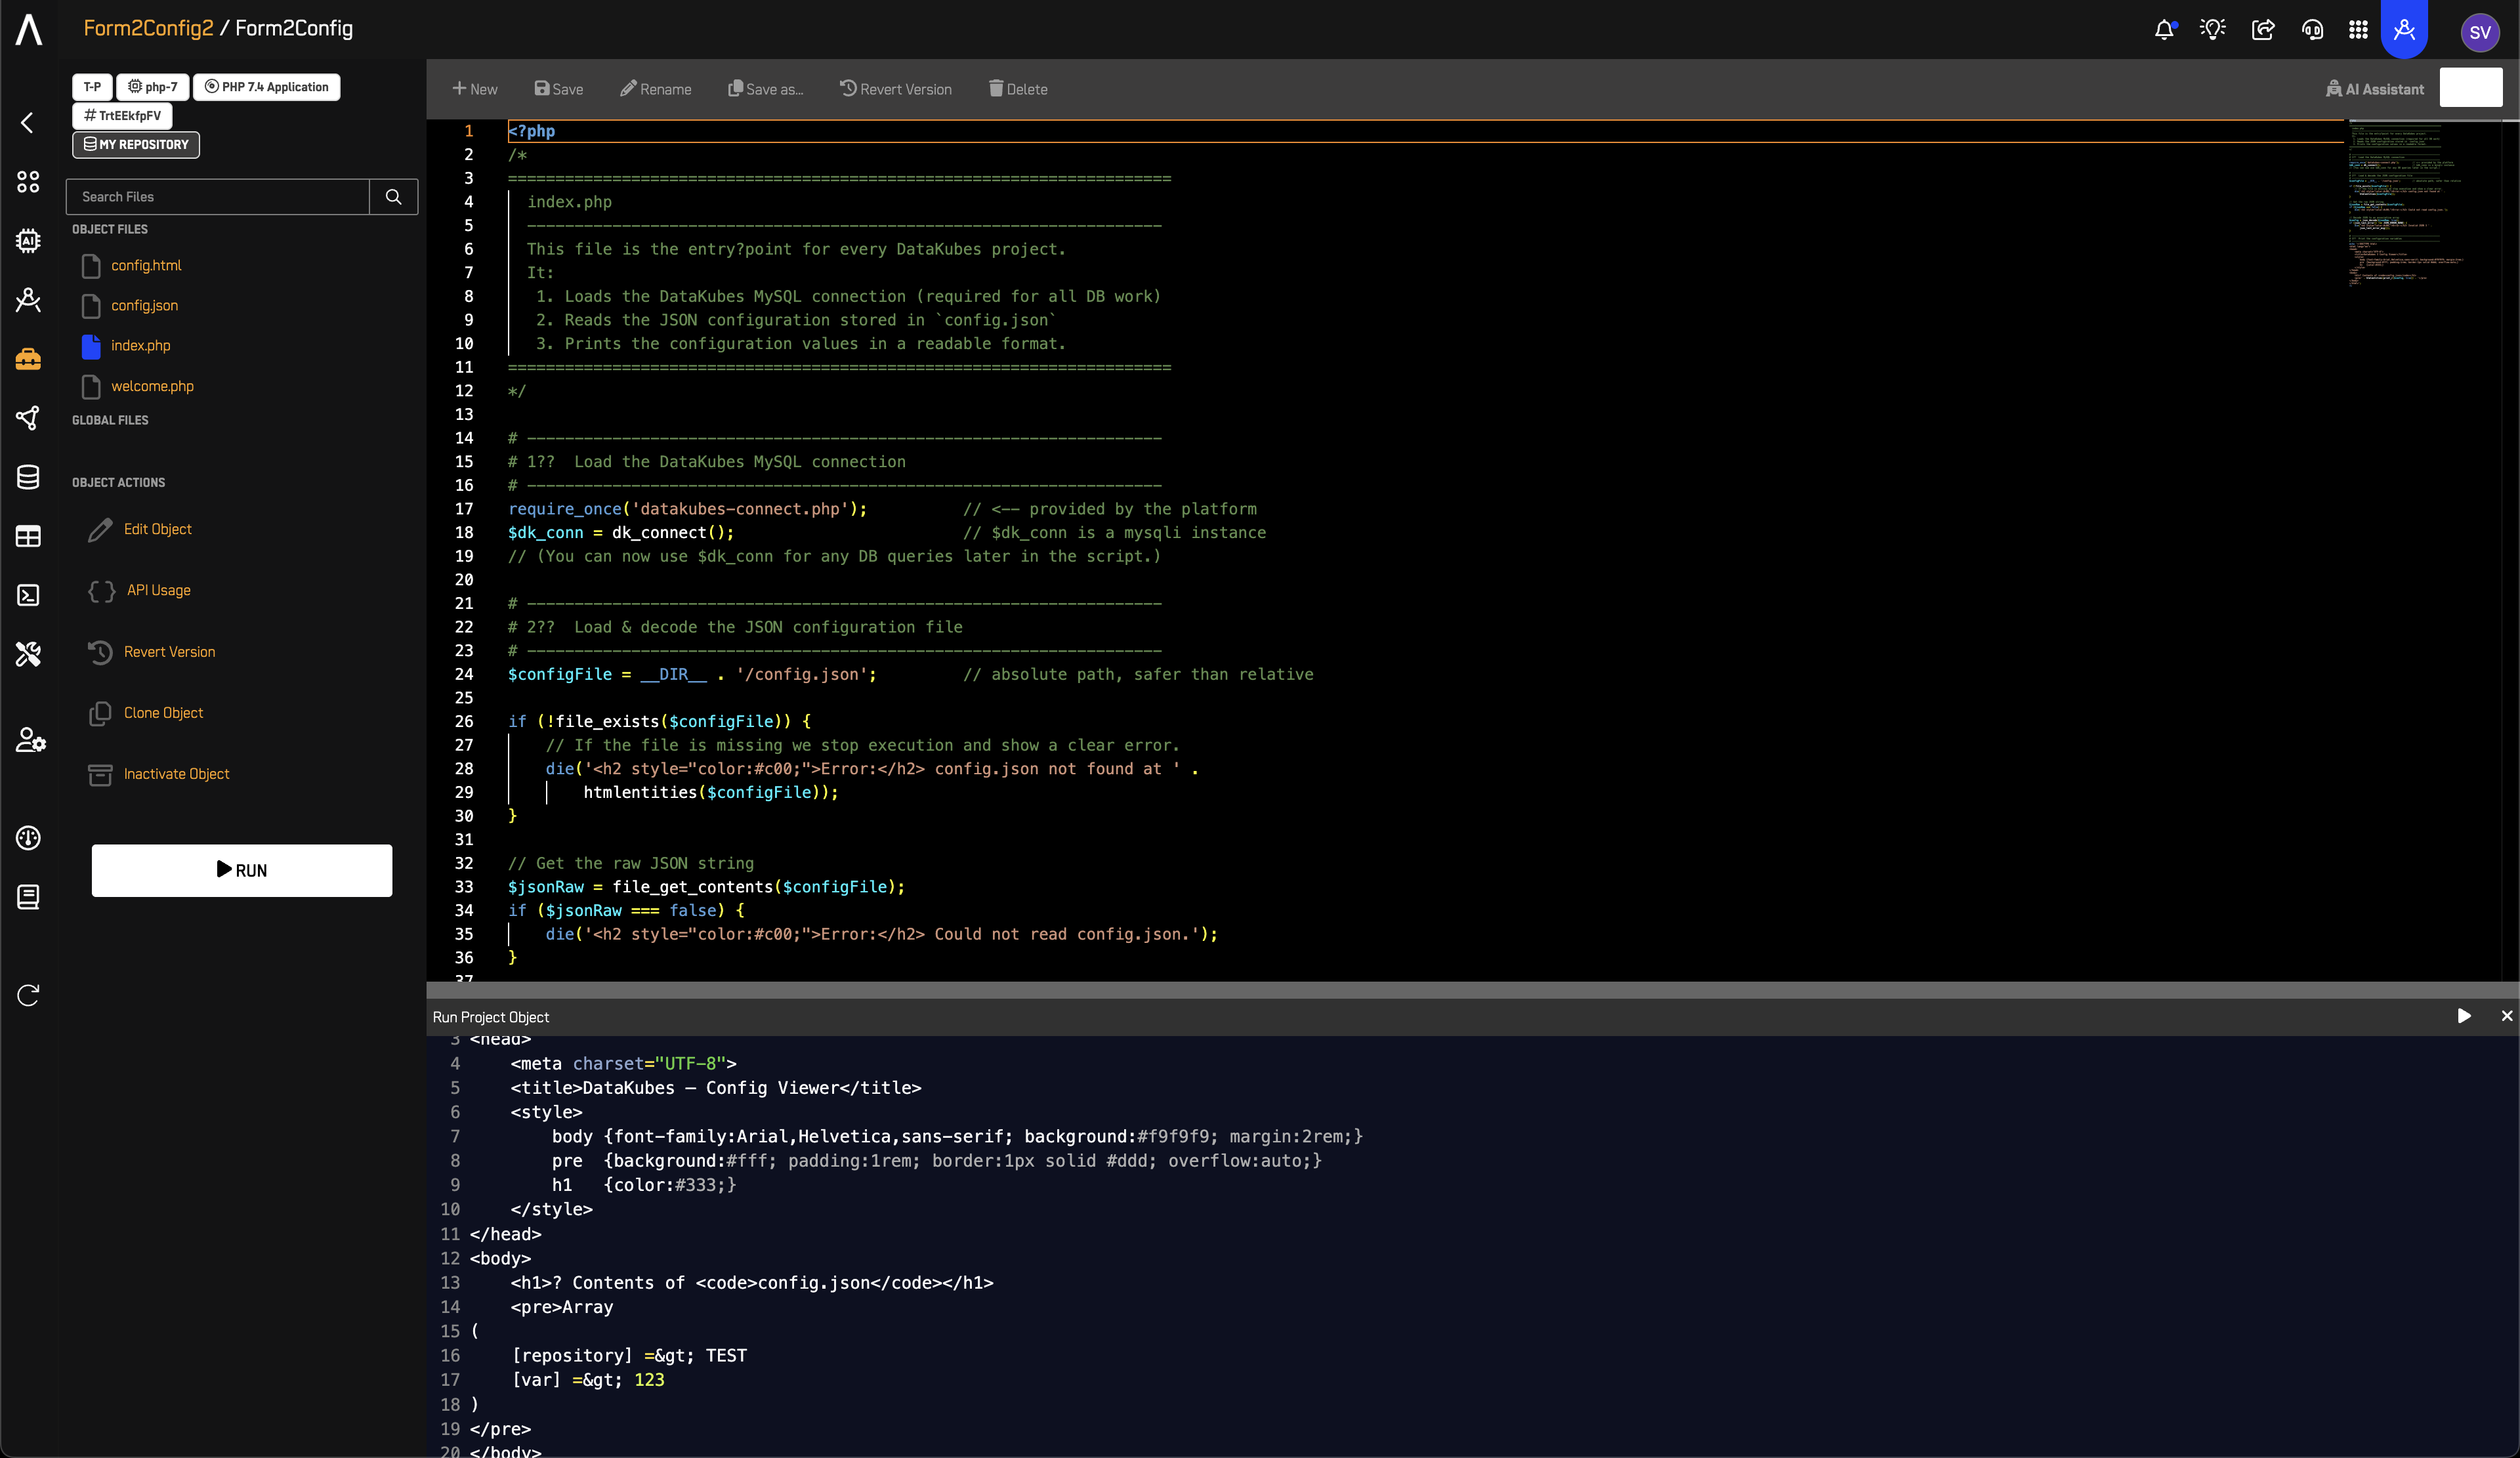
✅ Expected Output:
<!DOCTYPE html>
<html lang="en">
<head>
<meta charset="UTF-8">
<title>DataKubes – Config Viewer</title>
<style>
body {font-family:Arial,Helvetica,sans-serif; background:#f9f9f9; margin:2rem;}
pre {background:#fff; padding:1rem; border:1px solid #ddd; overflow:auto;}
h1 {color:#333;}
</style>
</head>
<body>
<h1>? Contents of <code>config.json</code></h1>
<pre>Array
(
[repository] => TEST
[var] => 123
)
</pre>
</body>
</html>
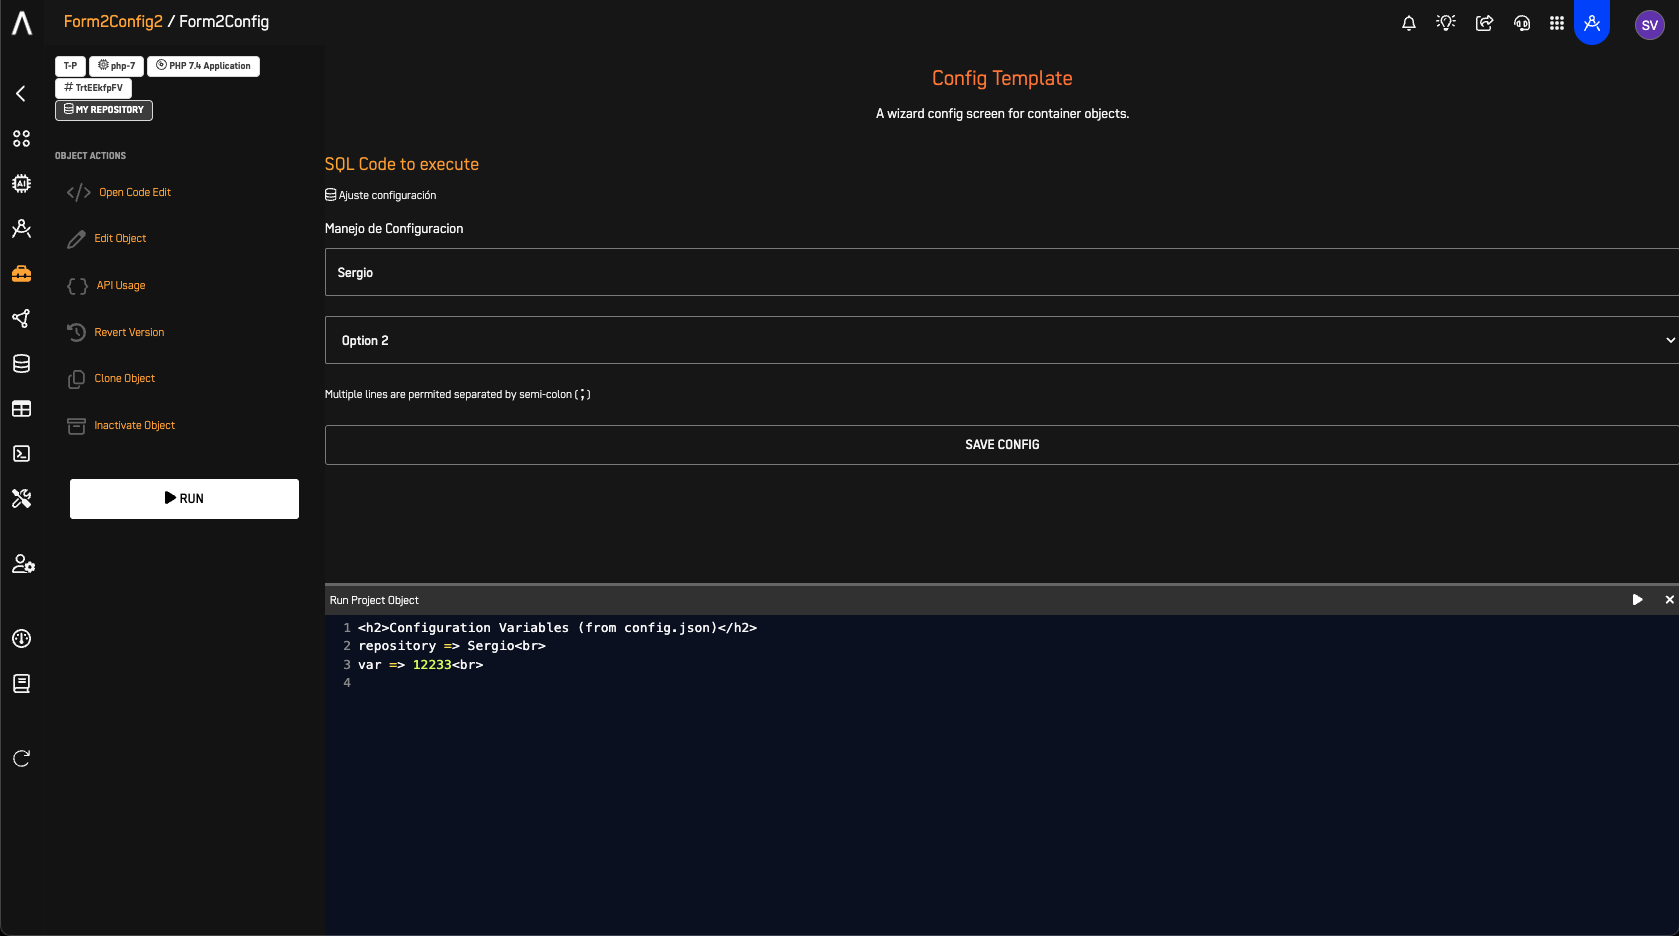
9️⃣ Run with Option 2
-
Repeat Step 5.
-
Run the object. Repeat Step 7.
✅ Expected Output:
<!DOCTYPE html>
<html lang="en">
<head>
<meta charset="UTF-8">
<title>DataKubes – Config Viewer</title>
<style>
body {font-family:Arial,Helvetica,sans-serif; background:#f9f9f9; margin:2rem;}
pre {background:#fff; padding:1rem; border:1px solid #ddd; overflow:auto;}
h1 {color:#333;}
</style>
</head>
<body>
<h1>? Contents of <code>config.json</code></h1>
<pre>Array
(
[repository] => TEST
[var] => 12233
)
</pre>
</body>
</html>
🏁 Summary
- You’ve created a dynamic, configurable Workshop object that:
- Collects inputs via HTML Form (config.html)
- Stores data persistently in JSON (config.json)
- Reads and uses the config in PHP (index.php)
- Potential Use Cases:
- 🔄 Data transformation pipelines
- 🌐 API integration configs
- 🤖 AI model parameter settings
- 🛠 Backend processes driven by UI inputs
Updated 11 months ago