Creating a Machine Learning Model with AutoML
Creating a Machine Learning Model with AutoML
In this guide, you will learn how to build a Machine Learning model quickly using ARPIA's AutoML feature.
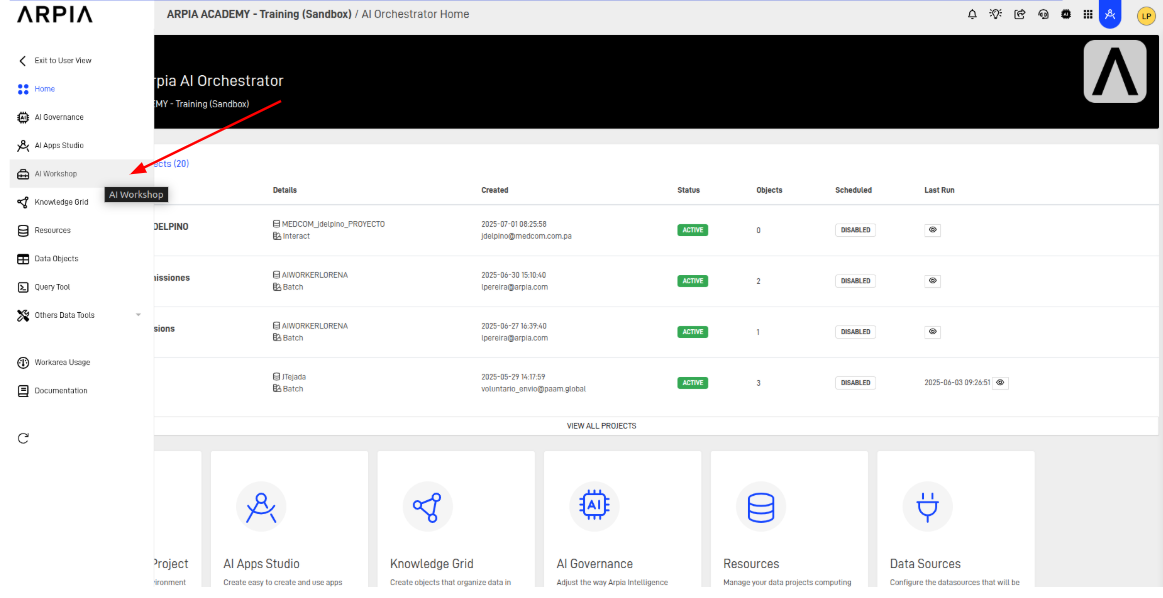
Step 1: Access the AI Workshop
- From your Home page in the Orchestrator, navigate to the AI Workshop.
Step 2: Select a Project
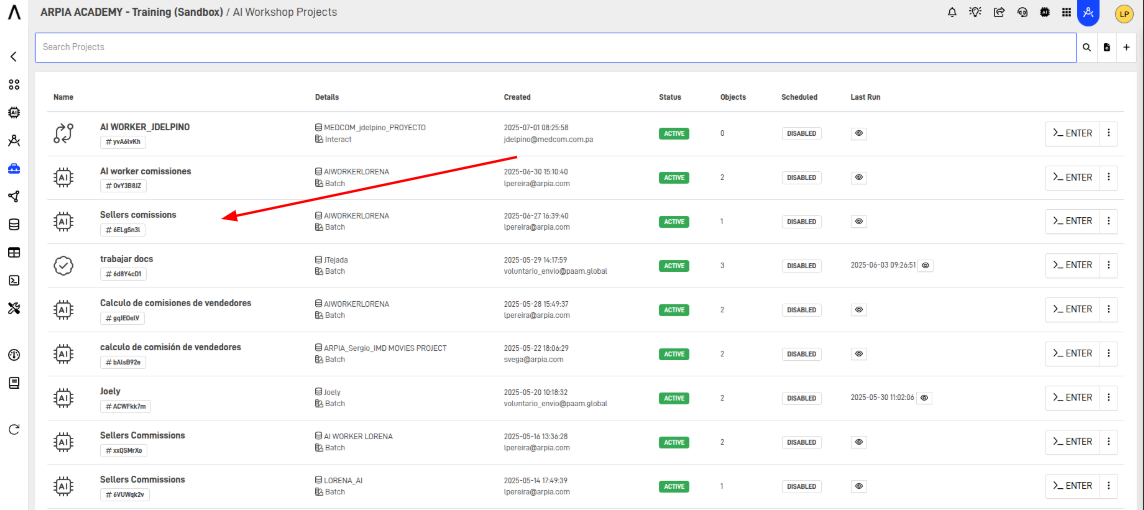
- Choose the project where you want to create the Machine Learning model.
Step 3: Add a New Model
- Click on the + button to start creating a new model.
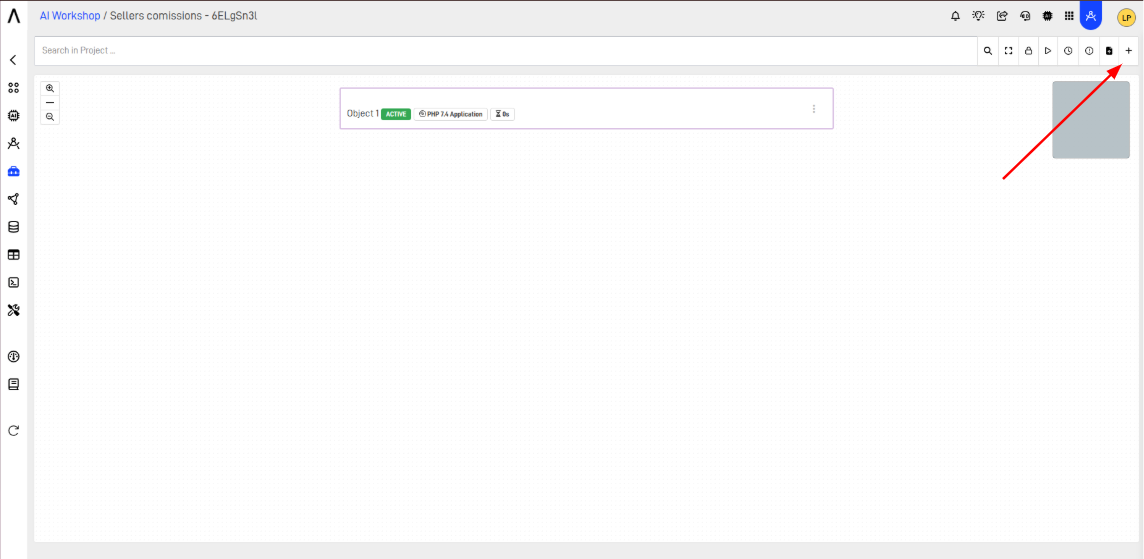
Note: Ensure that your data source and output storage structure are available and properly set up in the workshop.
Step 4: Configure Model Details
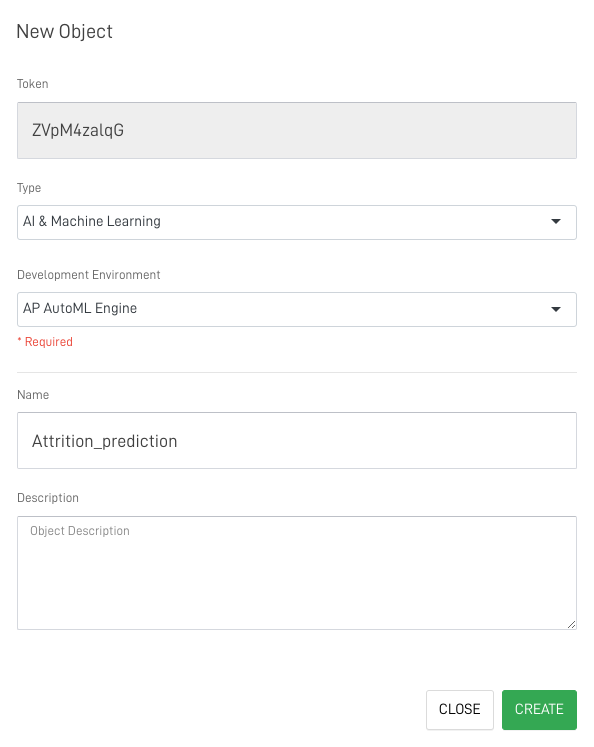
- In the new window:
- Select Machine Learning for the Type field.
- Choose DK AutoML Engine as the Development Environment.
- Enter a Name and an optional description for your model.
Step 5: Configure Engine Settings
- Set the following in the Engine Settings:
- Choose preconfigured models.
- Define the percentage of data for testing.
- Enable dataset randomization if needed.
- In AutoML Engine Status, select Metrics.
- Opt to retrain on each batch if required.
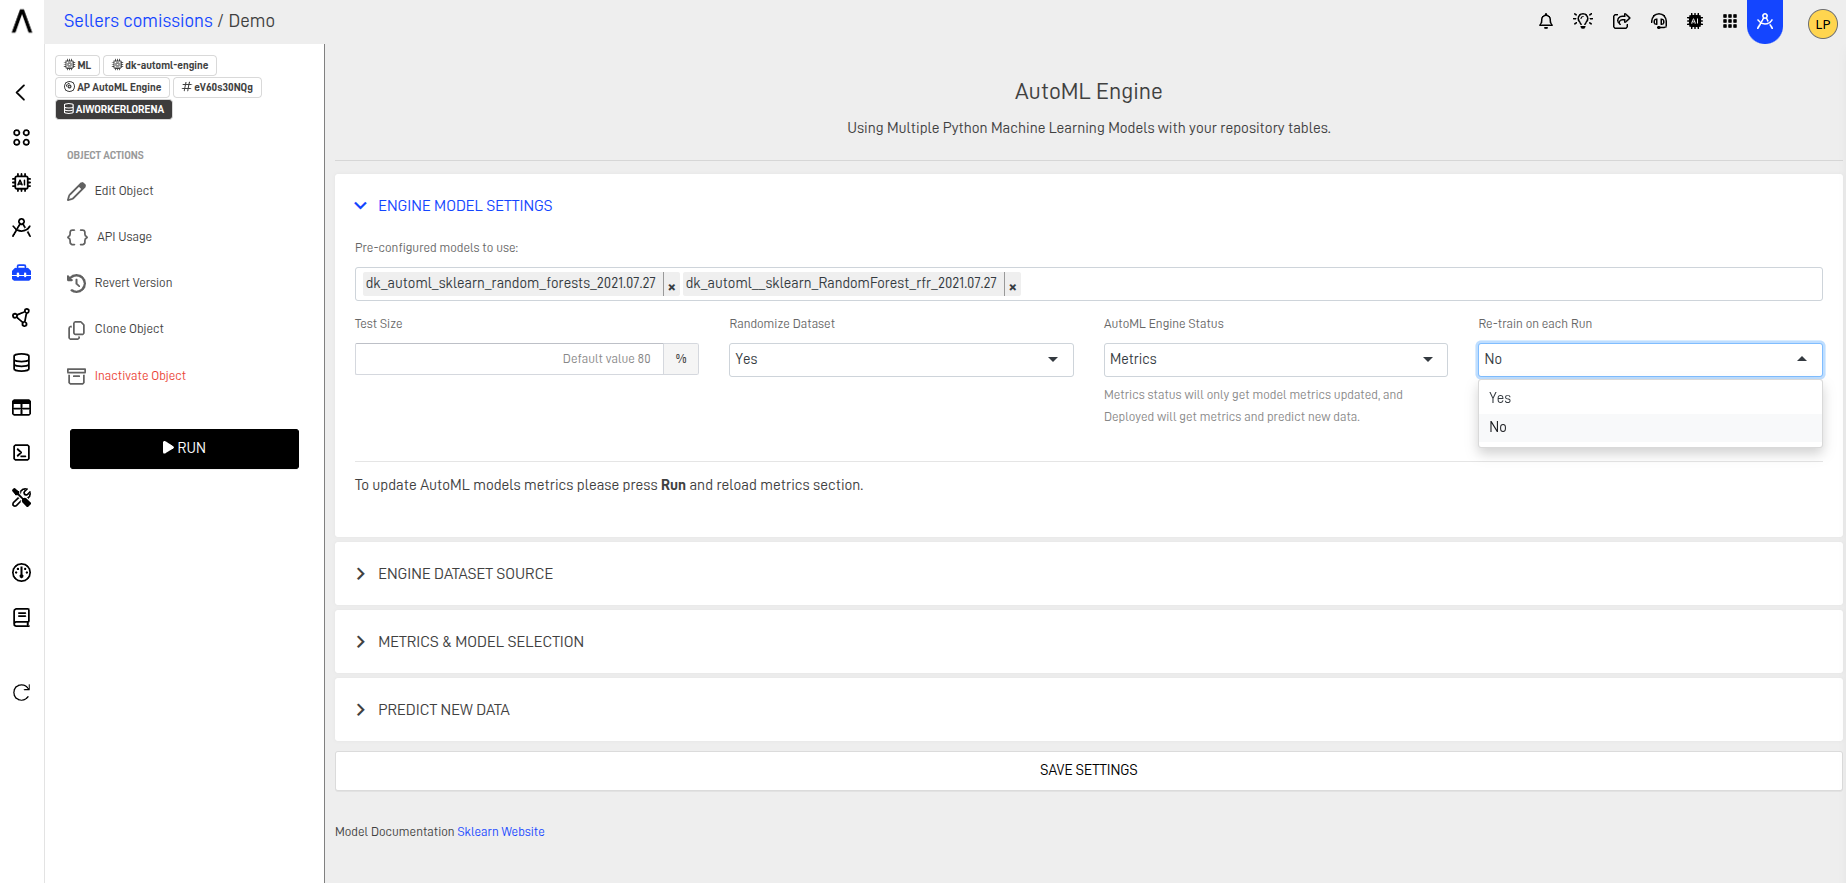
Note: ARPIA's AutoML supports both classification and regression models. Learn more in the blog: ¿Clasificación o Regresión?
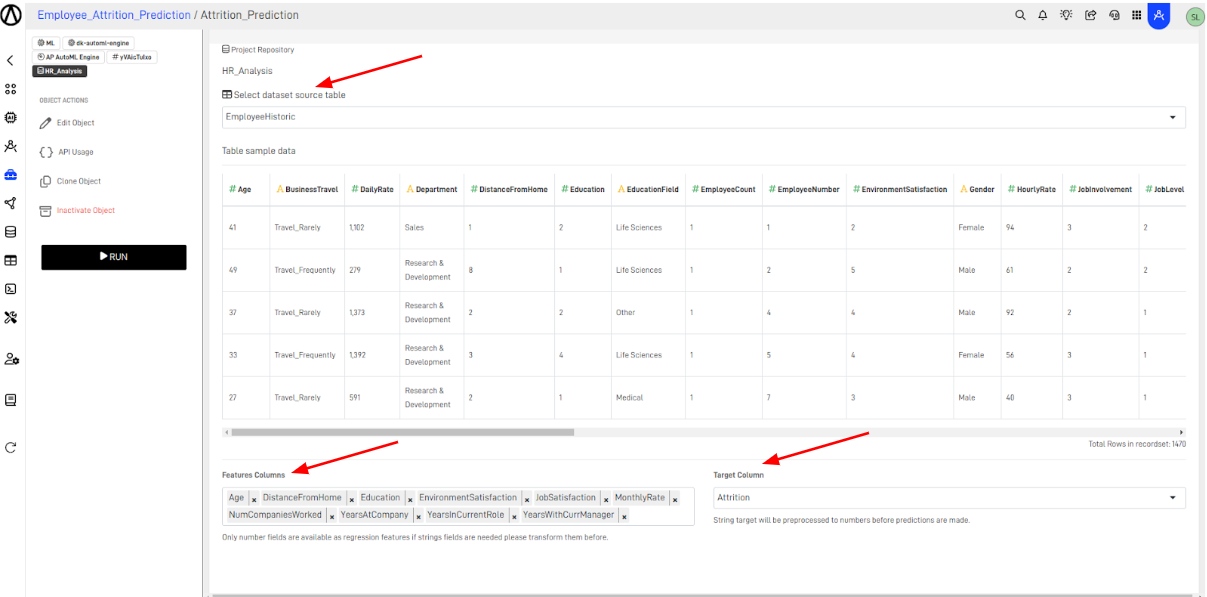
Step 6: Select Dataset Source
- In Engine Dataset Source:
- Choose the table for training the model.
- Select the columns to train the model (Features Columns).
- Specify the column to predict (Target Column).
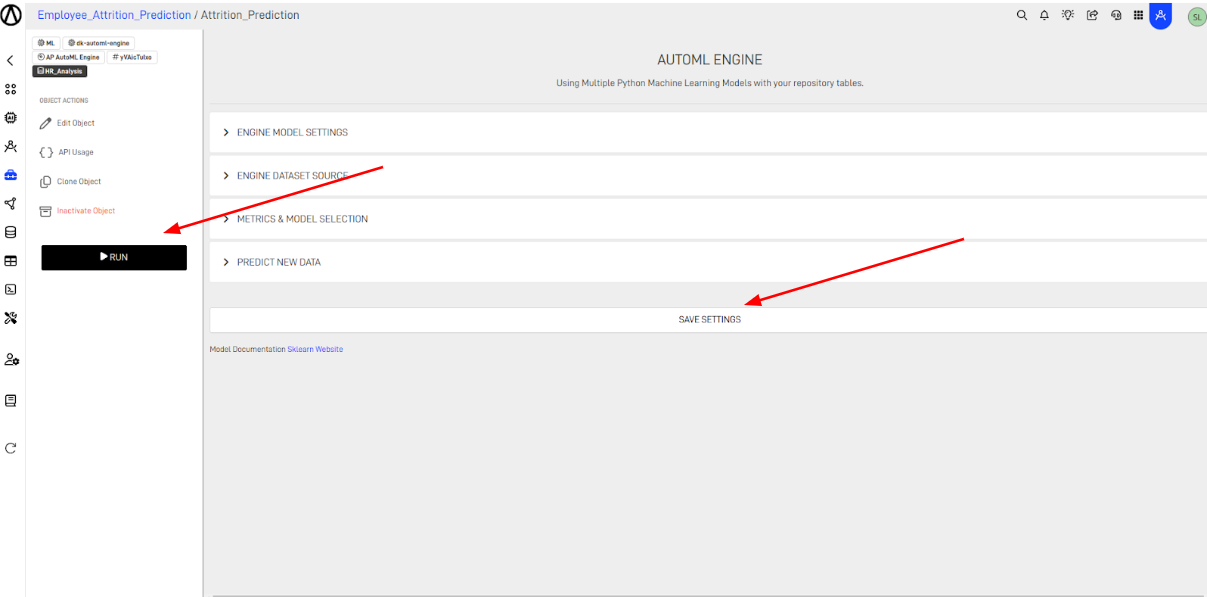
Step 7: Save and Run Settings
- Click on SAVE SETTINGS, then click RUN to initiate the model creation process.
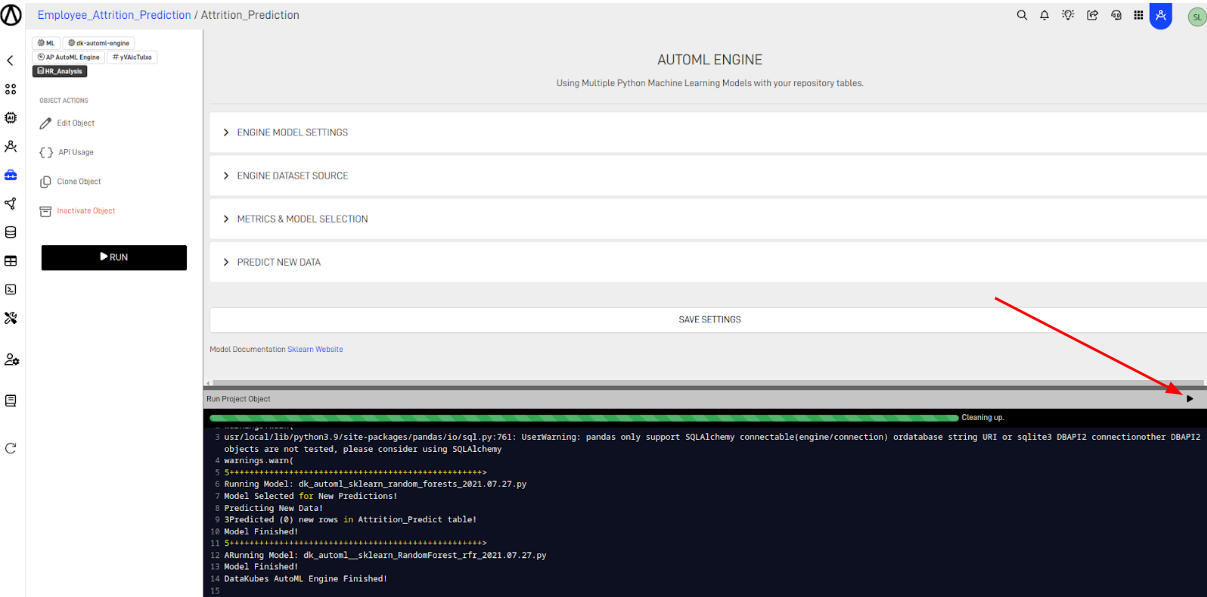
Step 8: Execute the Model
- After clicking RUN, a new window will open. Confirm the execution by clicking on the Start button on the screen that opened. Monitor the training progress and results in the status section.
Step 9: Review Metrics
- Once the training is complete, the Metrics section will display the evaluation metrics. Review the models and select the one with the best accuracy.
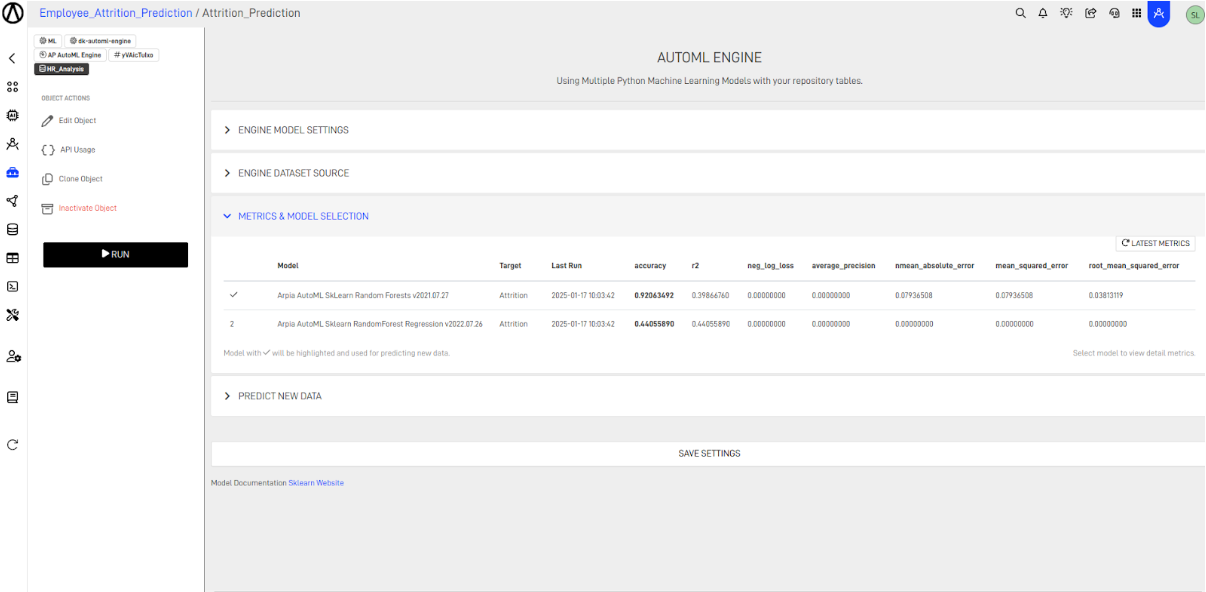
Tip: Accuracy measures how well the model performs. Values closer to 1 indicate better performance.
Step 10: Deploy the Model
- In the ENGINE SETTINGS section, update AutoML Engine Status to Deployed.
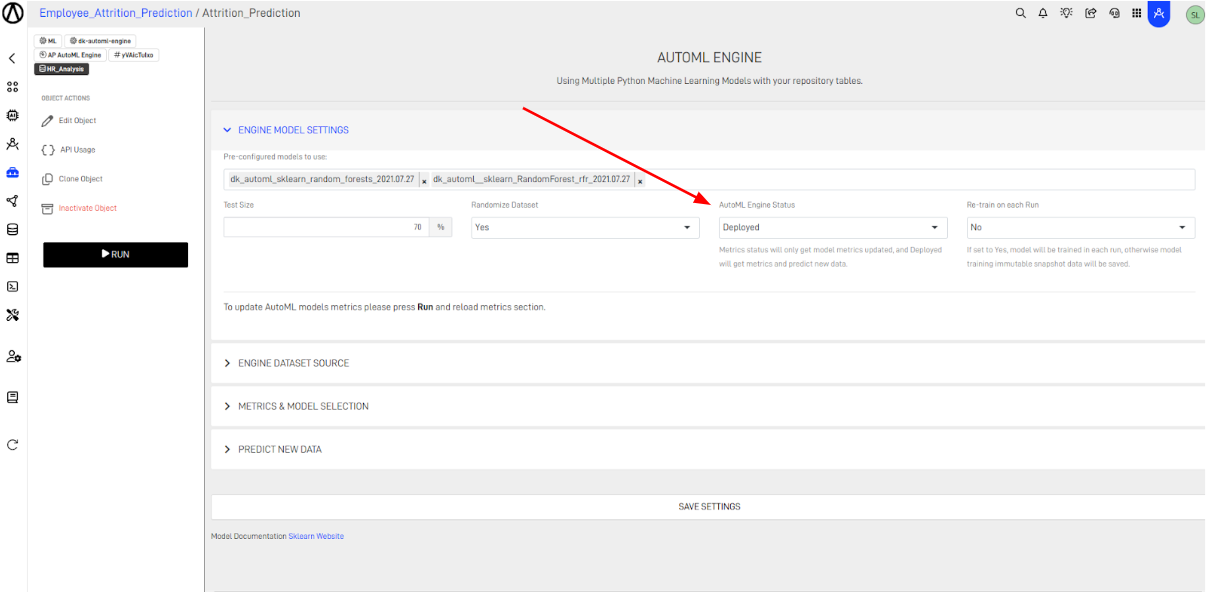
Step 11: Save and Execute Deployment
- Click SAVE SETTINGS and then RUN to deploy the model.
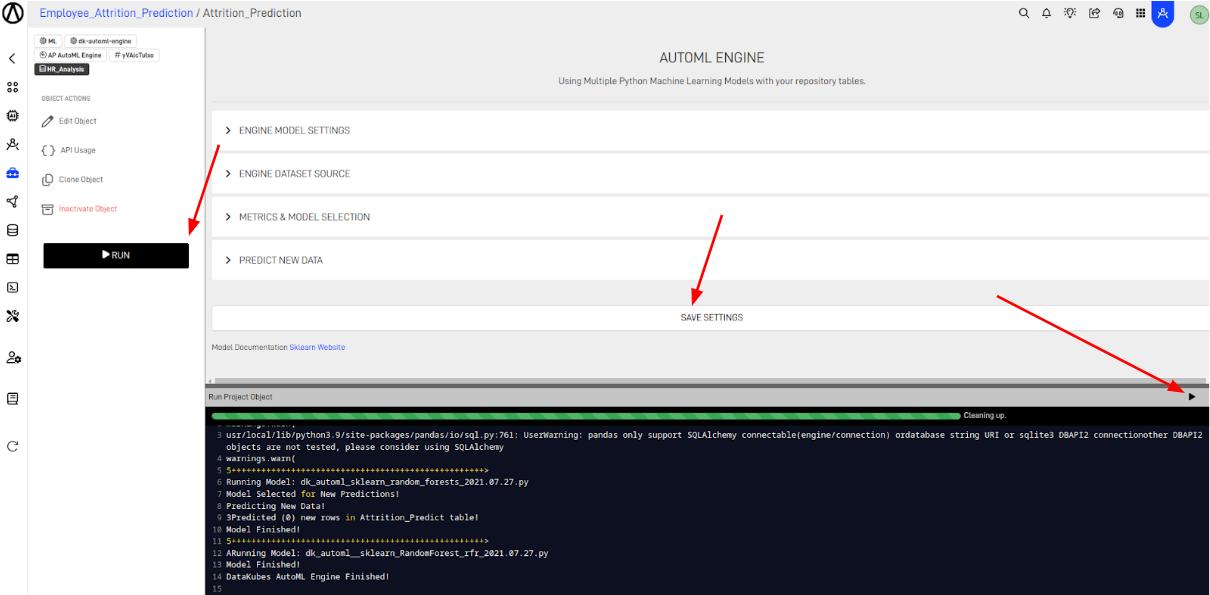
Step 12: Review Final Metrics
- After deployment, revisit the Metrics section to verify the model’s performance and readiness.
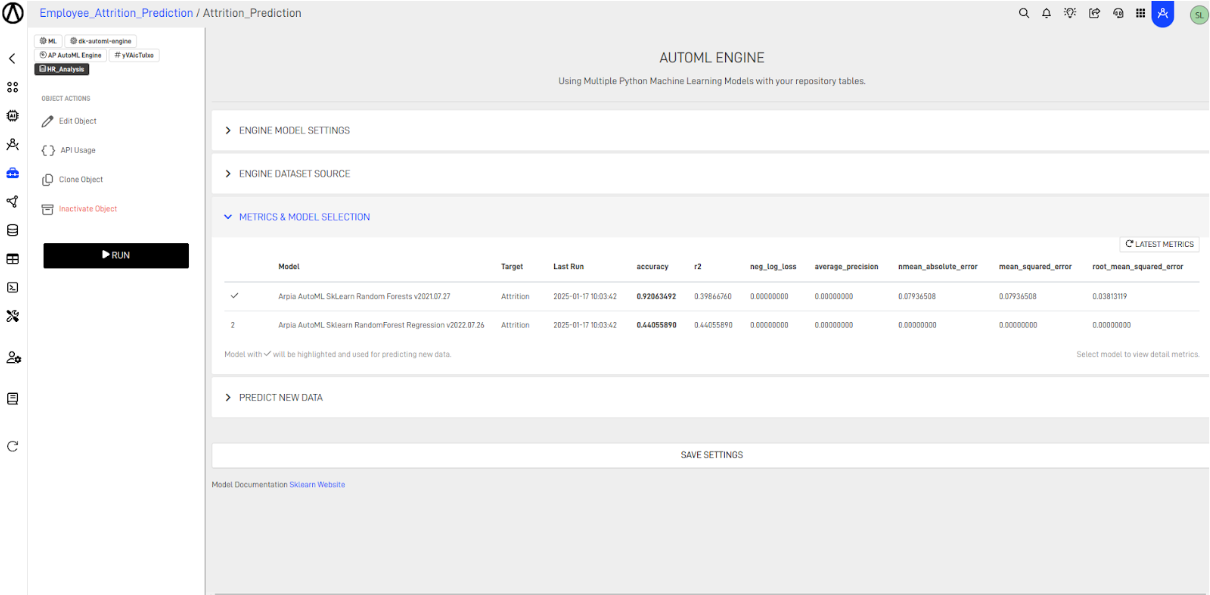
Note: When a model is selected, a checkmark appears, indicating that it is ready for prediction.
Step 13: Predict New Data
- In the PREDICT NEW DATA section:
- Choose the table where the model will be applied.
- Select the columns that contain each required data.
- Select the target column to be predicted.
- Select the primary key of the table where the model will be applied.
- Click SAVE SETTINGS and RUN to store predictions in the selected table.
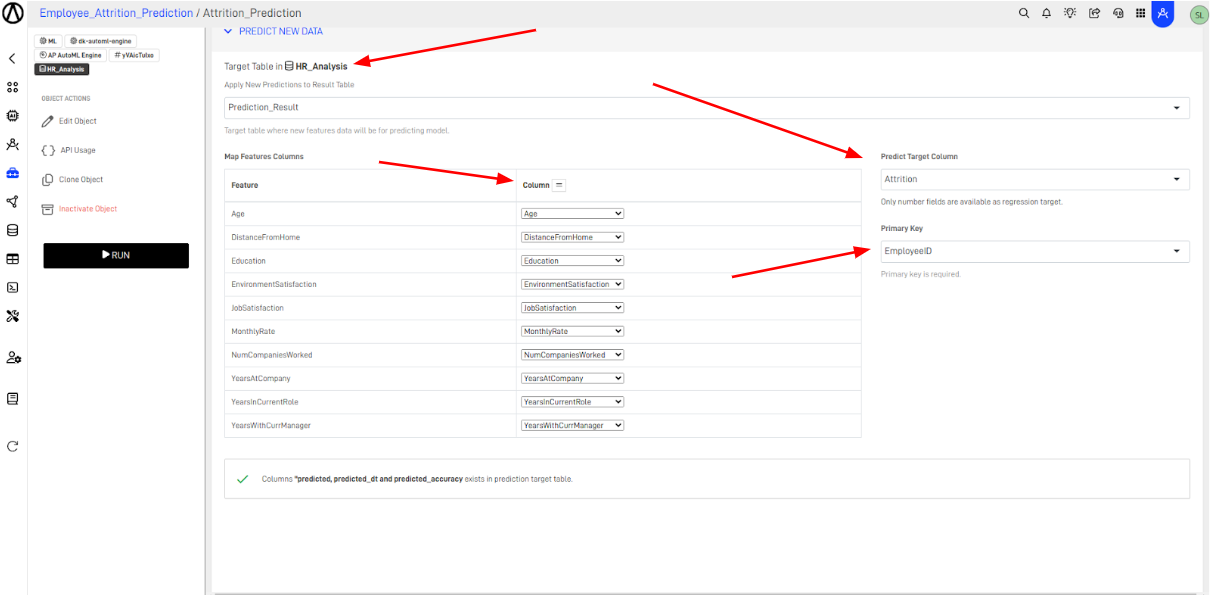
Note: ARPIA will automatically create "predicted", "predicted_dt", and "predicted_accuracy" columns if they do not exist in the table.
Conclusion
You have now successfully created and deployed your first AutoML model in ARPIA. Use it to make predictions and enhance your data-driven decisions!
Updated 8 months ago
