
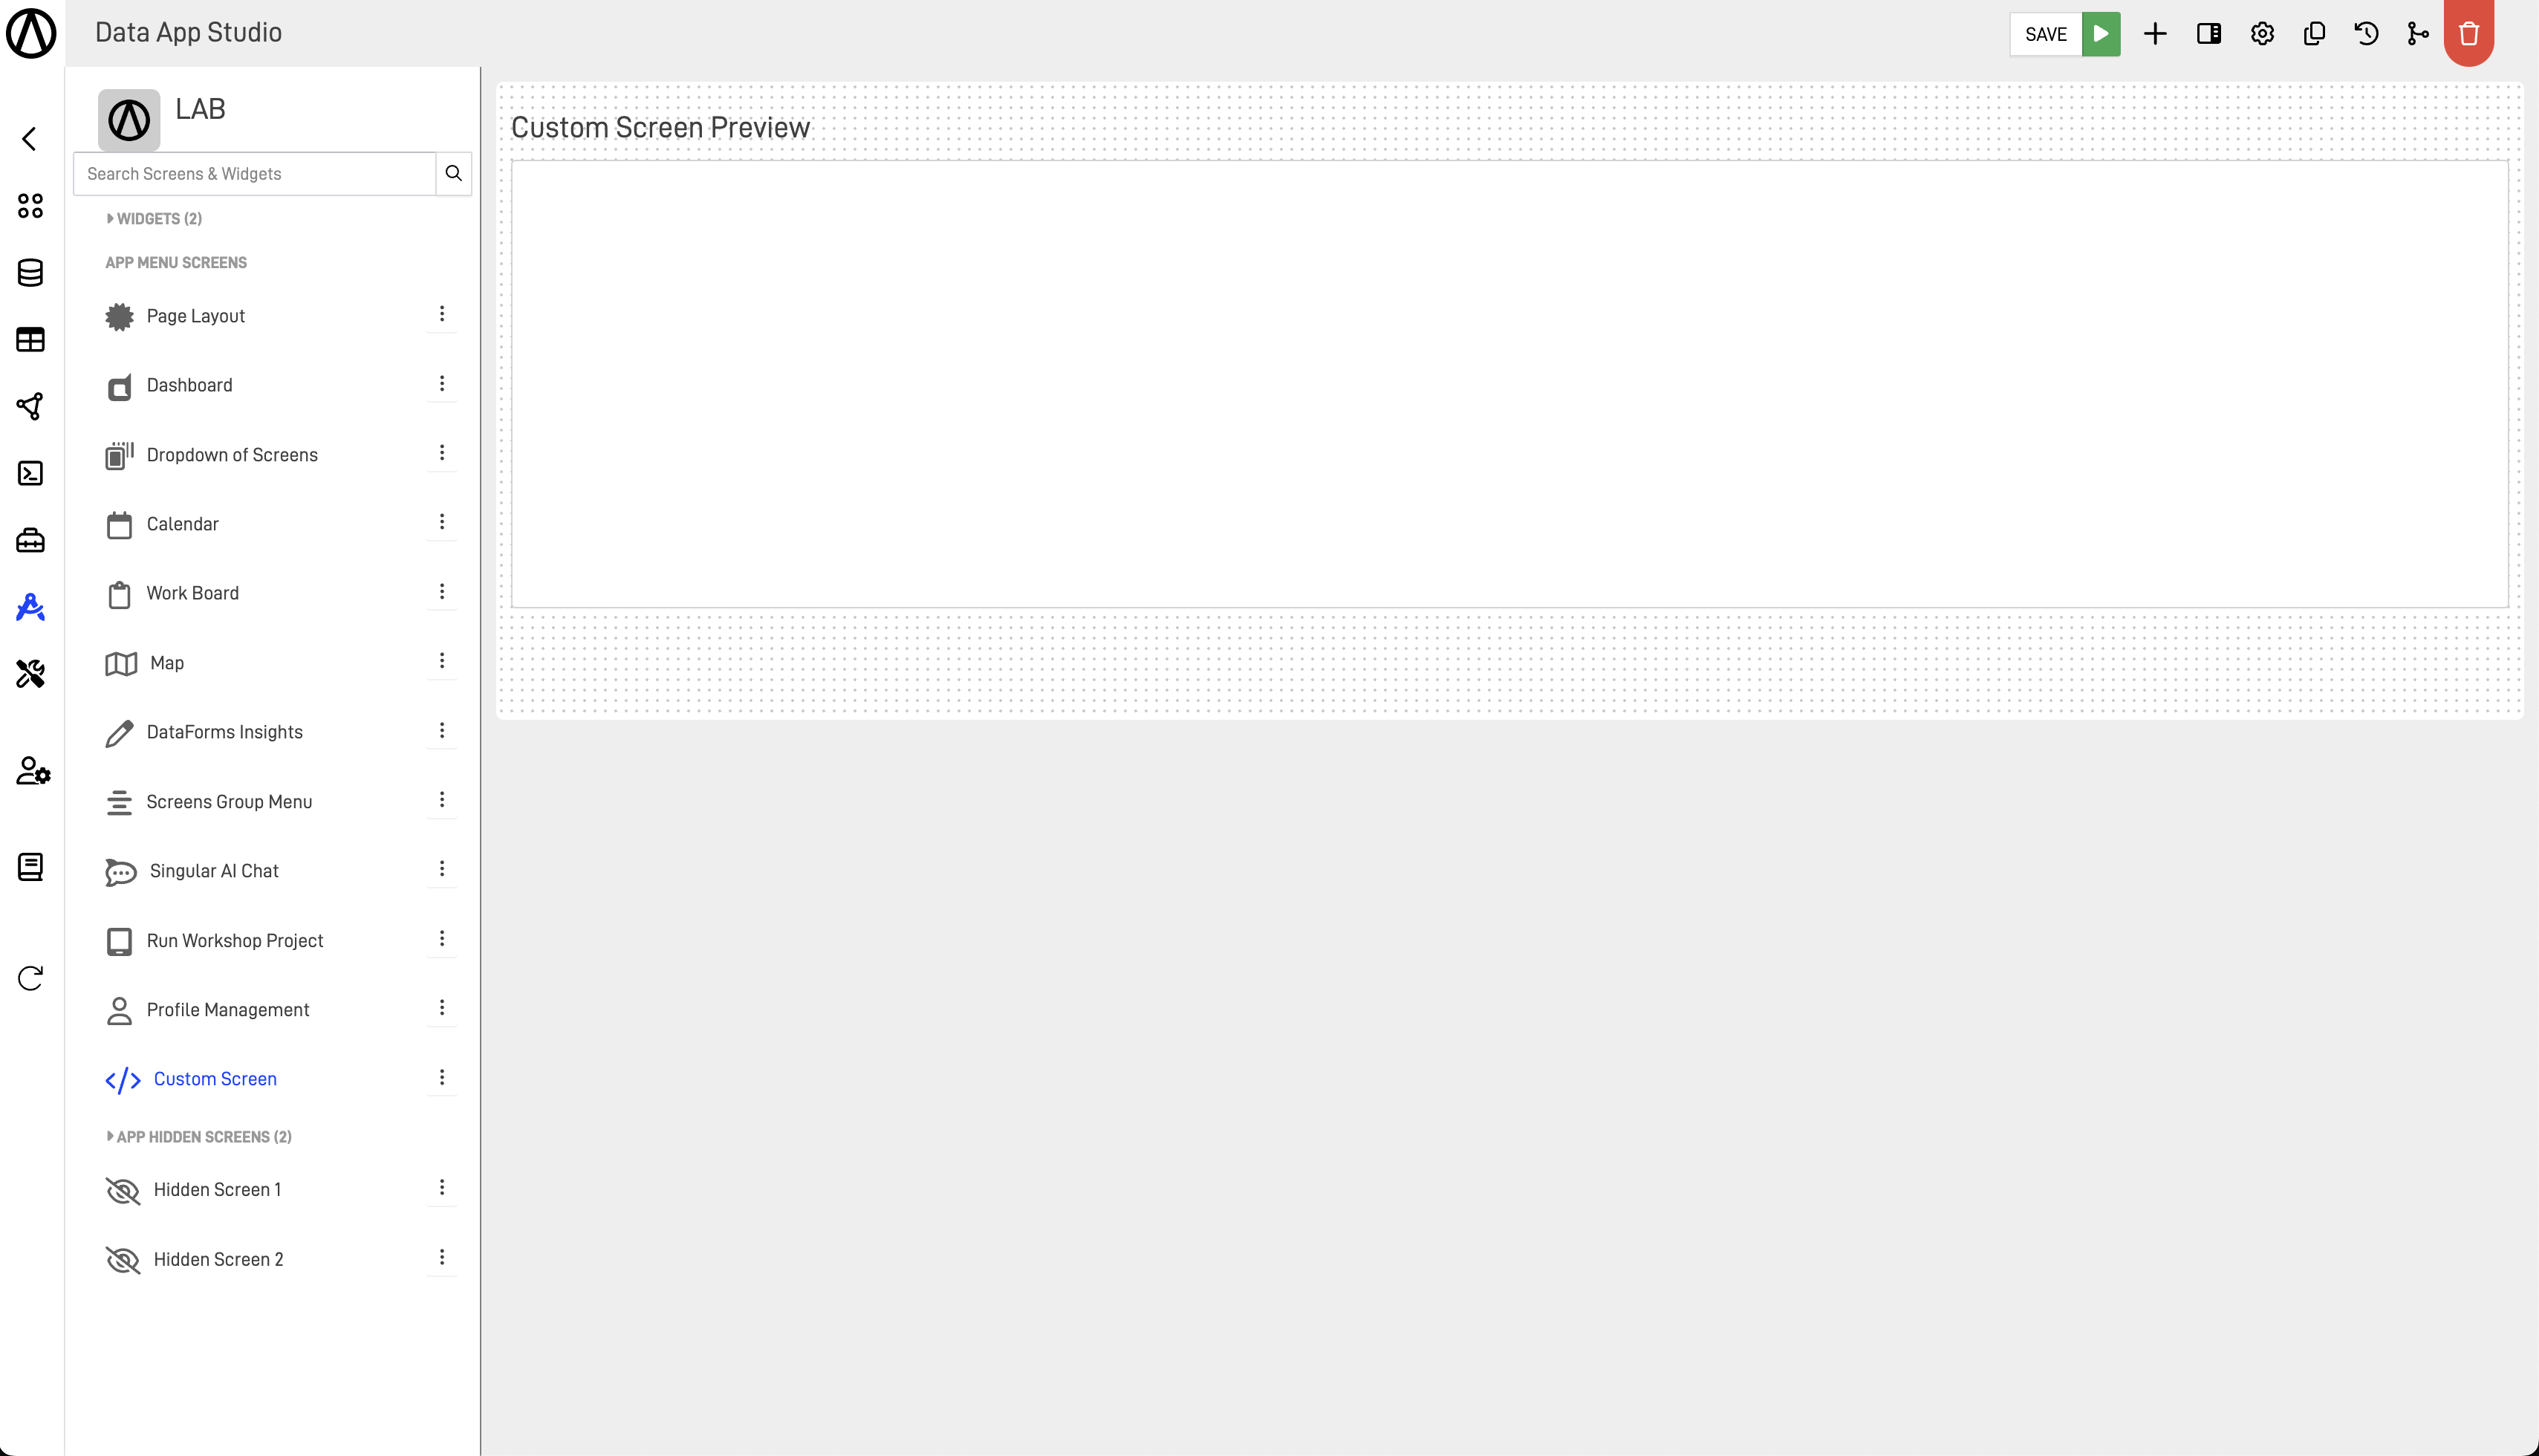
How to use the Custom Screen?
Step-by-Step Guide: Custom Screen
Requirements
It's essential to have advanced knowledge in the following development languages to easily understand this article:
- Bootstrap 4.6
- HTML 5
- CSS 5
- JQuery
- JSON
- Javascript
Guide
In this step-by-step guide, we will show you how to use the Custom Screen and its main tools to take full advantage of this feature.
Step 1: Add Your Design
The first step in customizing the screen is to add your custom HTML/CSS code to design your screen.
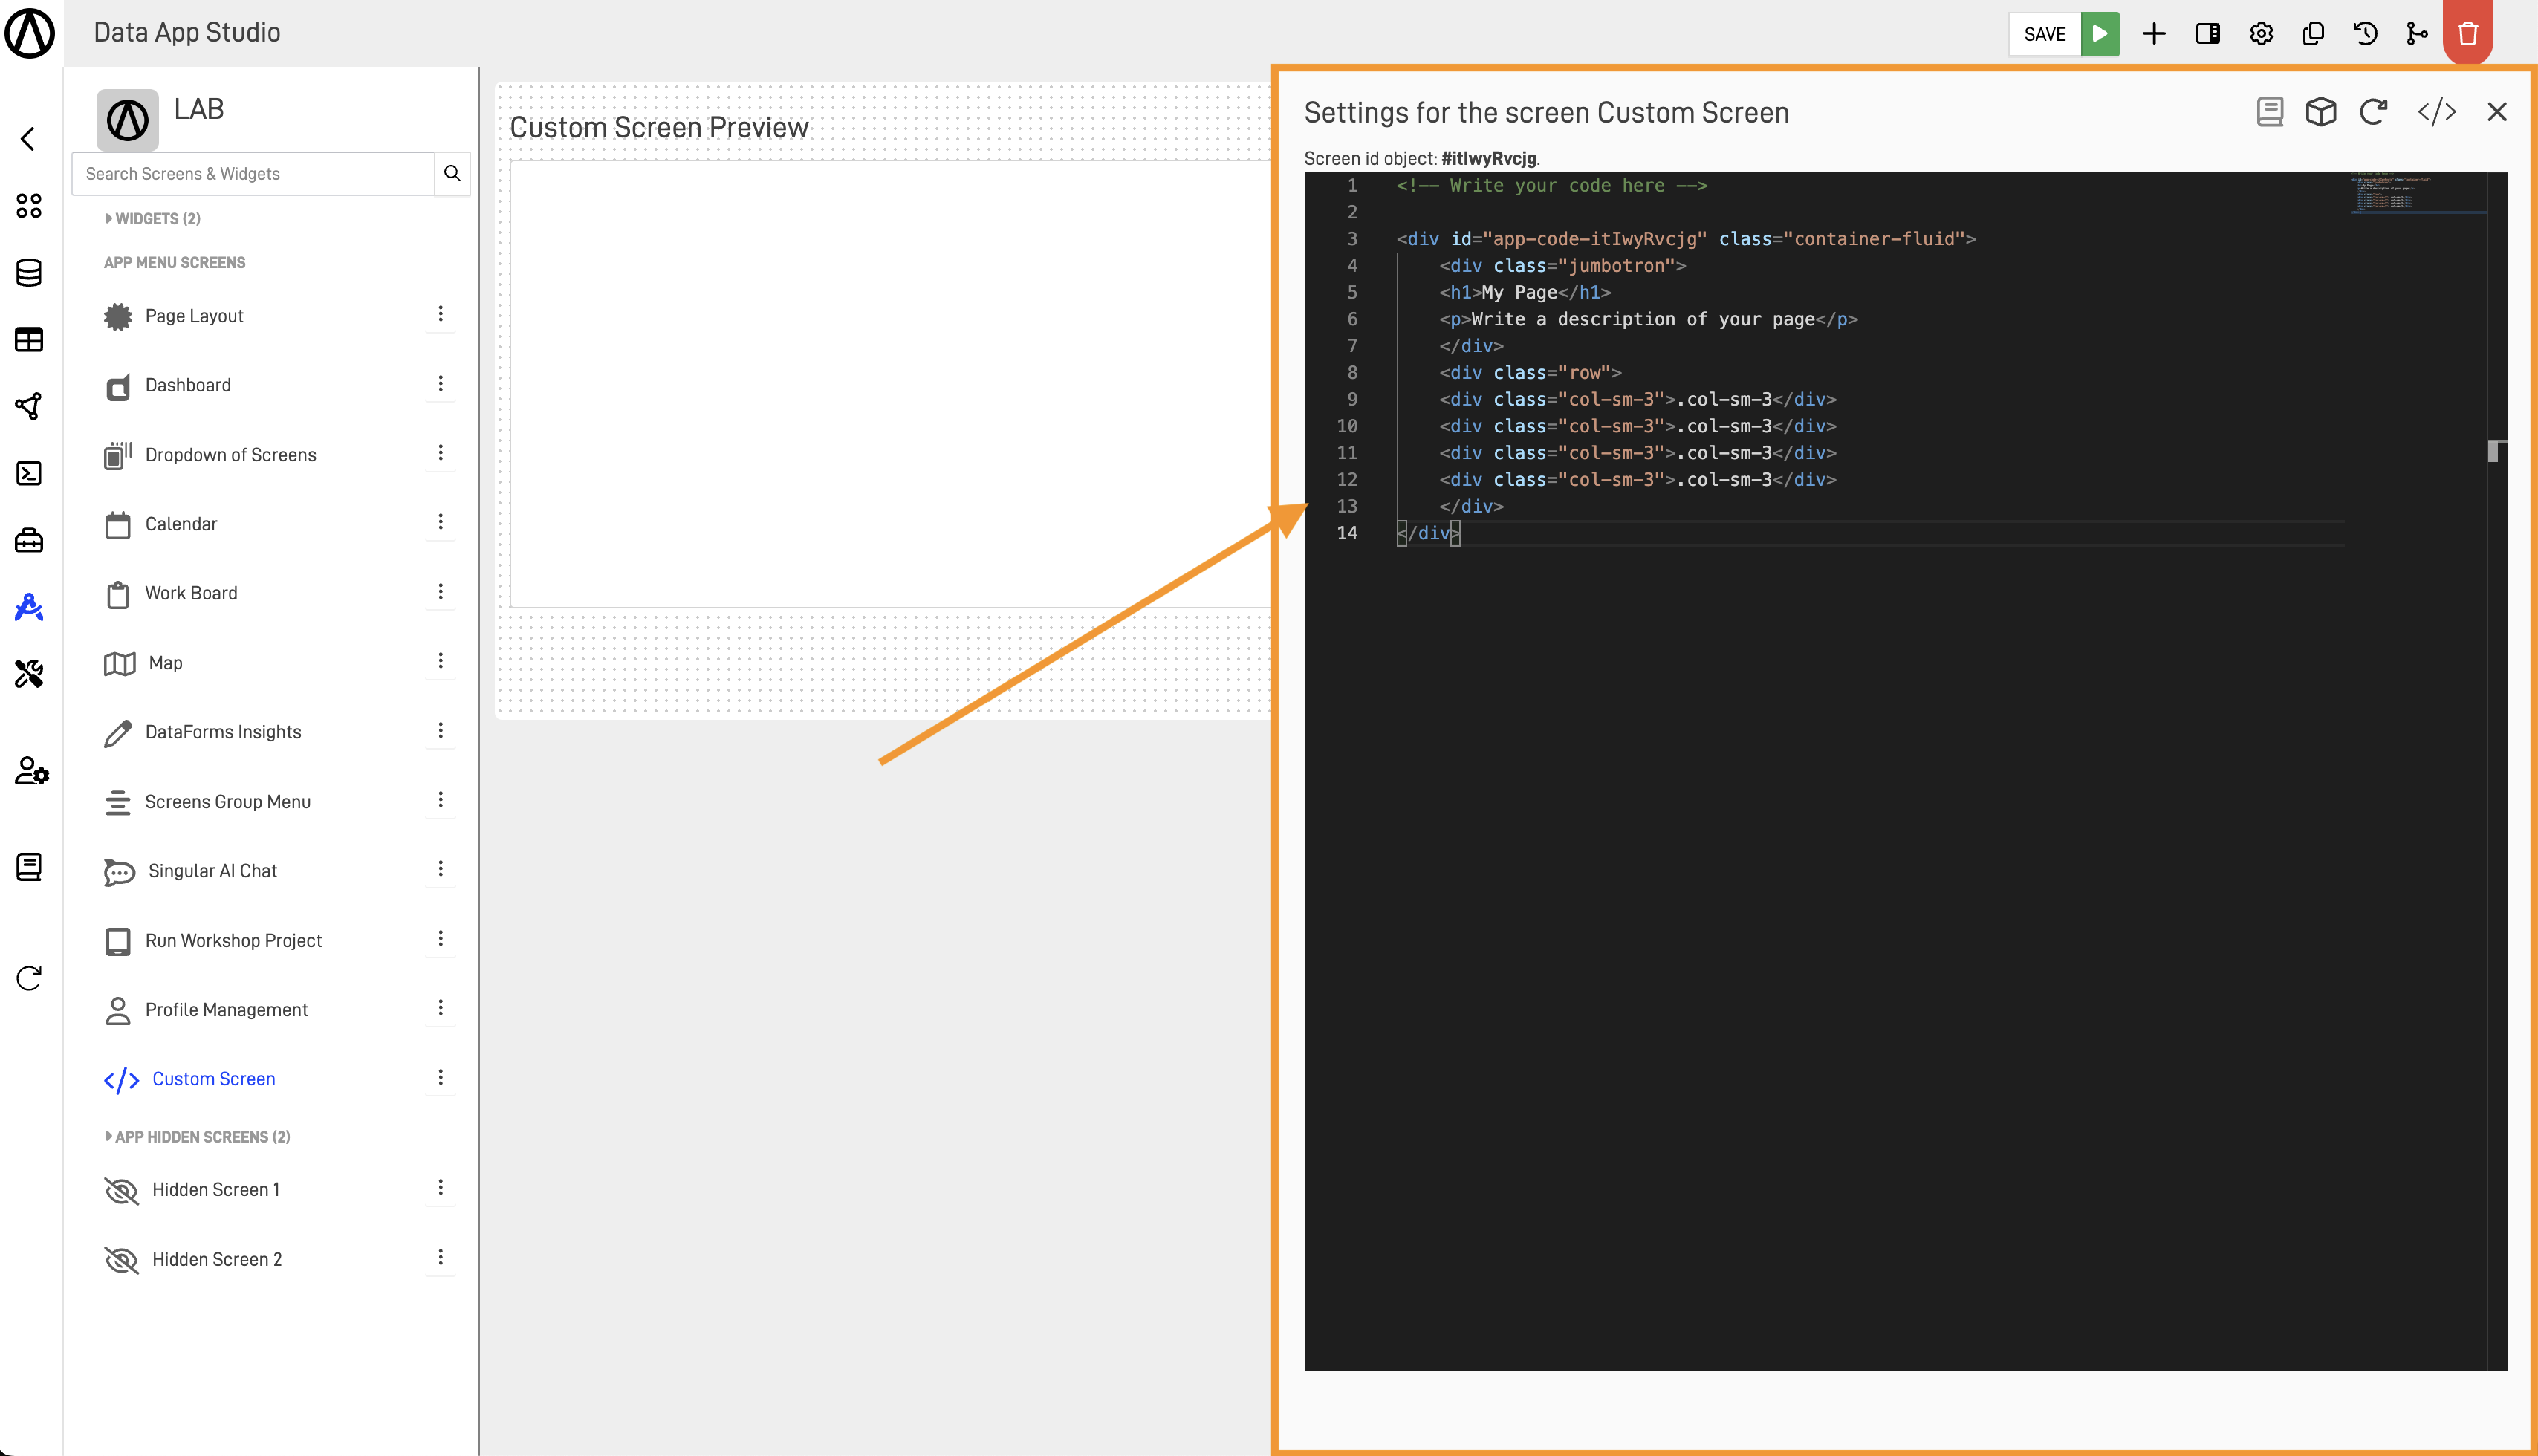
To see a preview of what your design will look like, press the green button with the arrow pointing right, then select the option "Update Preview Pane".
Adding Data Kube Models to Your Custom Screen
One powerful feature of the code screen type is the use of integrated data models based on your pre-created Kubes in your workspace. The workflow to embed a Data Kube model in your custom code is as follows:
- Open the Data Insight Designer in DataApp Studio.
- Select the Kube you want to load.
- Customize the loaded Kube according to your needs.
- Generate the embedded code.
- Copy the code and paste it into your code screen editor.
To open the Data Insight Designer in DataApp Studio, use the following icon:
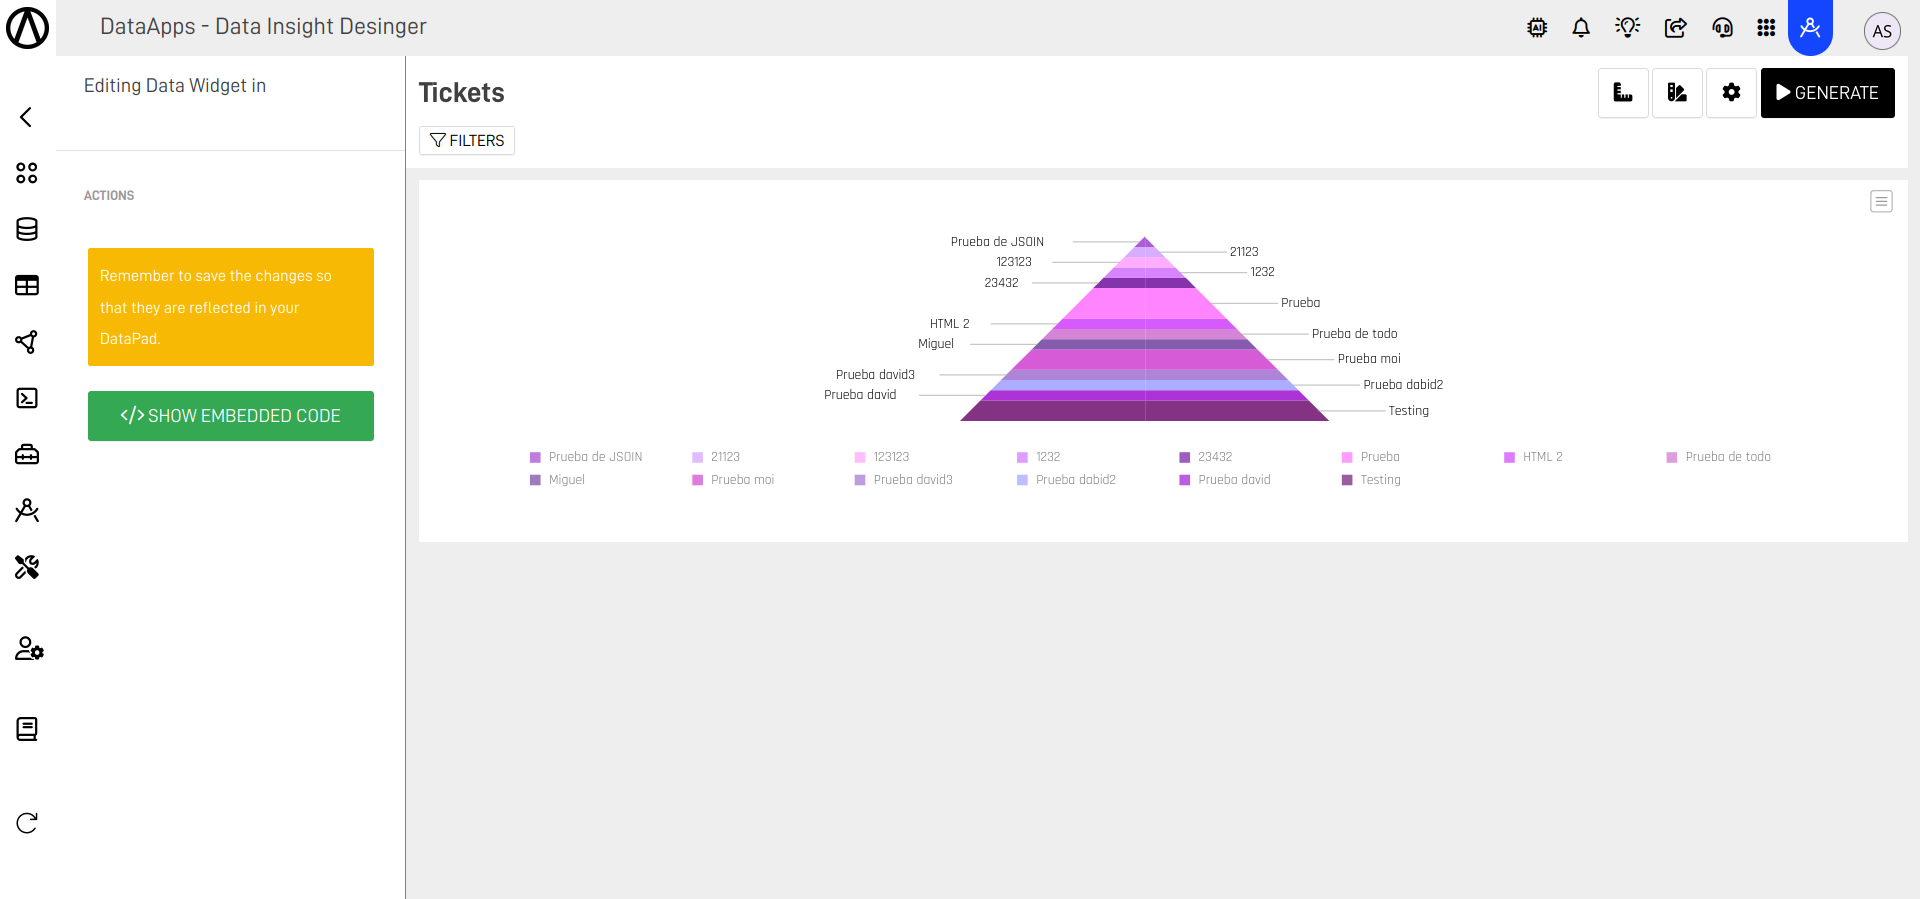
Once the icon is pressed, select the Kube you want to load in the Data Insight Designer, as shown in the following screen:

In the new window, customize the Kube as you would like it to be loaded:
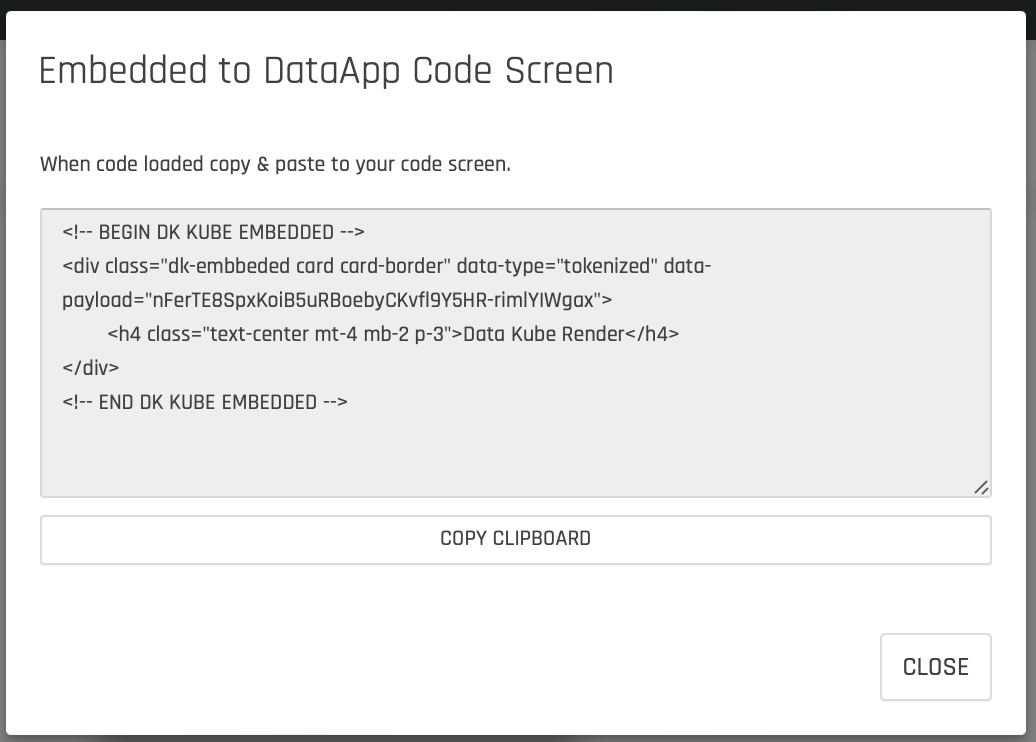
Once you are ready, generate the embedded code by pressing the "SHOW EMBEDDED CODE" button:
The code modal will open, where you can copy the complete code by pressing the copy to clipboard button.
Important Note!
Each time you edit or make a new change in the Embedded DK Kube, it will create a new unique token, and you need to copy the new code into your custom screen.
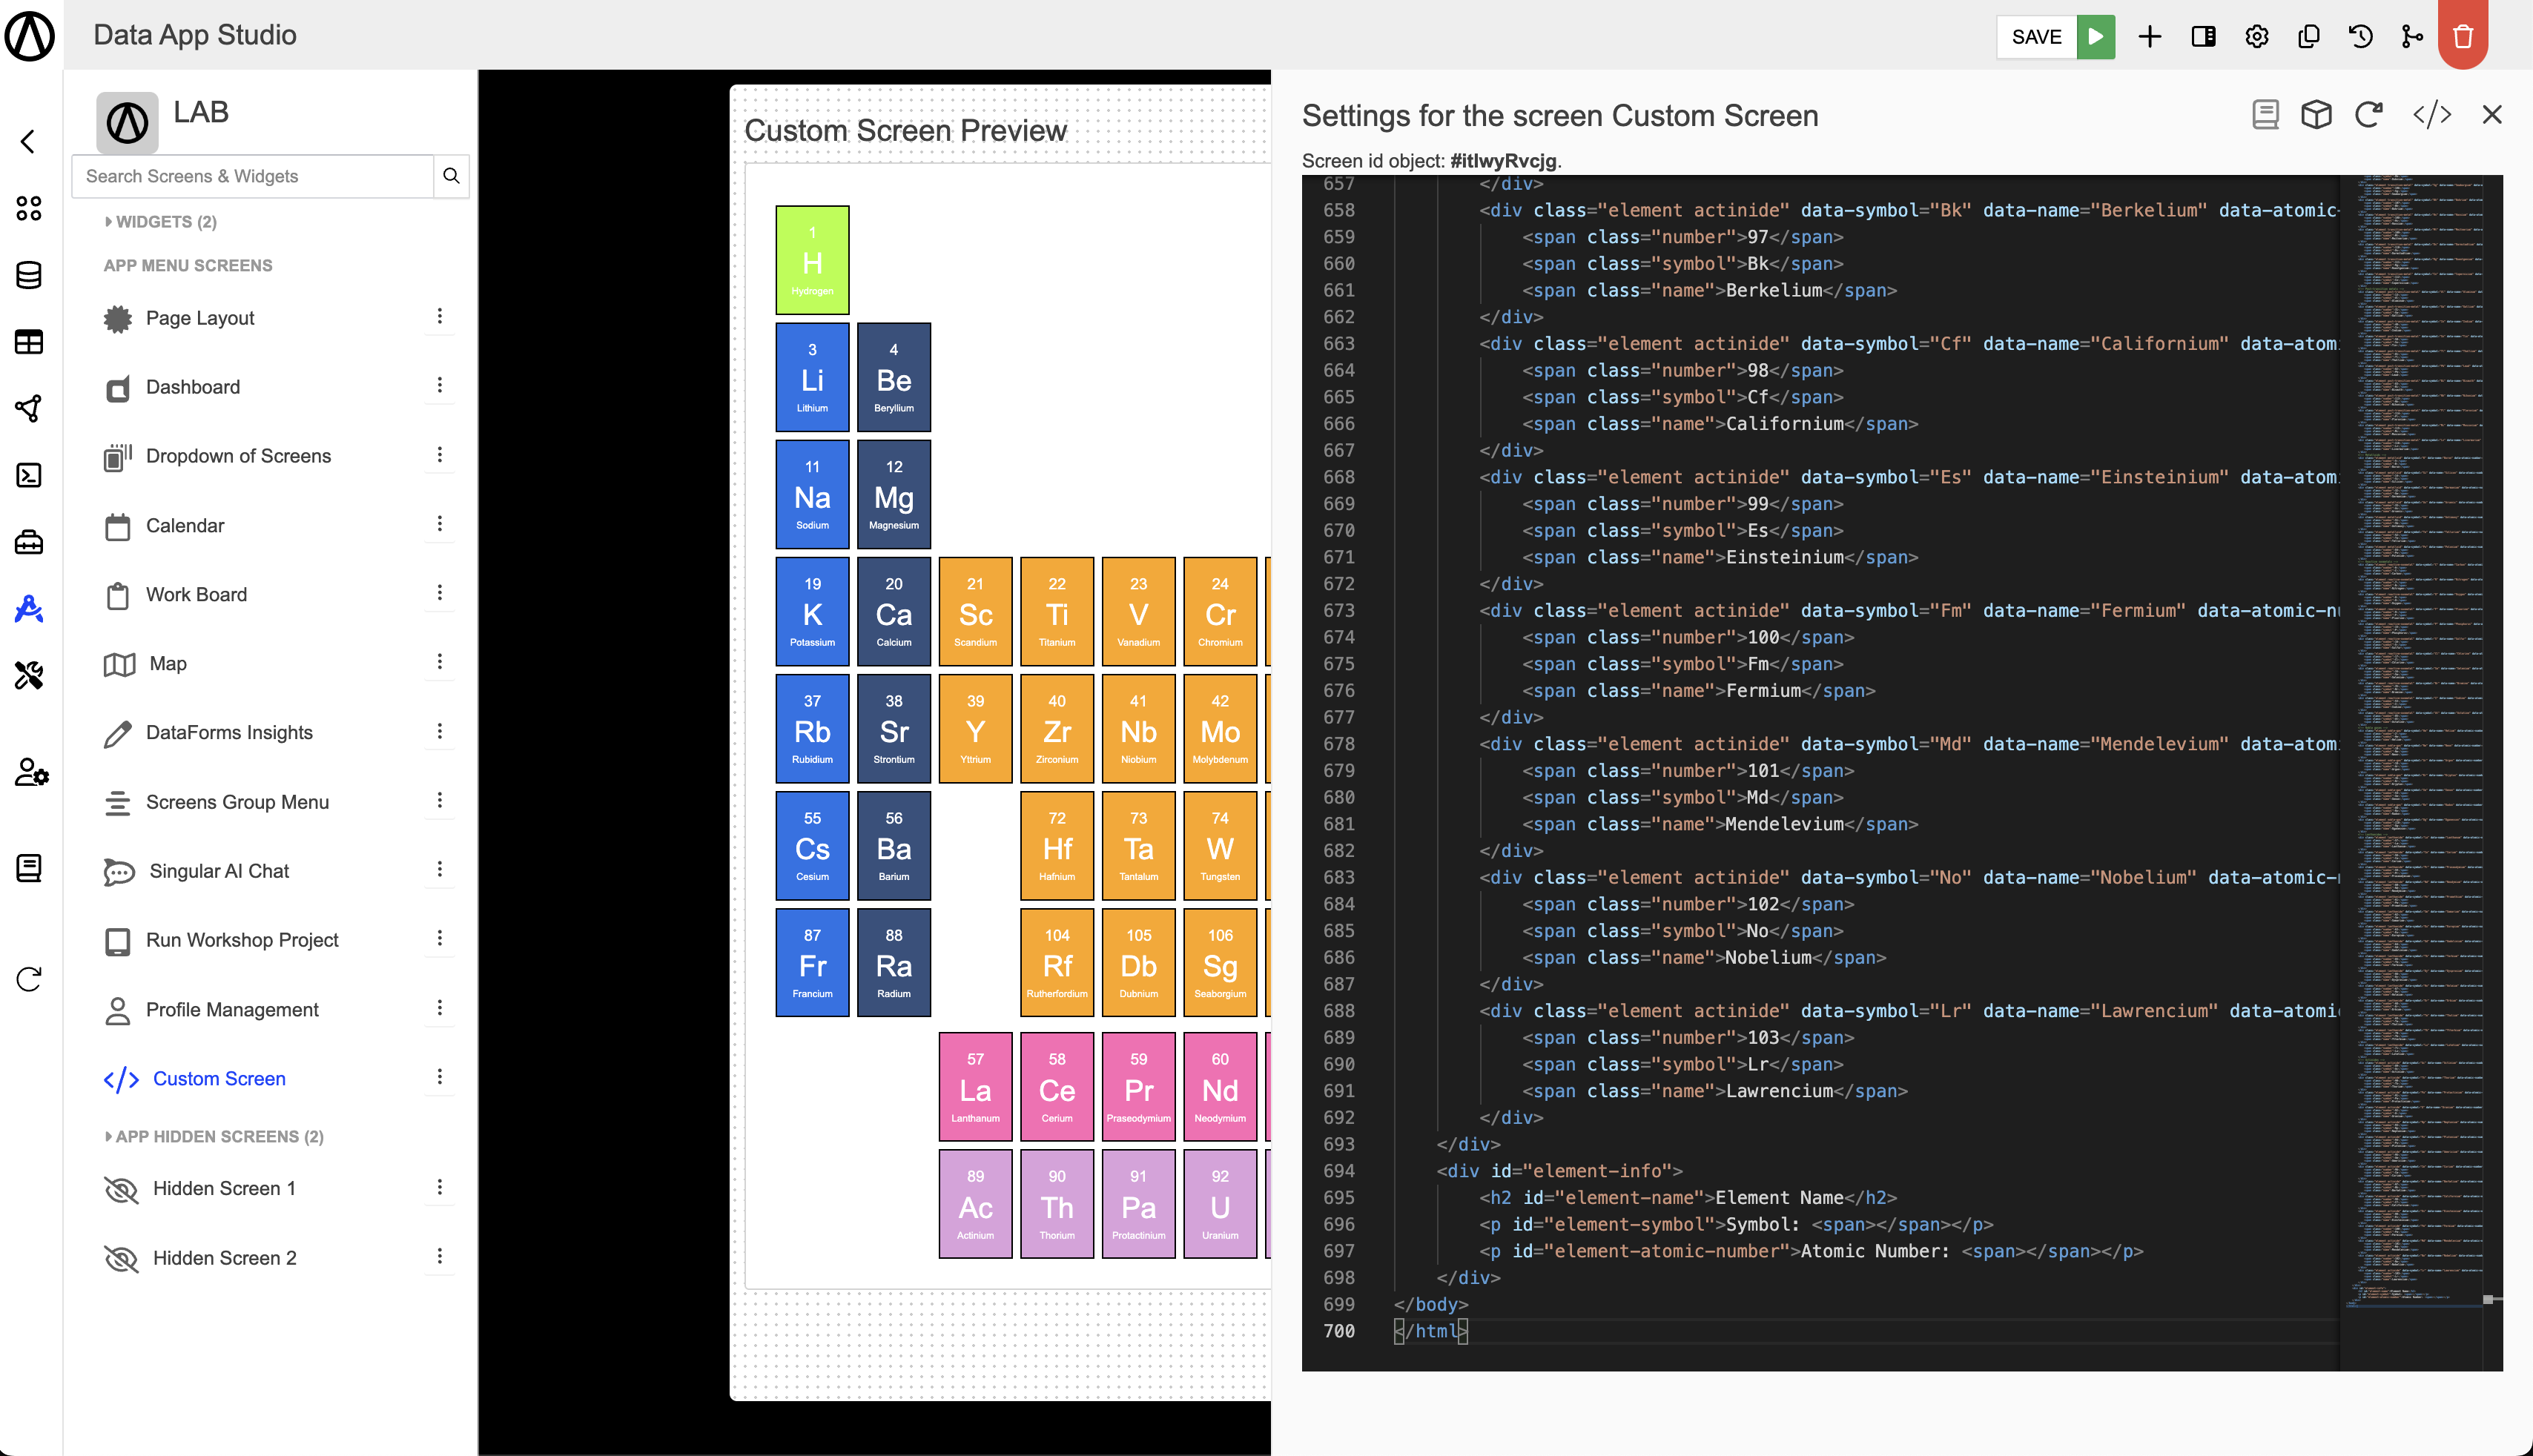
With the code in the clipboard, you can paste it into the code editor of your code screen in your DataApp application, for example:
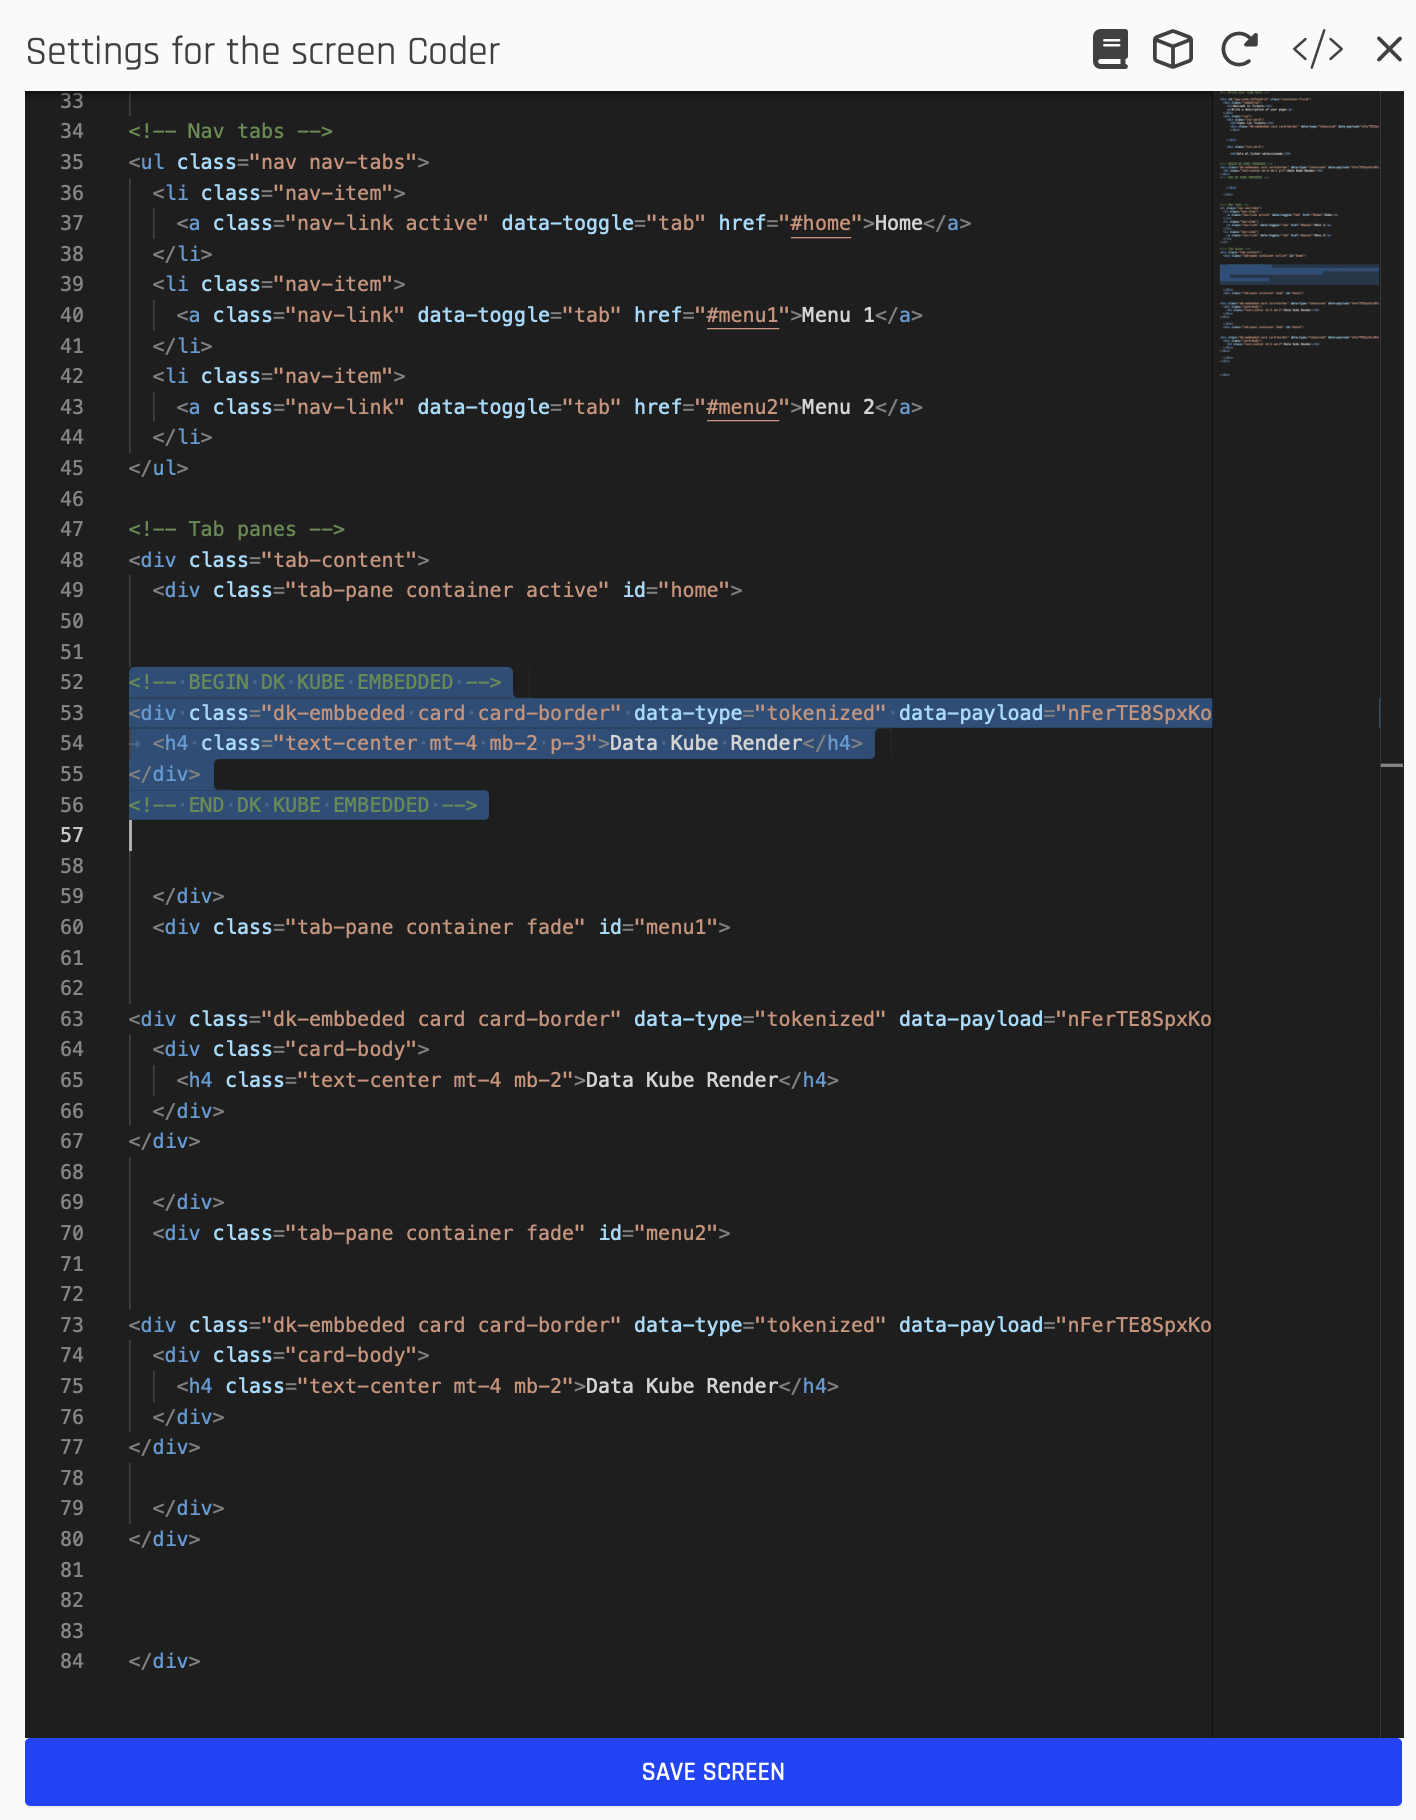
Once done, you can save your work and reload the preview panel to show the new changes.
Save Your Work!
Always remember to save your work when using DataApp Studio.
Linking DataApp Global Variables and Connecting Screens to Code Screens
DataApp Global Variables allow us to send custom values between screens in the data application and embedded Kubes to create advanced user experiences in DataApp.
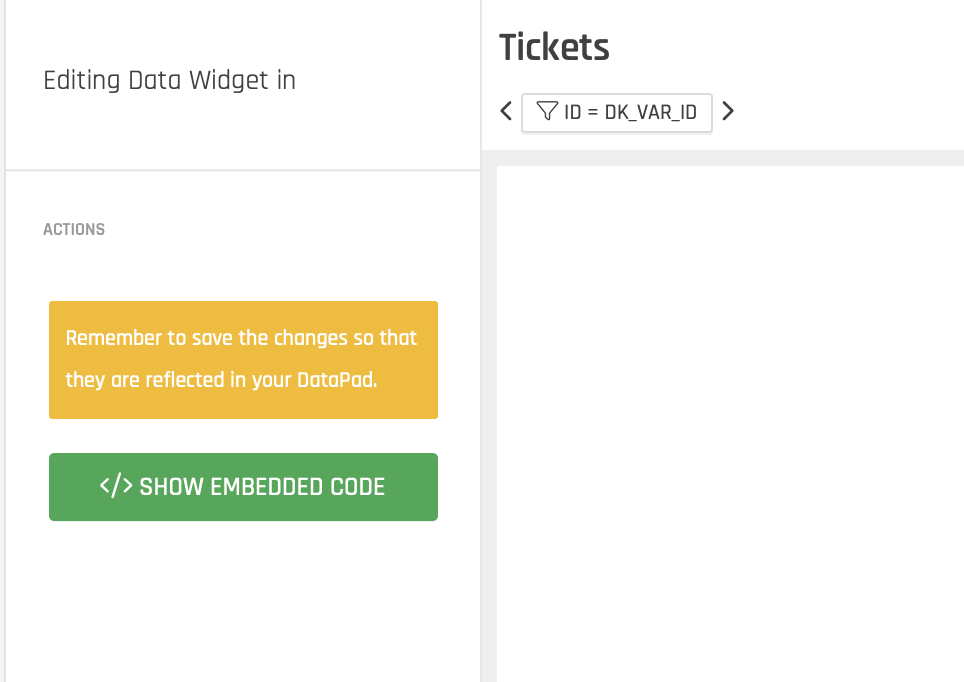
Adding Custom Filters
To add custom filters, we use DataApp Global Variables. Therefore, the code to turn any input tag into a global variable would be as follows:
<input data-dk-var-name="dk_var_custom_name" class="form-control" size="16" value="">
Adding Date Filters and Date Range
To add date filters to your screen, you can use the following code in your code and script editors:
<div class="input-group">
    <input type="text" id="date-range" class="form-control" />
</div>
$(document).ready(function(){
    // Initialize datepicker
    $('#date-range').daterangepicker({
        opens: 'left',
        autoUpdateInput: false,
        locale: {
          format: 'MM/YYYY',
          cancelLabel: 'Cancelar'
        }
    });
    // Update the value of the input when a date range is selected
    $('#date-range').on('apply.daterangepicker', function (ev, picker) {
        var startDate = picker.startDate.format('YYYY-MM-DD');
        var endDate = picker.endDate.format('YYYY-MM-DD');
        console.log(startDate, endDate)

        $(this).val(picker.startDate.format('MM/YYYY') + ' - ' + picker.endDate.format('MM/YYYY'));
        // code to execute...
    });
});
DataApp Global Variables
Remember to add the corresponding DataApp Global Variables to your embedded Kubes and the corresponding
data-dkvar-nameattribute in the input tag to apply filters to them.
Reload Embedded Kubes
You can use the
dk_app_code_renderAll()function to reload all your embedded Kubes on the code screen the first time when the screen loads or when an event is triggered.
$(document).ready
Remember to use the jQuery function that is used to execute JavaScript code once the HTML document has fully loaded.
ARPIA Global Variables Object
We have enabled a const type variable in the JS model of all ARPIA applications that makes all Session Global Variables of ARPIA accessible through the JavaScript Object Model. Easily access any variable using the constant called dk_vars_obj, for example, you can display its content using the following code:
console.log(JSON.stringify(dk_vars_obj));
Bootstrap 4 Engine
You may use any of the bootstrap 4 tools in your screen to maximize the user experience. Please refer to the following online documentation for bootstrap 4 tools.
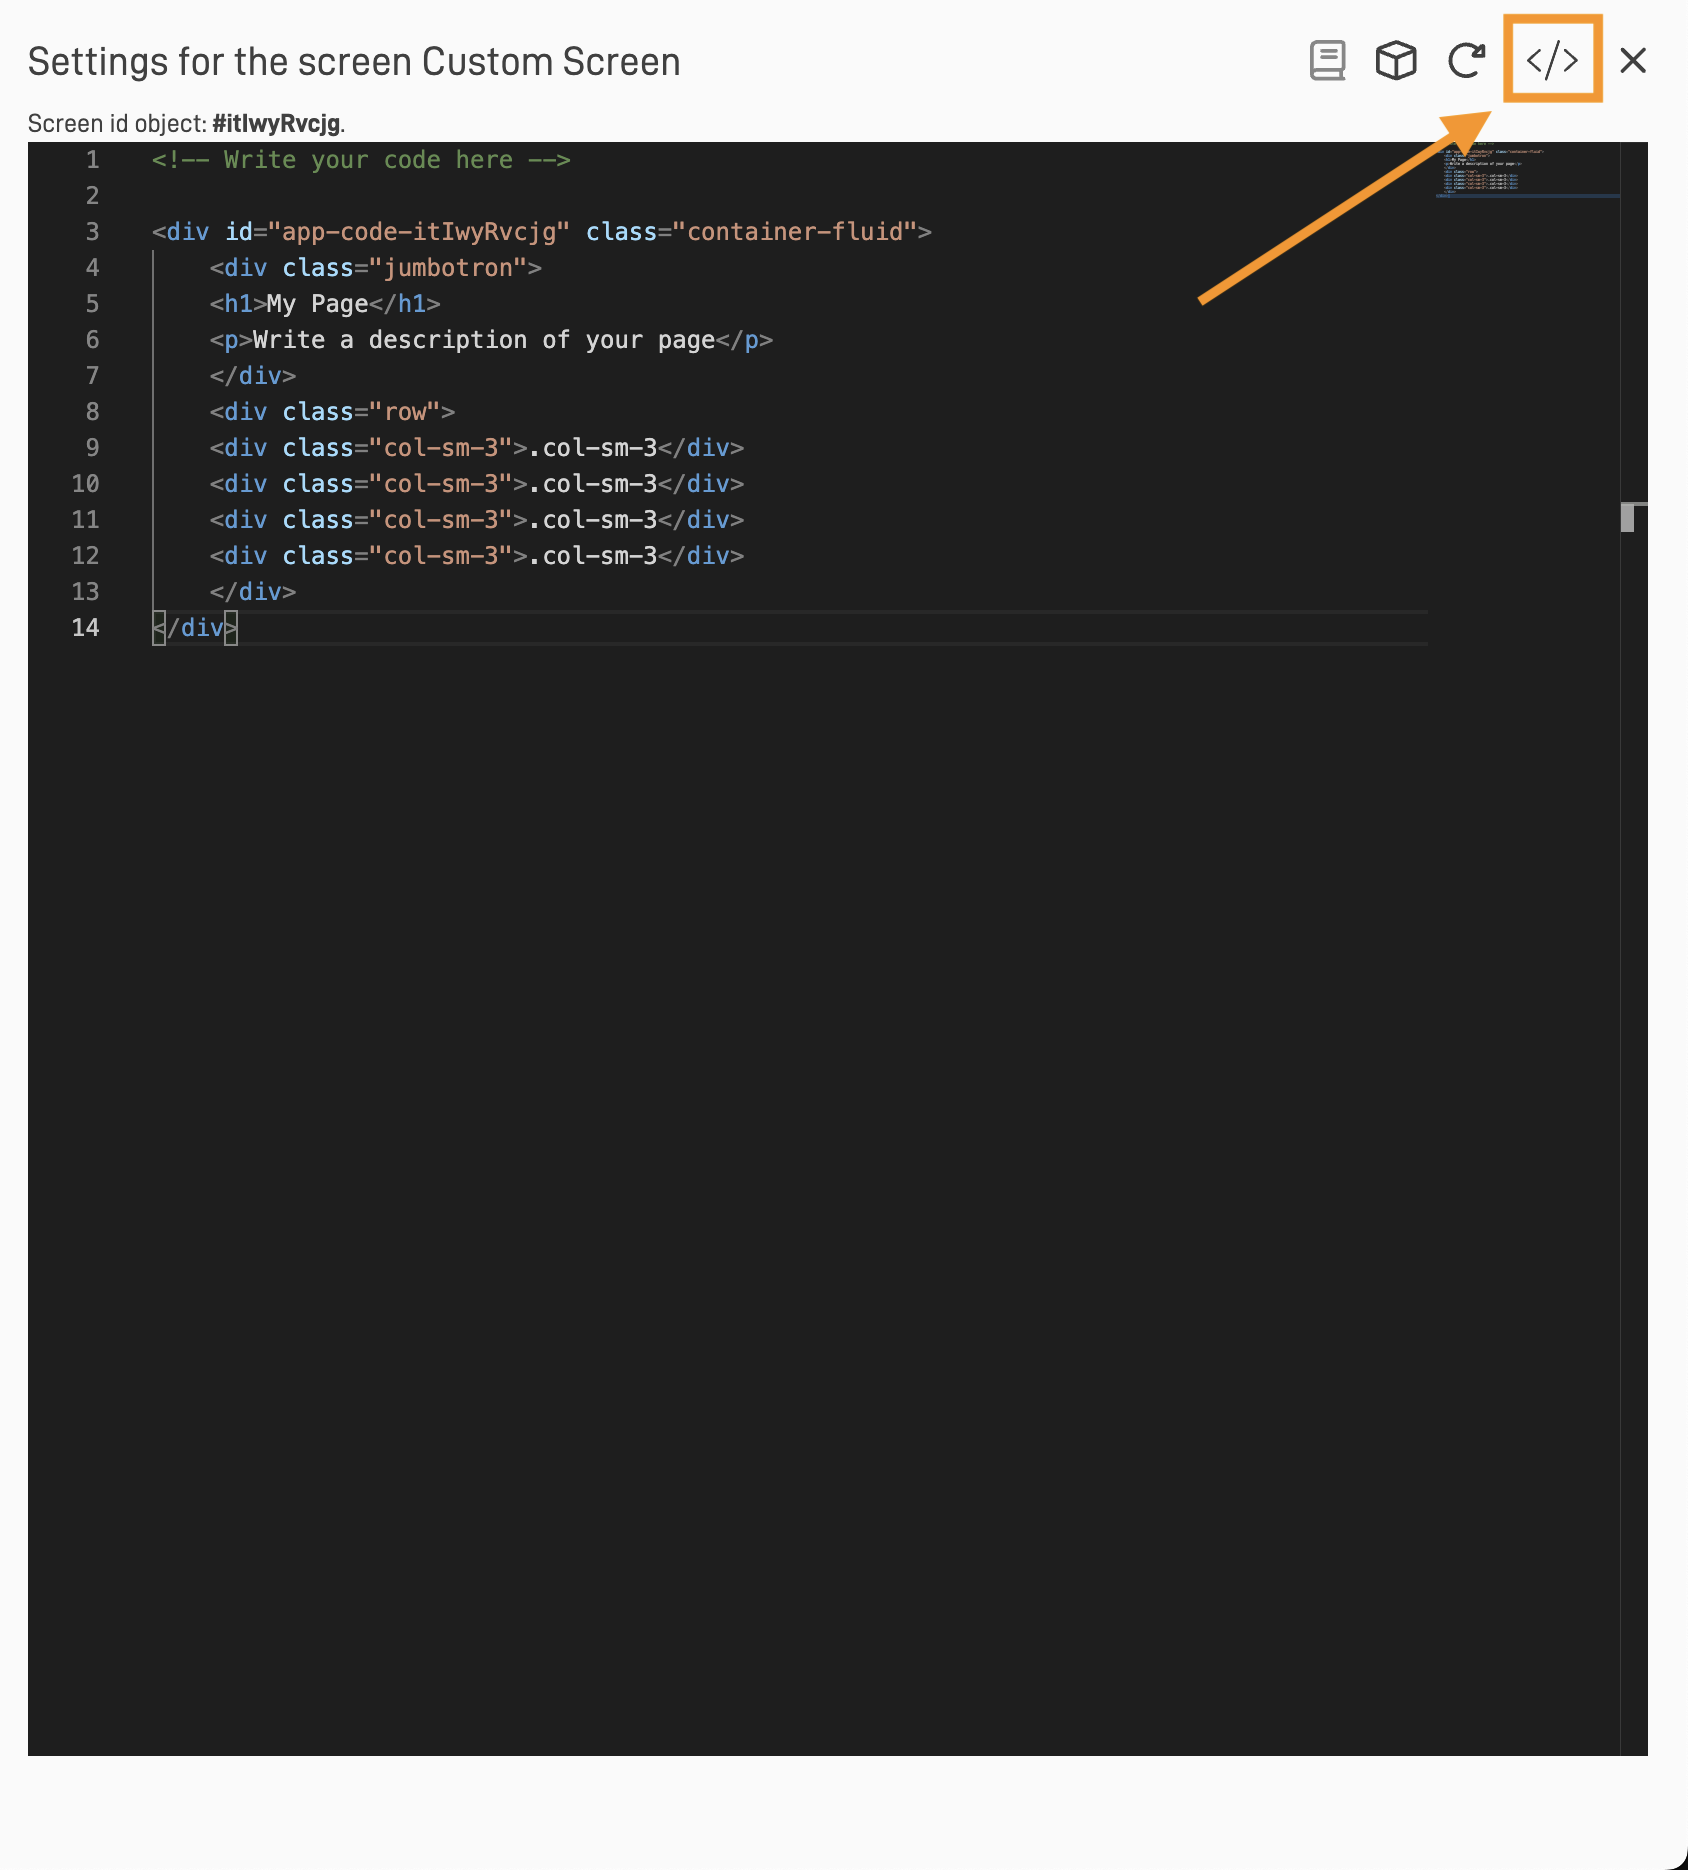
Step 2: Add Your Script
The next step is to add your jQuery script. To do so, press the "</>" button located in the upper right corner of the Custom Screen settings.
The "Screen Custom Script Editor" will pop up. Here is where you can add your script. Once the script is added, press the save button.

Step 3: Preview
To preview your custom solution, press the arrow button next to the save button. You will see there are three preview options you can select from.
| Preview Type | Use |
|---|---|
| Preview App | Opens a new screen to show what your custom solution looks like from a desktop perspective. |
| Open App | Opens the app directly. |
| Preview Screen | Opens a new tab, taking you to the ARPIA Platform Home screen where you can see your app along with other apps you may have created. |
| Mobile Preview | Opens a new window adjusted to mobile format to give you a preview of how the solution looks on mobile devices. |

Updated almost 2 years ago