
How to use the Work board Screen?
Step-by-Step Guide: Work board Screen
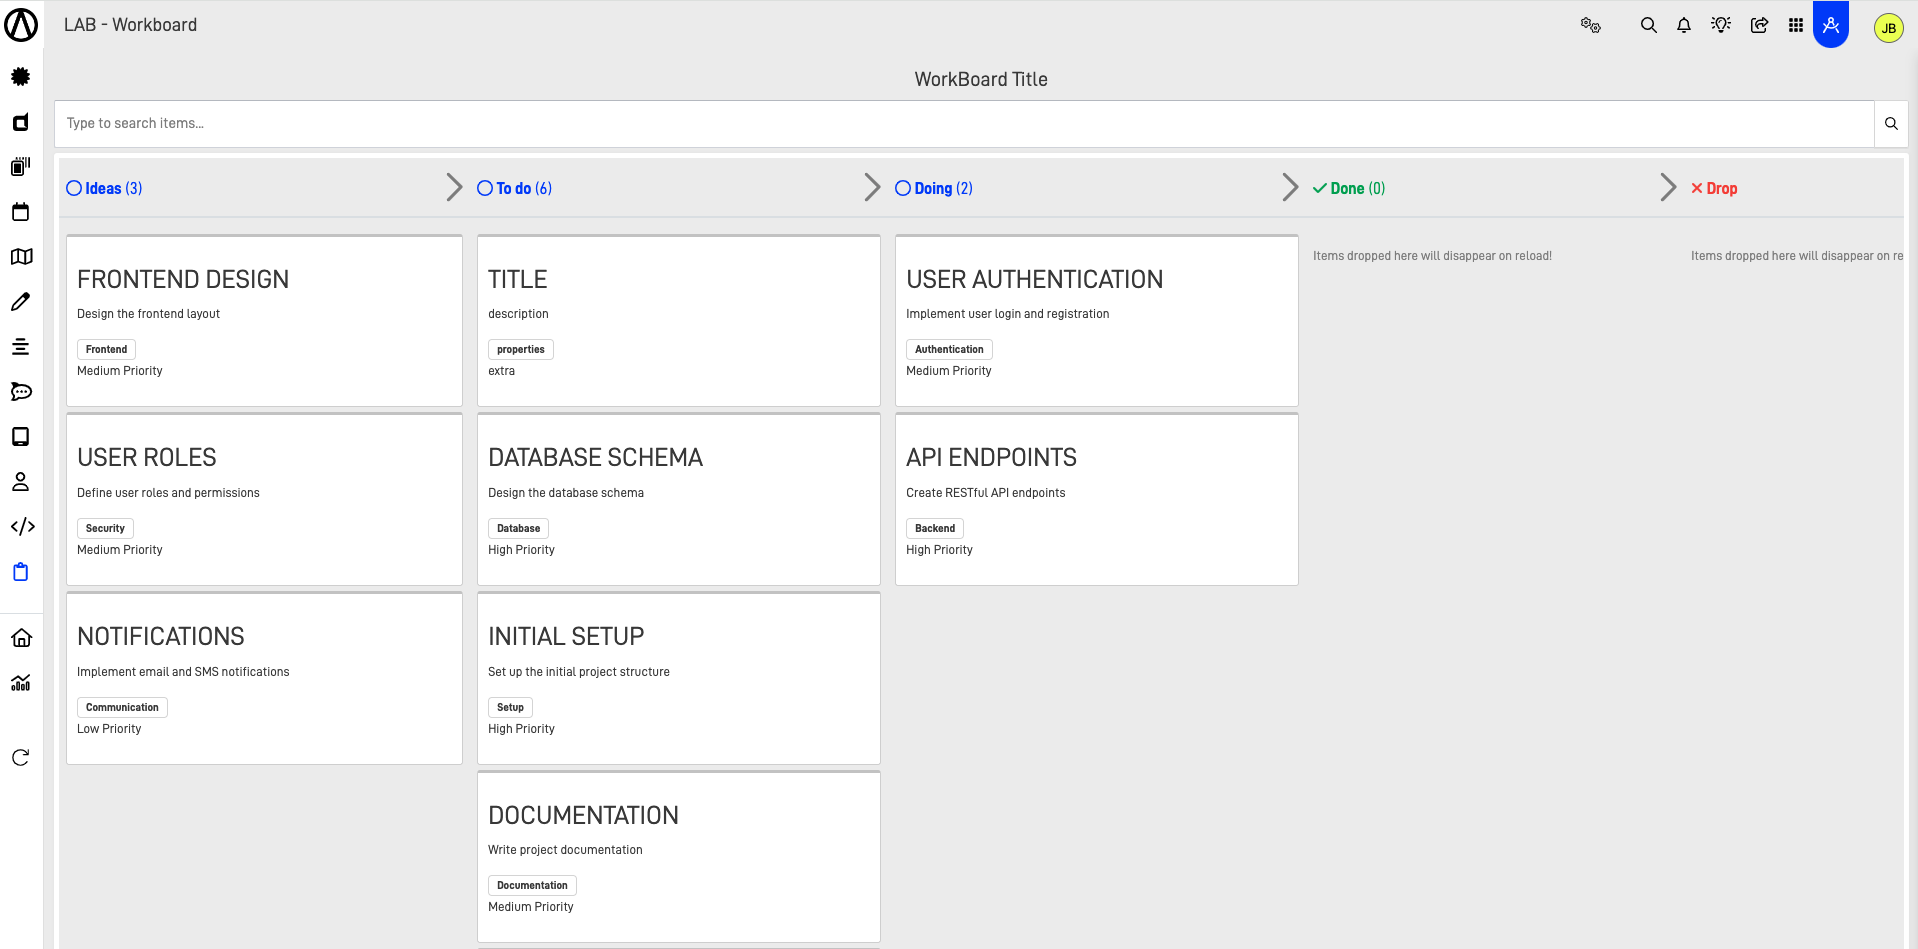
In this article, we provide a comprehensive guide on how to use the "Work Board" screen. This powerful tool allows us to set up a customized work board tailored to meet our organizational needs. The Work Board screen offers extensive customization options for each item, including the ability to add detailed descriptions, properties, and extra information. This flexibility ensures that each work board can be adapted to fit the unique requirements of different projects and teams.
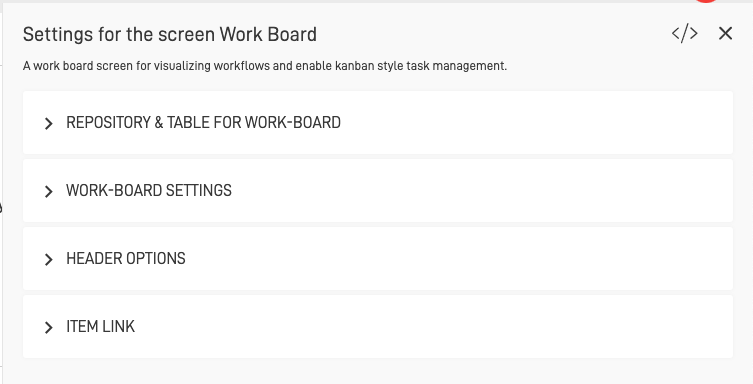
The Work Board configuration is divided mainly in 4 tabs: "Repository & Table for Work-Board", "Work-Board Settings", "Header Options" and "Item Link".
Step 1: Create a table and node
To effectively use the Work Board screen, you need to have both a table and a node set up. First, ensure the table contains specific columns necessary for item information. For example, your table should include columns for the item title, description, order, and status. After setting up the table, create a Node and designate the table as its primary table.
CREATE TABLE Workboard_table (
  item_id int NOT NULL,
  item_title varchar(100) DEFAULT NULL,
  item_description varchar(100) DEFAULT NULL,
  item_extra varchar(100) DEFAULT NULL,
  item_properties varchar(100) DEFAULT NULL,
  status_info varchar(100) DEFAULT NULL,
  order_info varchar(100) DEFAULT NULL,
  PRIMARY KEY (item_id)
)
Step 2: Configure the "Repository & Table for Work-Board" settings
First, we'll configure the repository and table settings to prepare the Work Board for use. This involves setting up the repository and defining the table's structure to ensure it can properly handle and display the necessary information.

The necessary components are the repository containing the table, the table designed specifically for this screen, and the Node created with the Work Board table as its primary table. In the relationship column, select the primary field or key of the table. This column should be linked to all Knowledge Grid Nodes that will be displayed on the same screen.
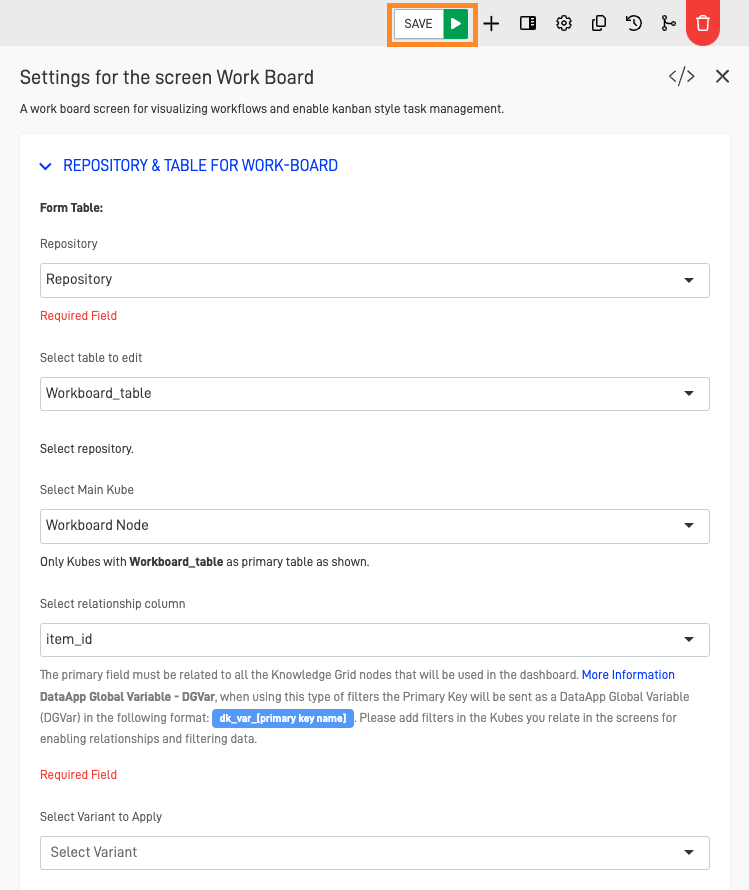
Next, click "Save" to store your configuration. After saving, refresh your browser tab to update and display the information on the screen..
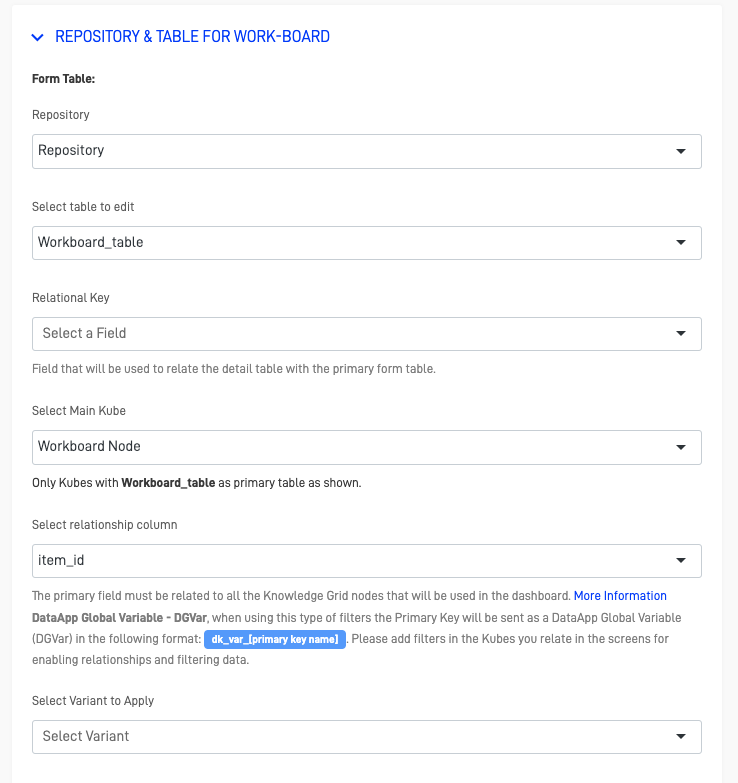
After completing this process, you'll have the option to set a relational key if you want to link items to a detail table or a hidden screen. Additionally, you can apply a variant to your node by using the "Select Variant" field.
Step 3: Configure the "Work-Board Settings"
The Work-Board settings can be divided in 2 main configuration options:
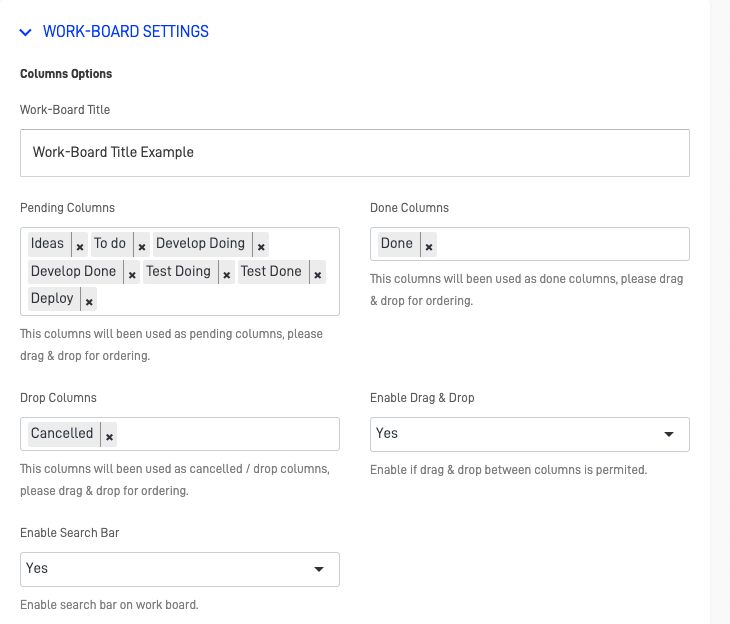
Columns Options
This settings allows you to customize the columns displayed on the Work Board.
Fields Configuration:
-
Work-Board Title: Customize the title of the Work-Board. This field can be left blank if no title is desired.
-
Pending Columns: Add and customize the columns for tasks that are in progress. These columns represent different stages before a task is completed.
-
Done Columns: Add columns for completed tasks. Items moved to these columns will have their status saved and will be removed from the active work-board.
-
Drop Columns: Add columns for discarded or canceled tasks. Items moved to these columns will have their status saved and will be removed from the active work-board.
-
Enable Drag & Drop: Enable or disable the ability for users to drag and drop items between columns.
-
Enable Search Bar: Enable or disable a search bar for easy searching of items on the work-board.
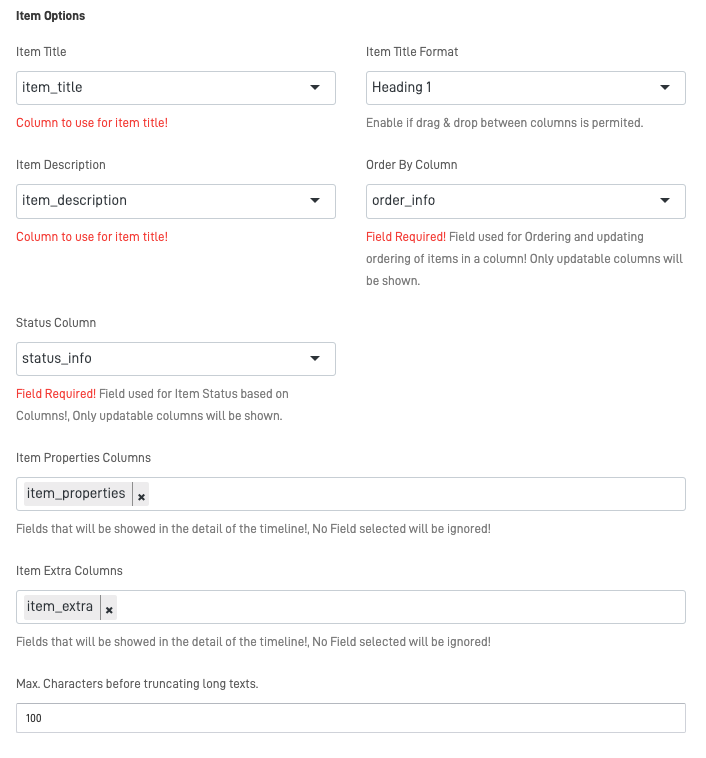
Item Options
Customize the columns that will be used to represent each of the items information that will be shown in the work-board.
Fields configurations:
- Item Title: Choose which column from the node will be used as the item title.
- Item Title Format: Customize the title format.
- Item Description:Choose which column from the node will be used as the item description.
- Order By Column: Choose which column from the node will be use for ordering and updating of the items.
- Status Column: Choose which column from the node will be use as the Status field.
- Item Properties Column: Choose what columns from the nodes will be chosen as properties information for the item.
- Item Extra Columns: Choose what columns from the nodes will be chosen as extra information for the item.
- Max. Characters before truncating long texts:Select the maximum amount of characters before truncating the text of the item information.
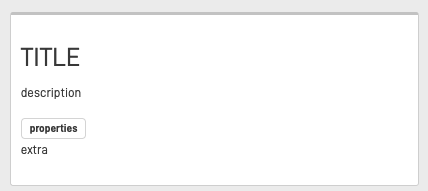
Item information example:
Step 4: Configure the "Header Options
Next, we'll customize the Work Board header. By default, the Work Board does not include a header, but you can add one. In the header, you can also include action buttons that direct users to another screen or an external URL..
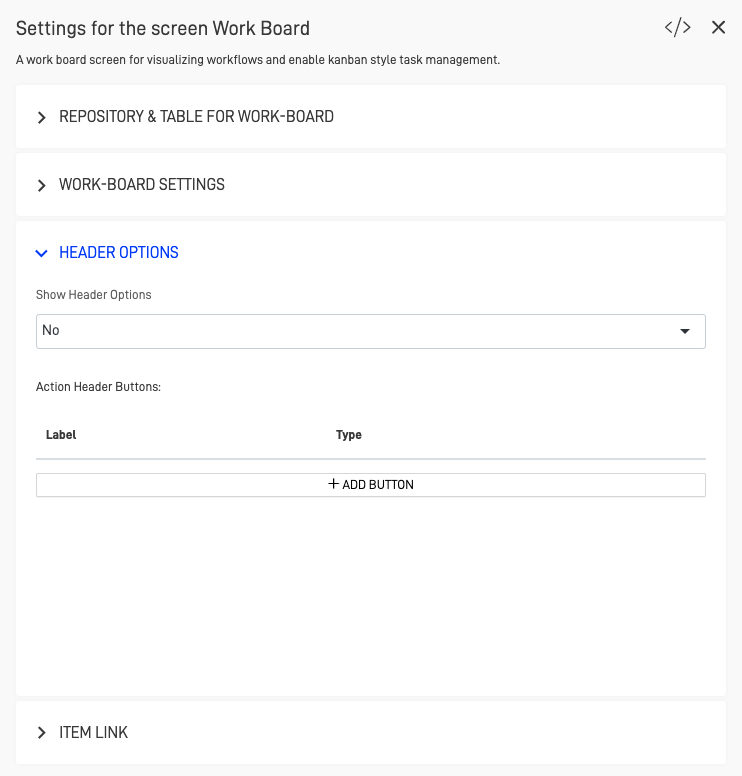
Here we can see these fields:
- Show Header Options: Enable or disable the calendar header.
- + ADD BUTTON: Add action buttons to the header.
All action buttons created will appear in the "Action Header Buttons" list. Here, we have two available actions:
- Configuration: Represented by the "gear" icon, this option allows you to customize the action button's settings, such as the button name, type, and destination URL or screen.
## Custom HTML to display images side by side
<img class="mobile-image" src="https://files.readme.io/8d41be4-Captura_de_Pantalla_2024-07-22_a_las_1.54.13_p._m..png" />
<img class="mobile-image" src="https://files.readme.io/1ed7878-Captura_de_Pantalla_2024-07-22_a_las_1.54.26_p._m..png" />

<style>
  .img {
    display: inline-block;
  }
  img.mobile-image {
    width: 49%;
    display: inline-block;
  }
</style>
- Delete: Represented by the "X" icon, delete the action button.
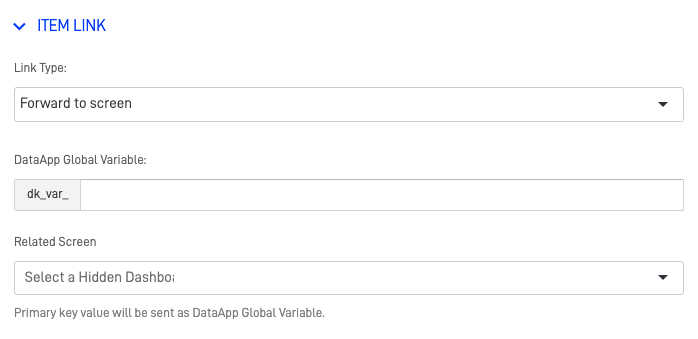
Step 5: Configure the "Item Link" settings
For the final step, configure the item link, which defines the action triggered when an item is clicked.

Field options:
- Disabled: Disable the link action of the items.
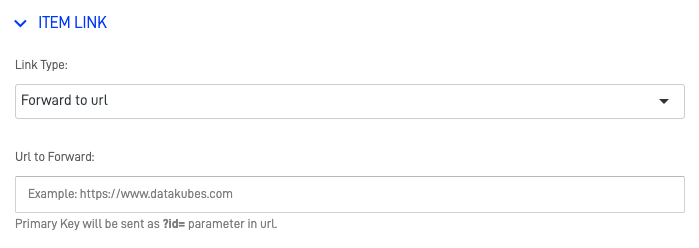
- Forward to screen: Forward to a screen within our Data App, it used in relation with the field in the "Relationship Column" from the "Repository and Table" settings. Additionally, add a DataApp Global Variable filter in the Node to establish this type of relation.
- Forward to url: Customize an external url for the items.
Updated almost 2 years ago